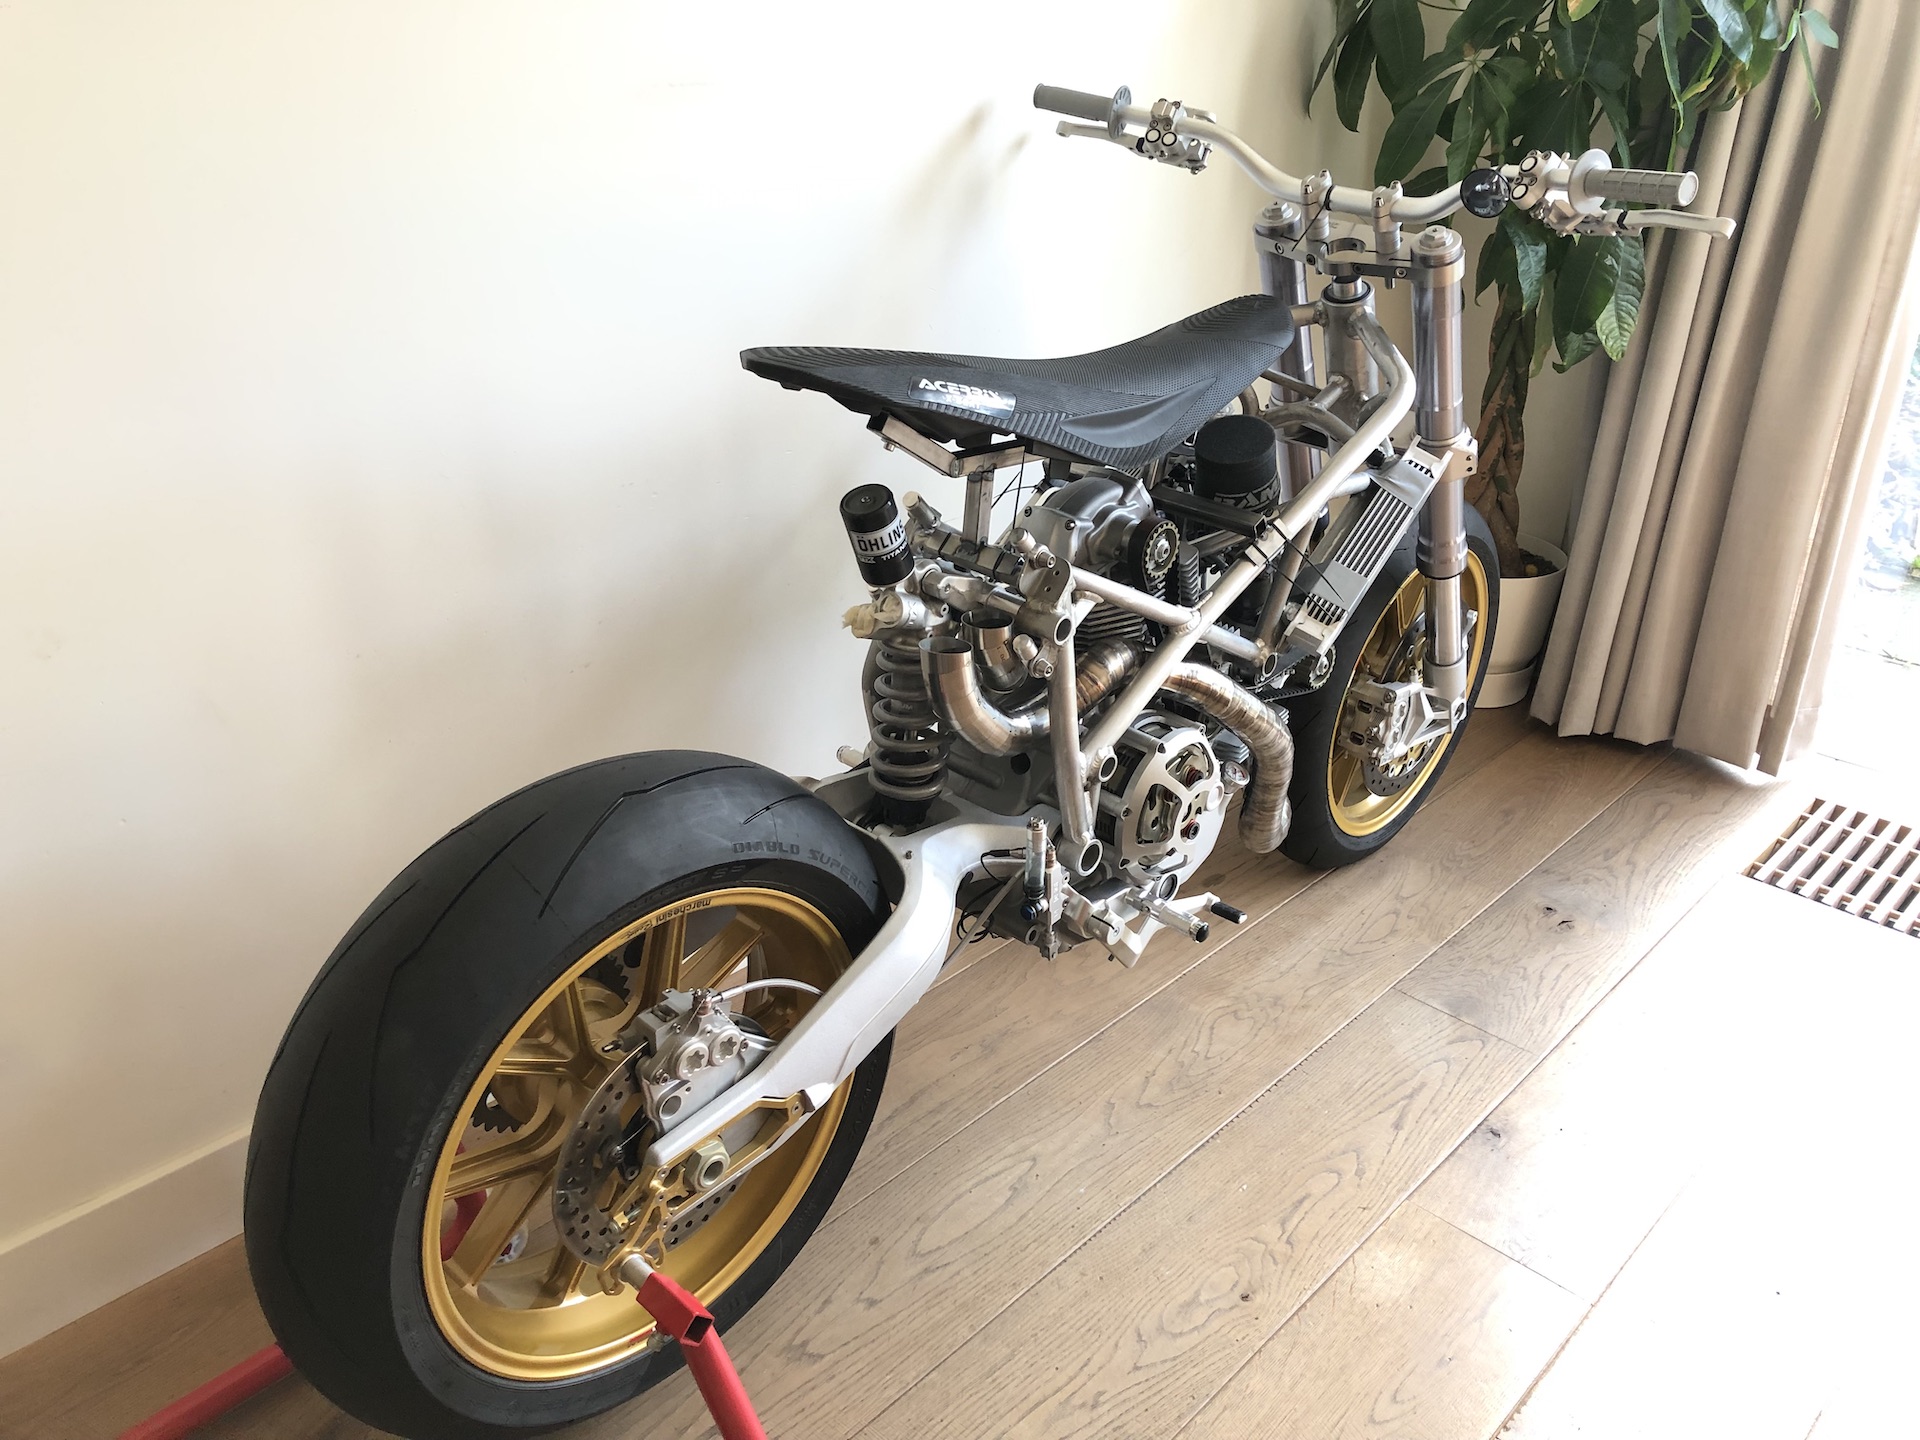
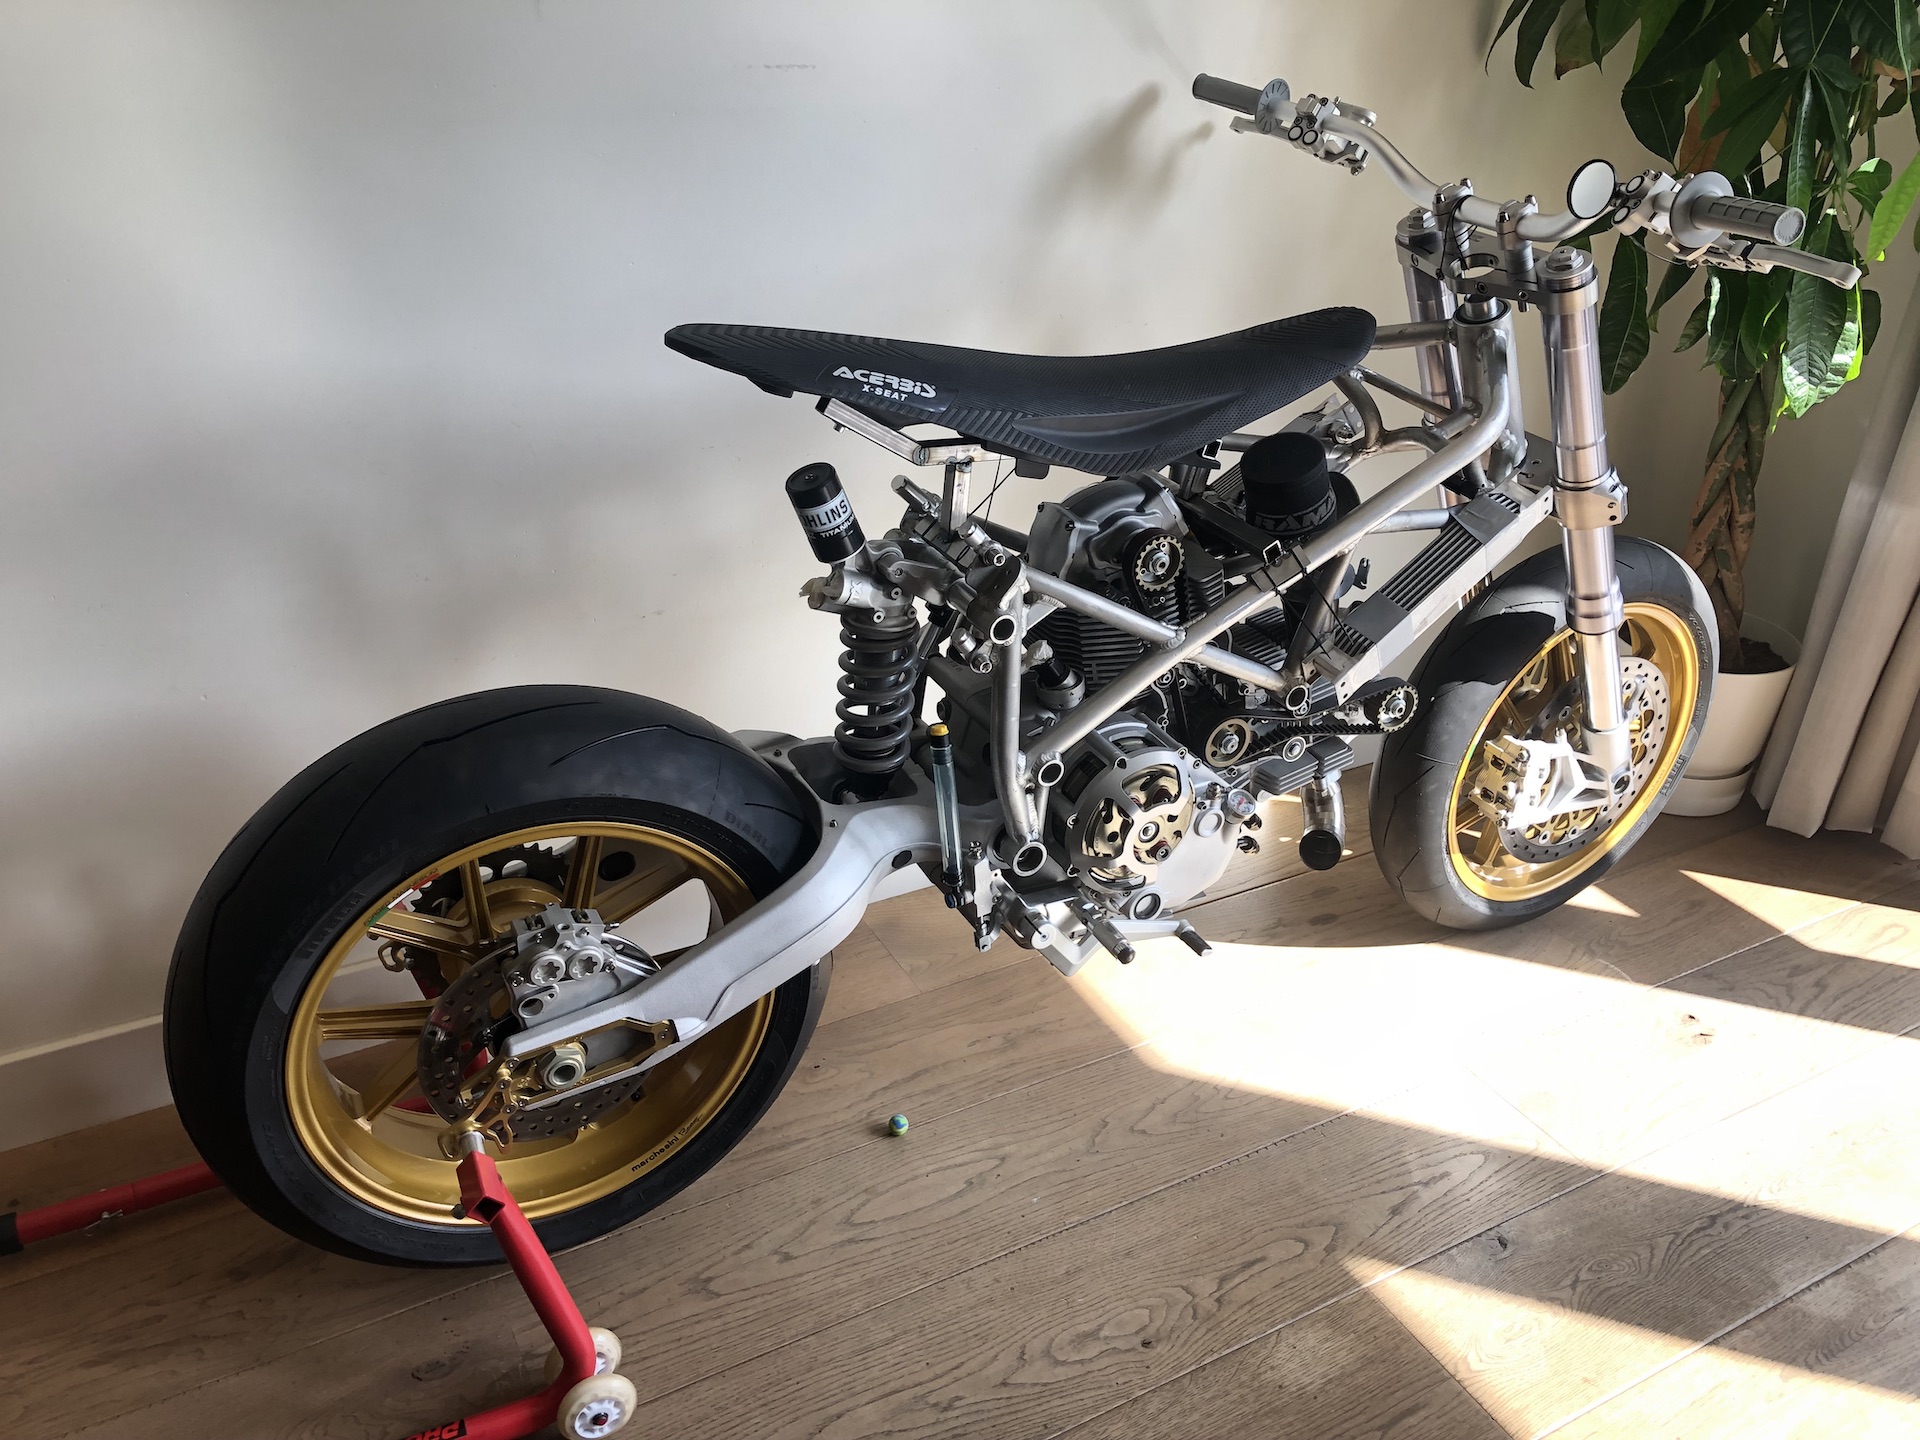
DUCATI DESMOTO
My personal vision of the ultimate Ducati Supermotard with the perfect balance between function and form. An extremely lightweight, high performance machine that wants to buck you off with every twist of the throttle…
Built from Titanium, Magnesium, Aluminium, and Nylon Carbon Fiber. Over 2000 hours of design and fabrication spread across 5.5 years.
End result?! 141KG WET, 112HP and 123NM torque on the rear wheel. Insanity!
My previous project allowed me to start a “internship” & amazing friendship at Biggelaar Special Performance. Over there I learned the more intricate stuff like engine revisions, tuning / flowing cylinder heads, ECU / Dyno remapping etc. This allowed me to elevate this build to a next level compared to the previous project!
Ducati Desmoto is featured on “BikeExif“, “RevZilla“, “MCN” and the magazines “KicXStart” and “Motorrijder”!
DUCATI DESMOTO
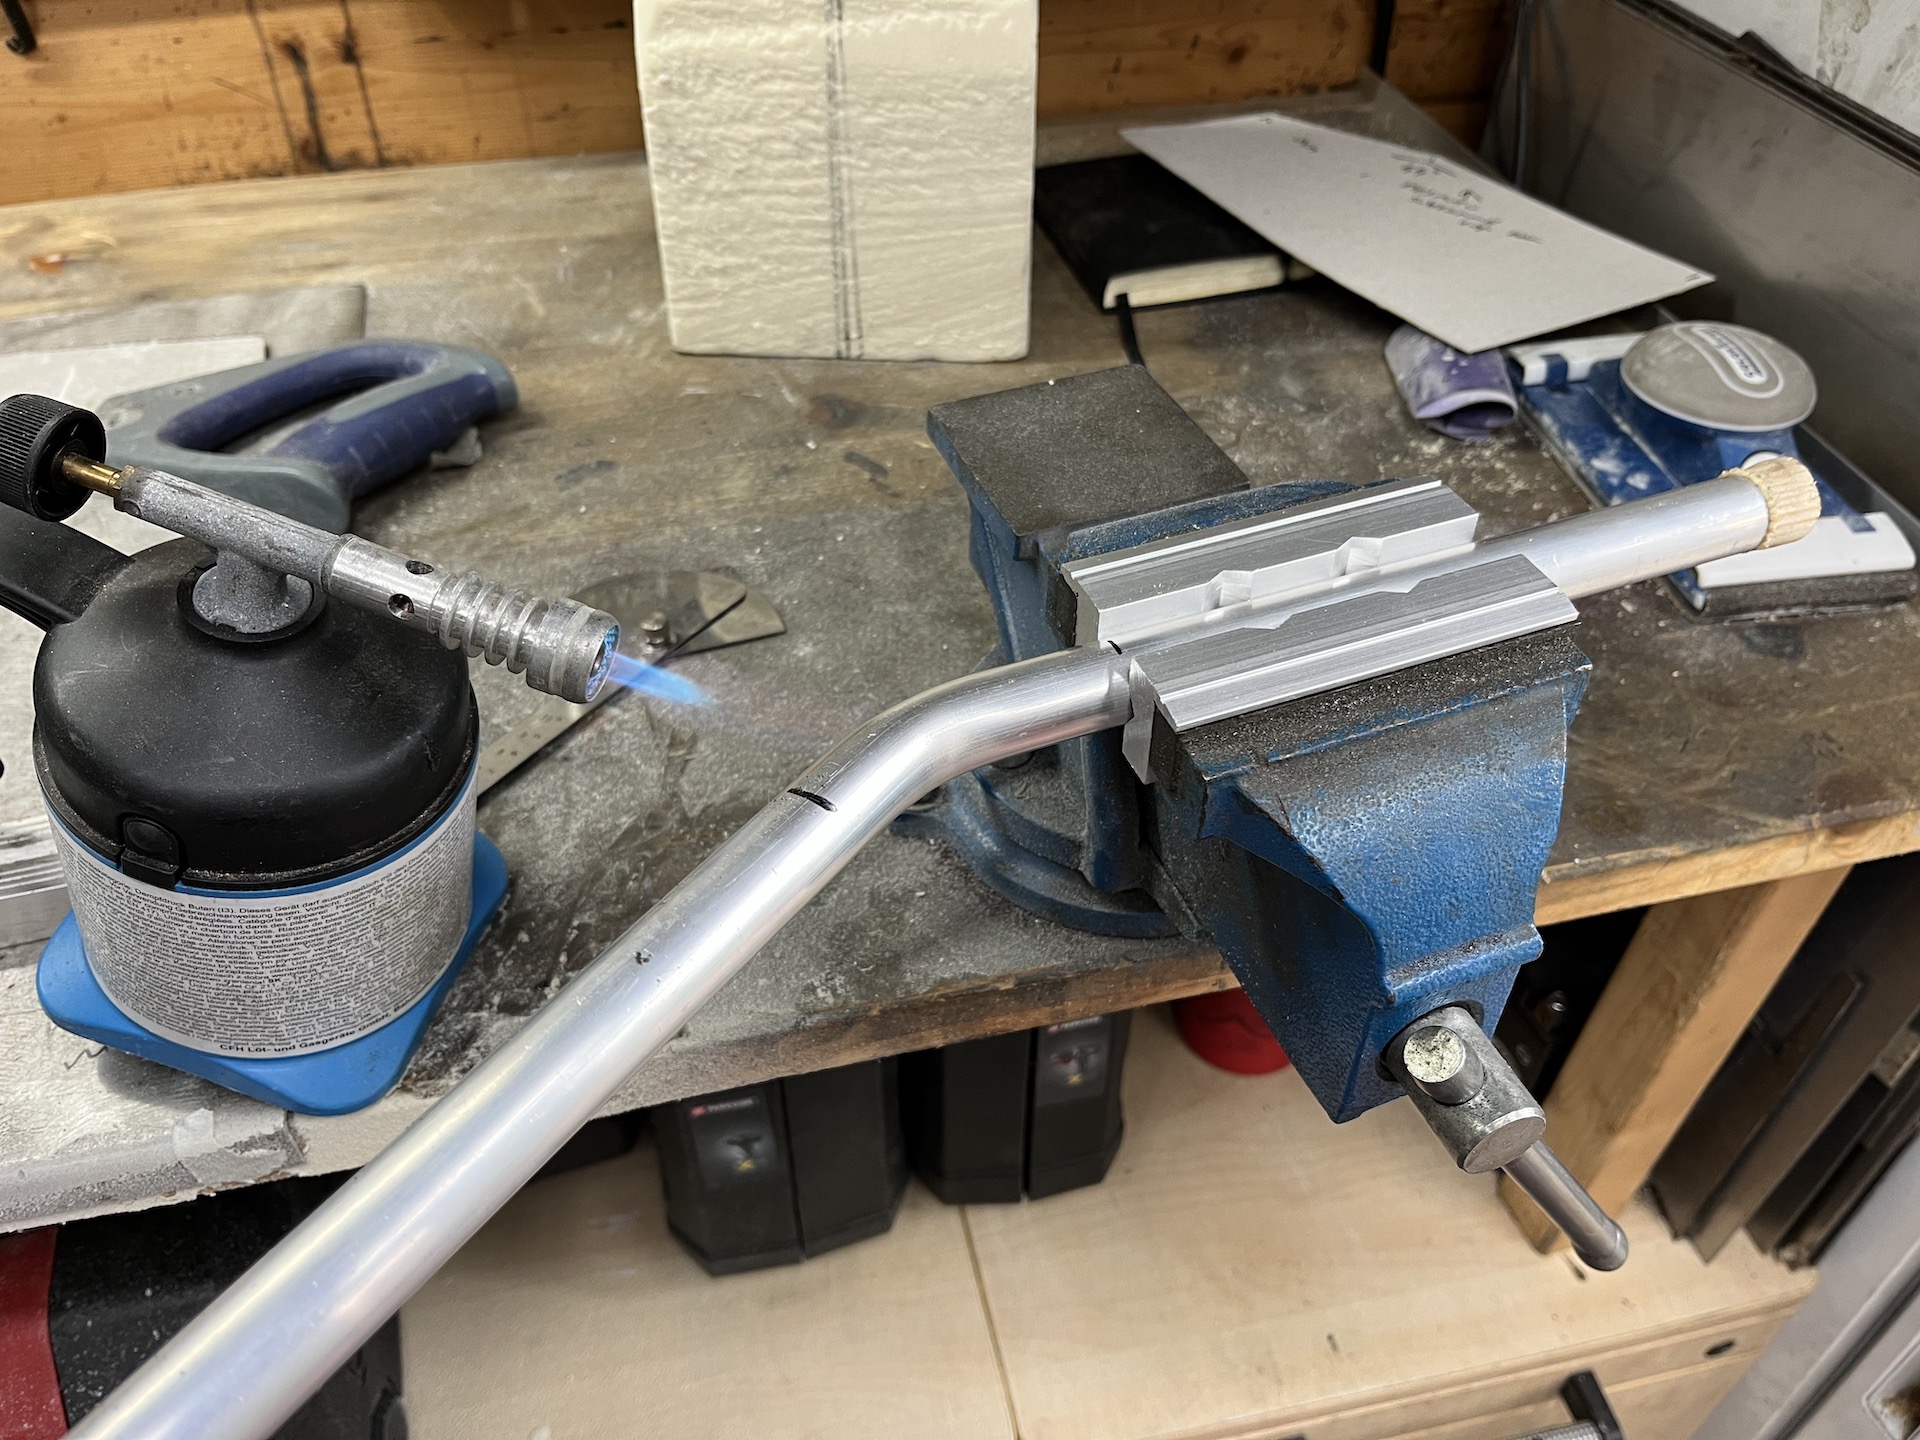
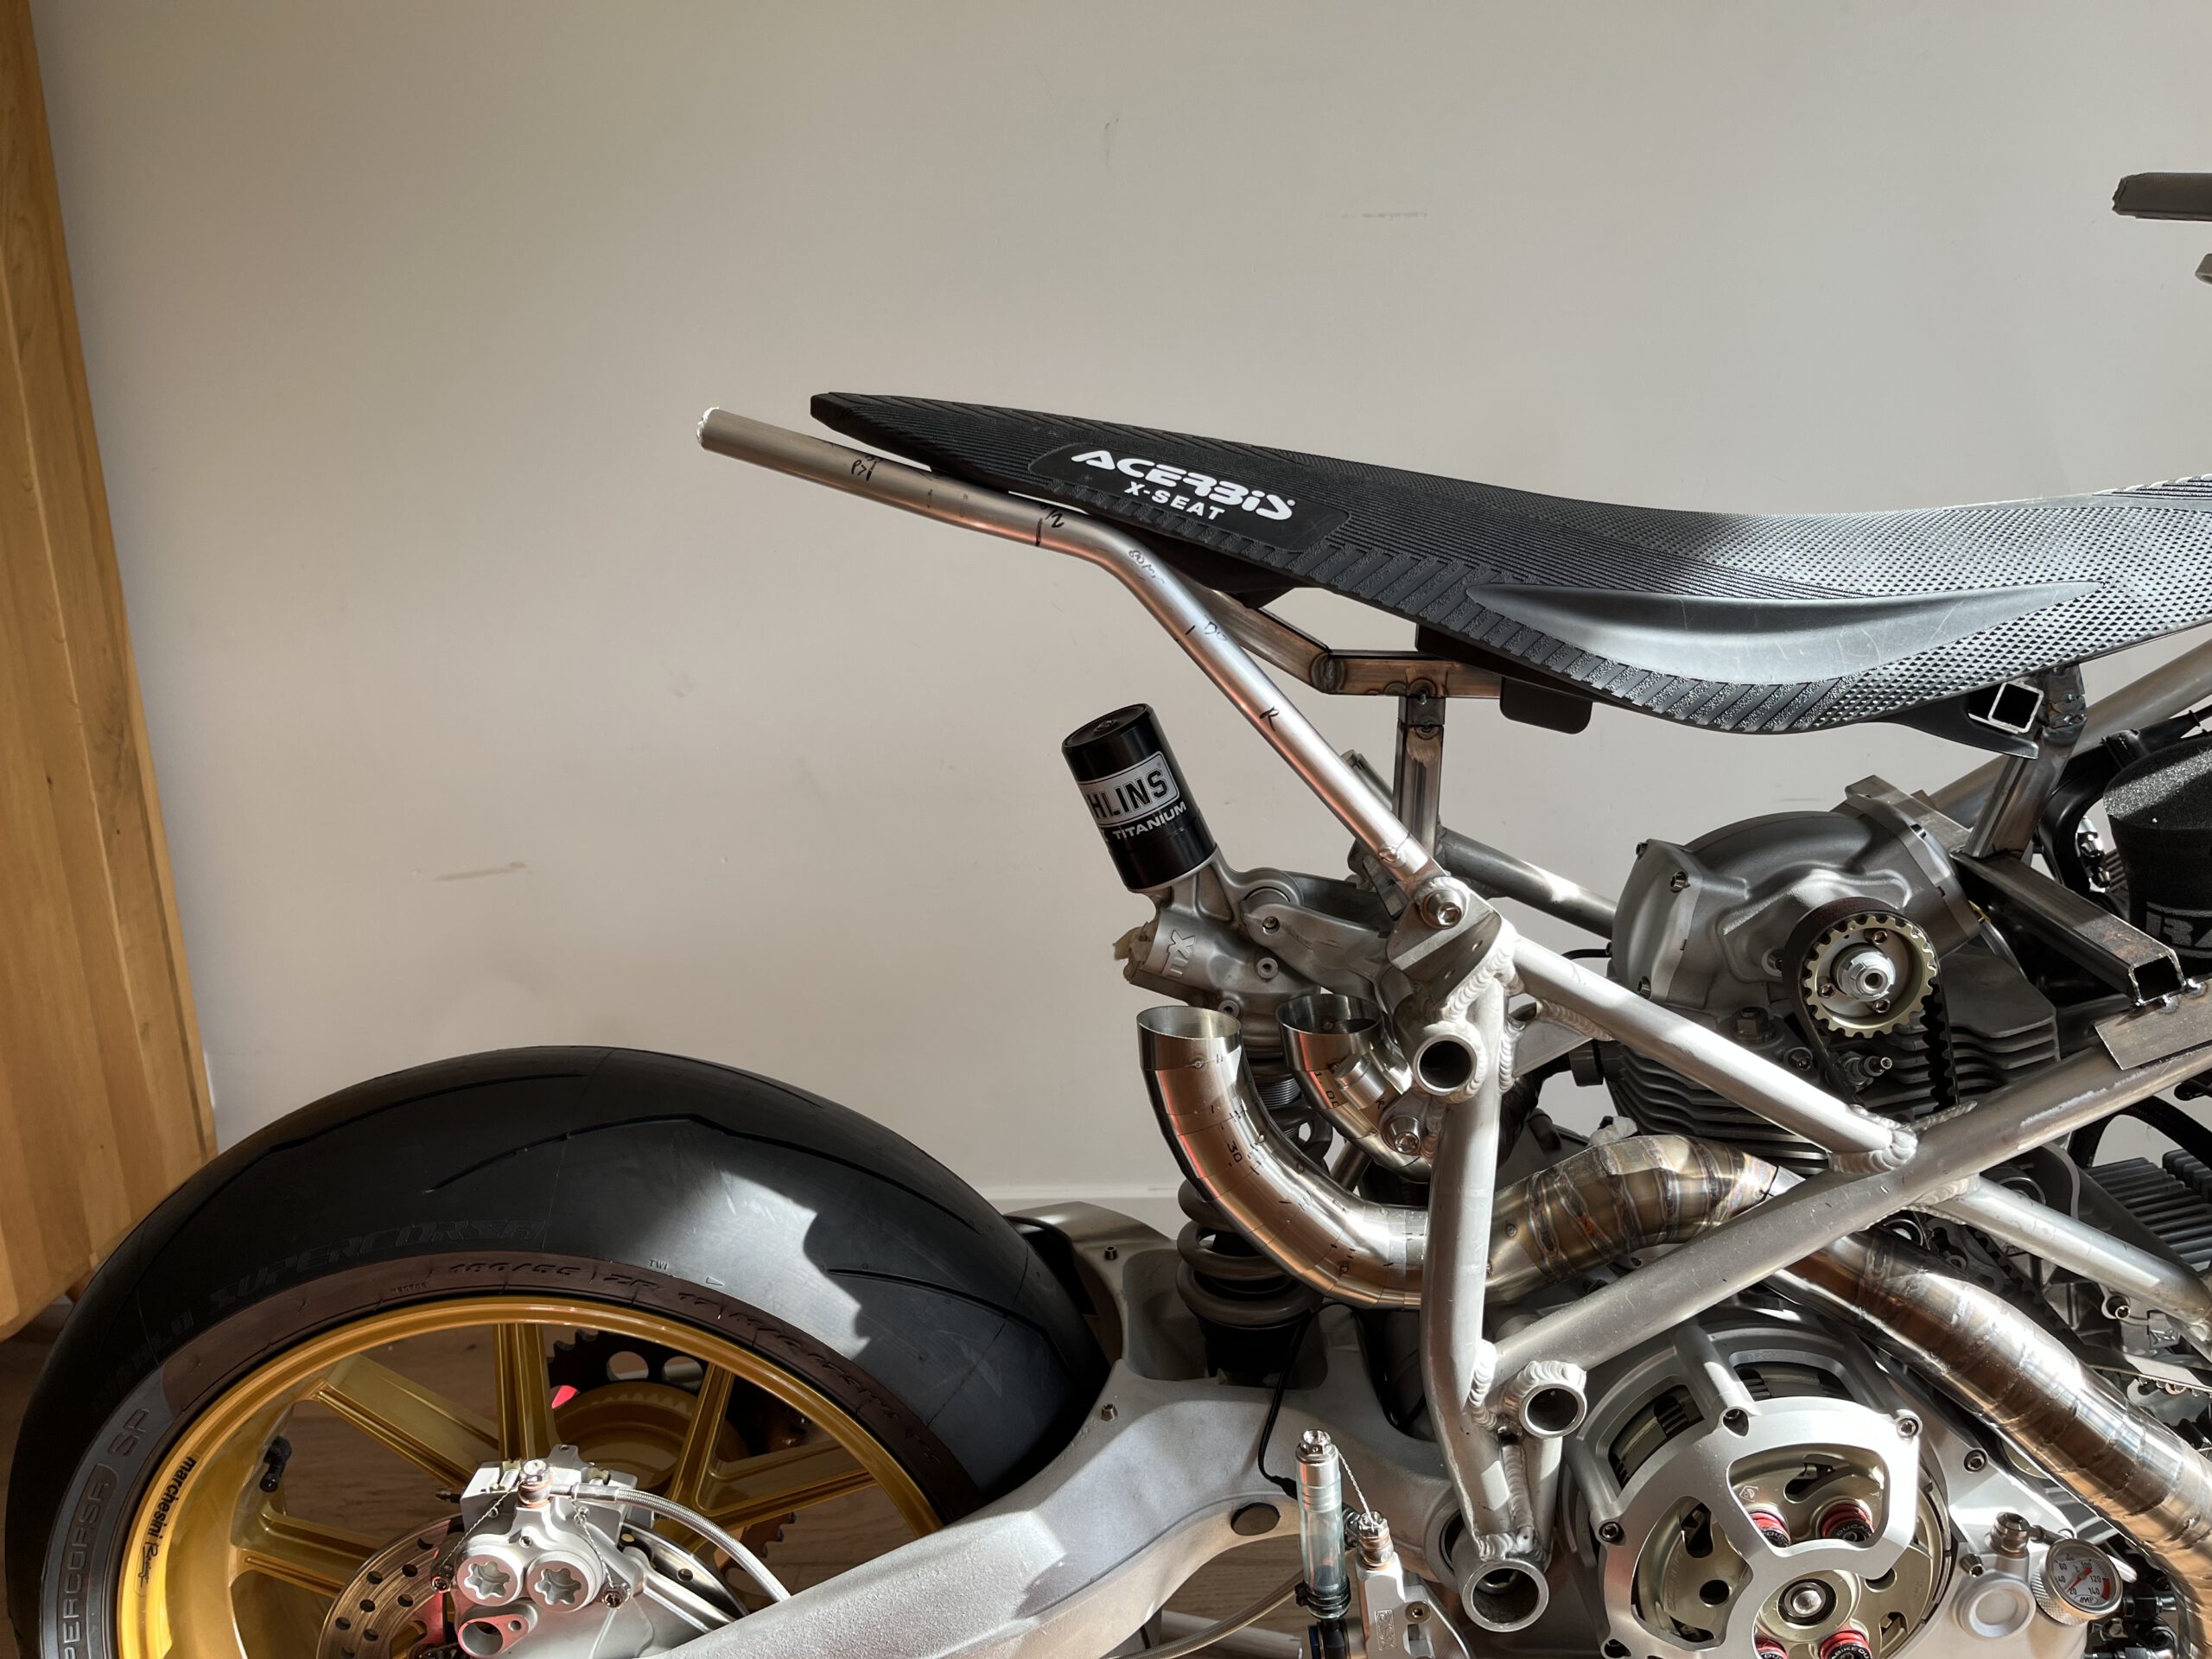
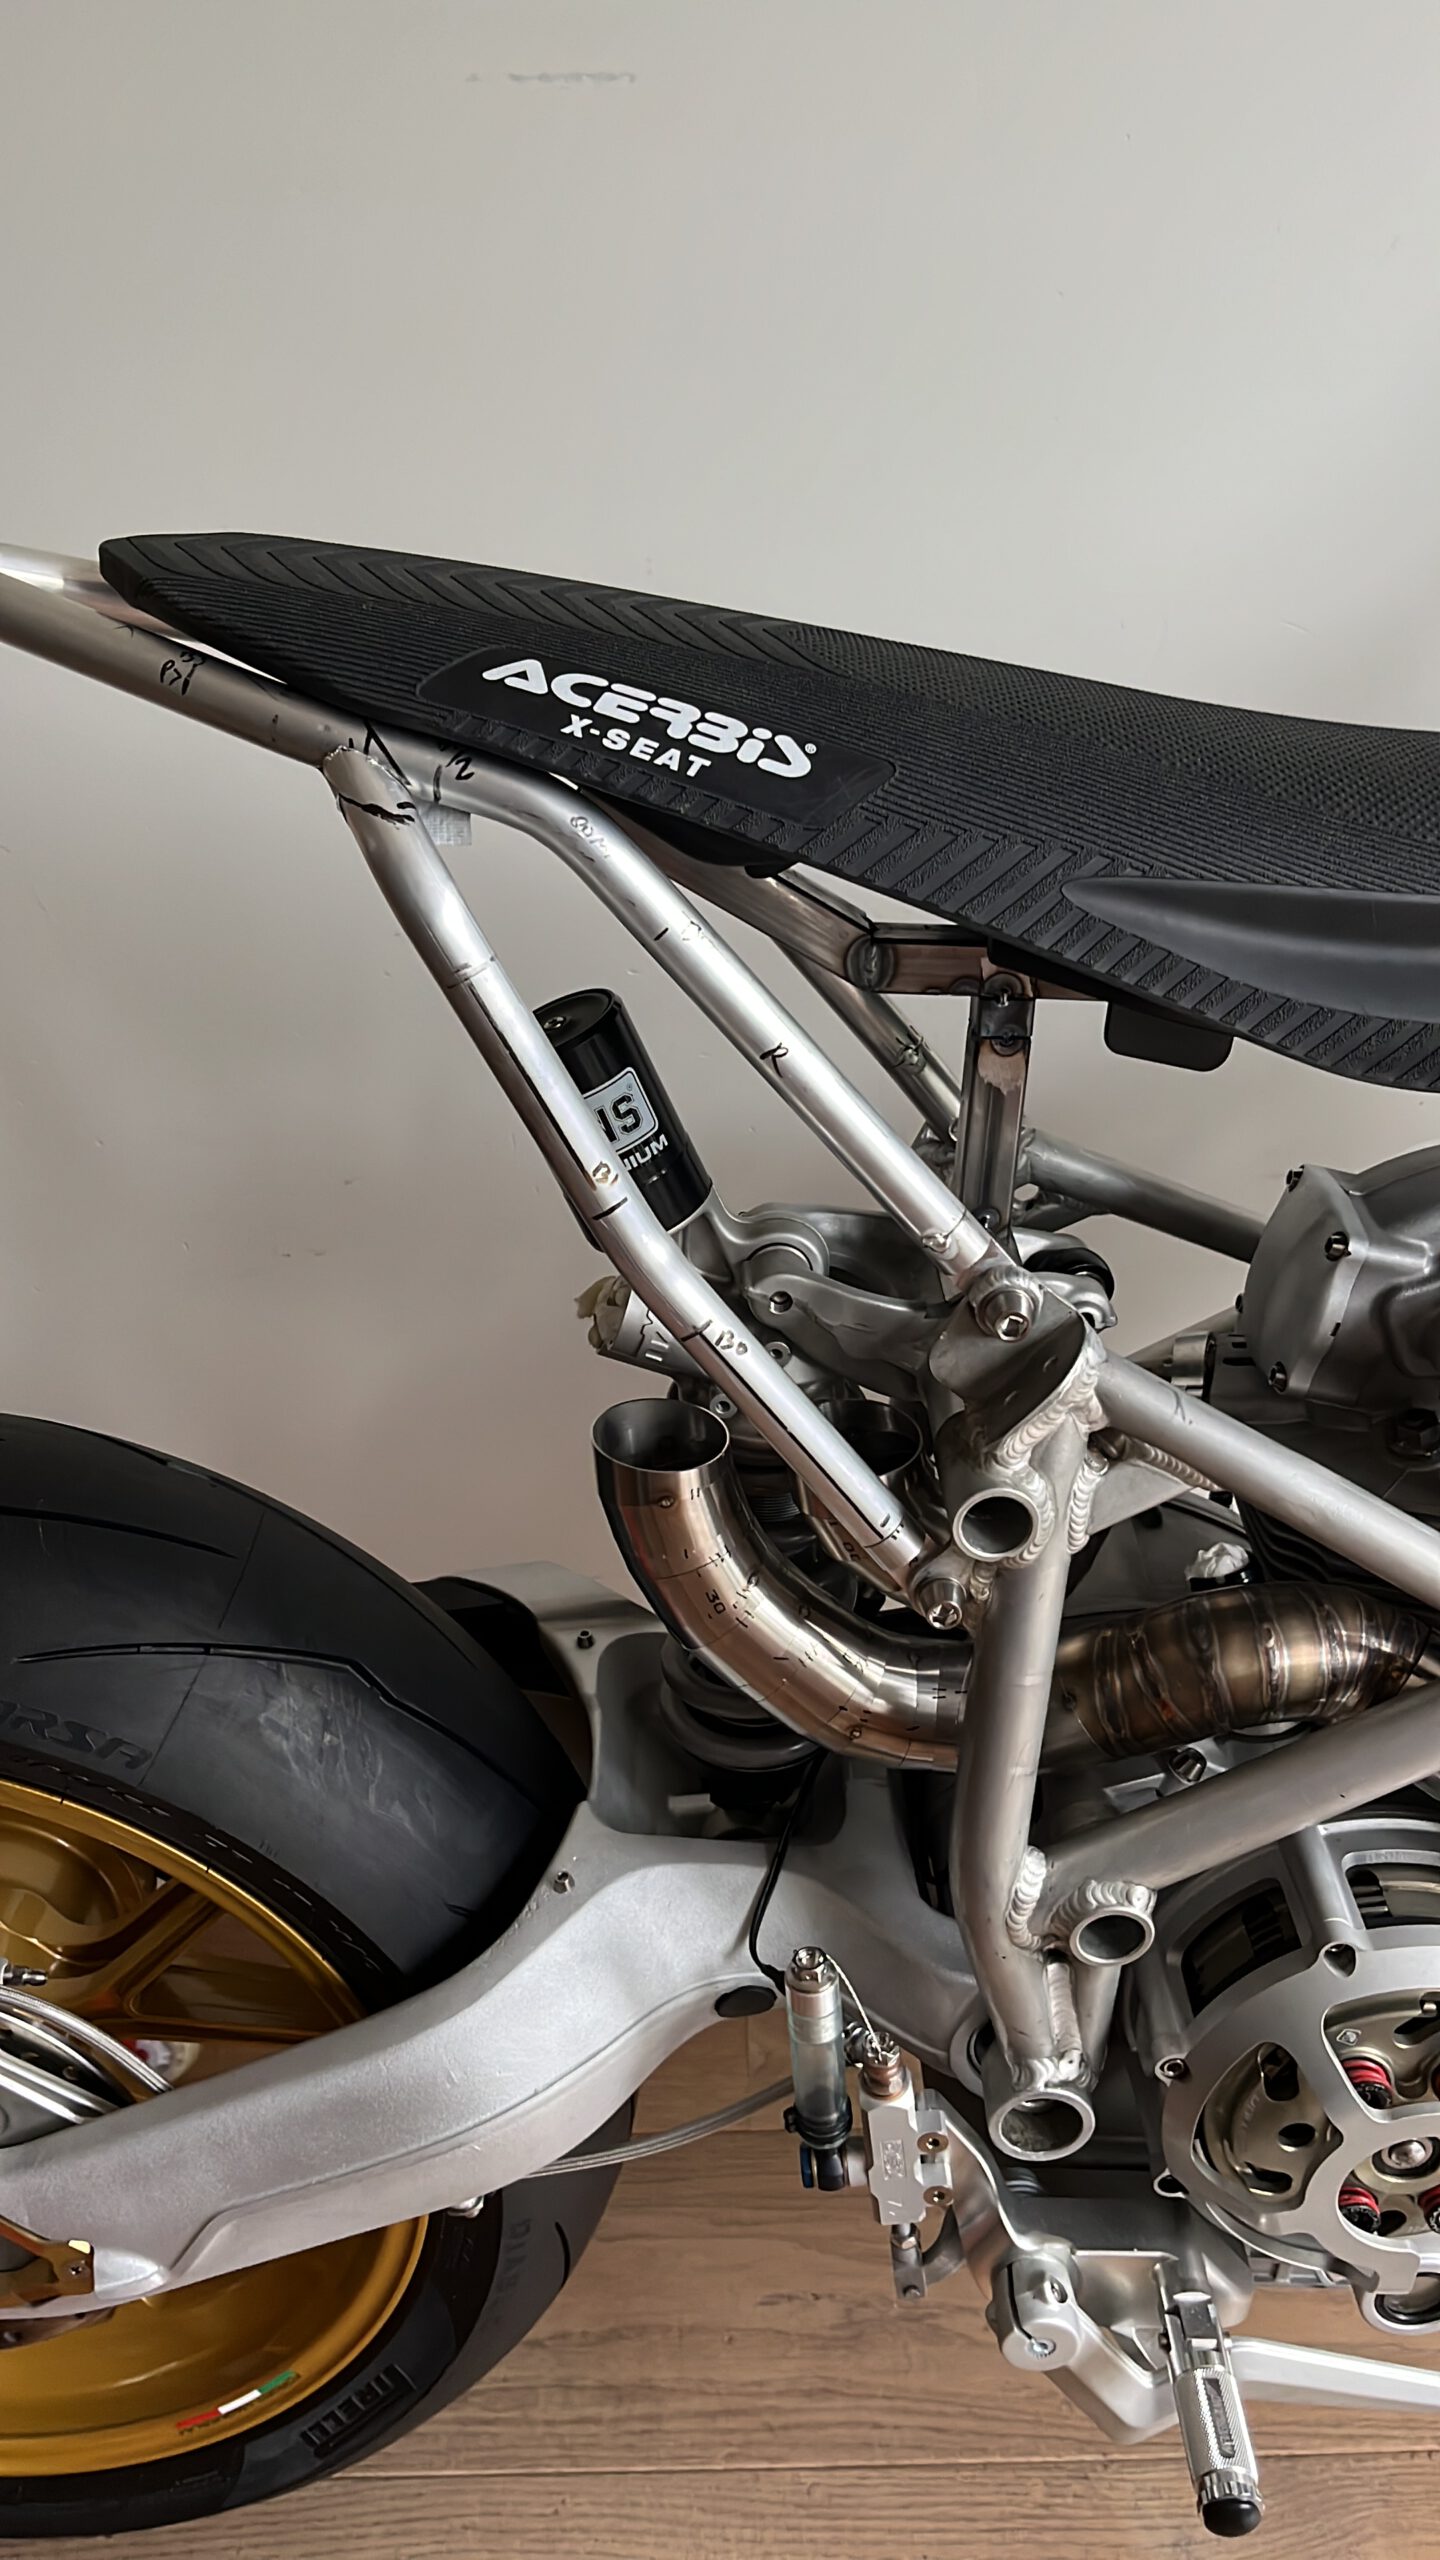
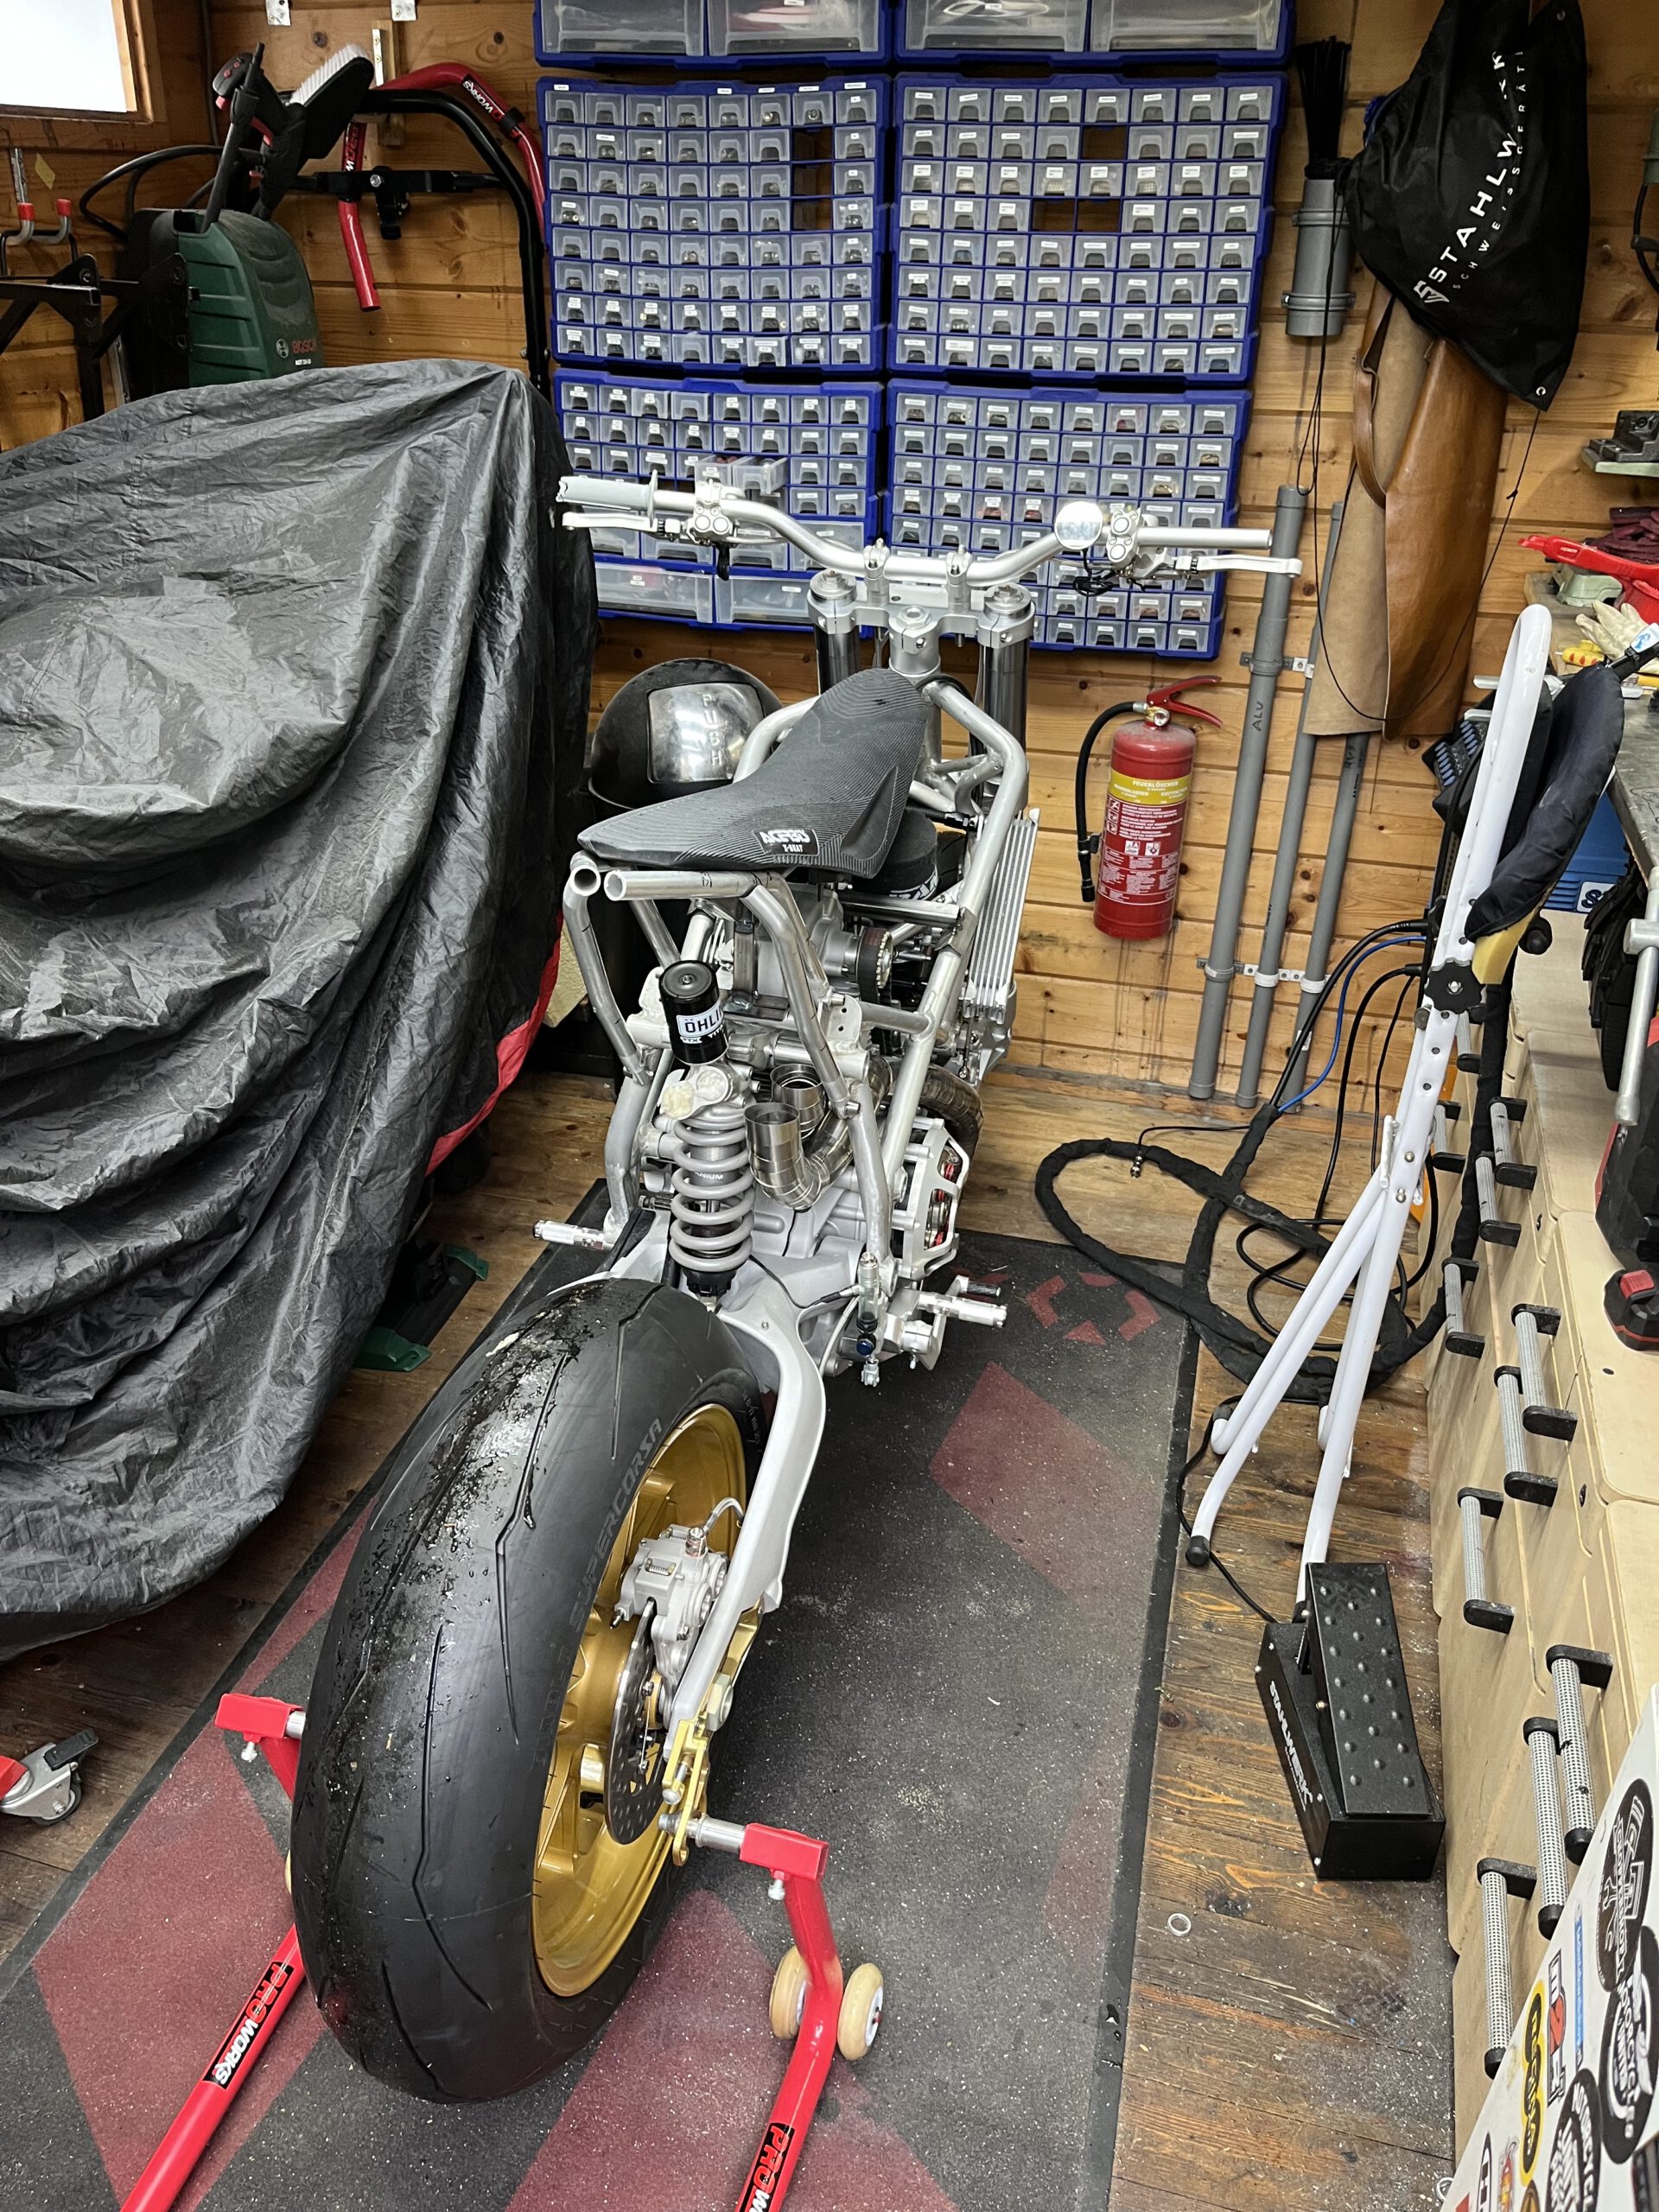
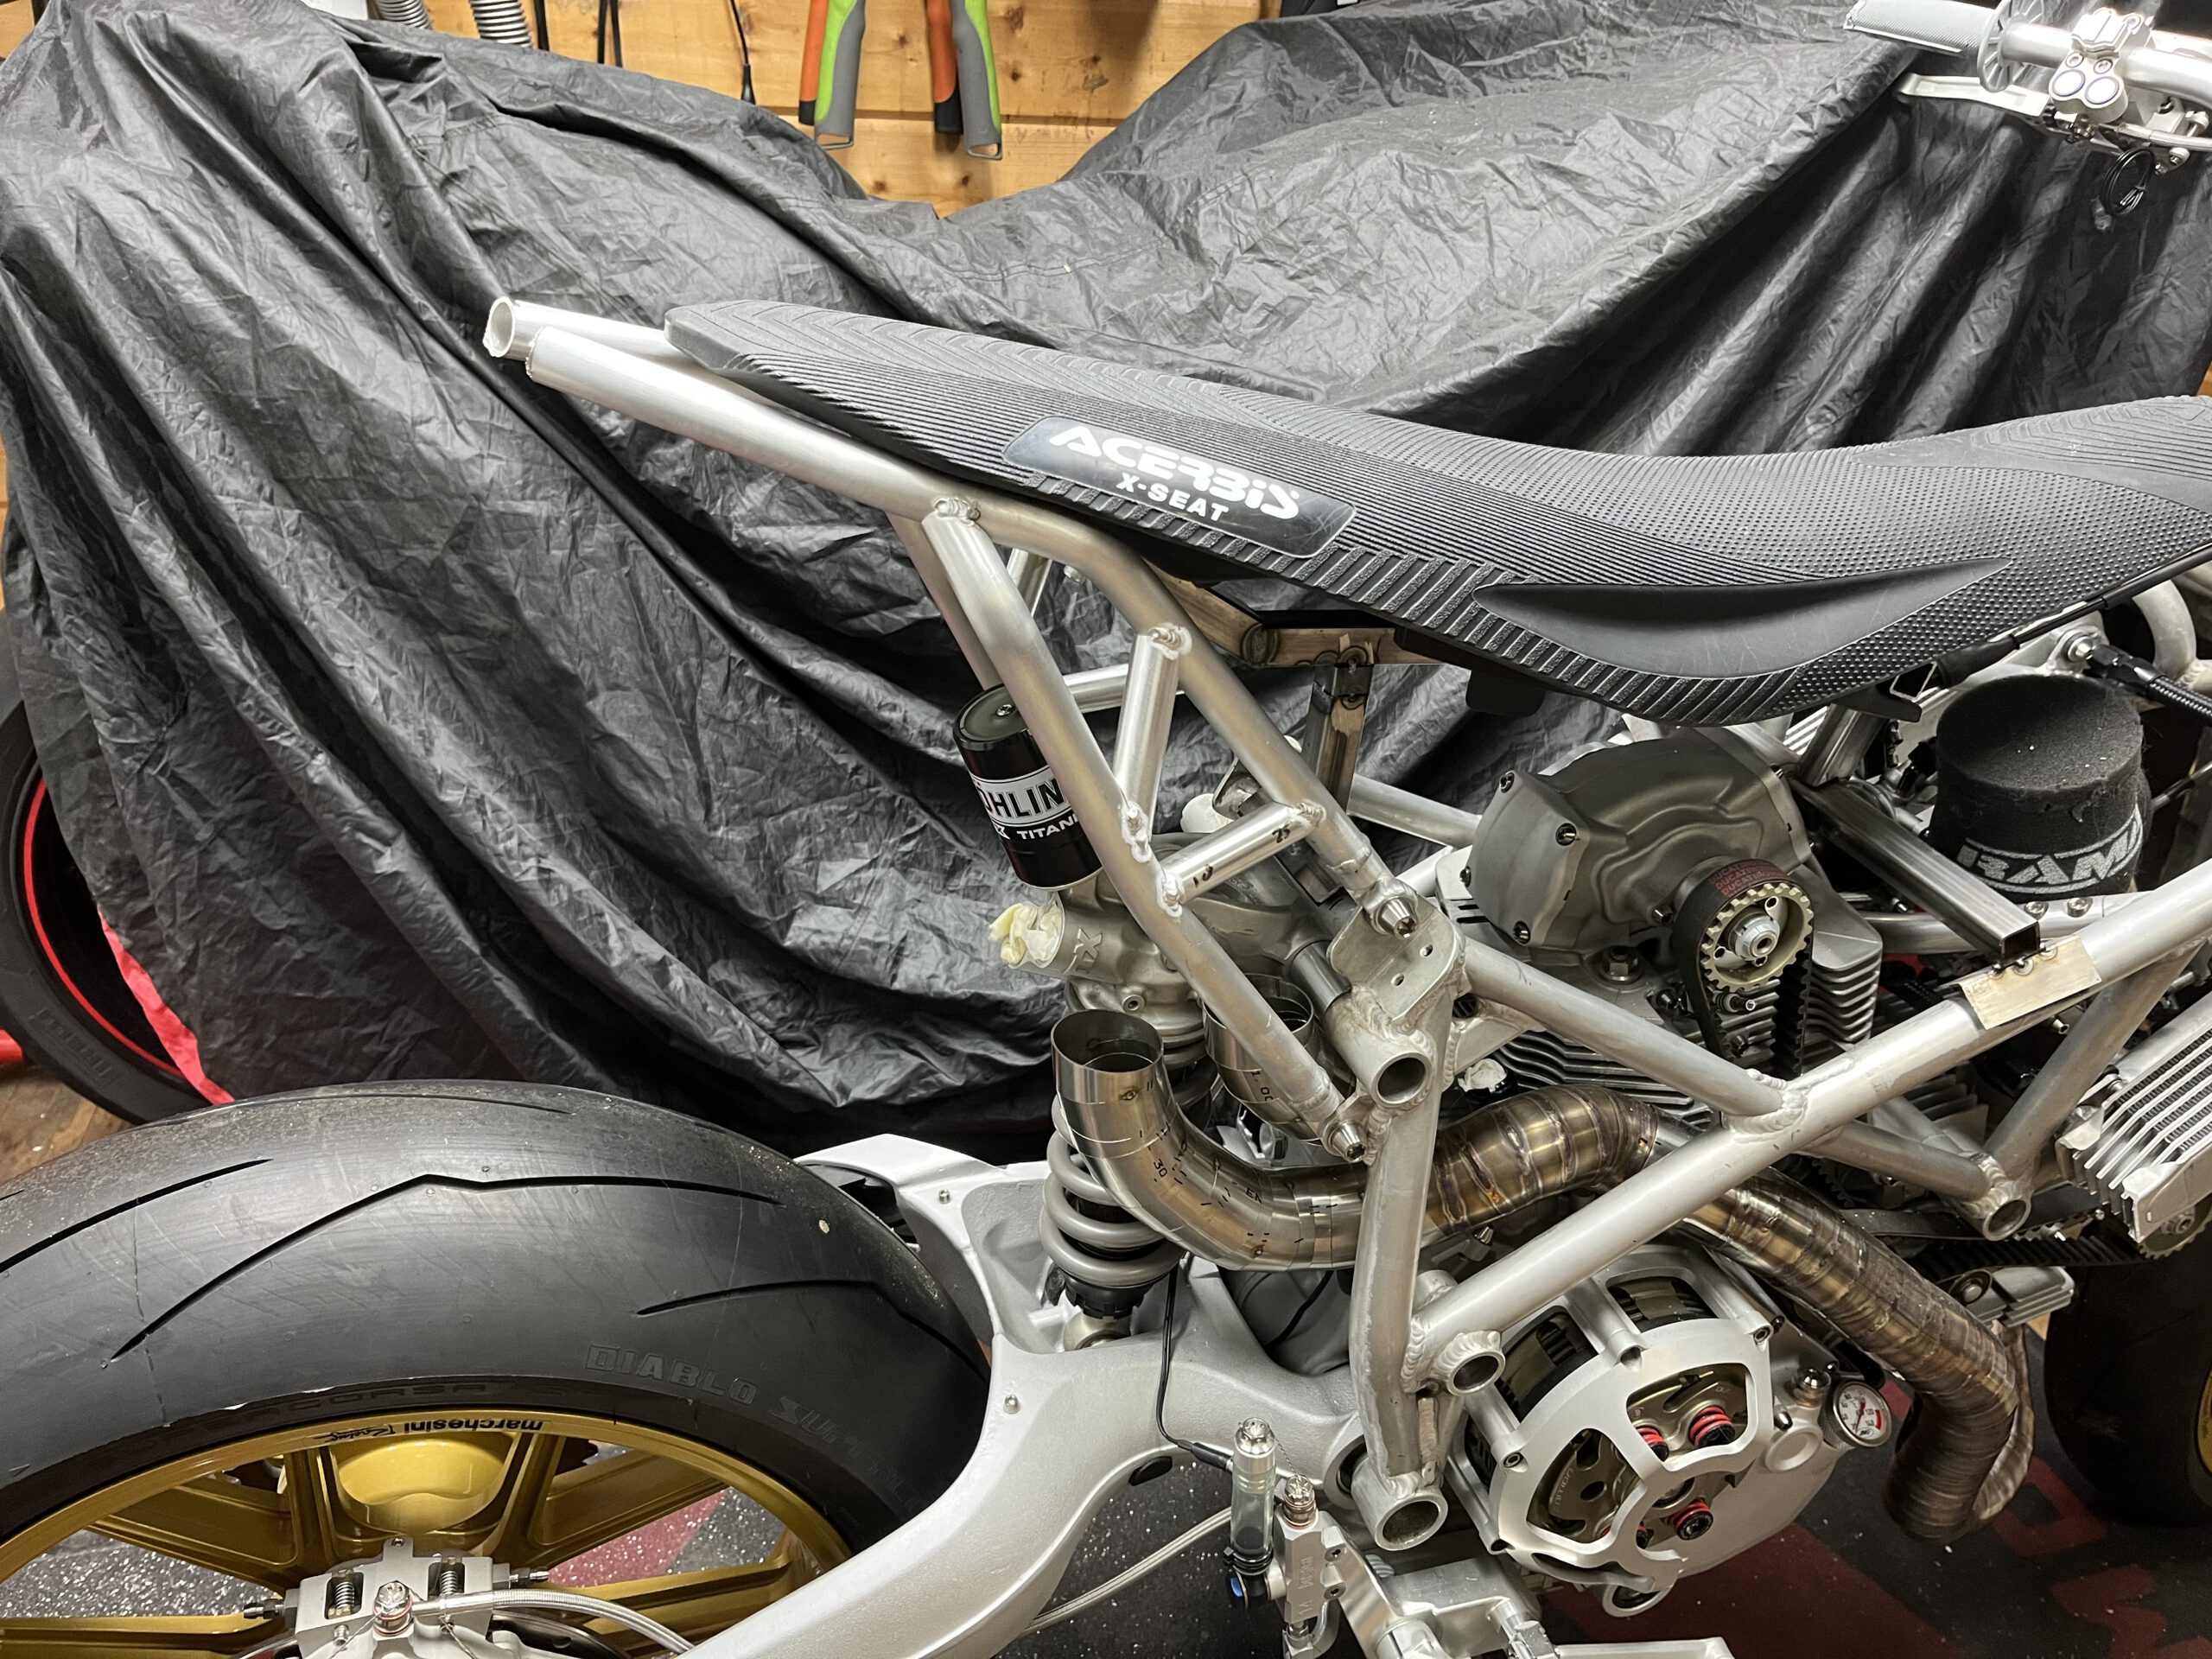
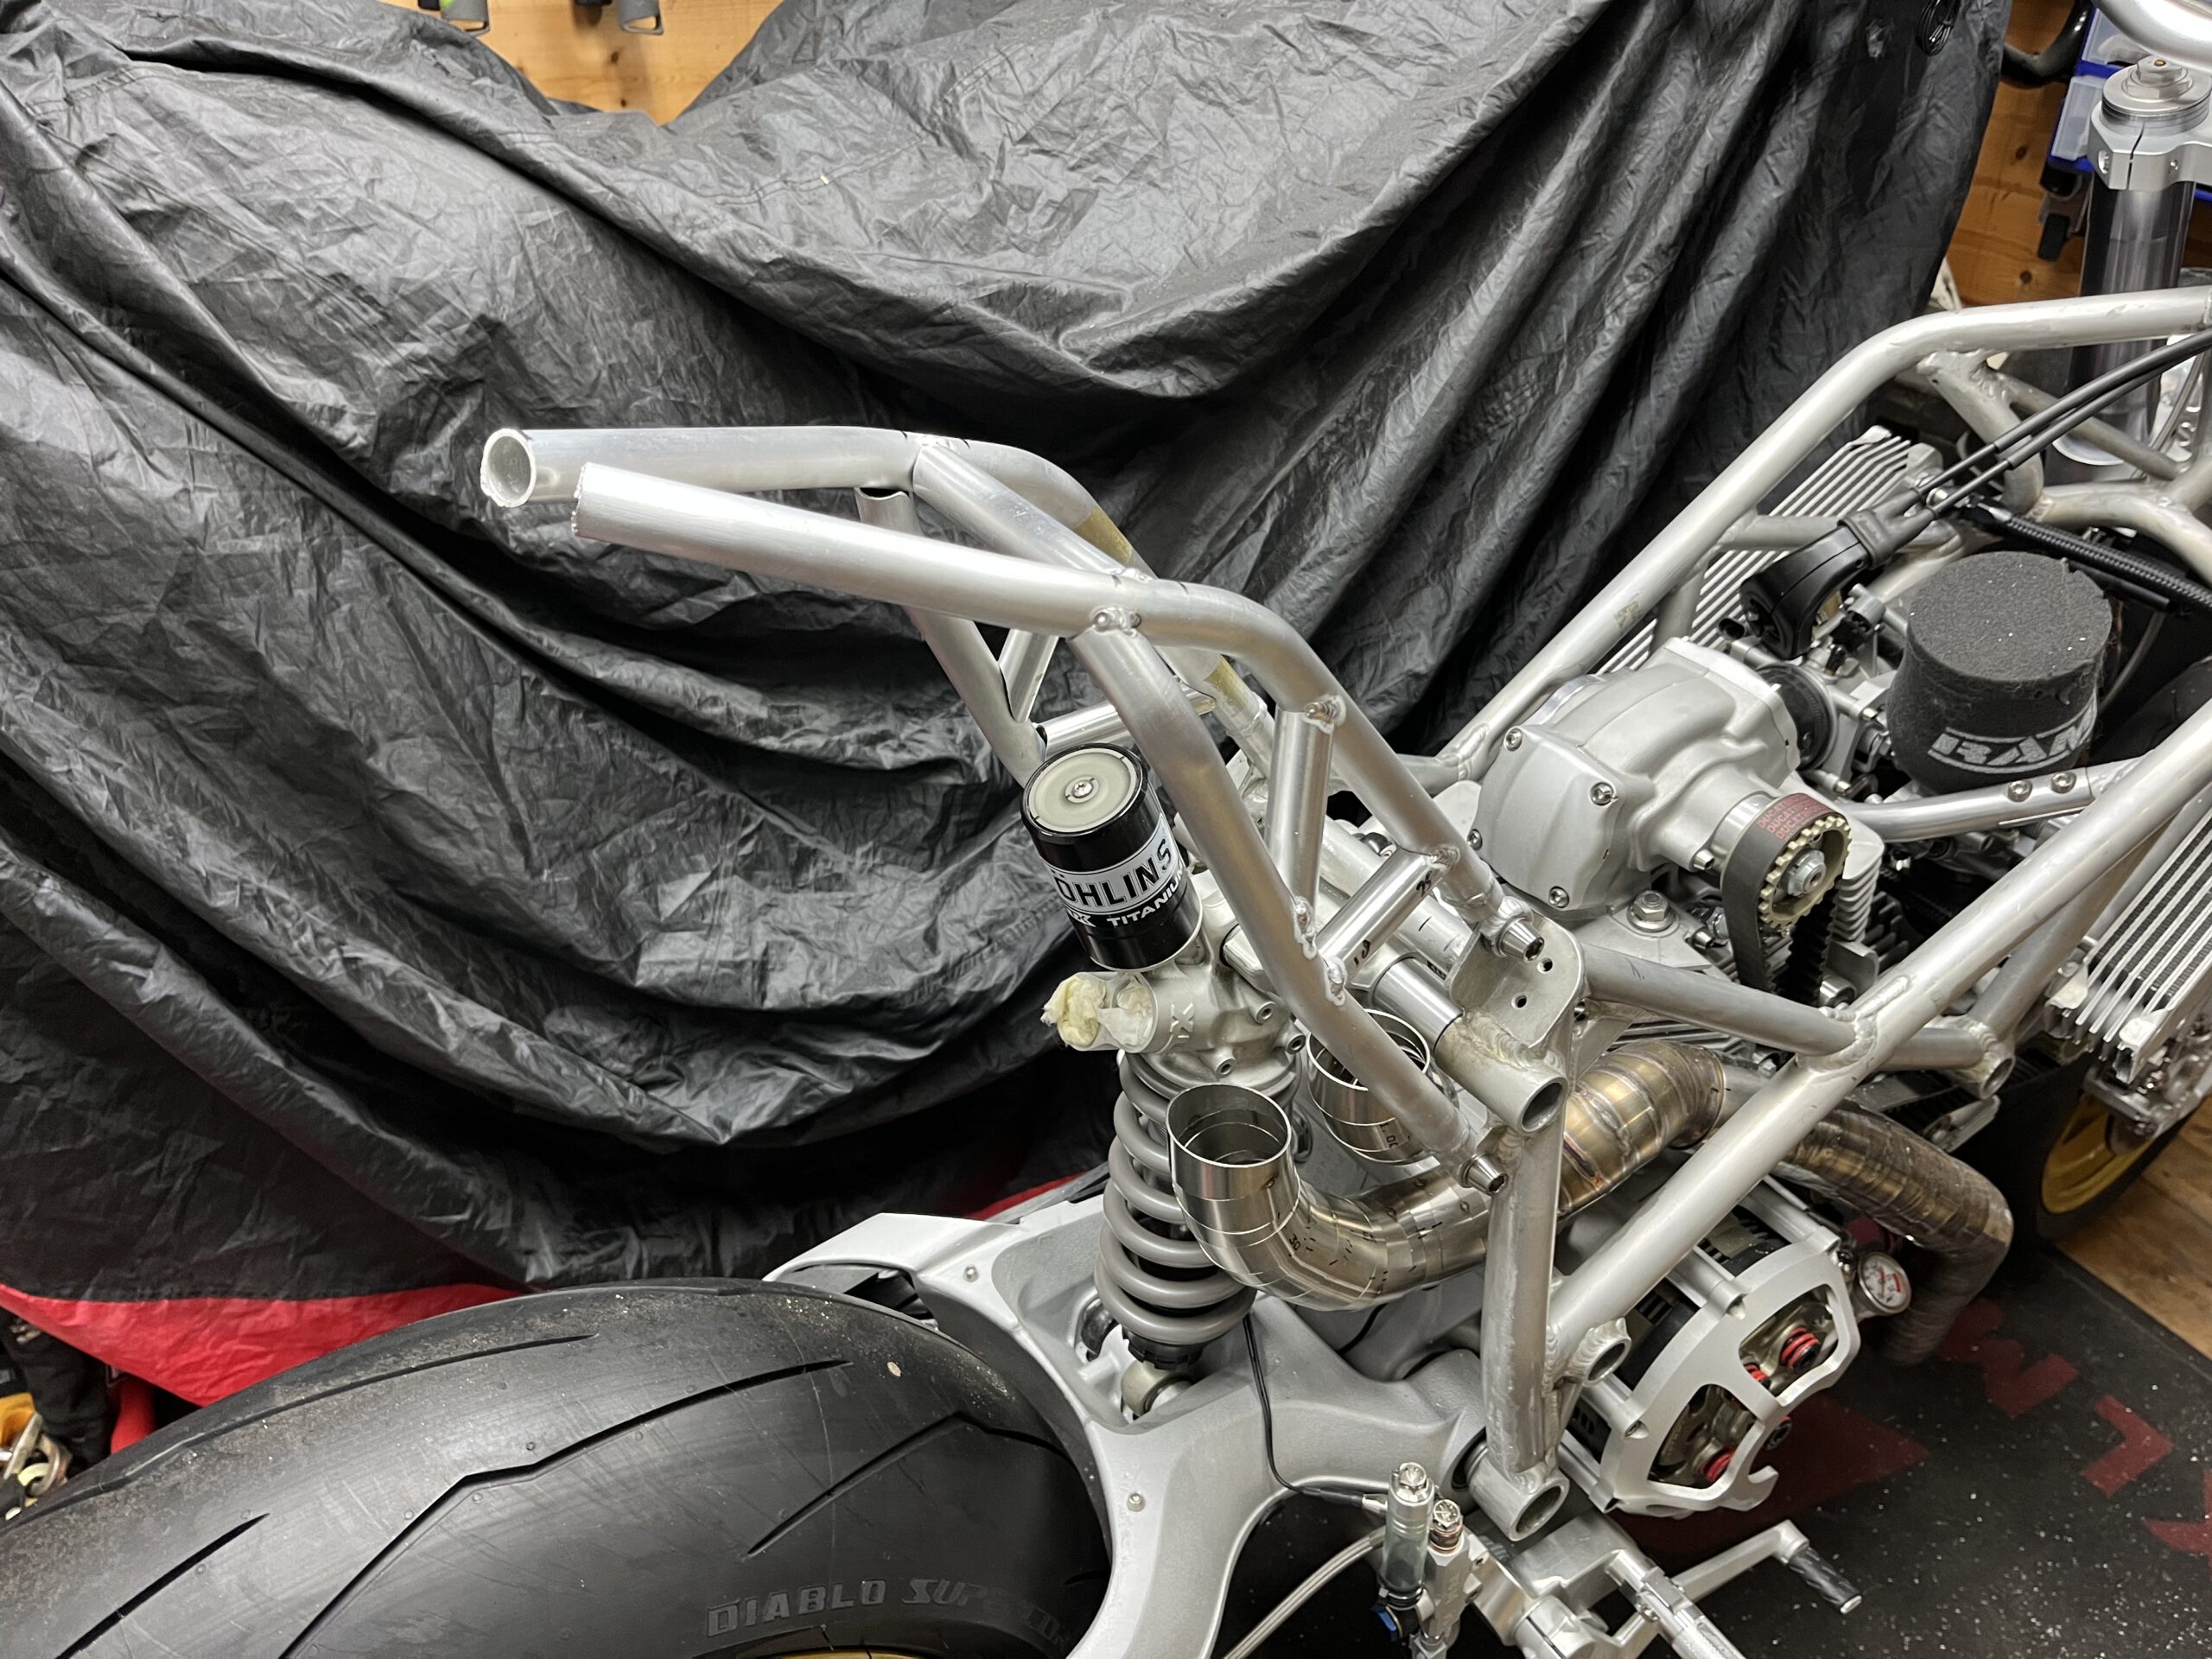
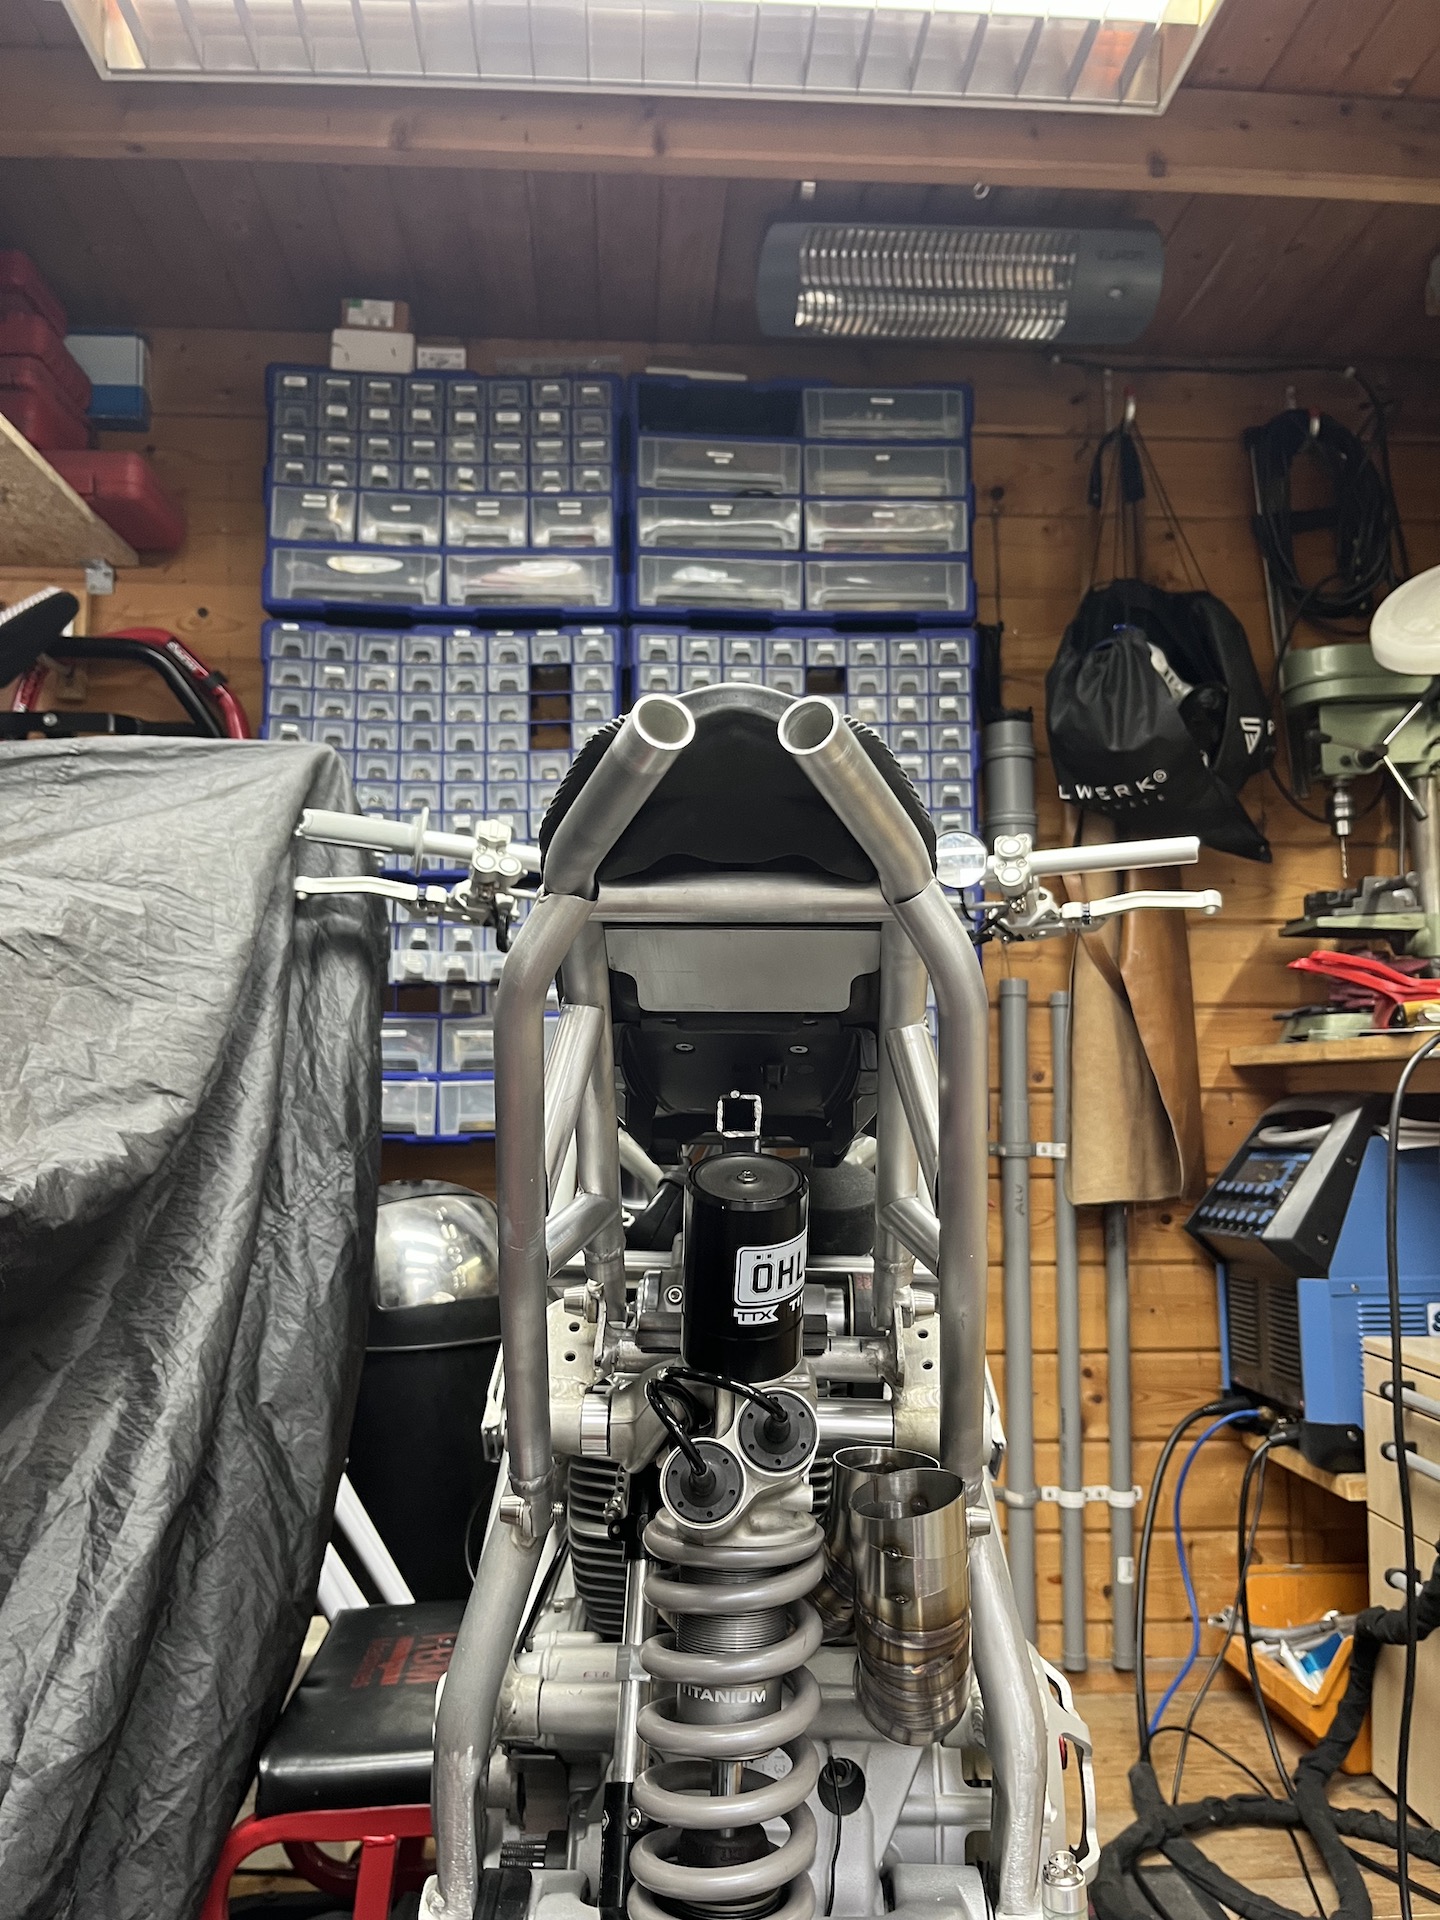
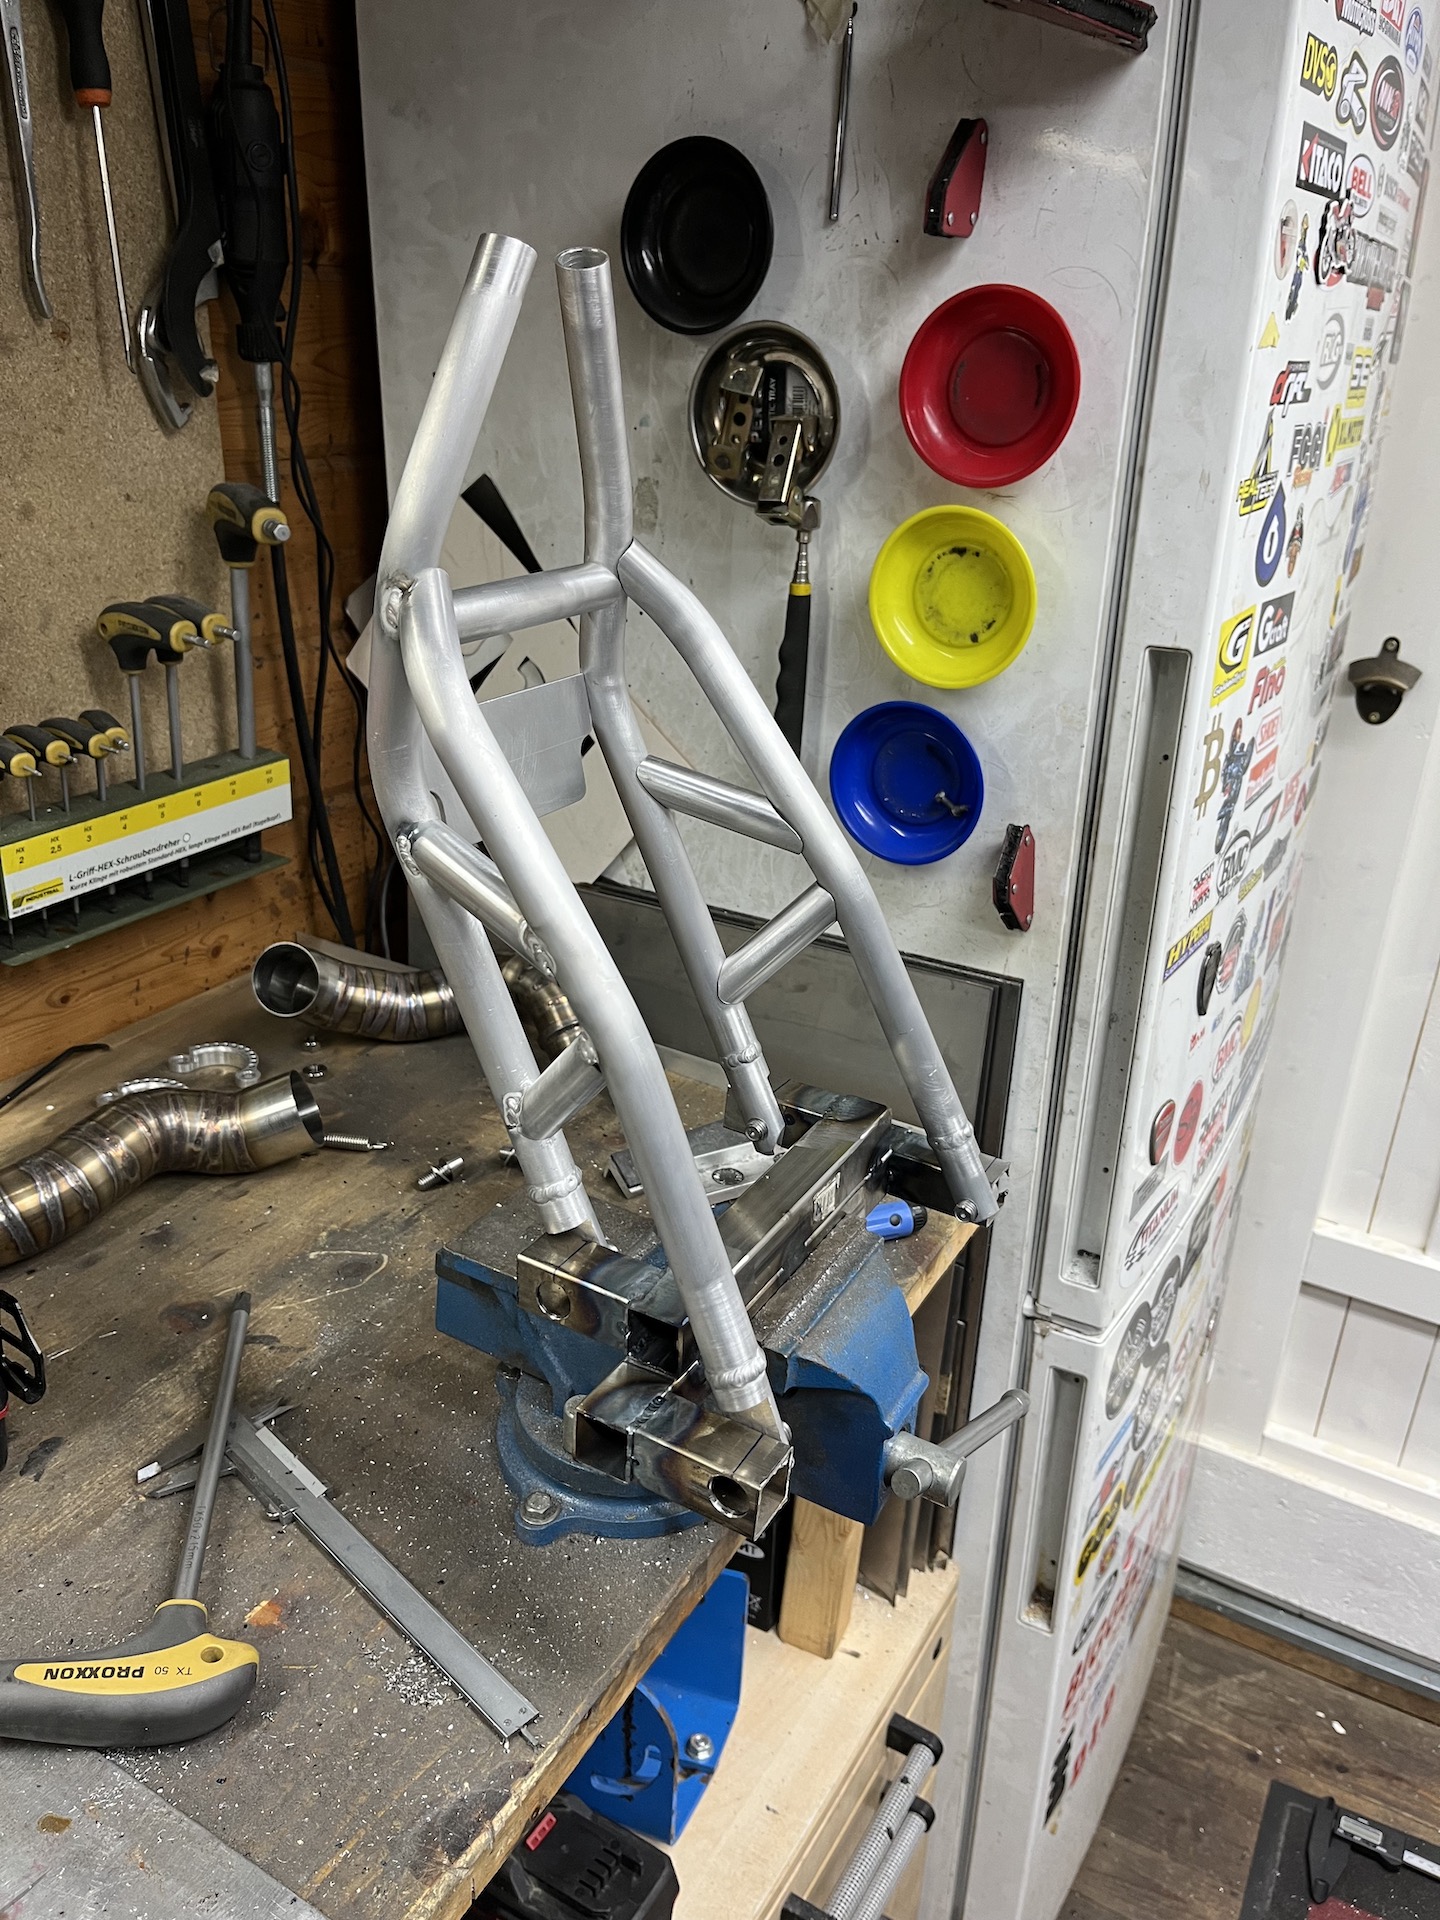
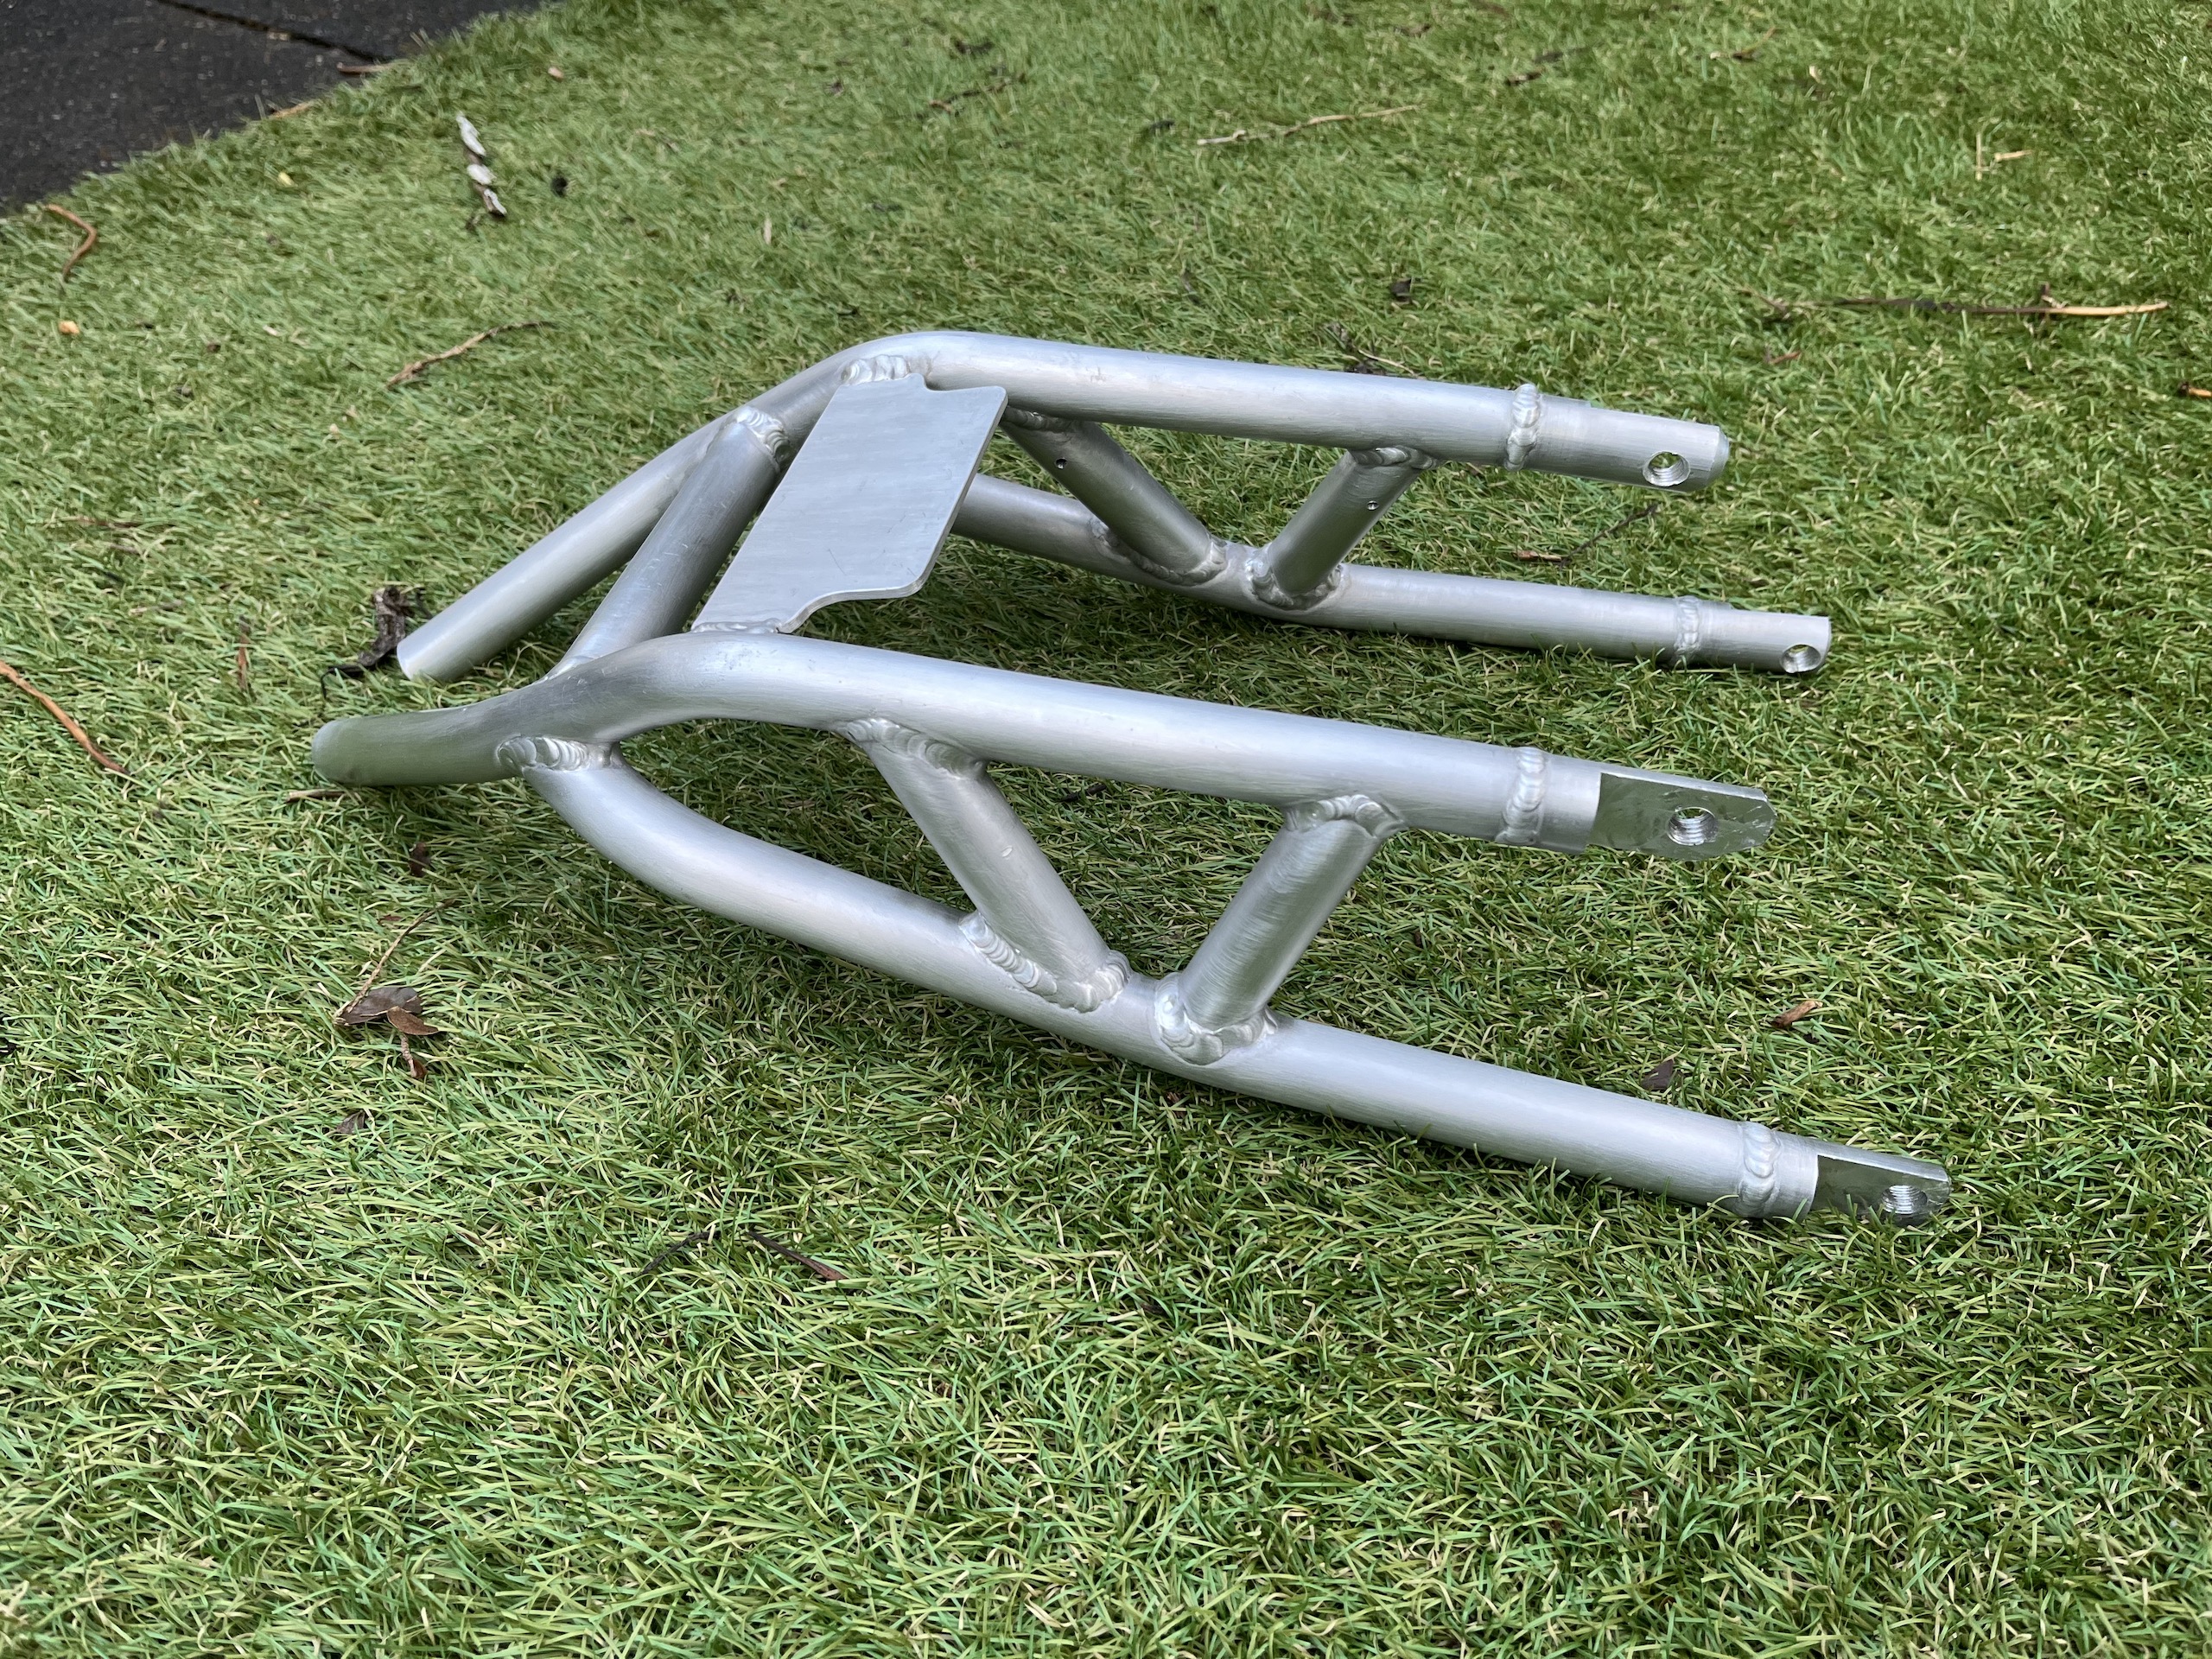
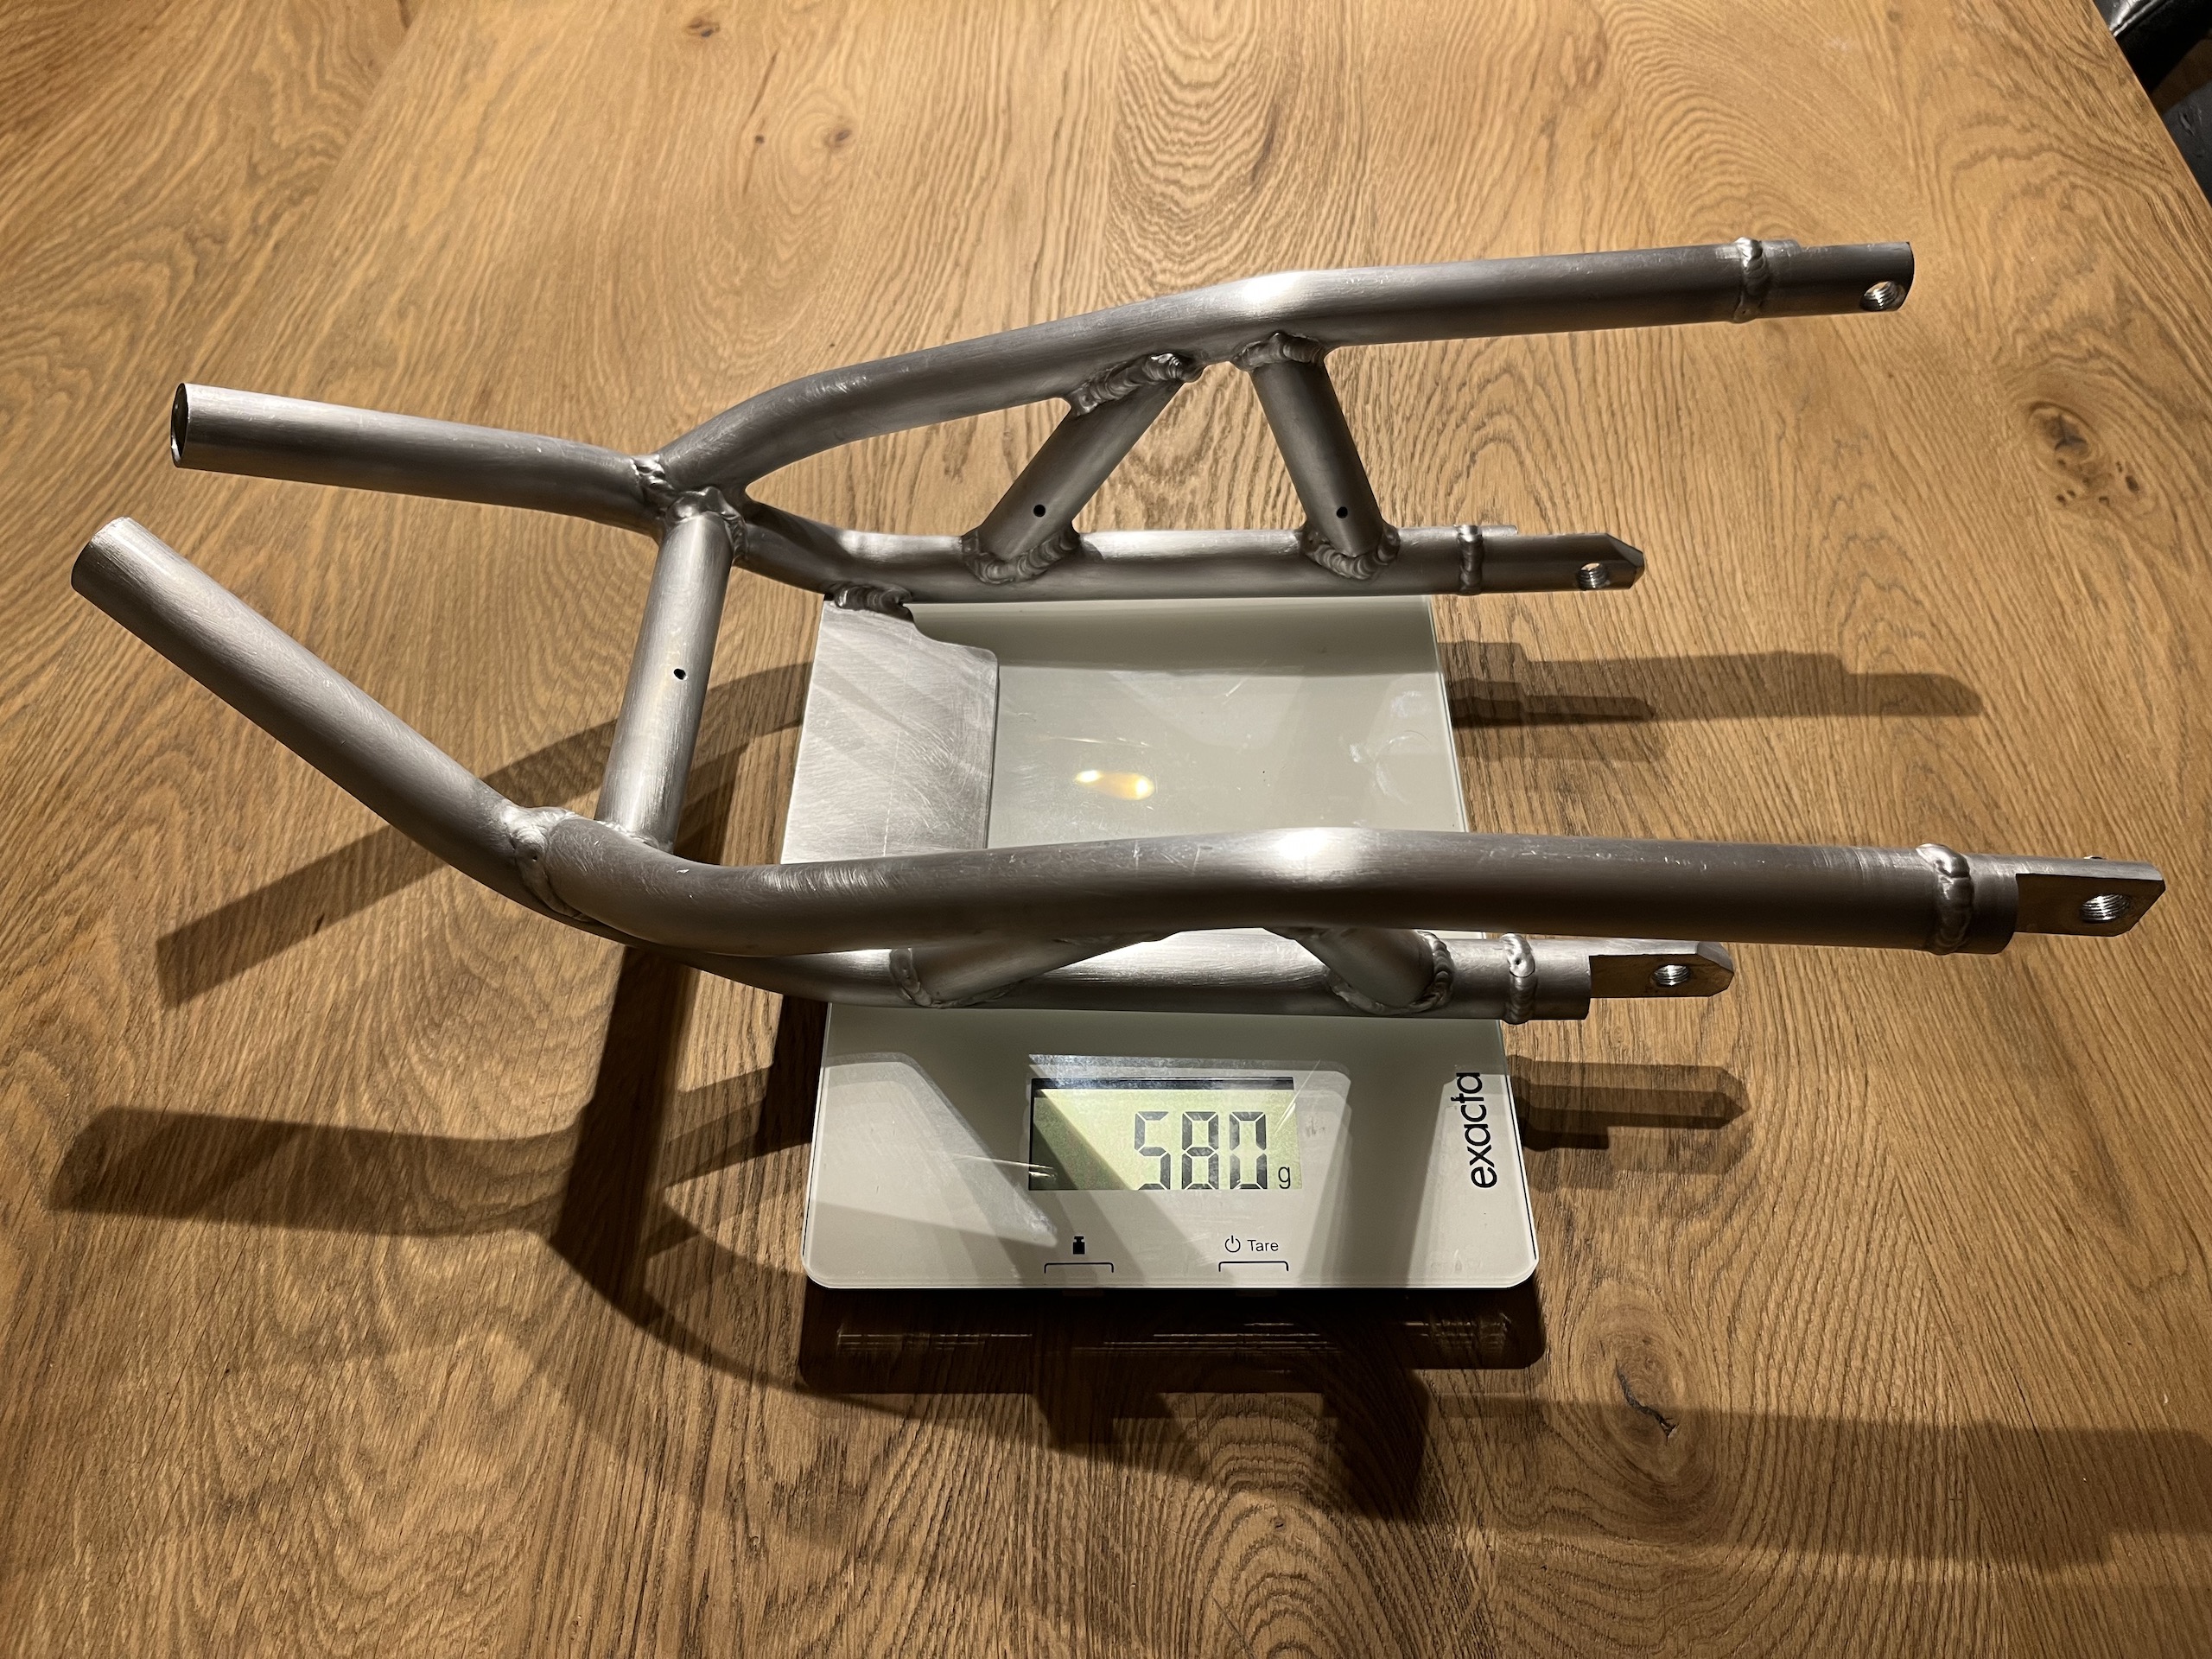
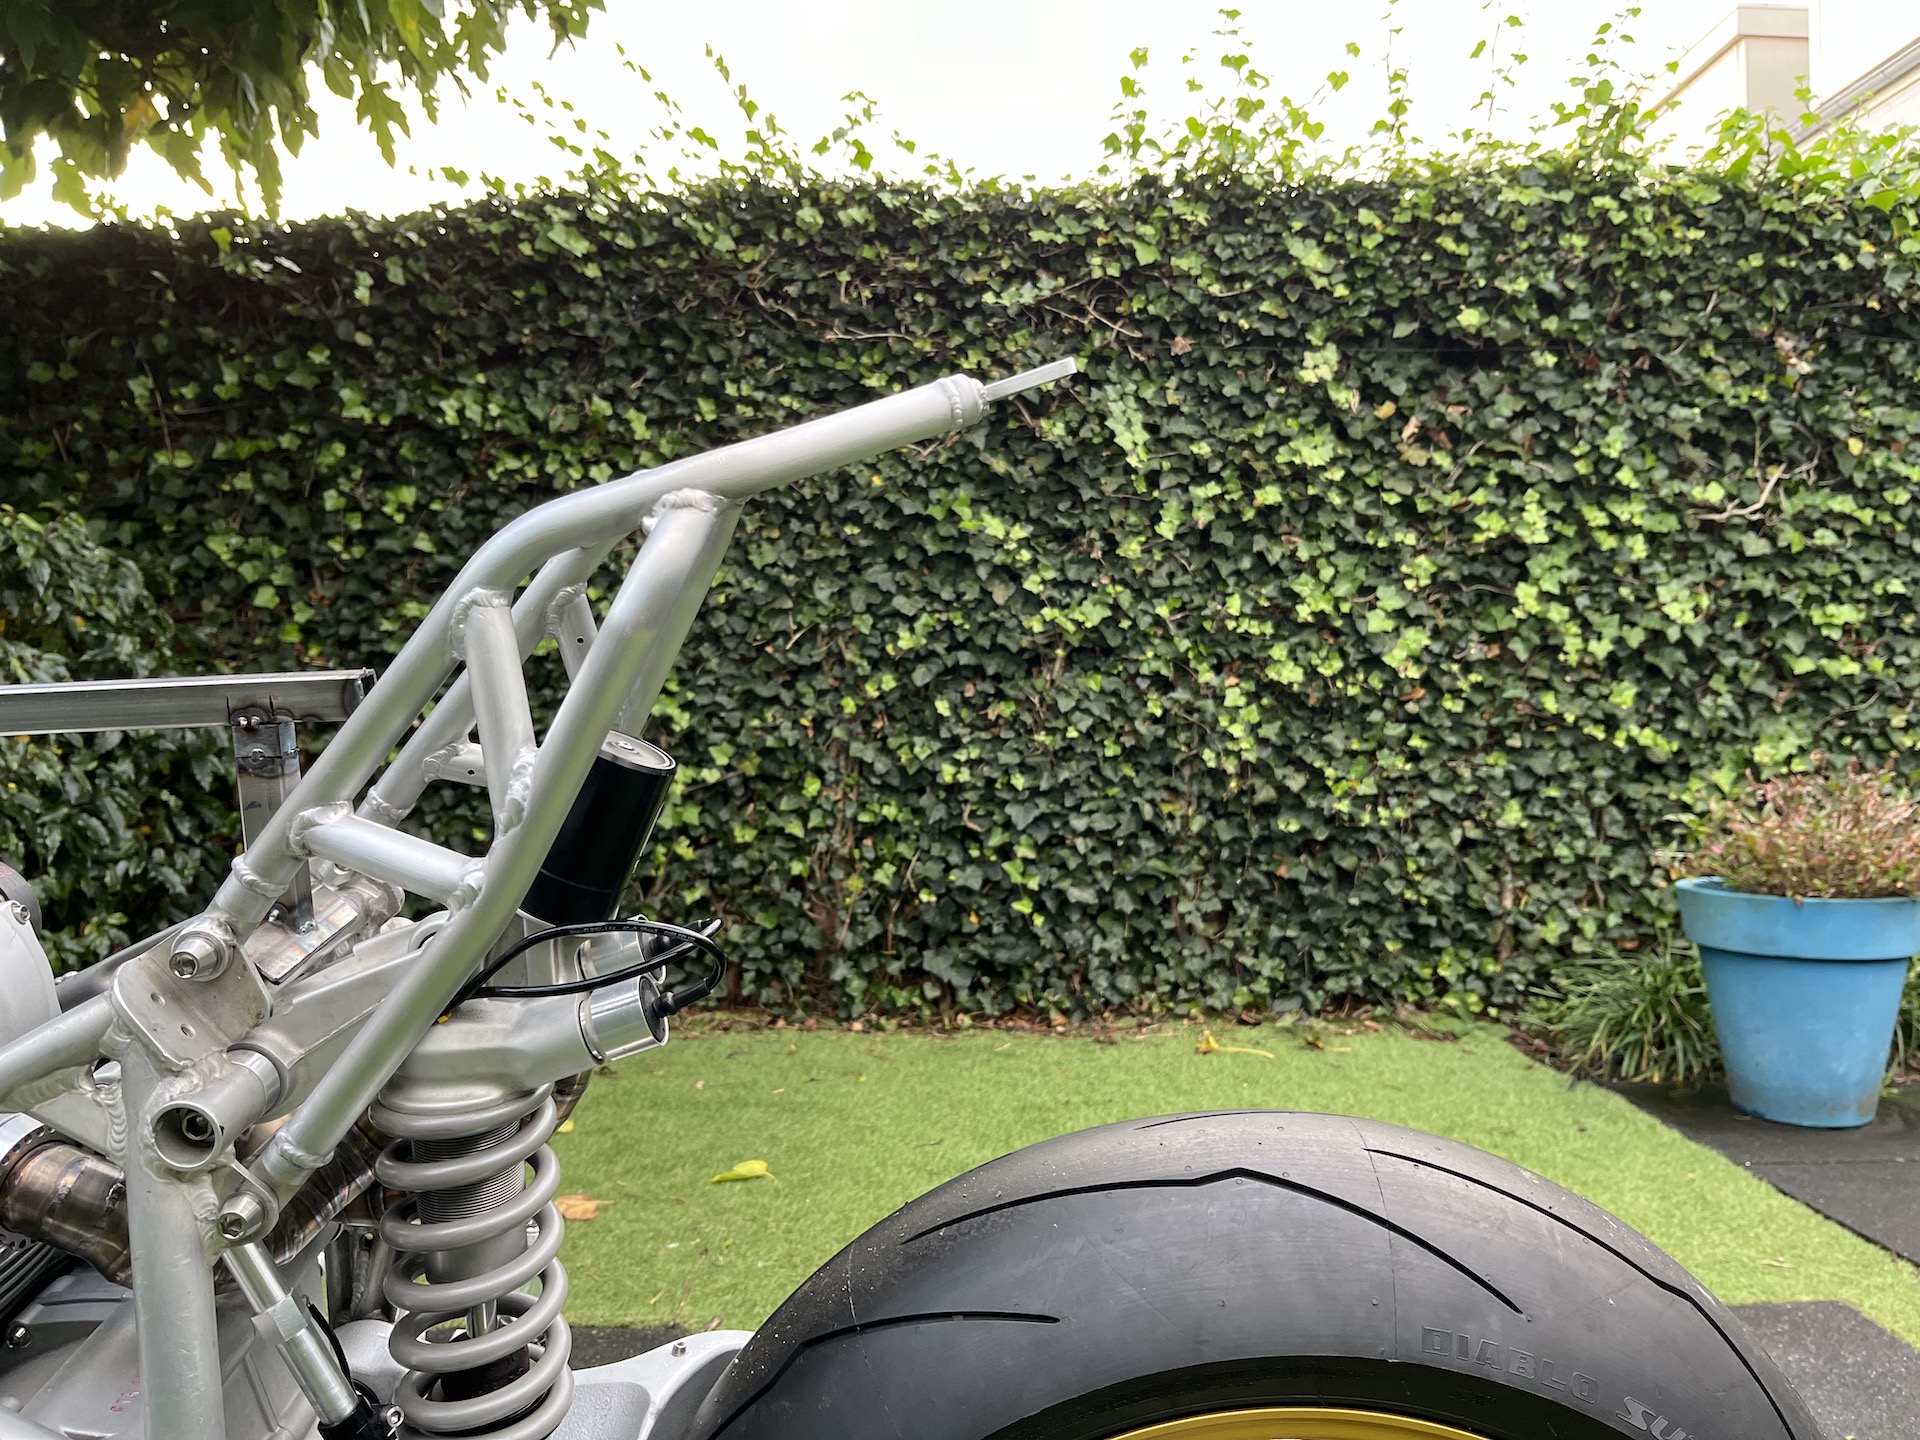
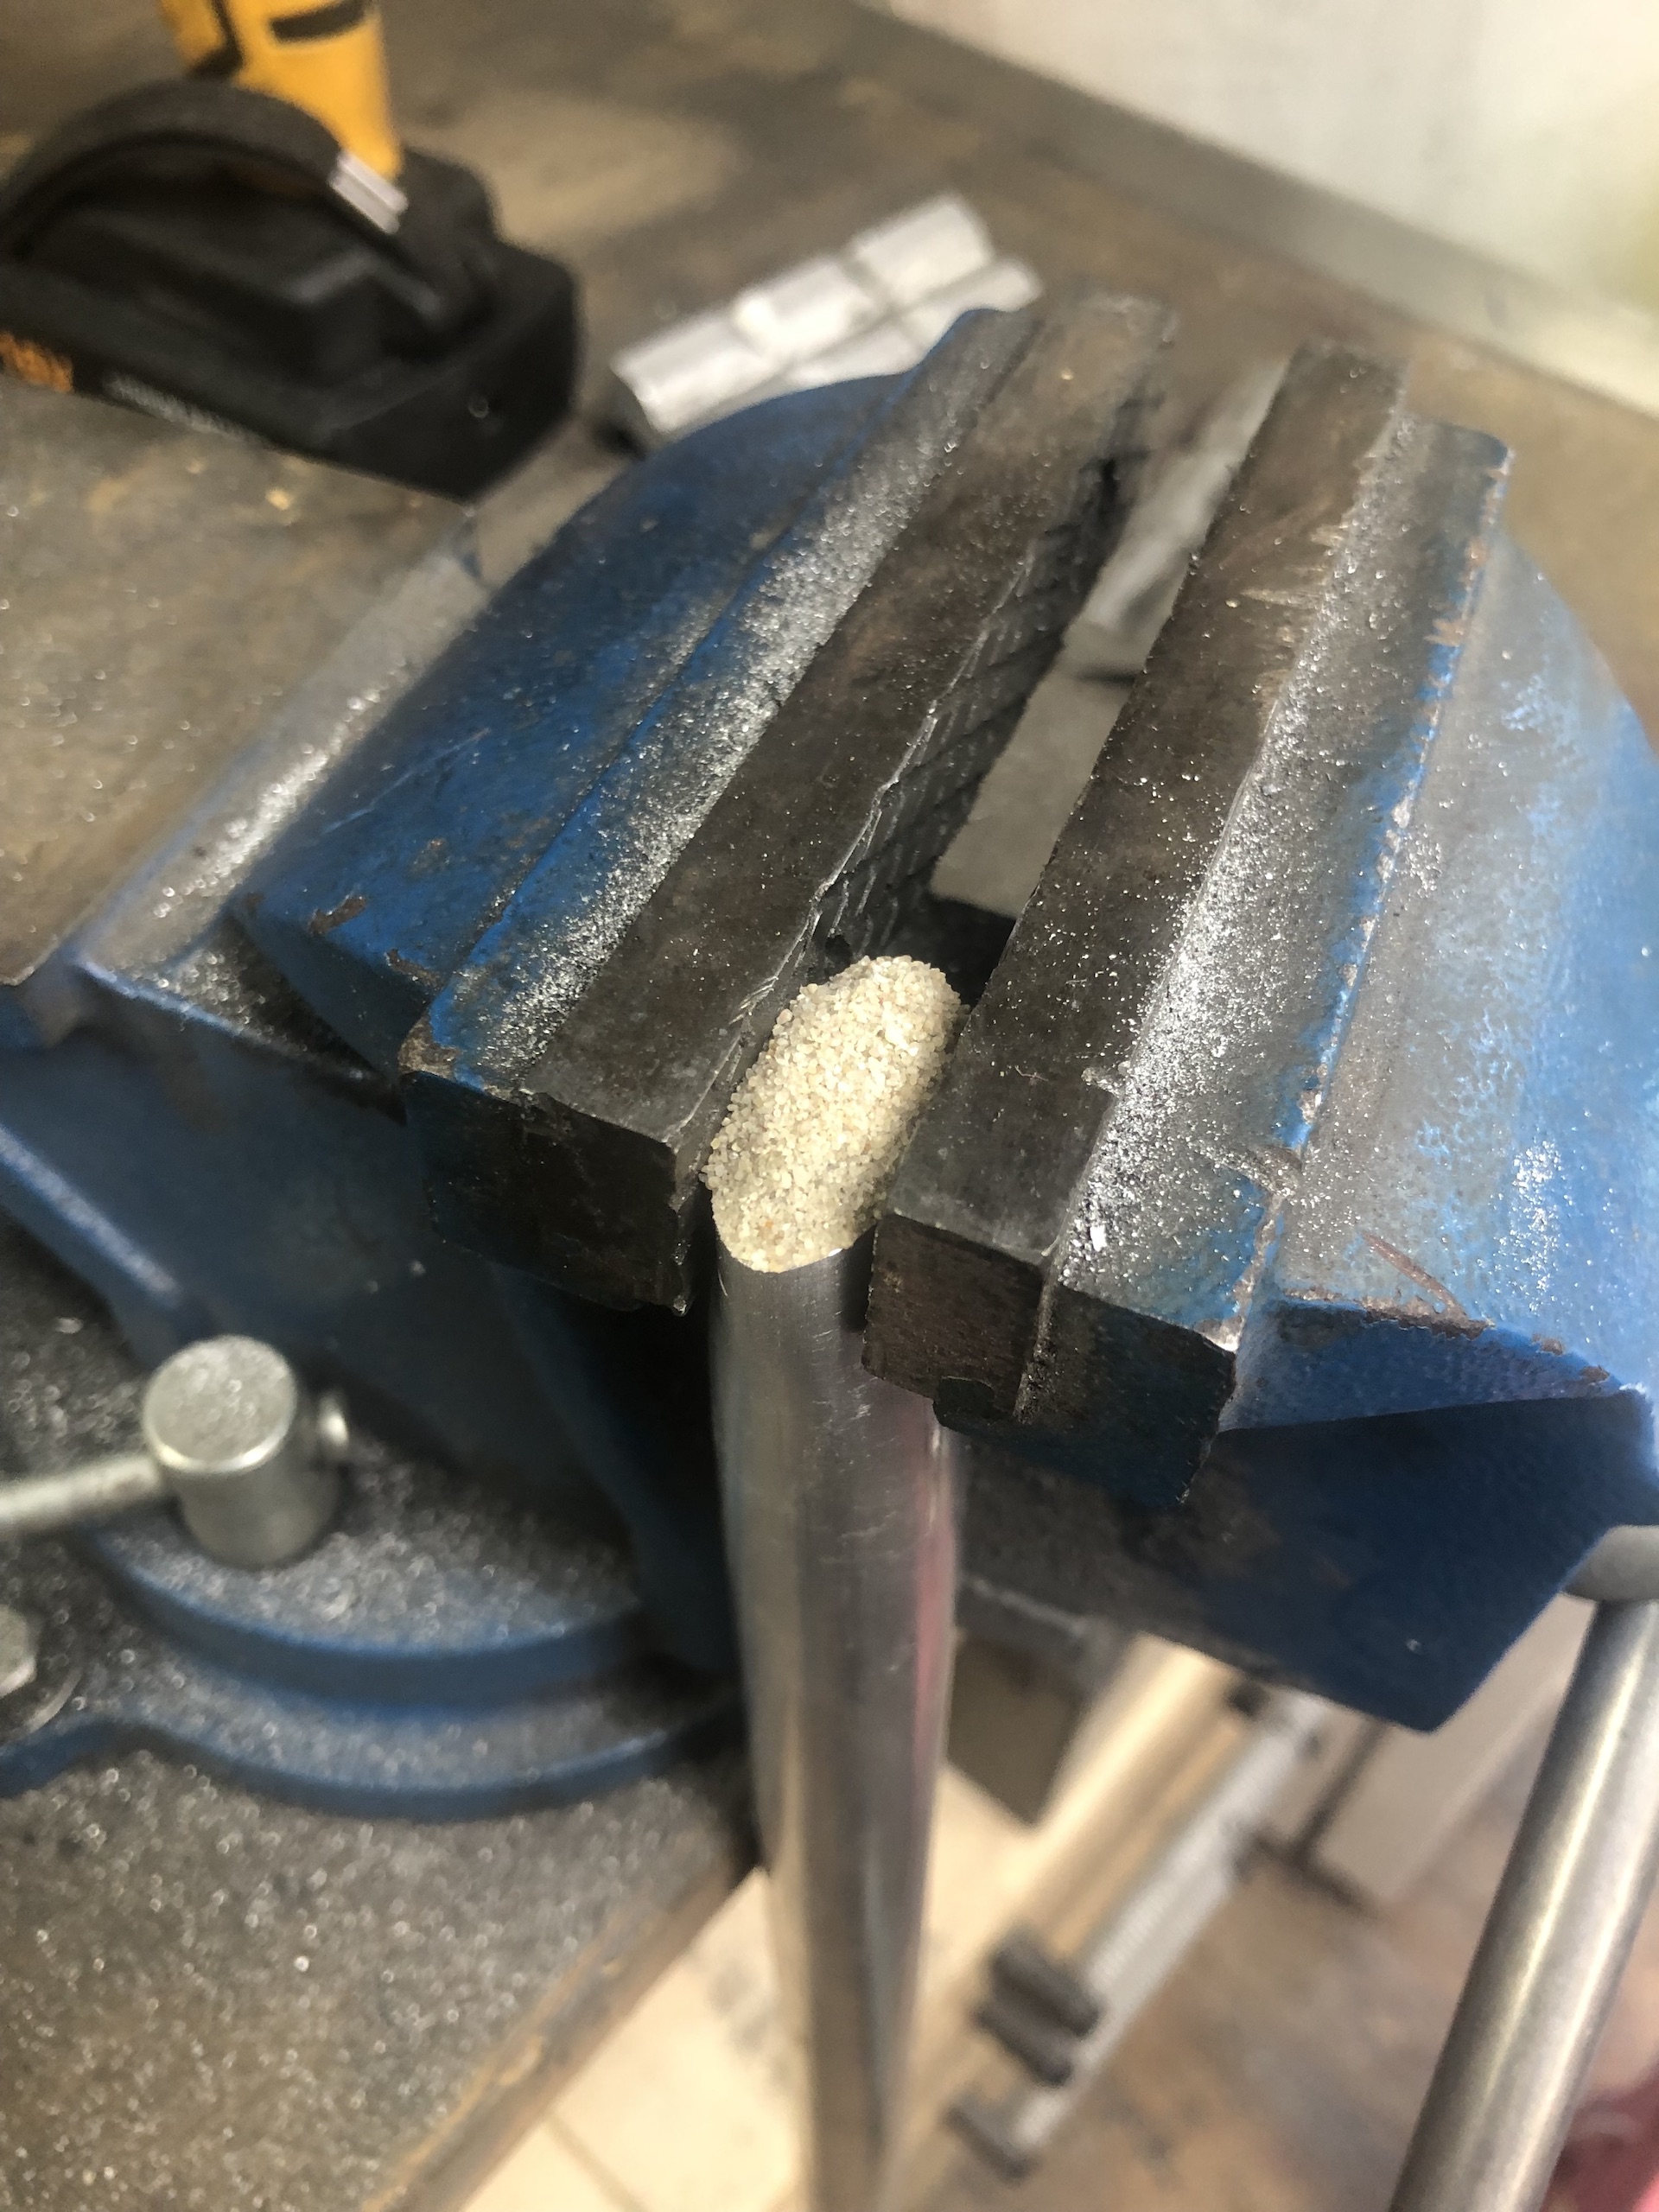
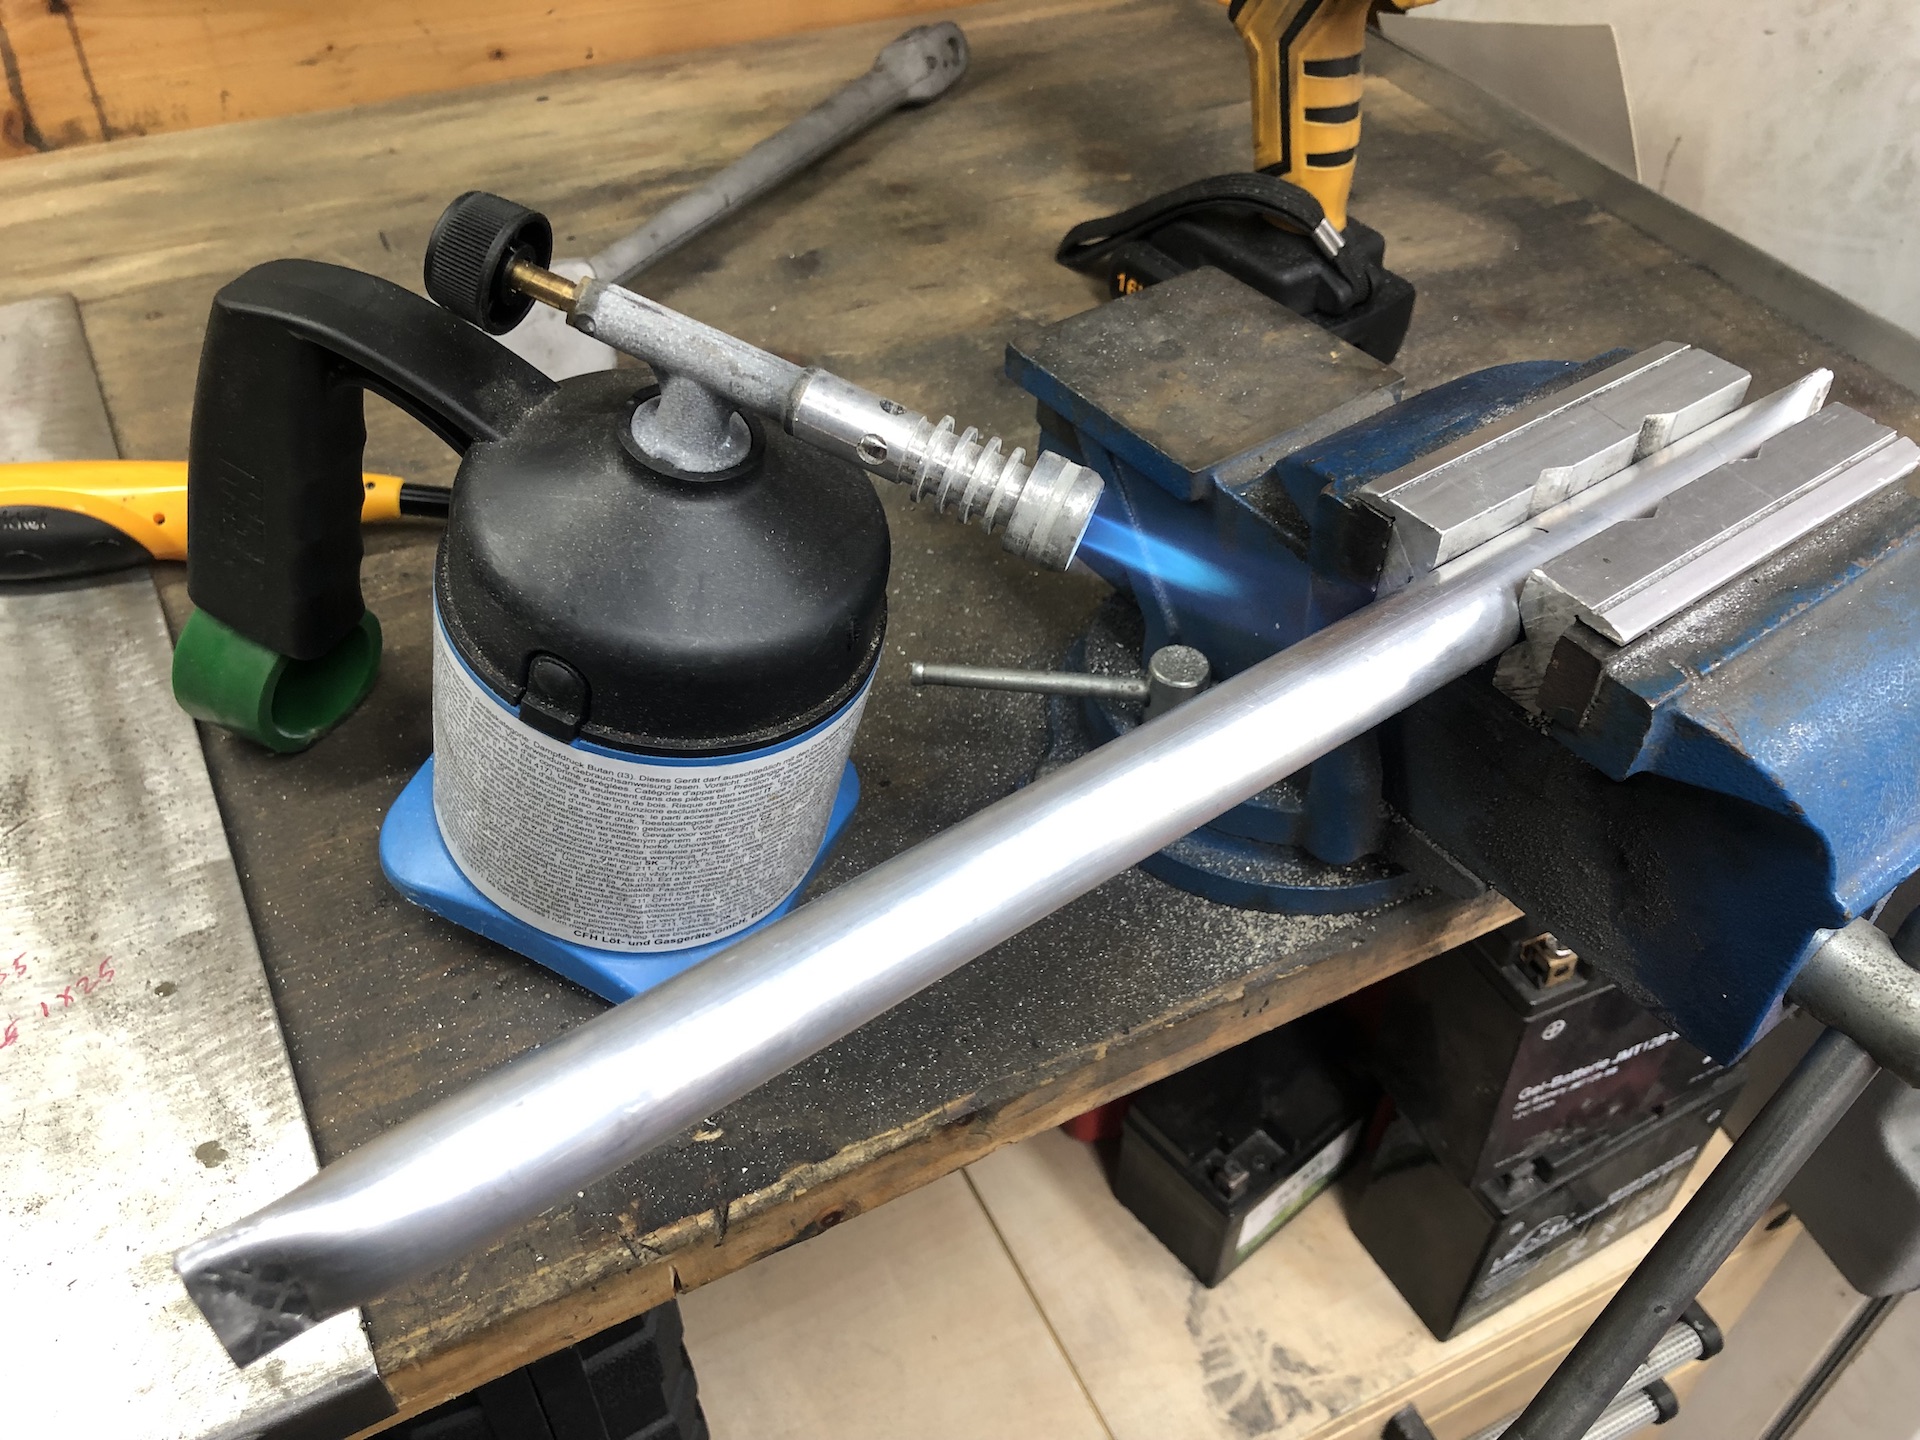
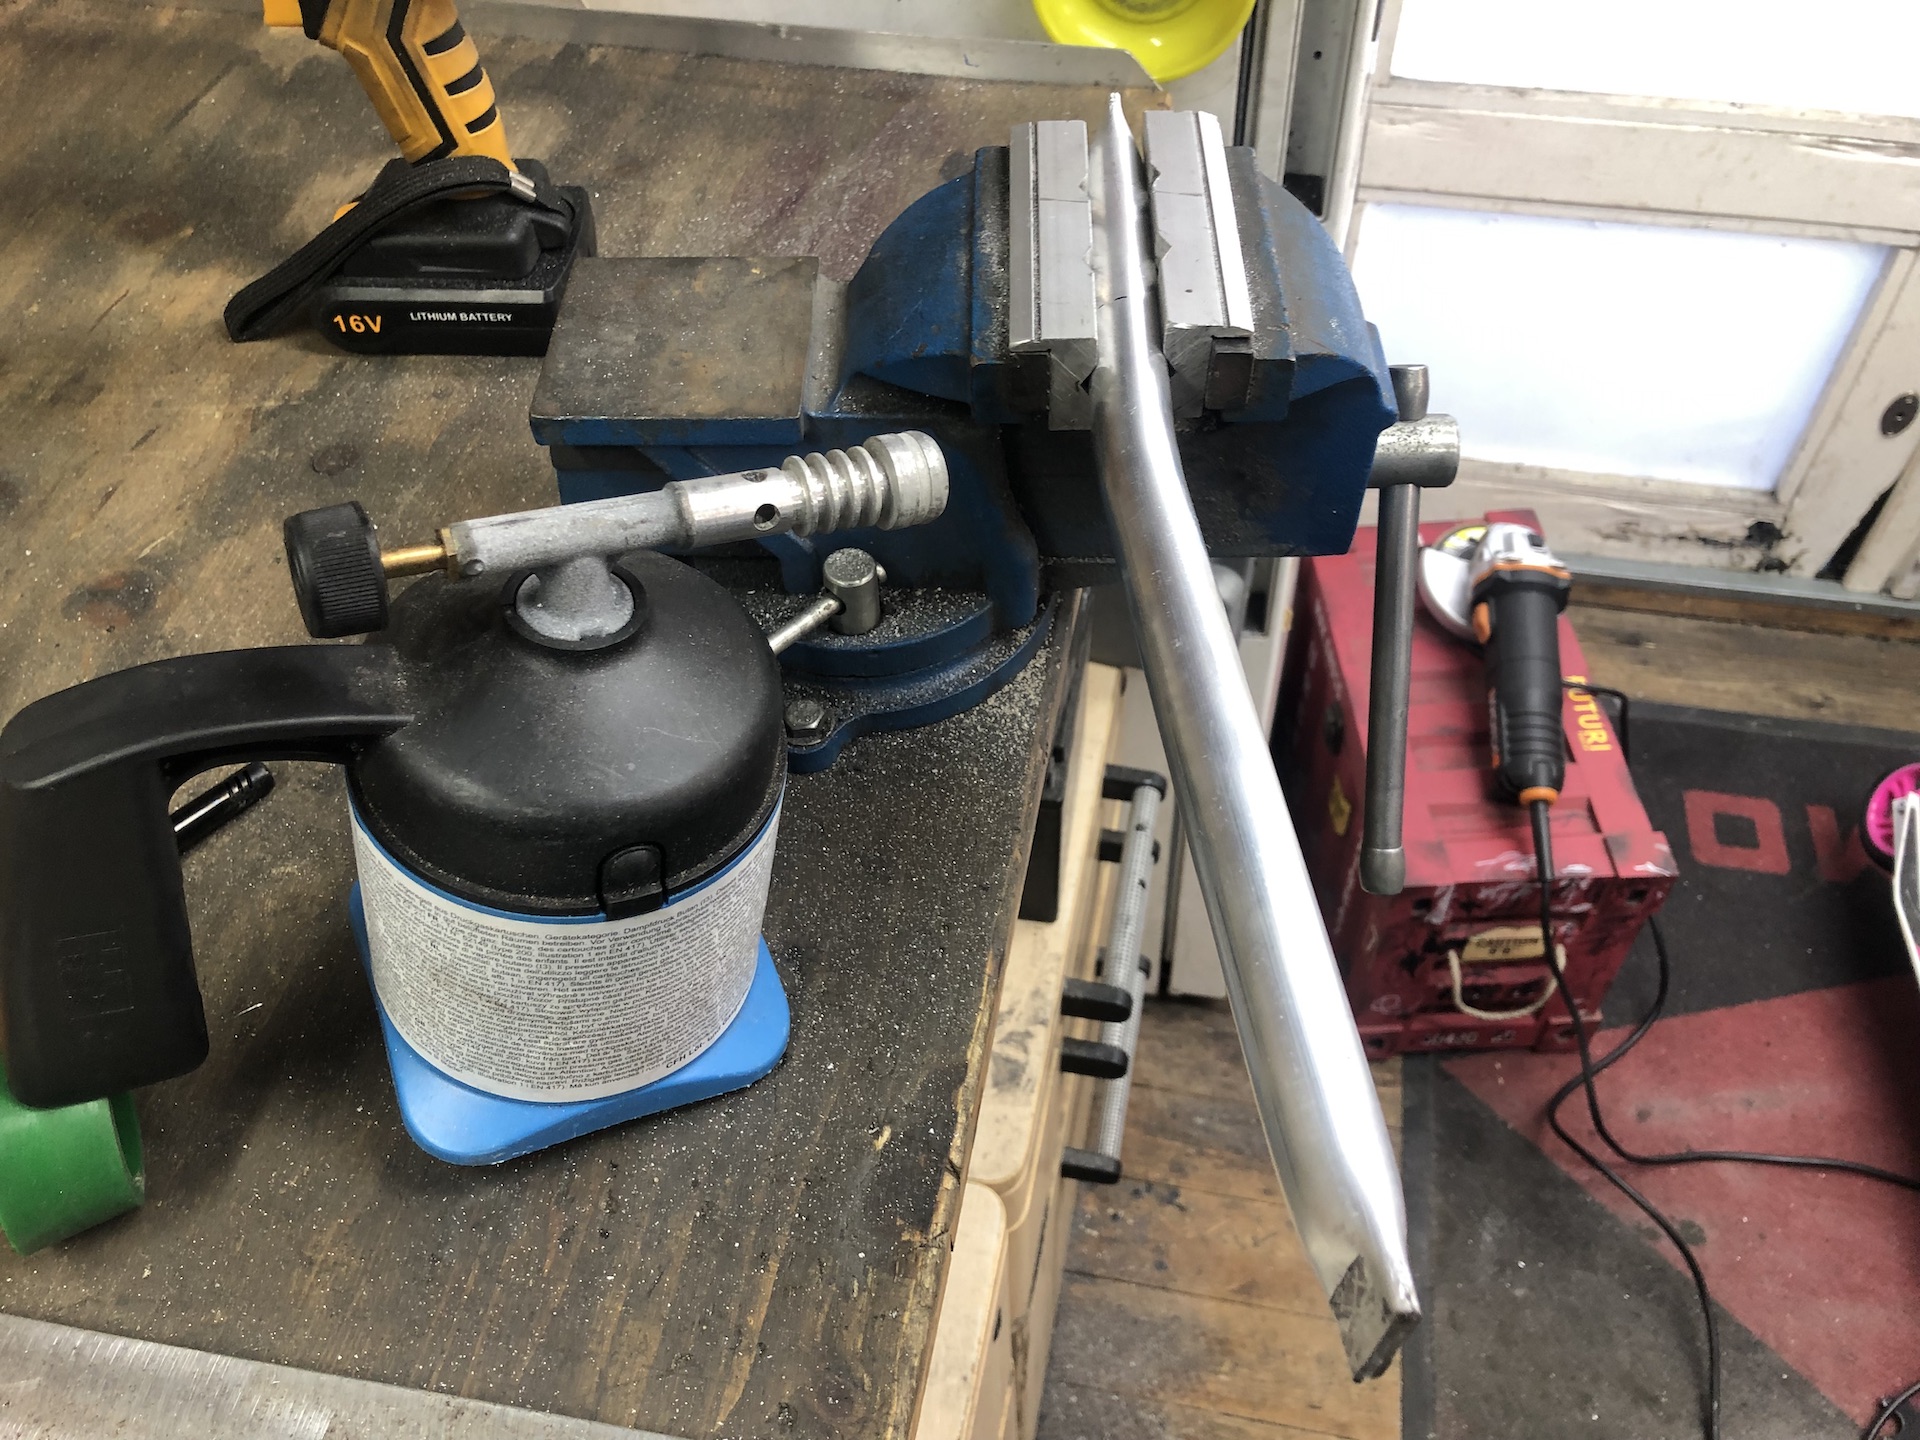
START ON THE ALUMINIUM SUBFRAME
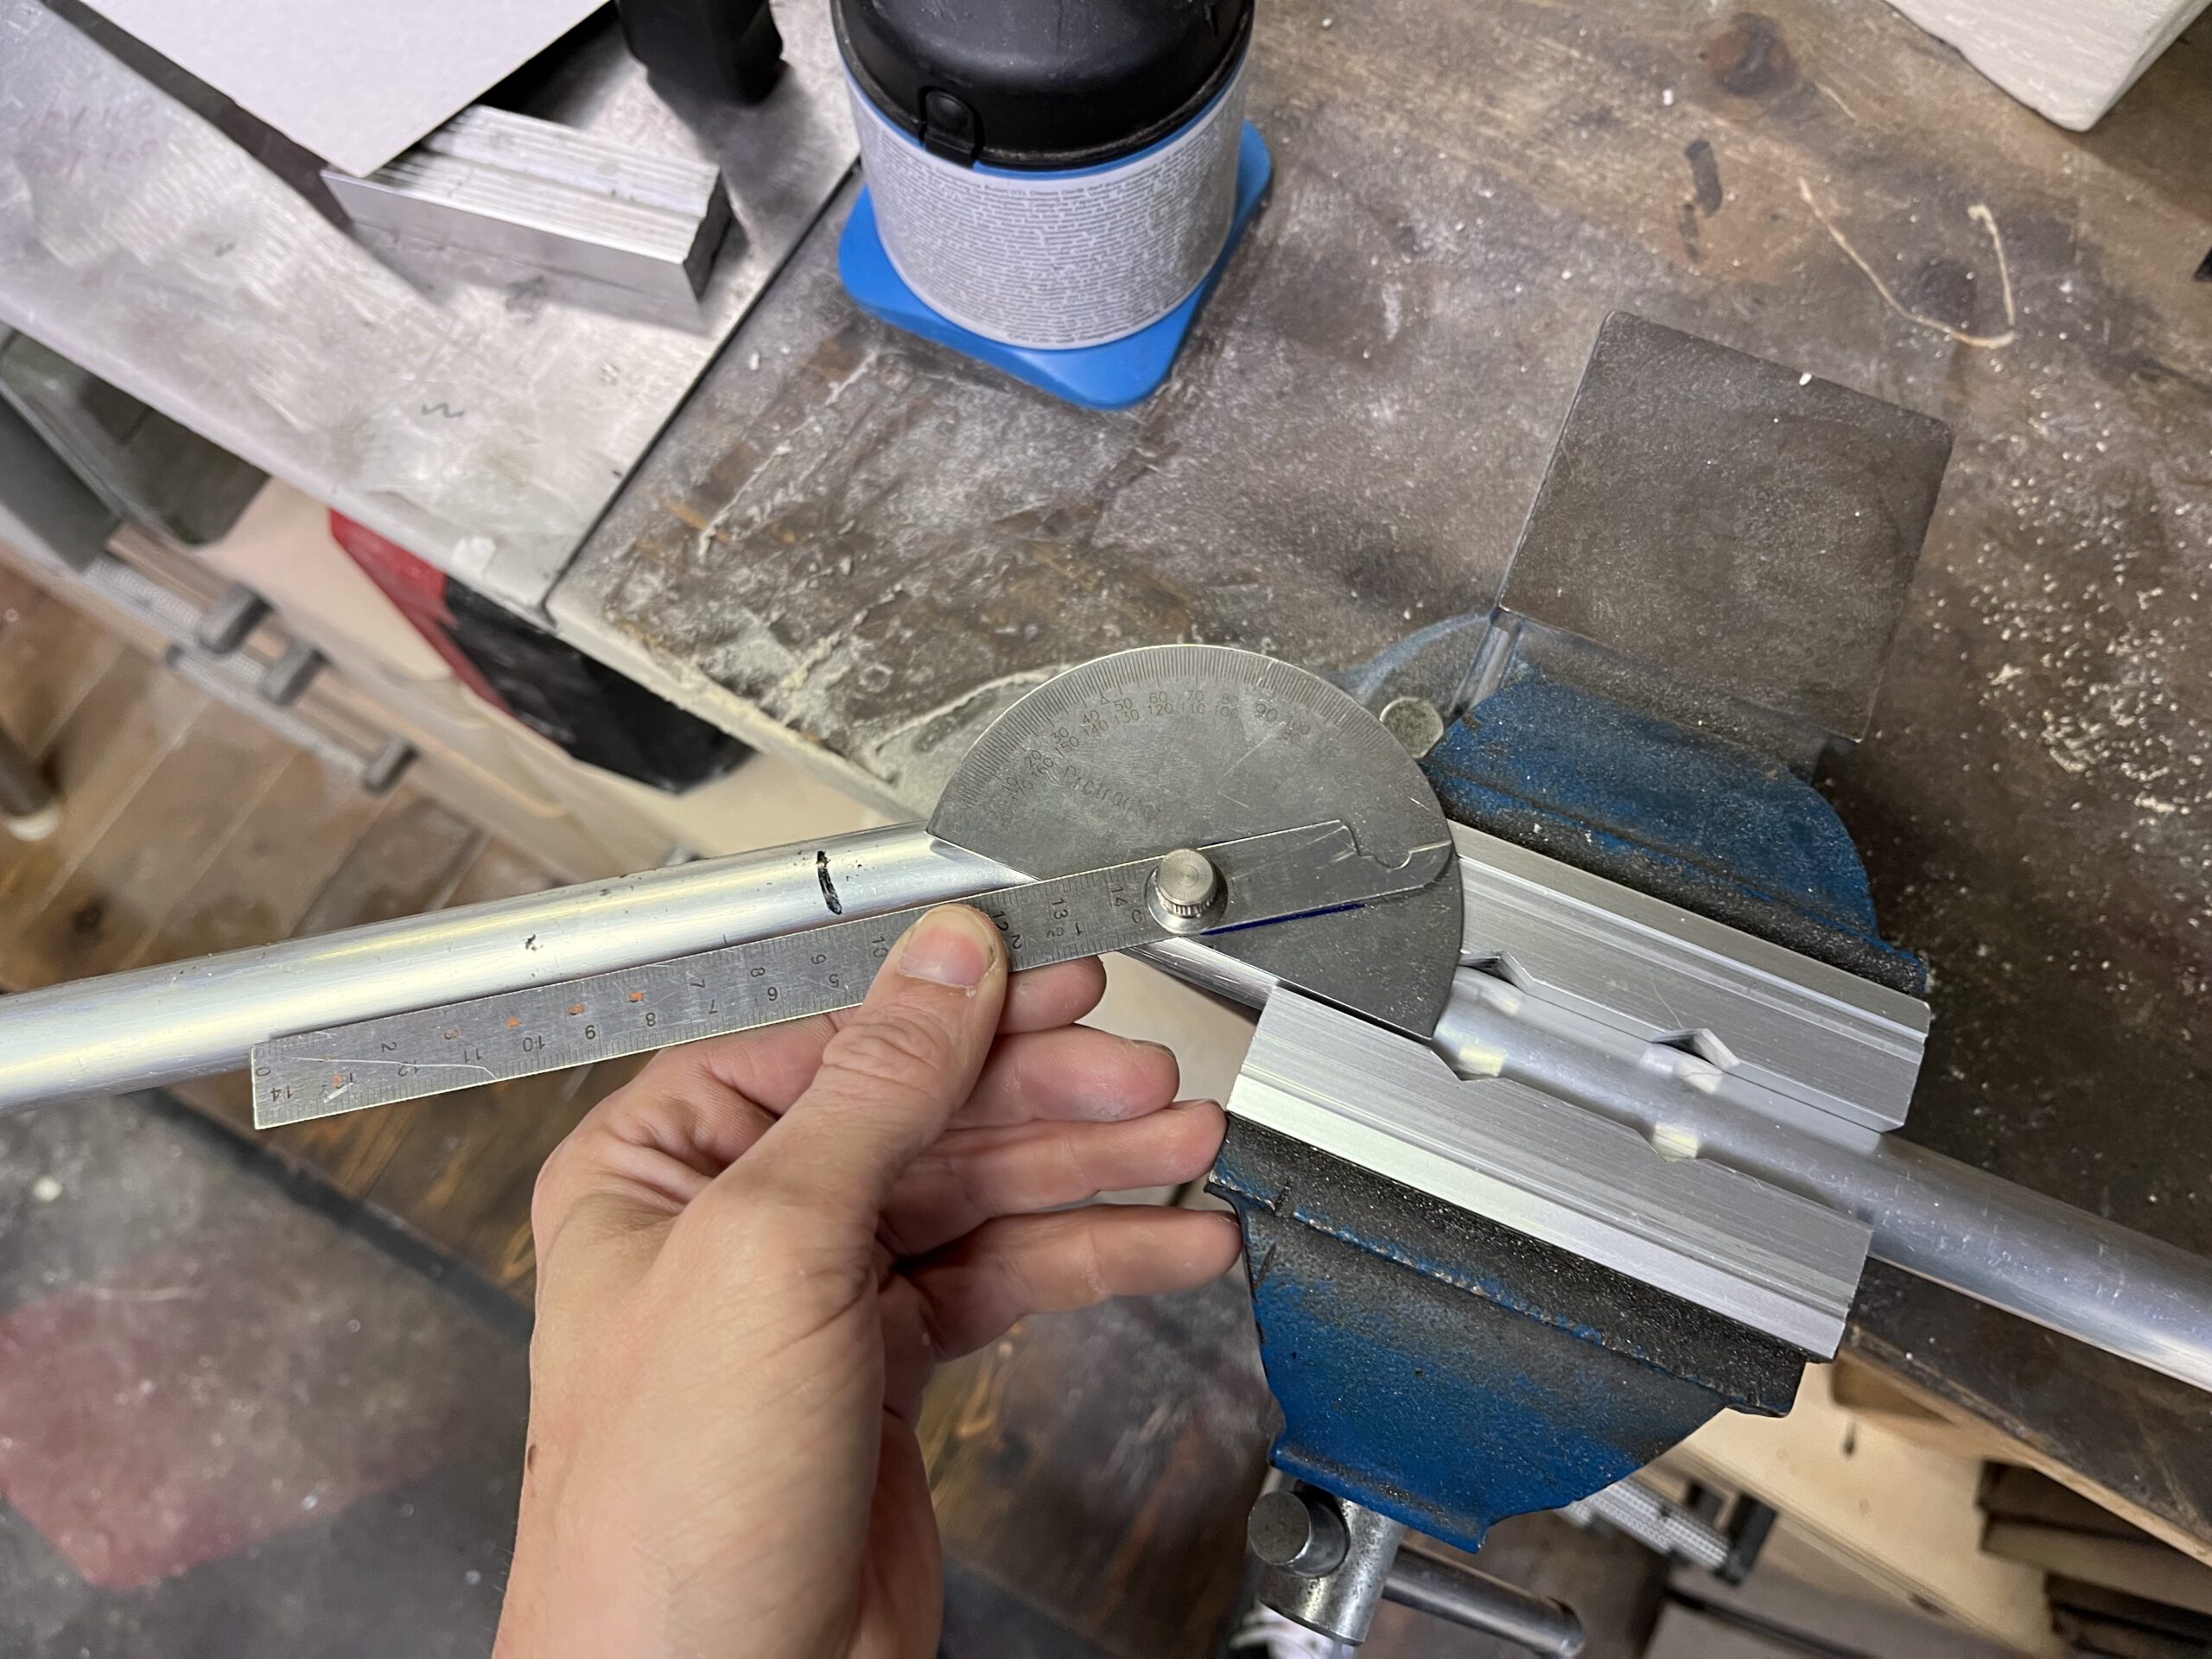
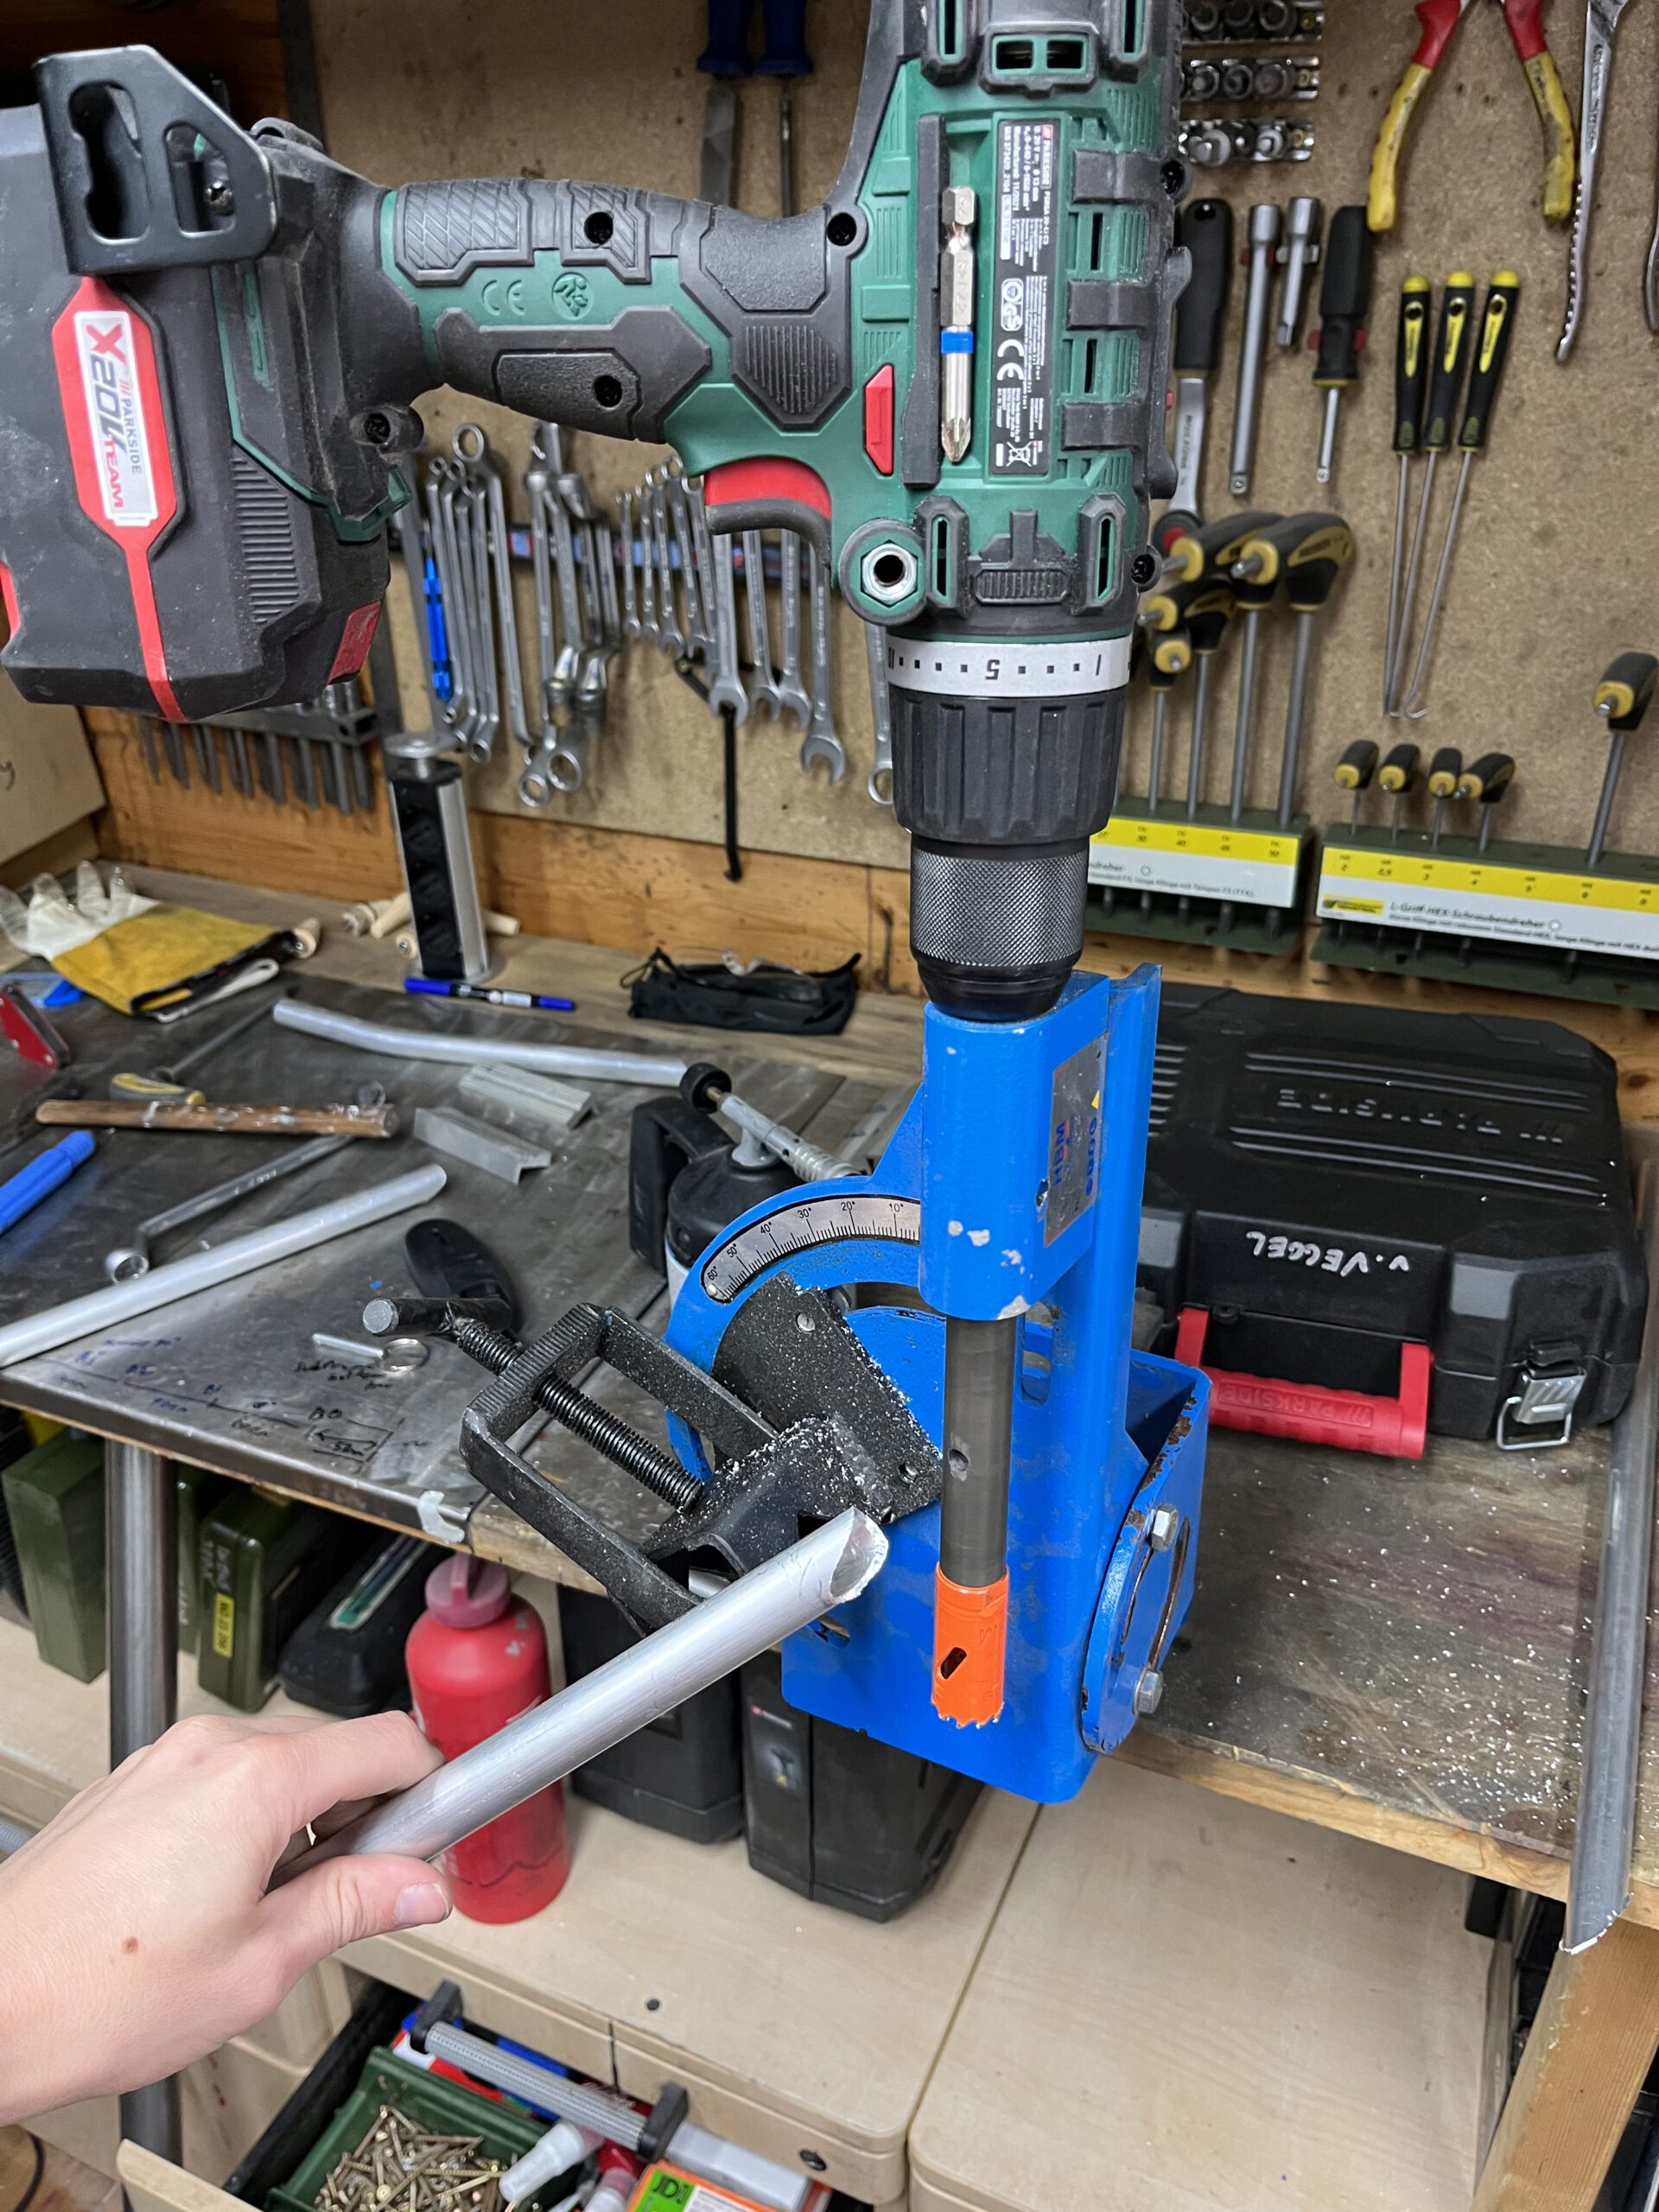
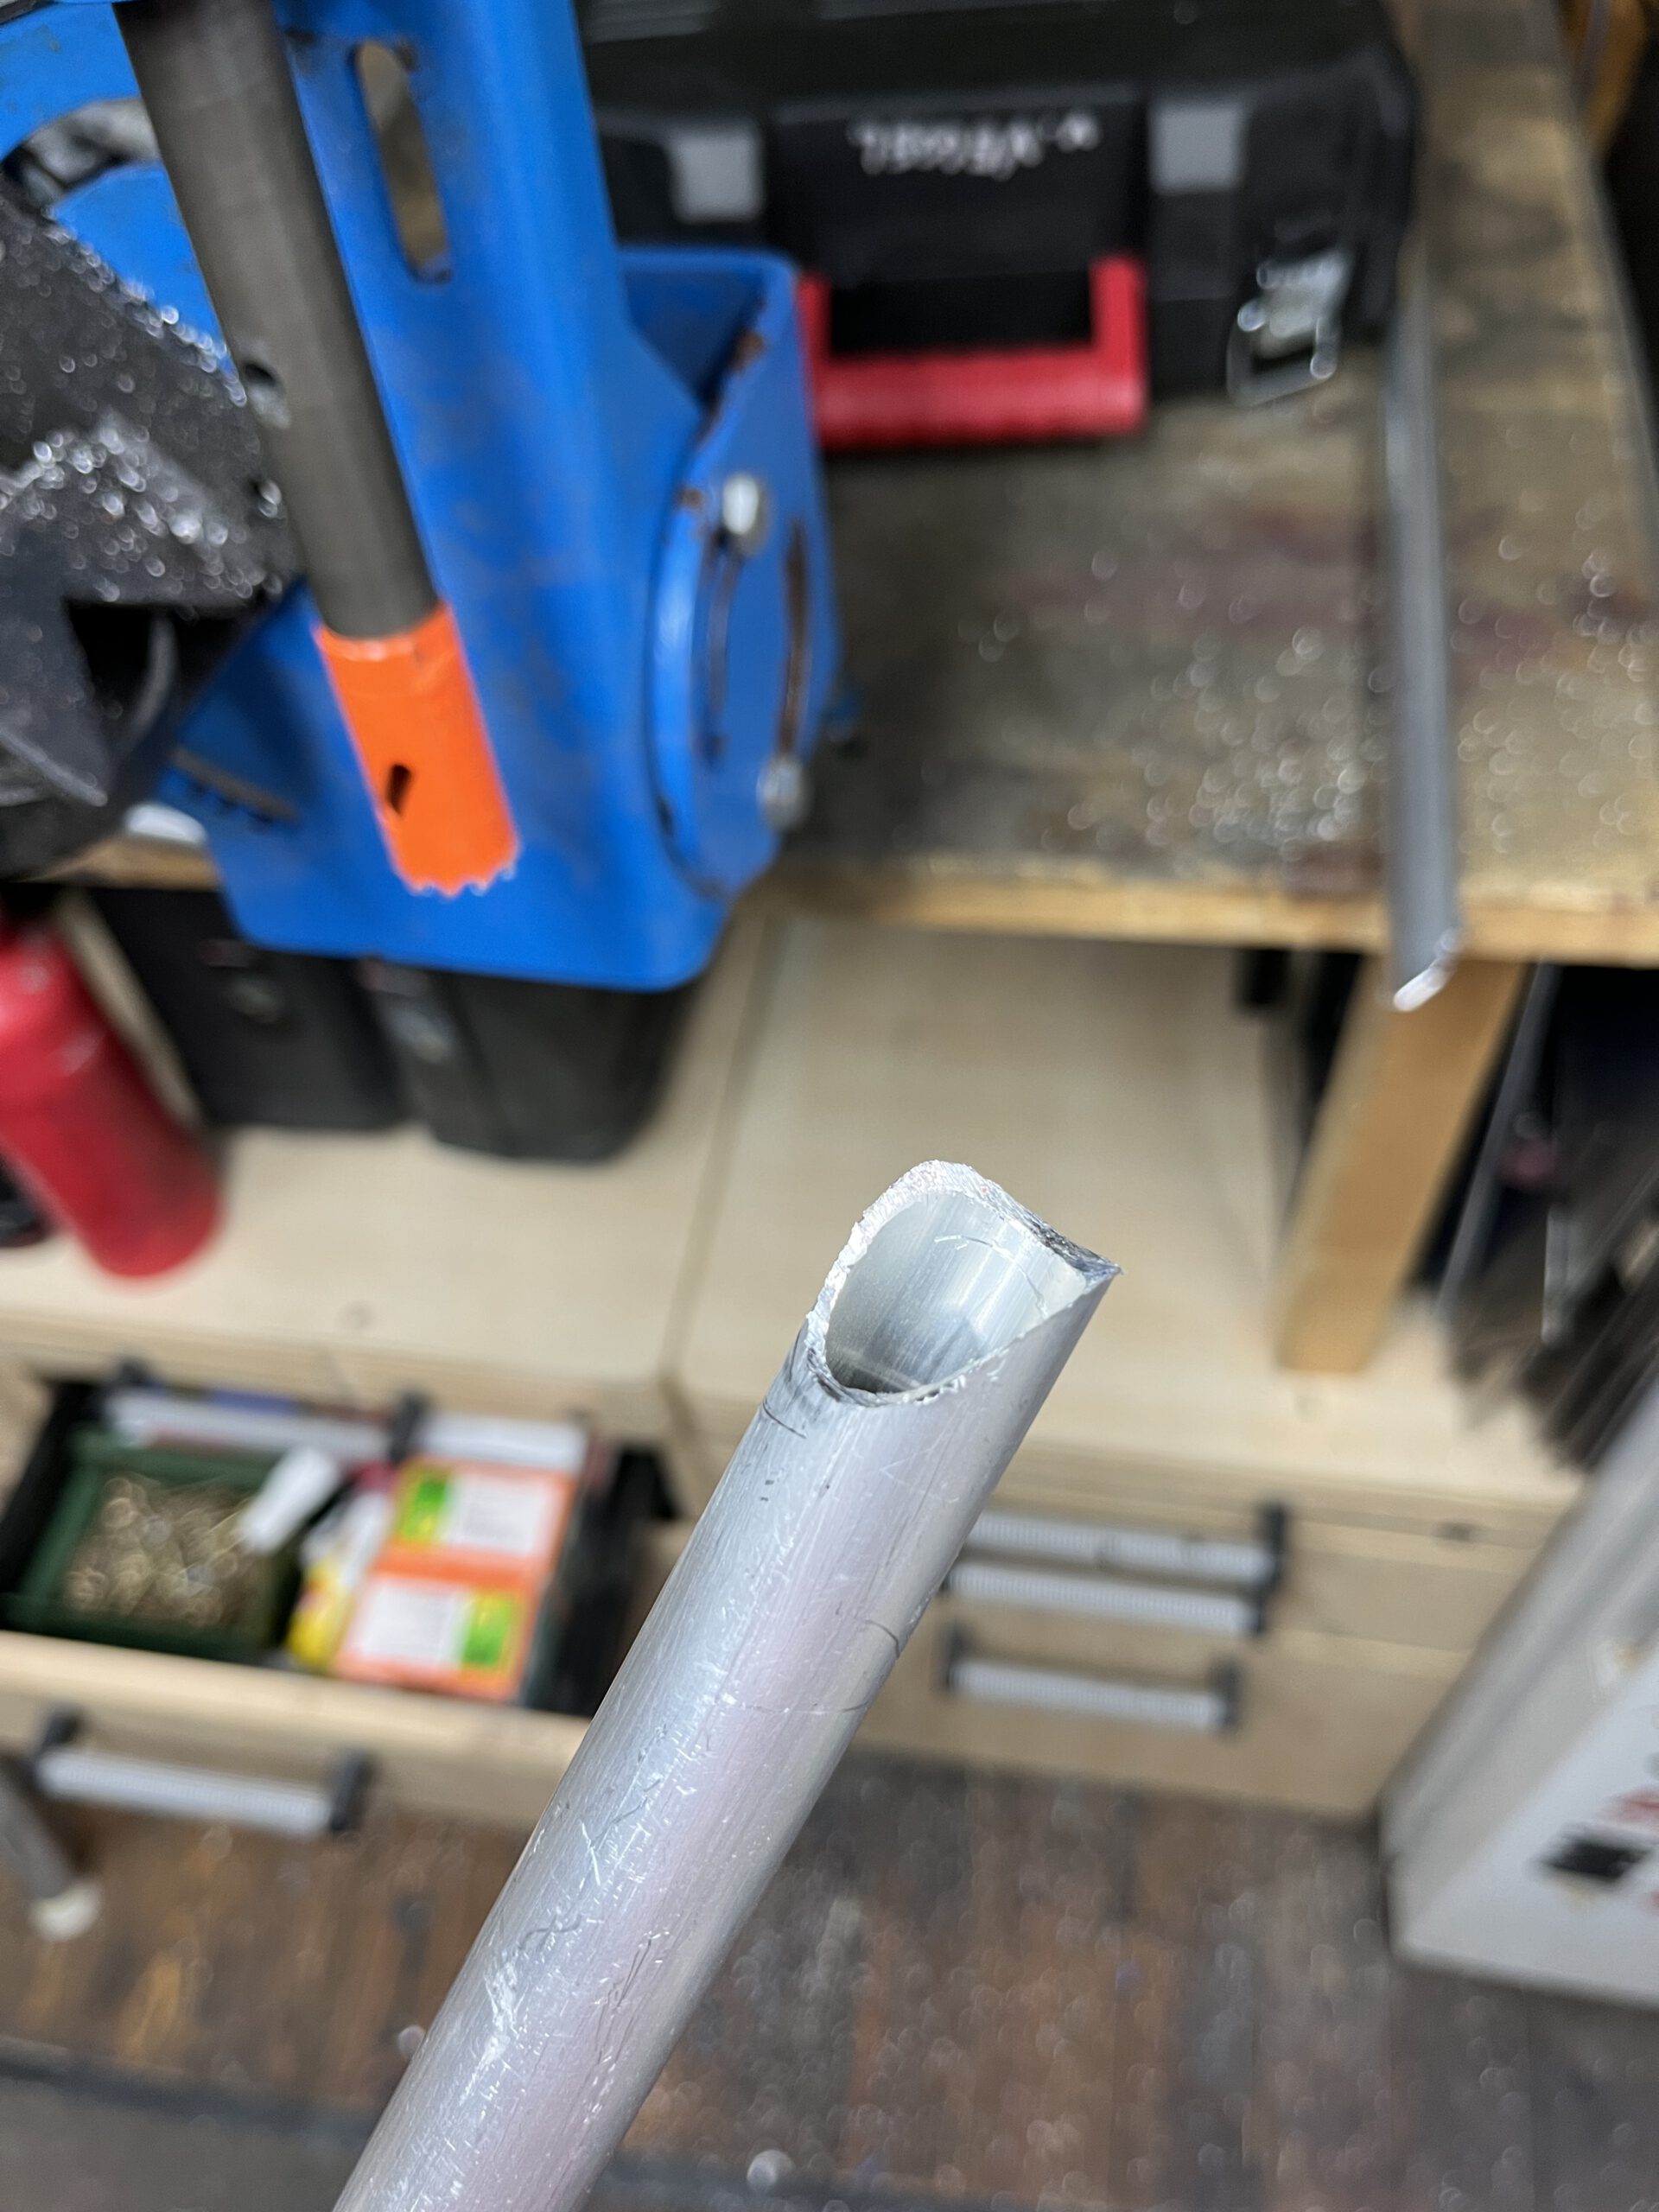
Now that the triple tree is done and the lines of the bike are really becoming more and more definitive now its time to get the subframe sorted. All made out of 20mm aluminium tubing. Using the same method as before to get the tubes bend, filling it with sand and then heating it up with a torch.
This was a process… I think I made 5 or 6 iterations before I found a shape I actually liked.
Light as hell! Only weighing 580 grams and more than strong enough.
One of the “dreams” I had when I started welding and building motorcycles was creating a custom aluminium subframe. Finally can check that one off my list. Really proud and happy with the end result and the welds really improved while working on this.
But damn its hard to make sure a structure like this doesn’t warp and twist because of the heat while welding. It didn’t warp much luckily because of the jig, but it take some finesse to get it mounted back on the bike.
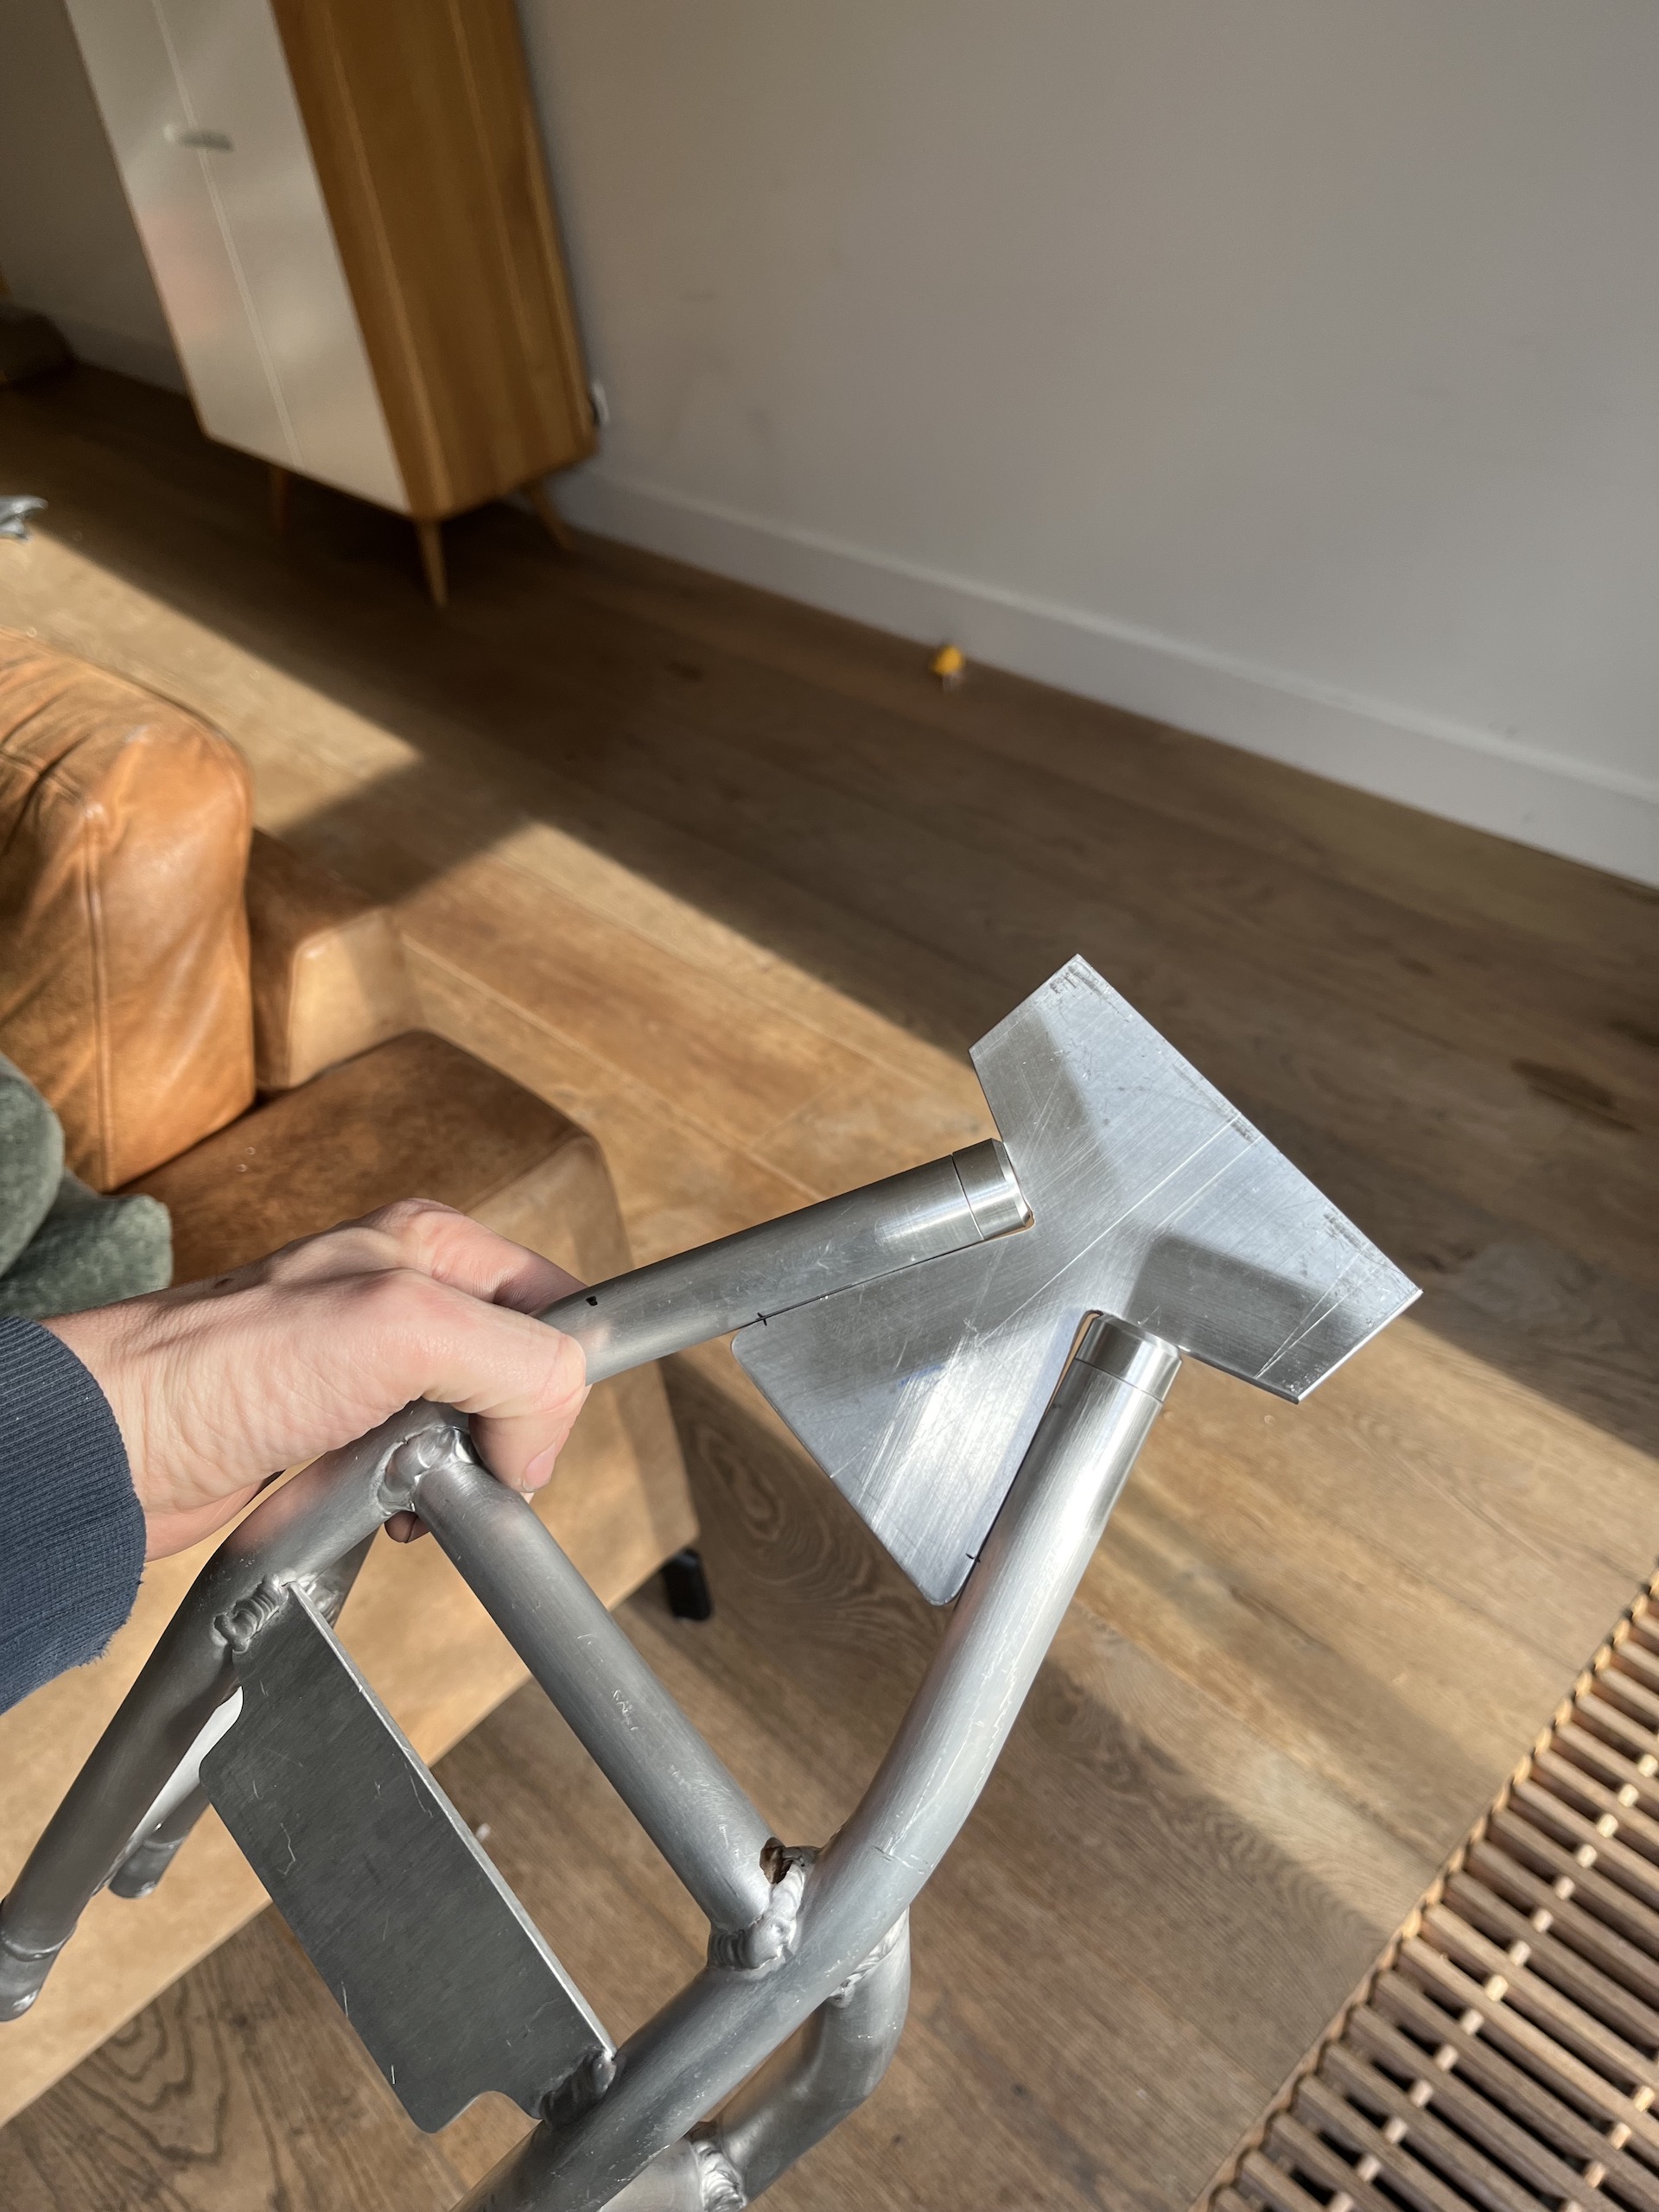
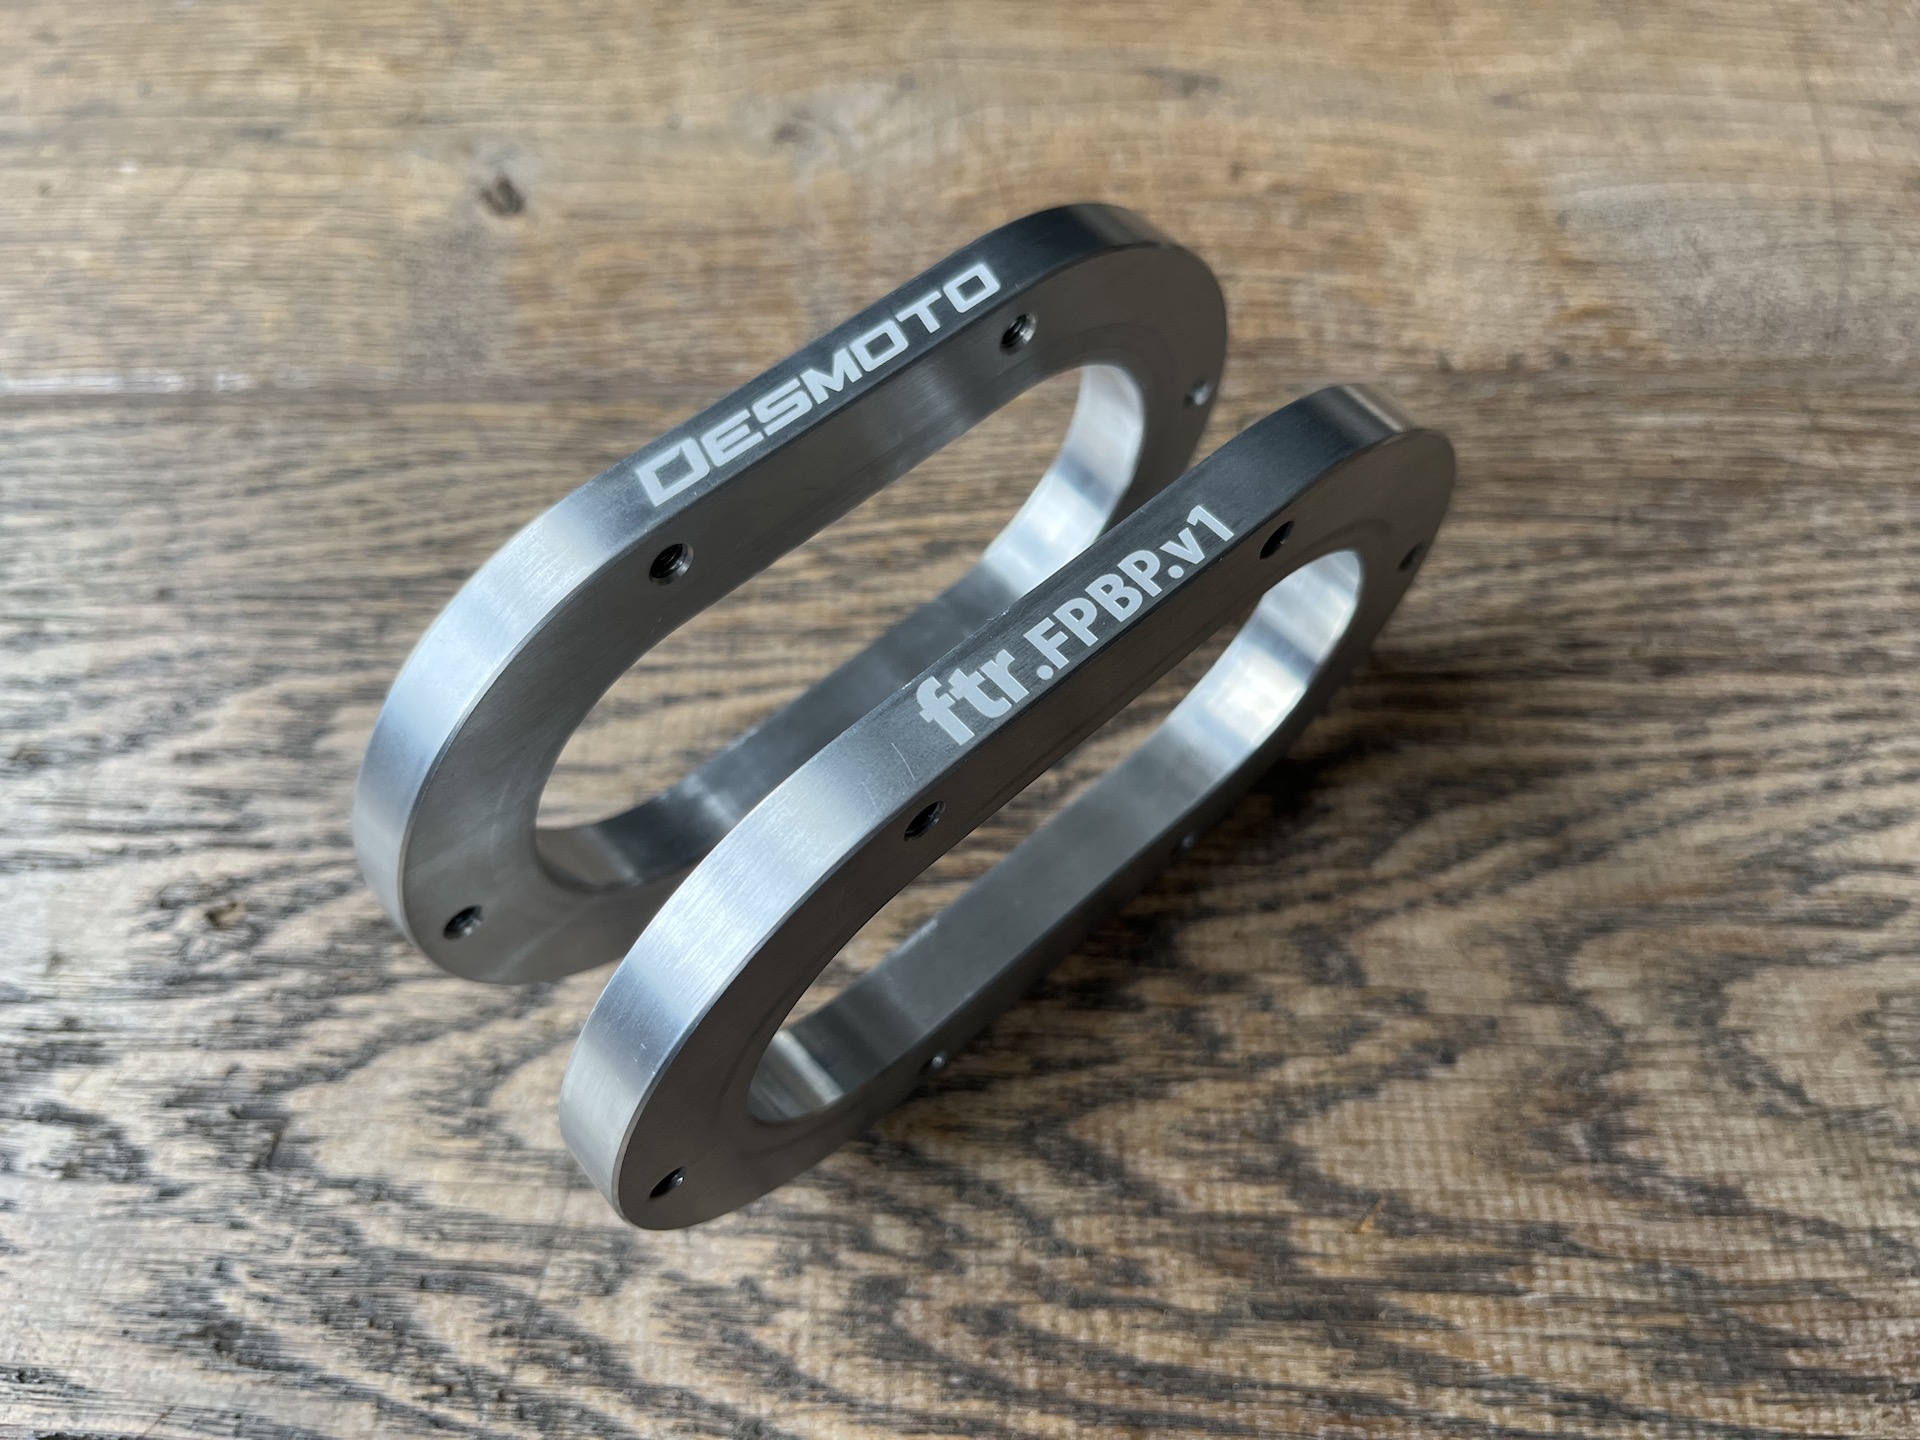
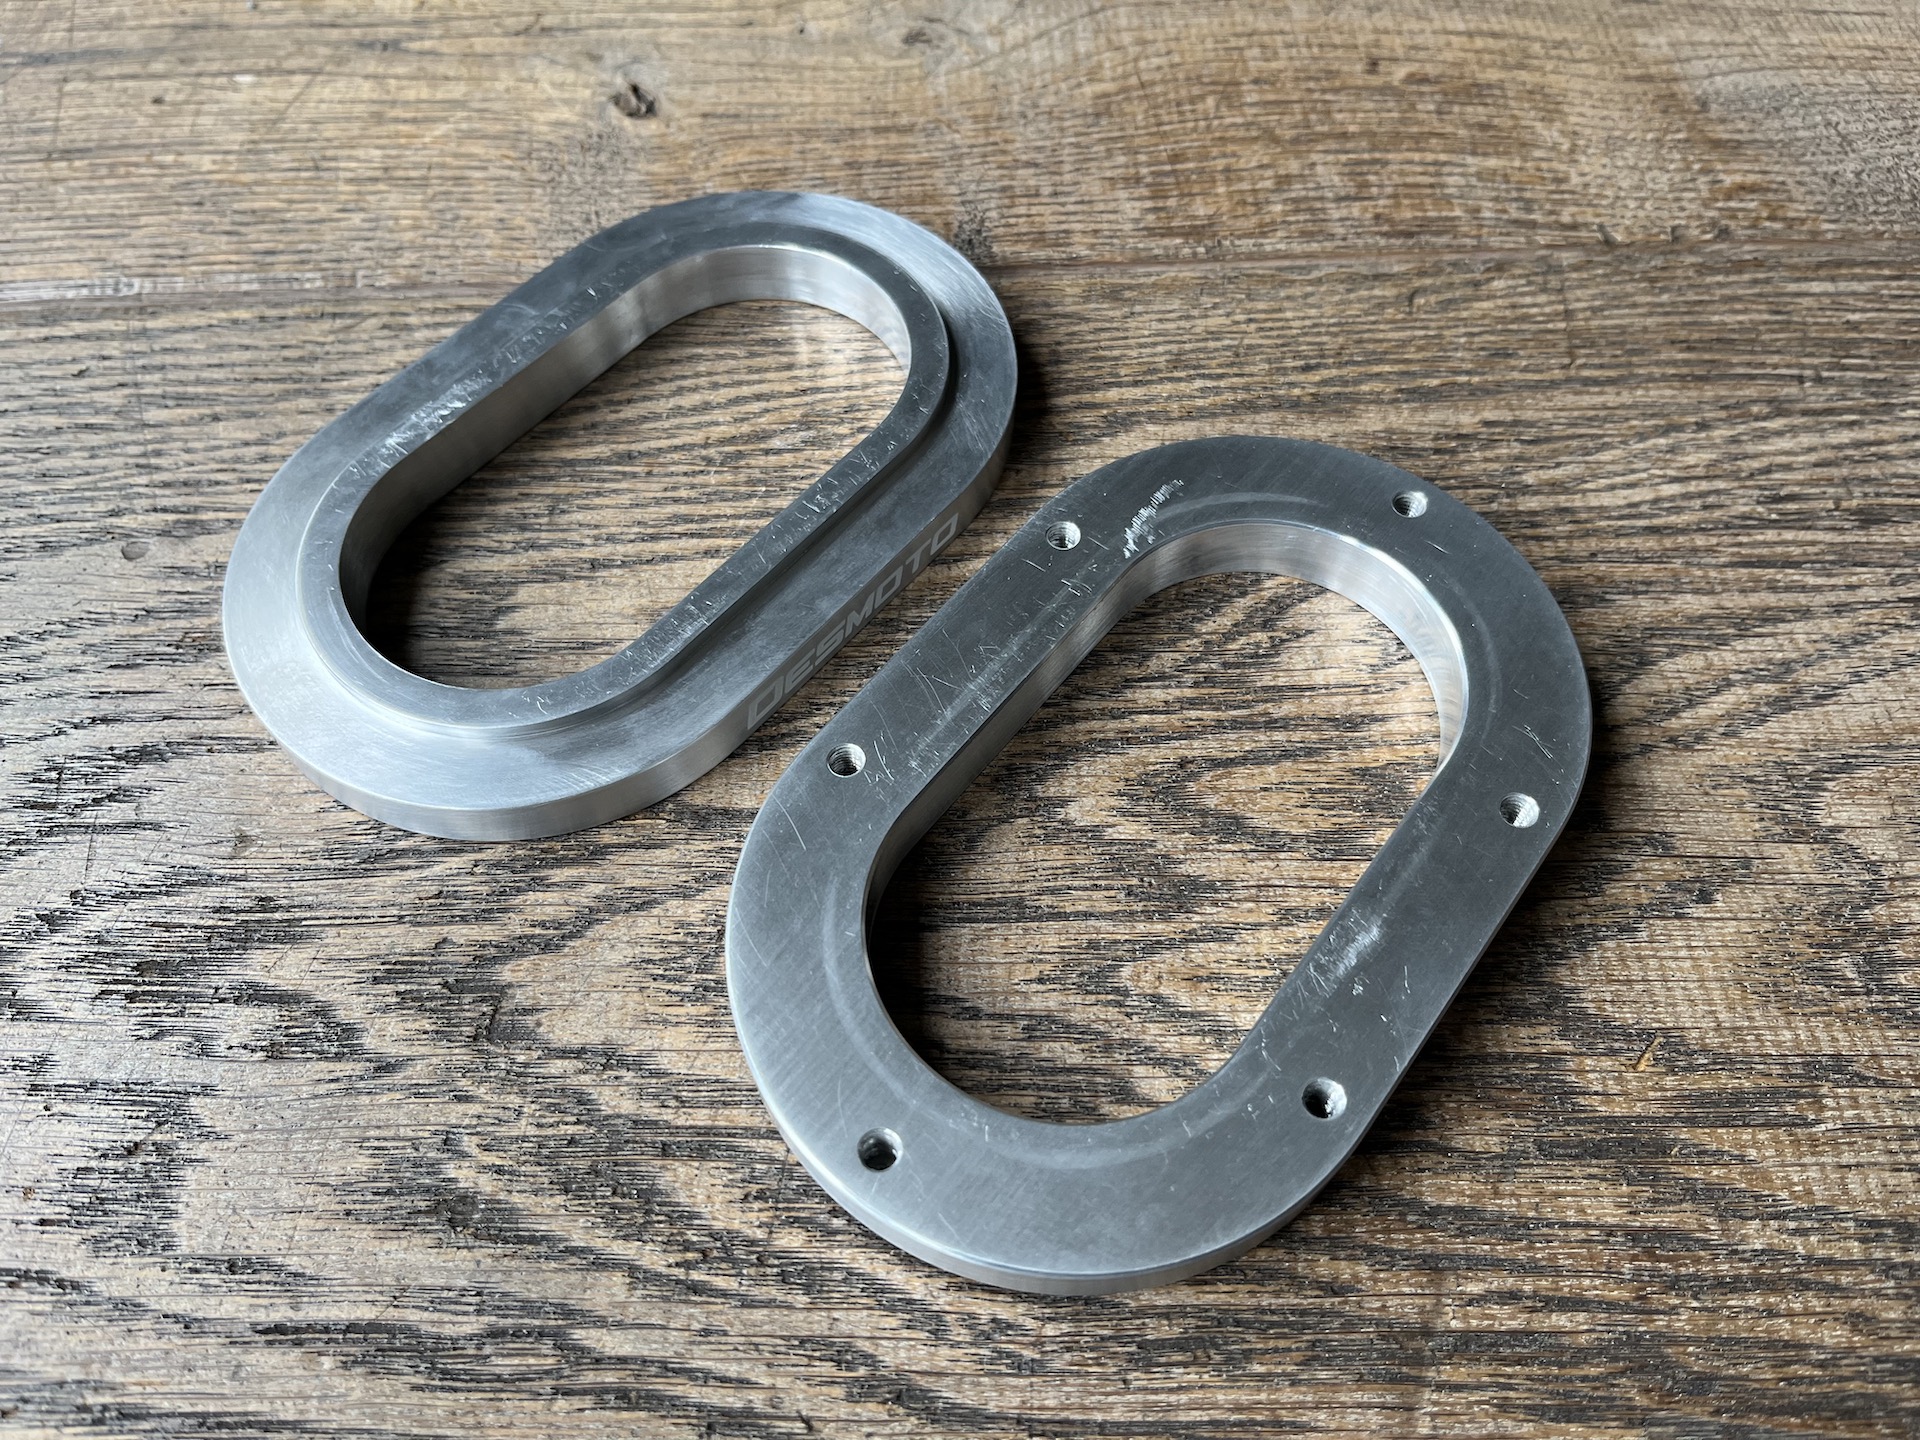
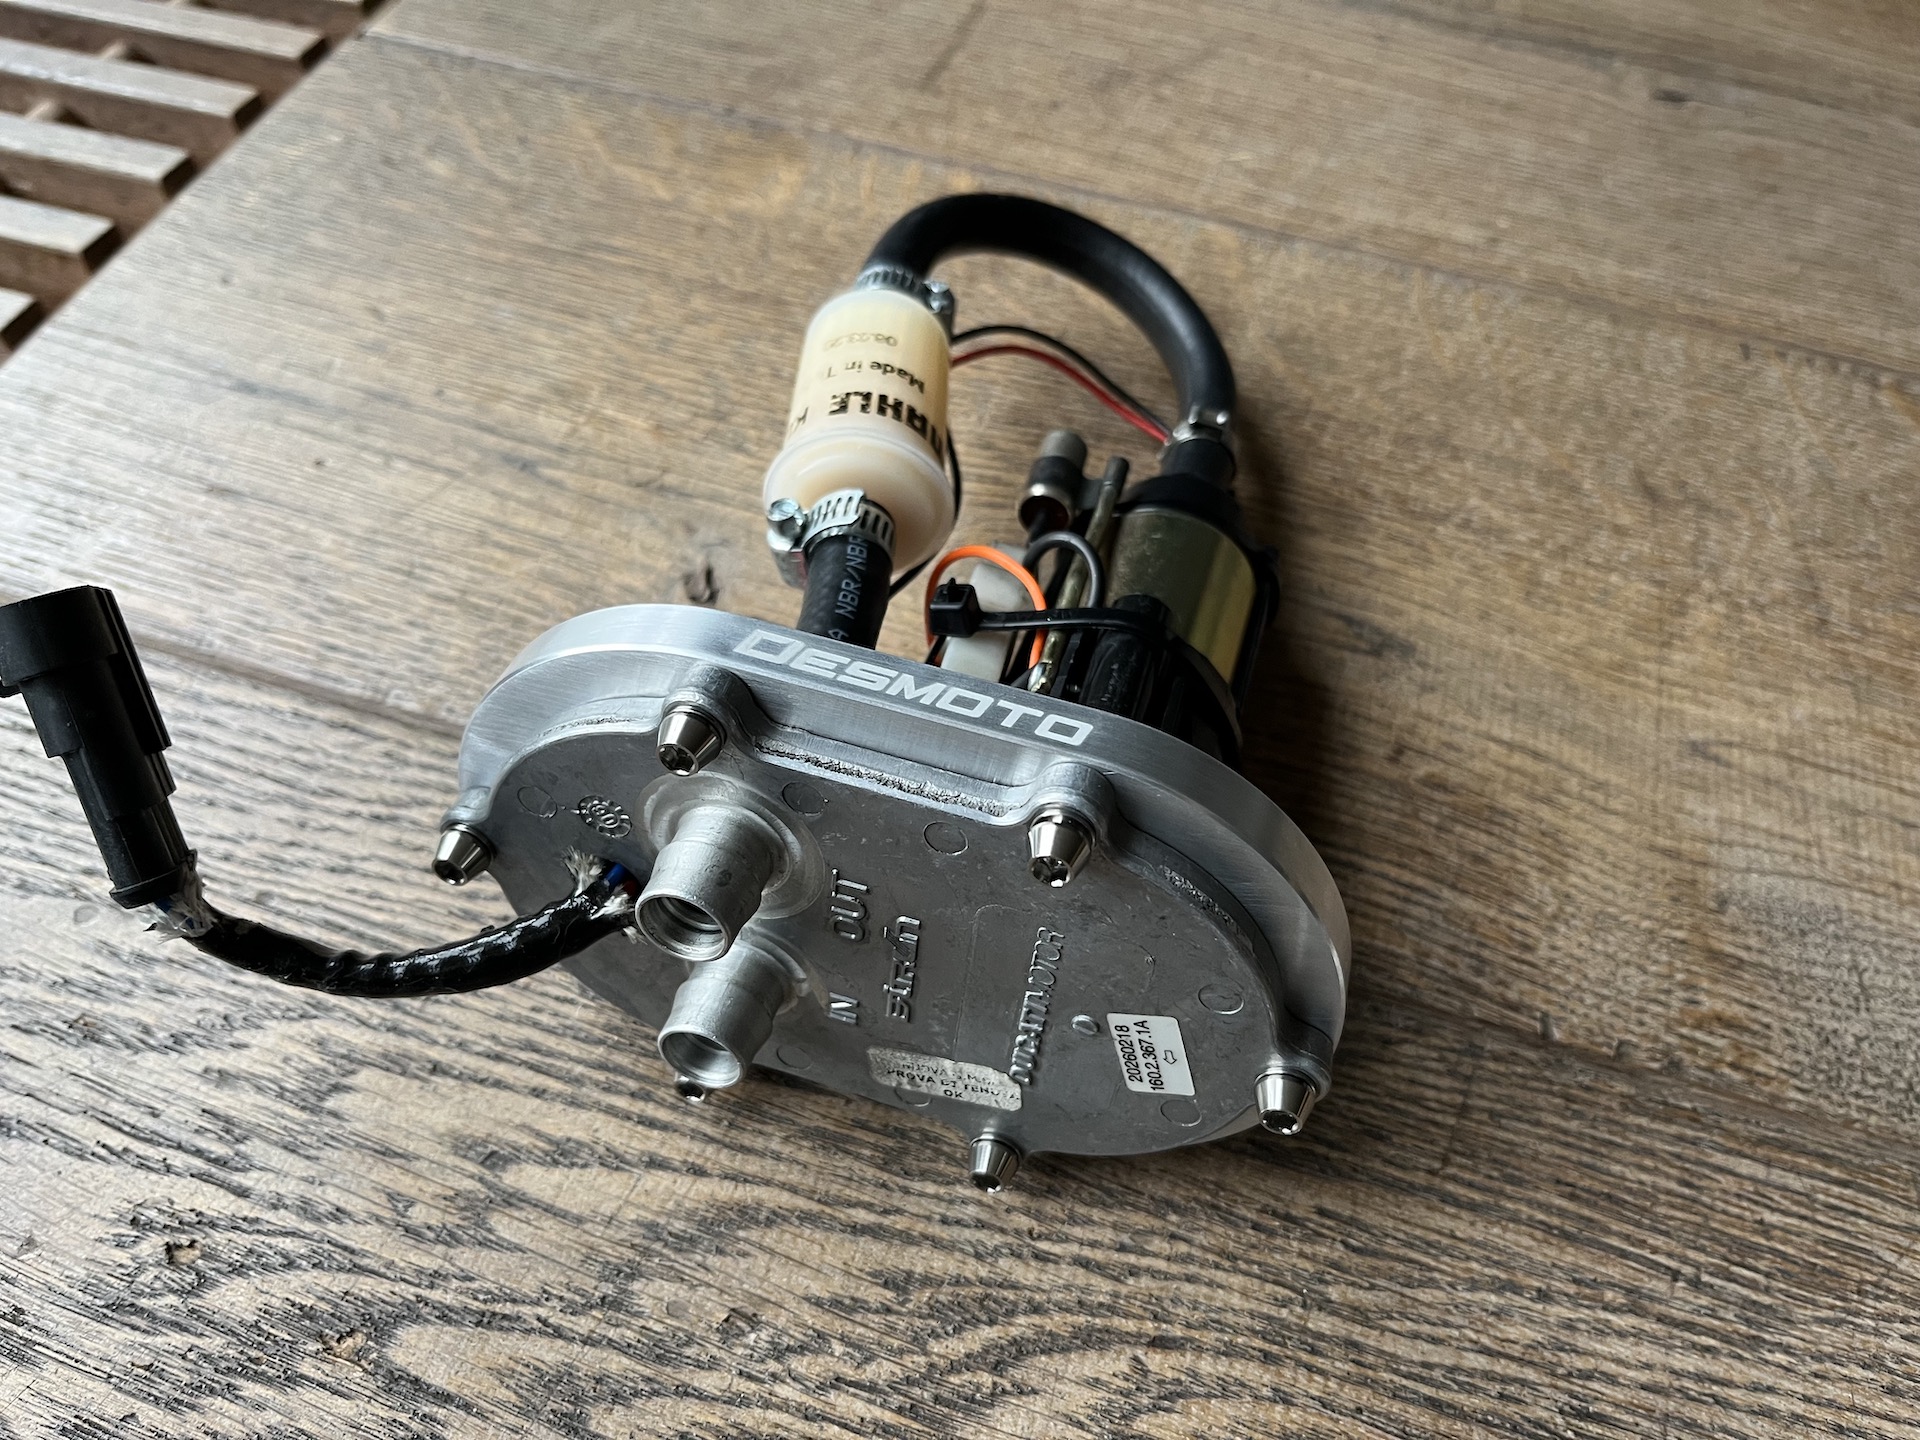
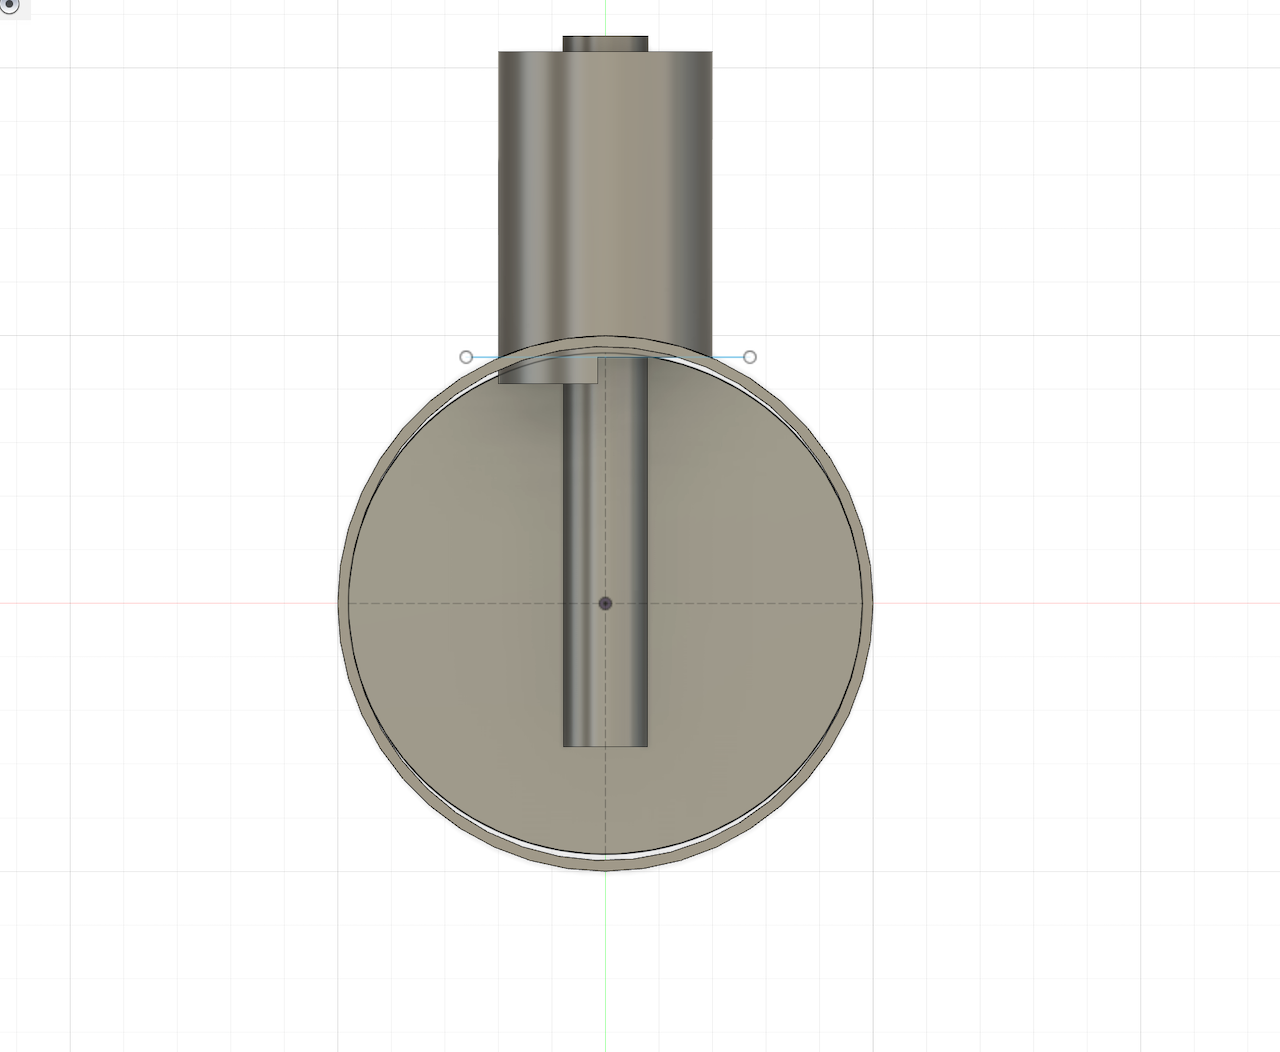
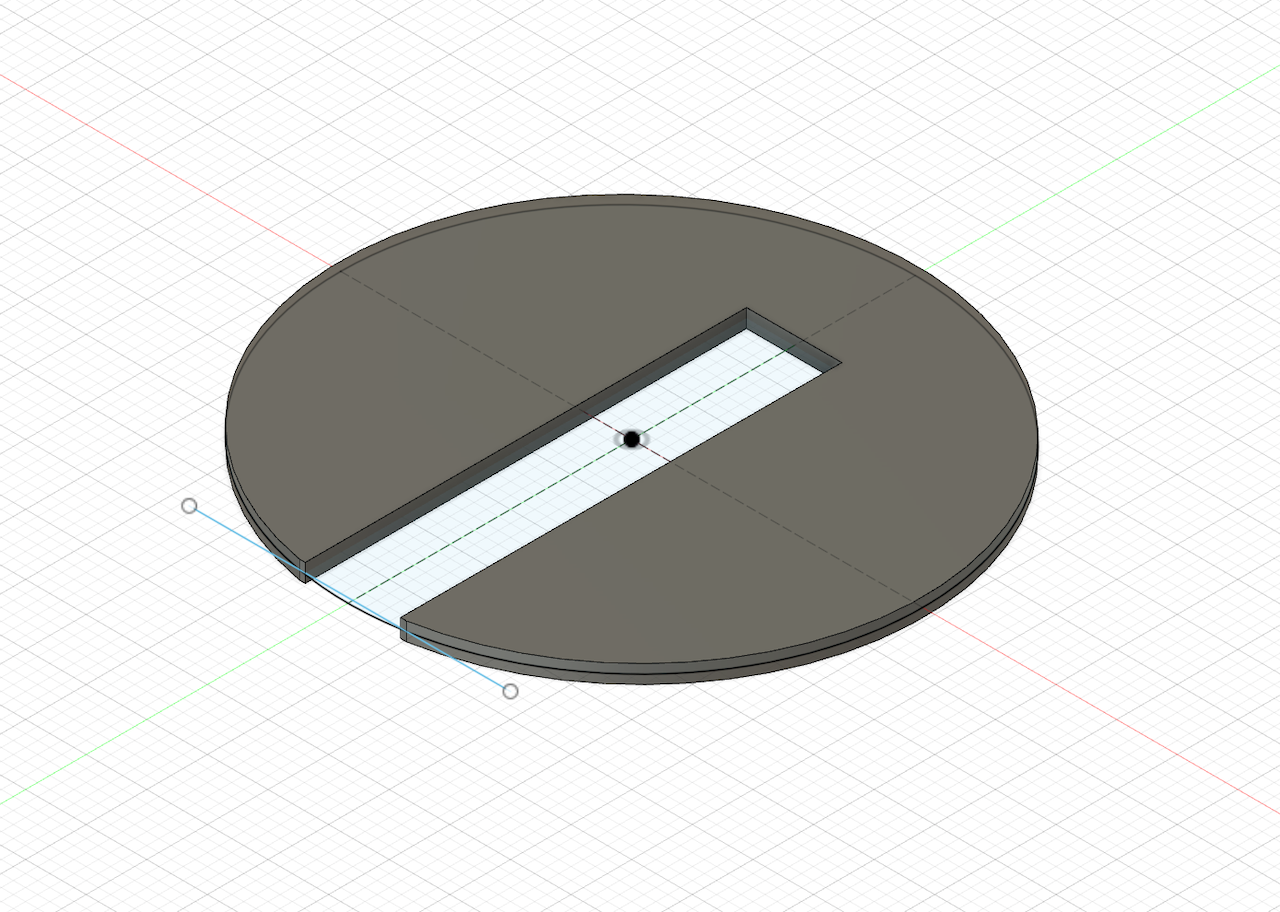
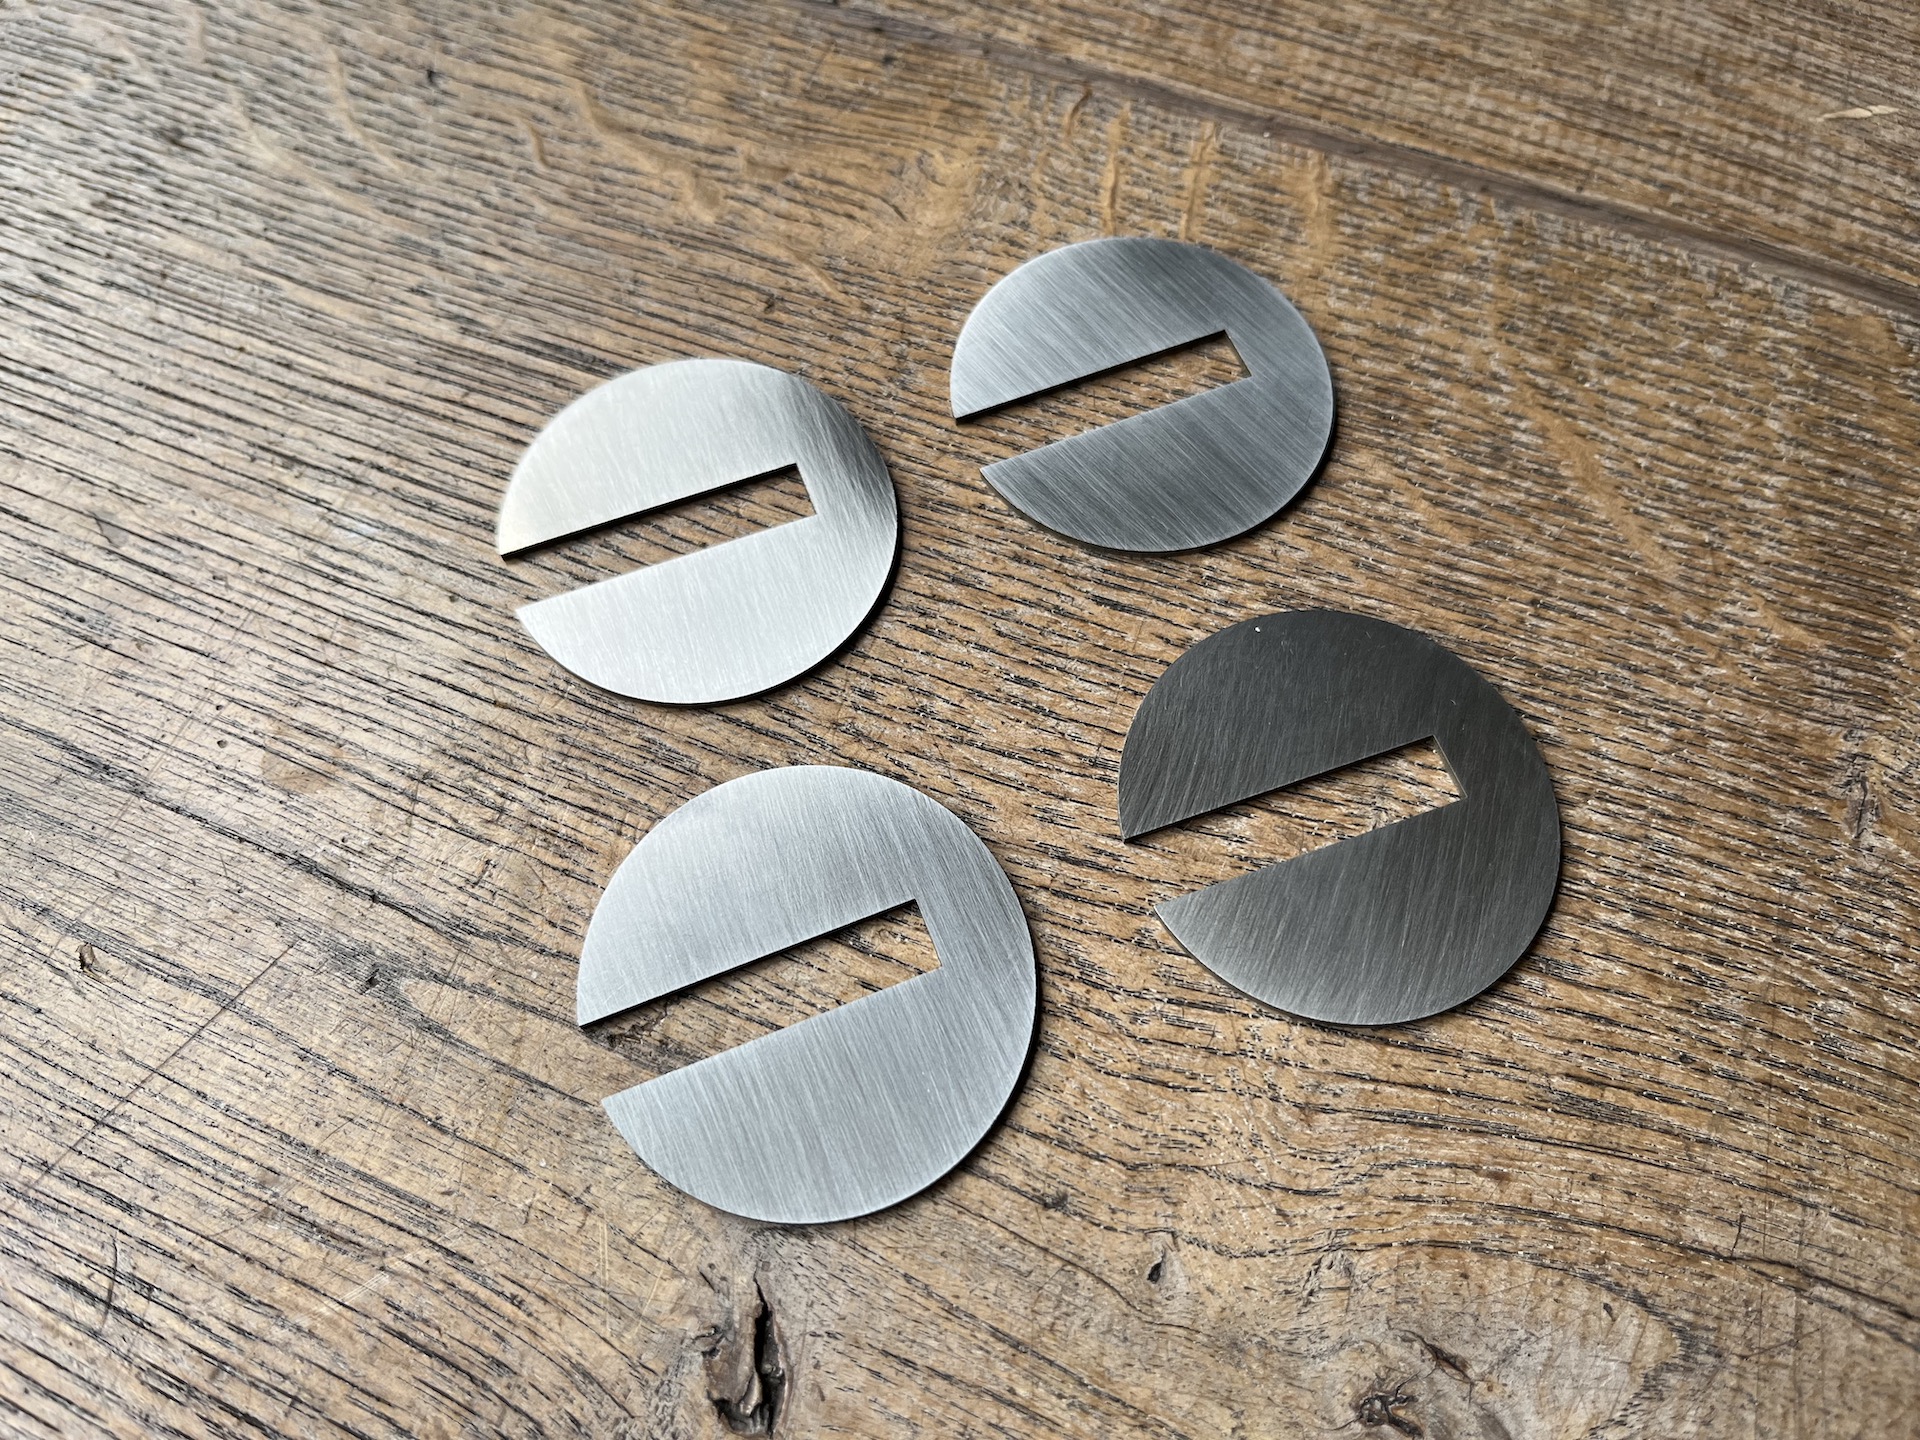
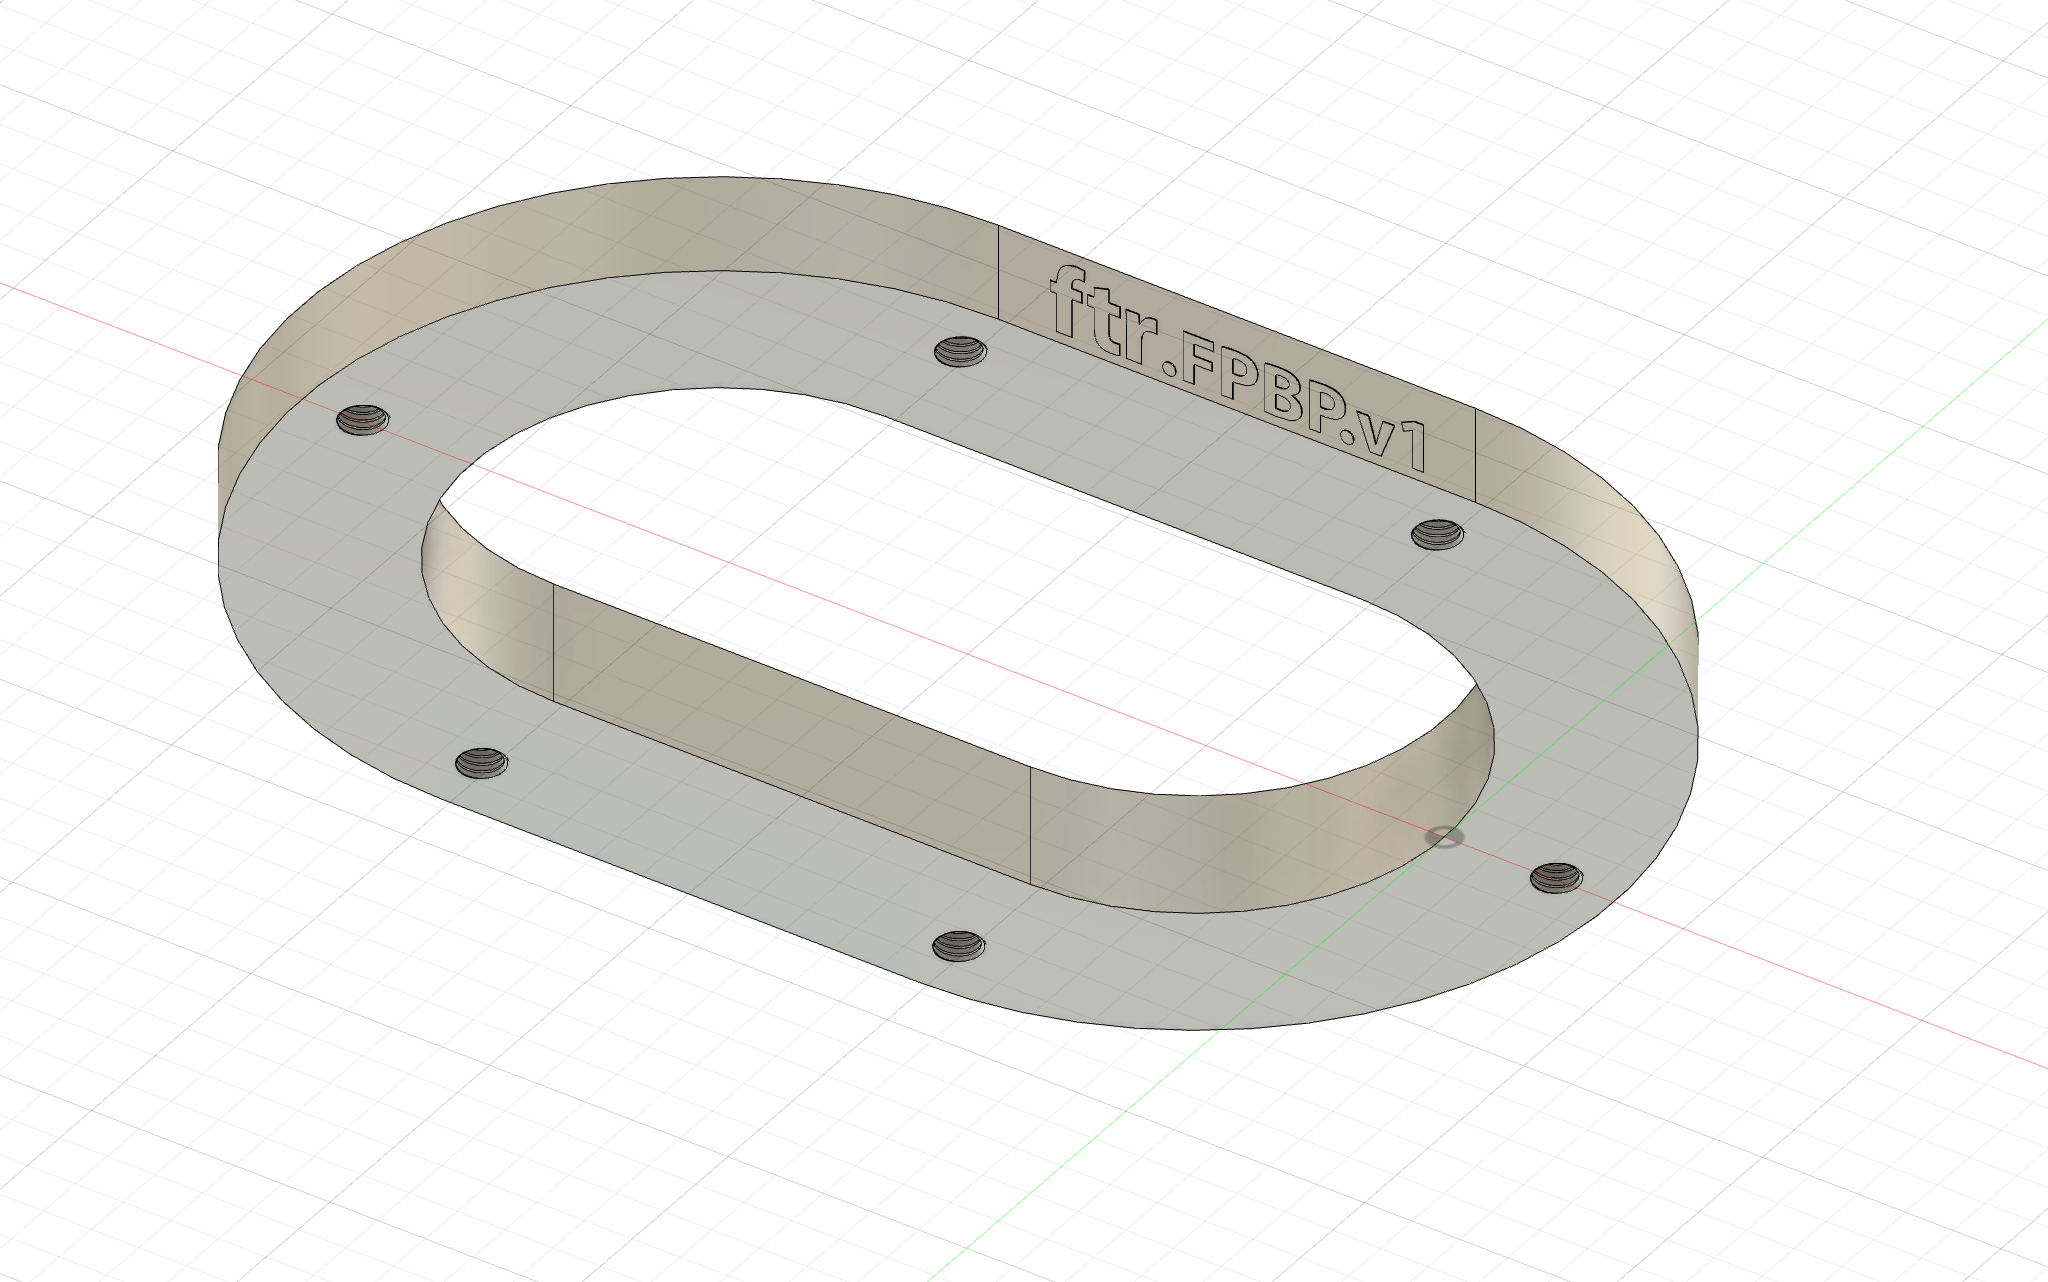
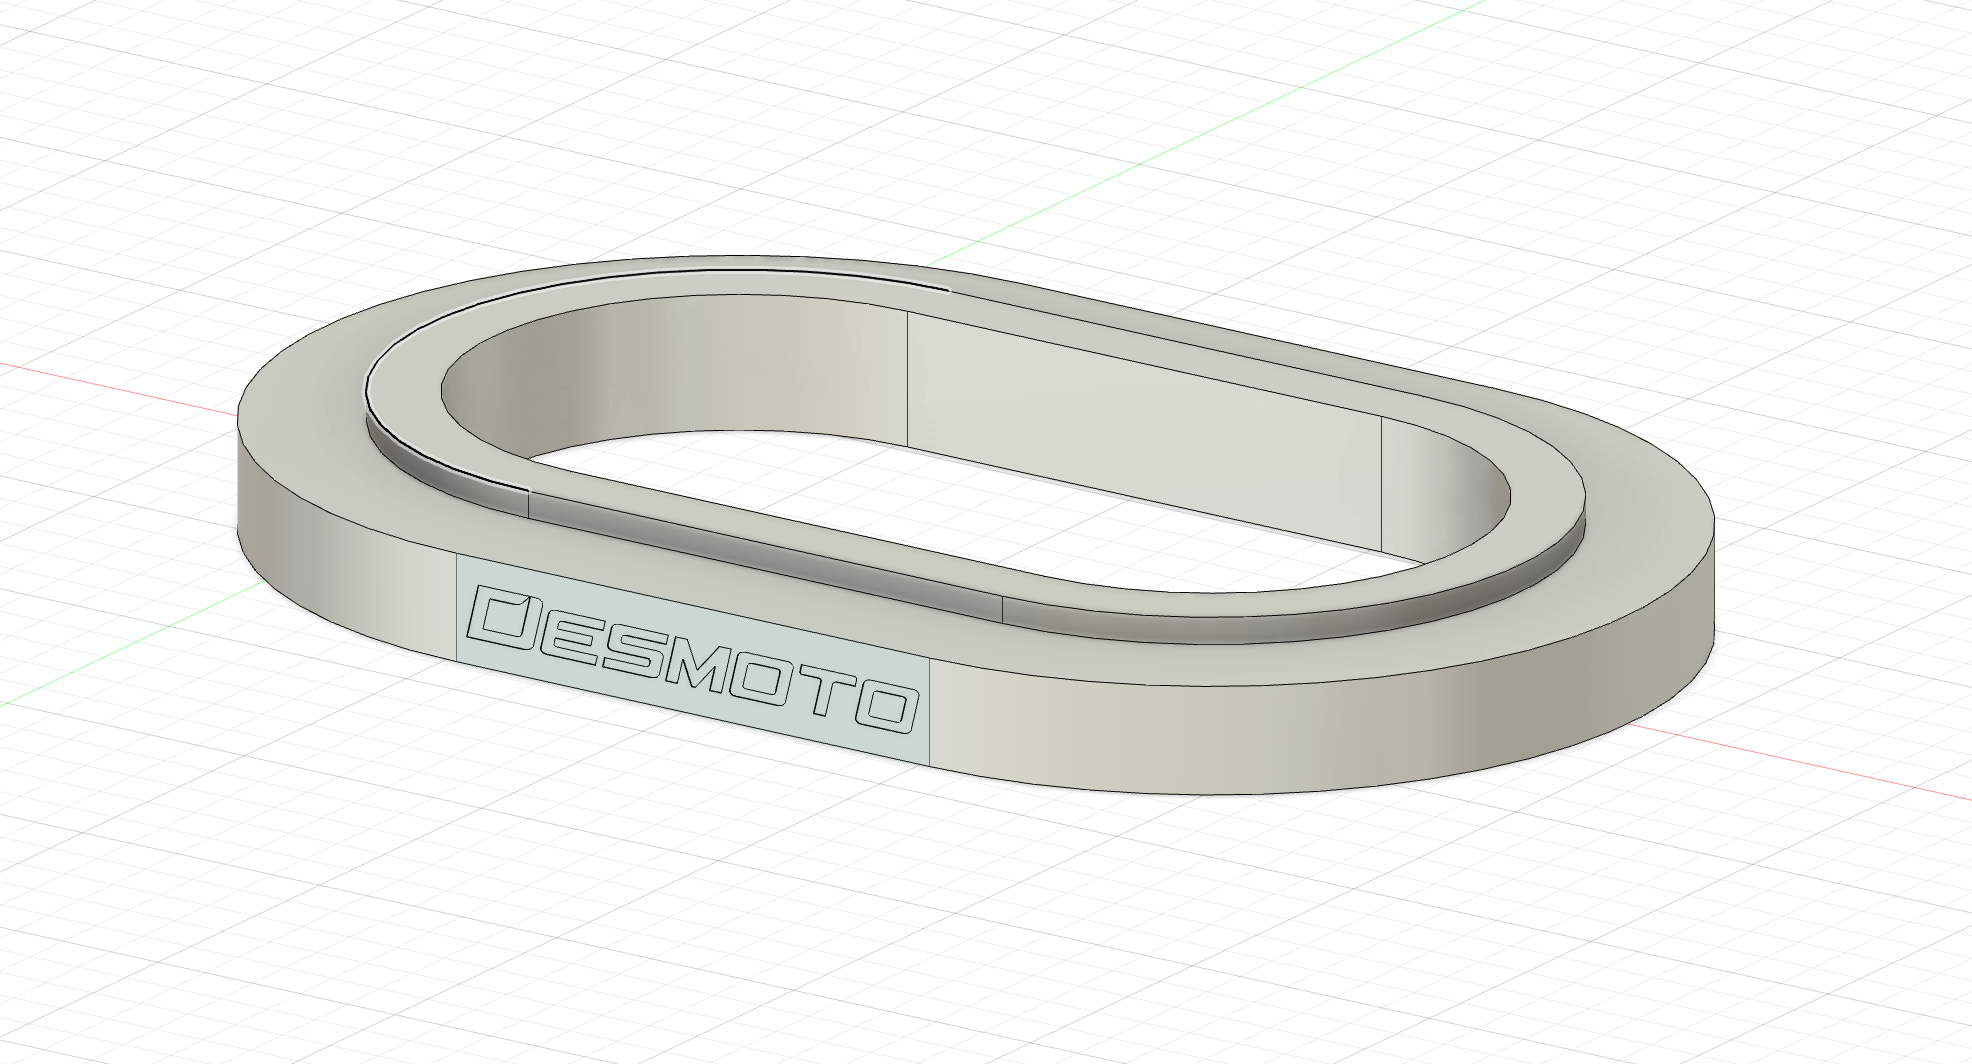
FUEL PUMP BASE PLATES
Also these simple but effective parts arrived! Aluminium fuel pump mounting plates with some Desmoto and FTR laser engraving.
Im building a custom aluminum fuel tank later in the project and needed a way to mount the 1098 fuel pump within the tank. This mounting plate has a very small footprint since I have no space at all and gets welded on to the tank from the inside.
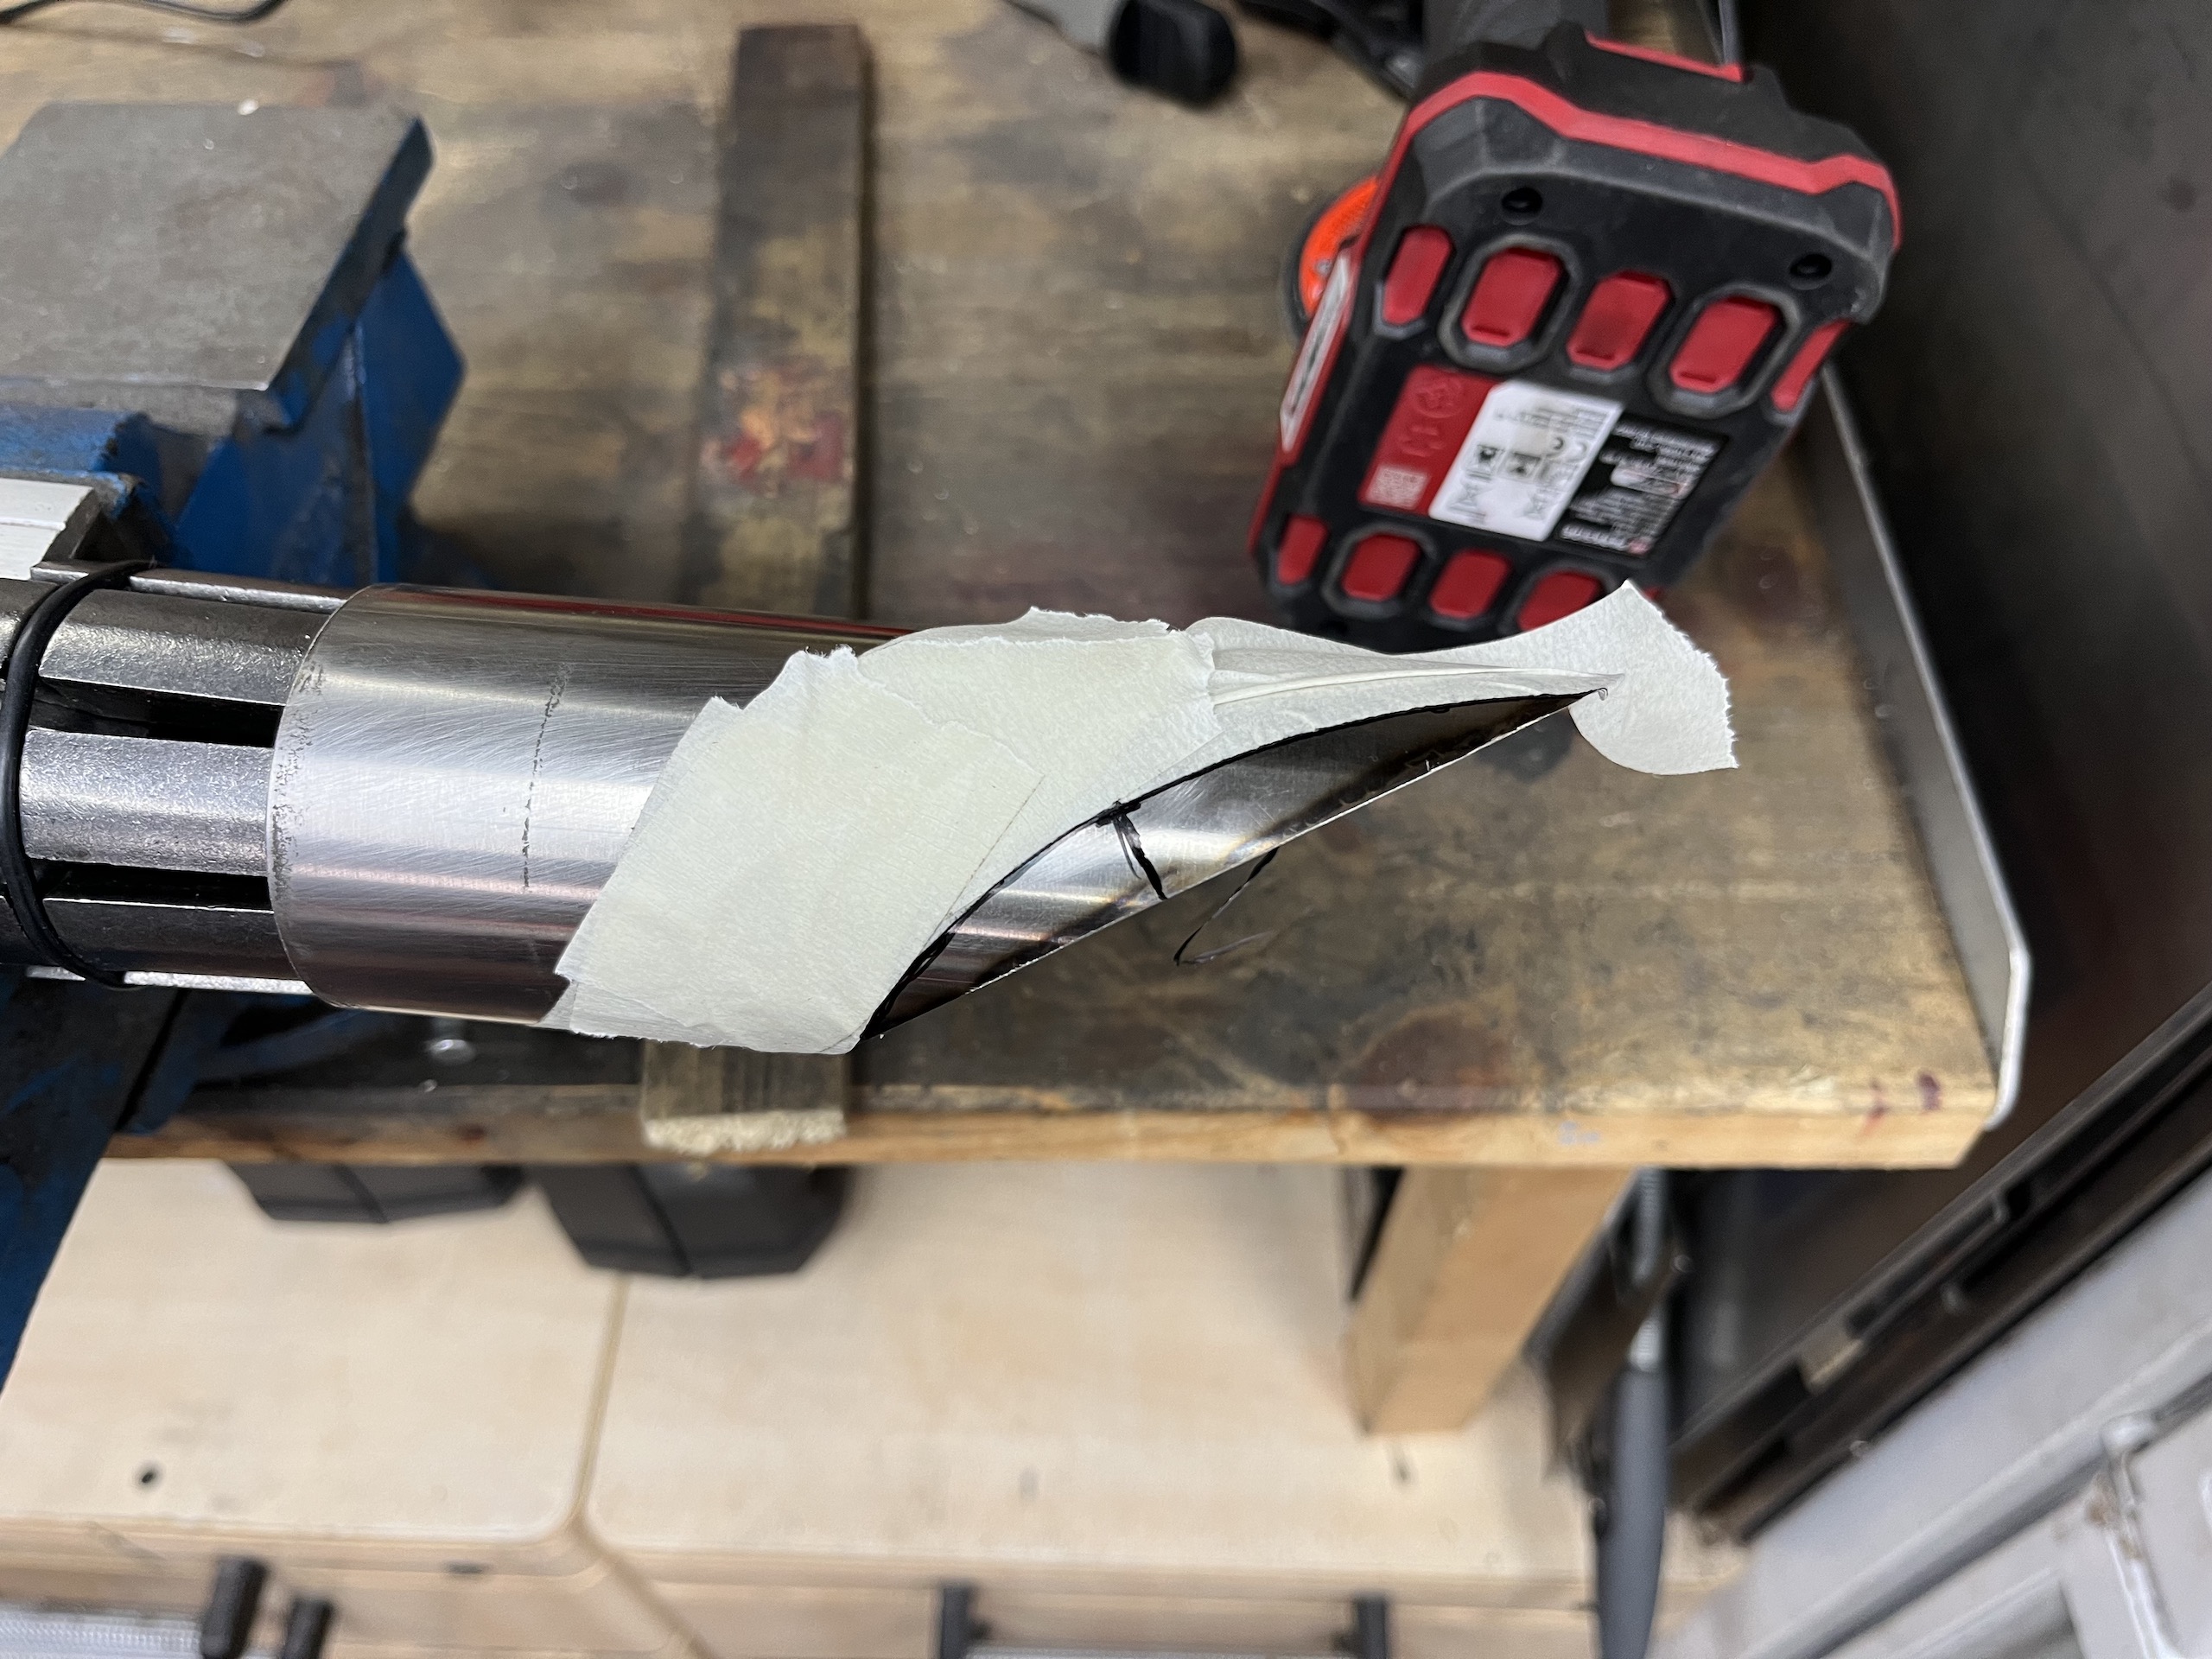
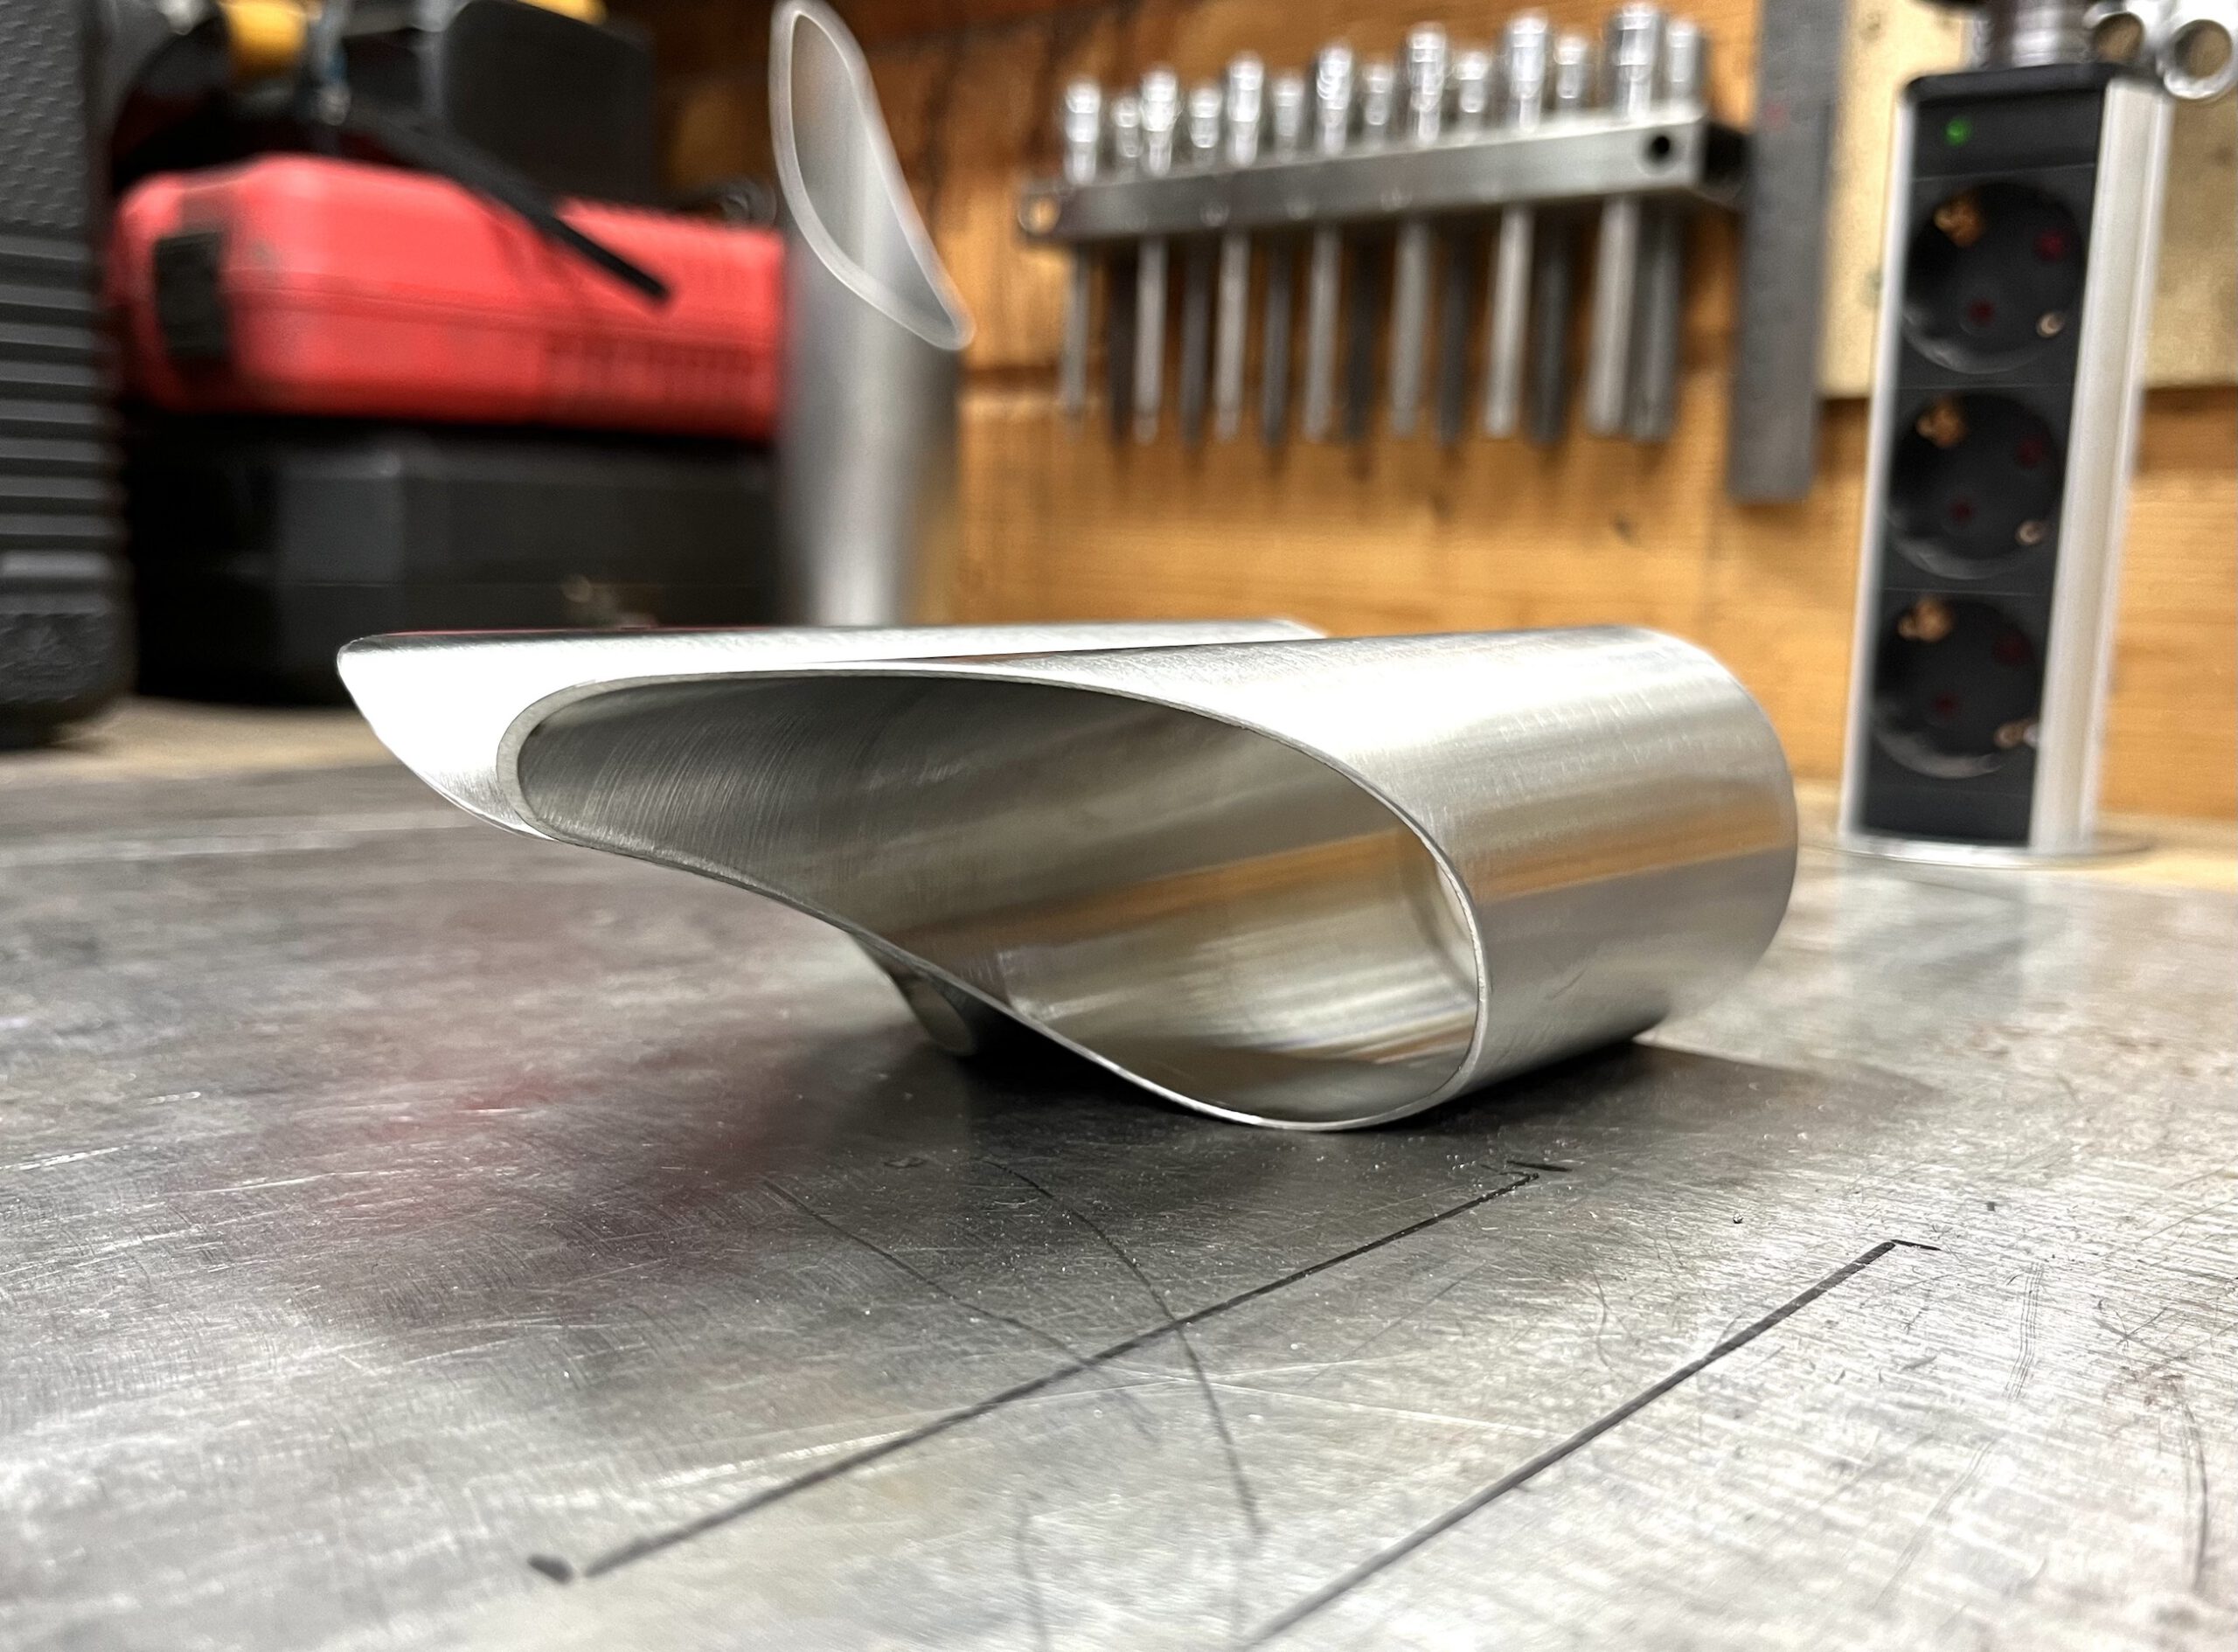
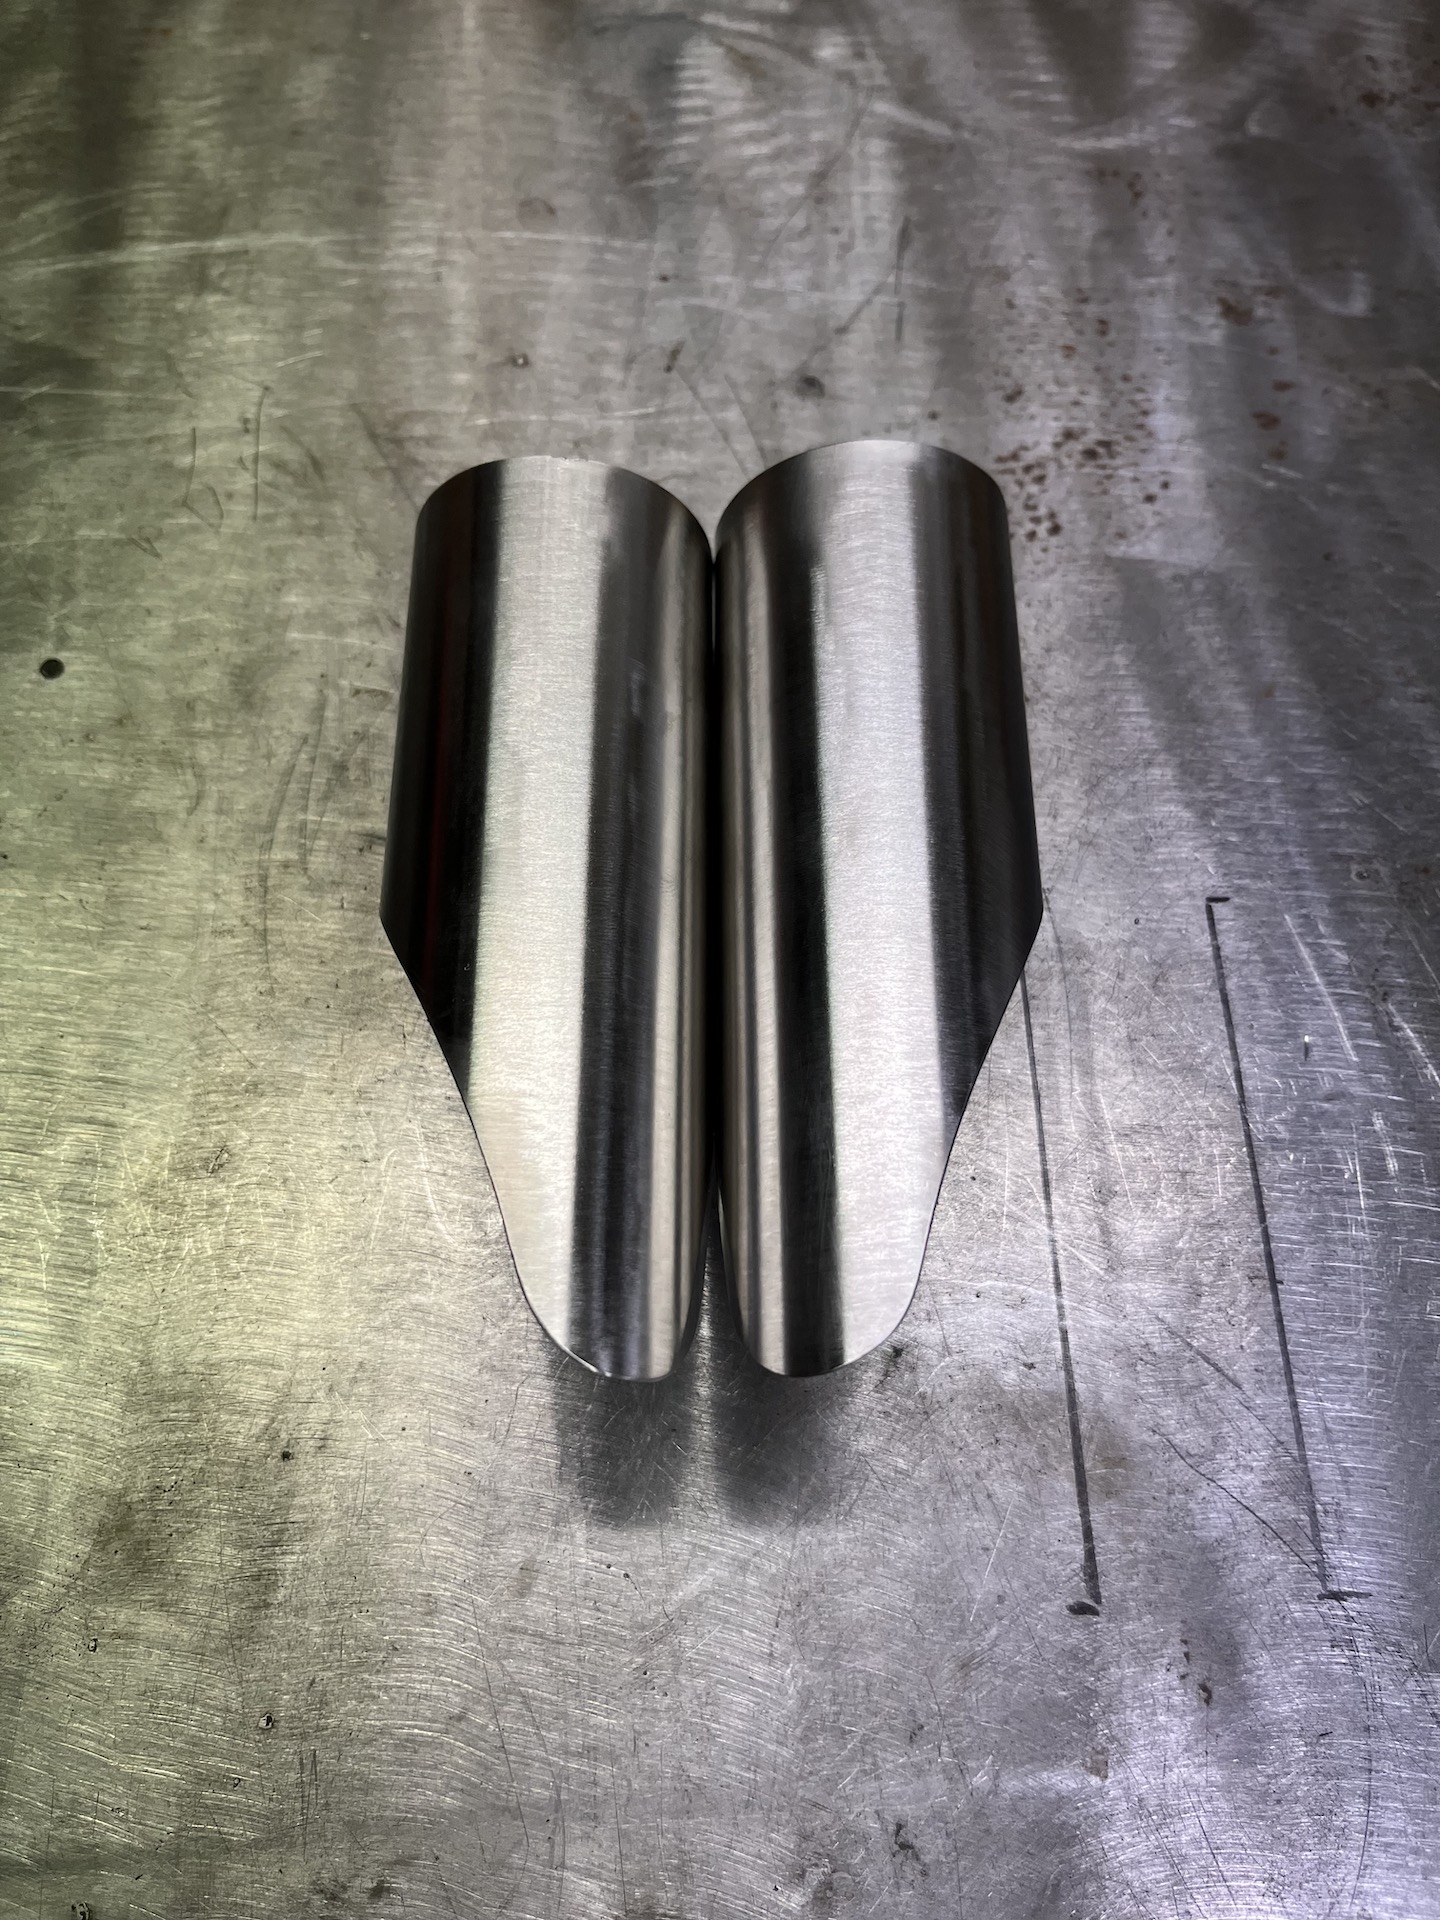
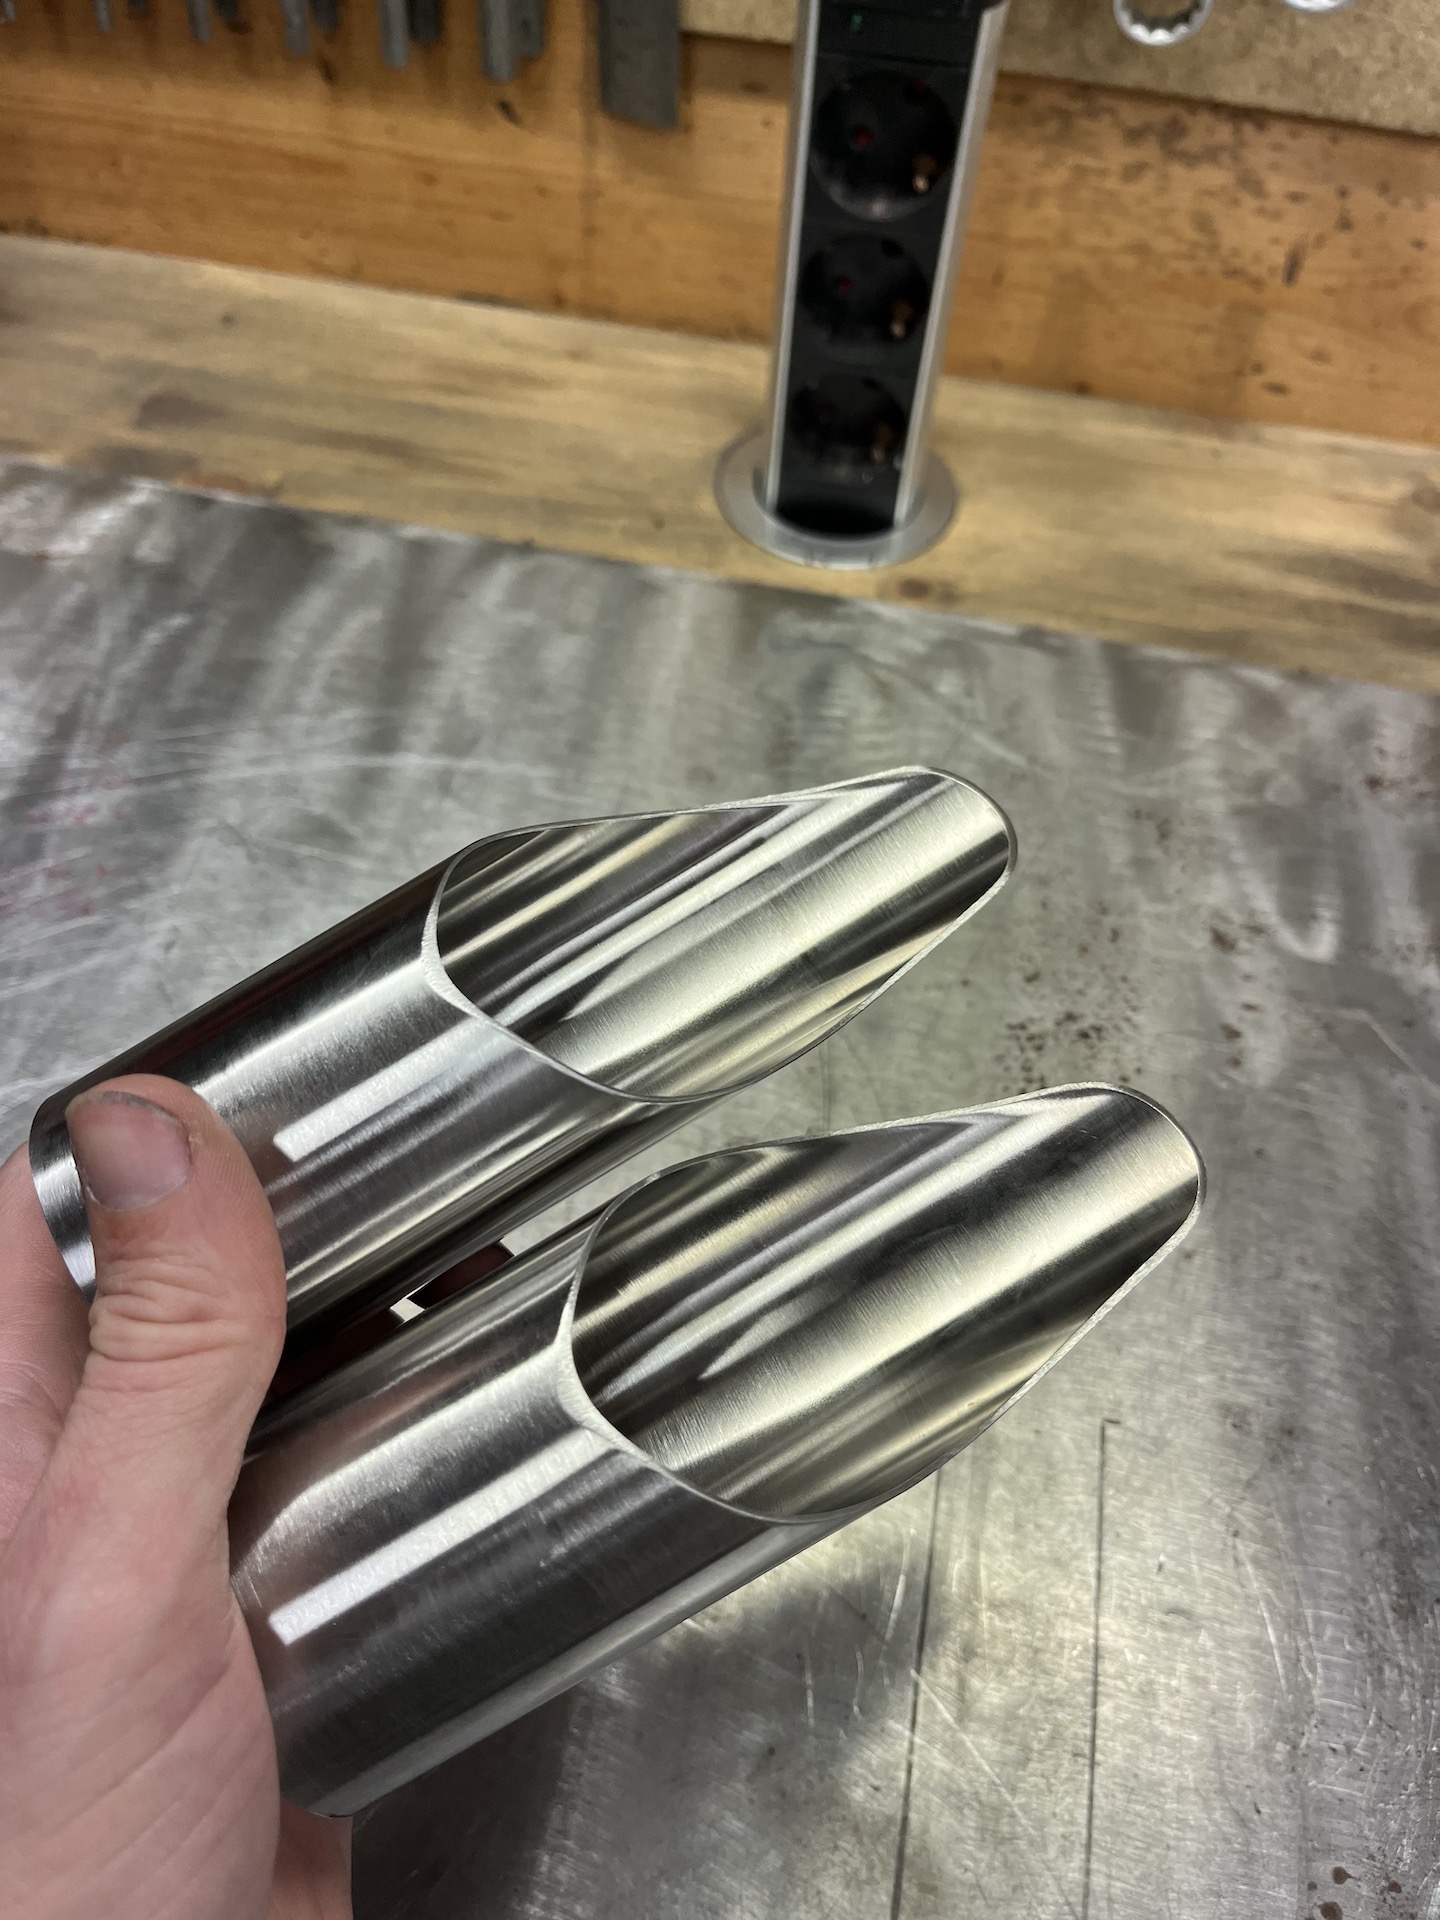
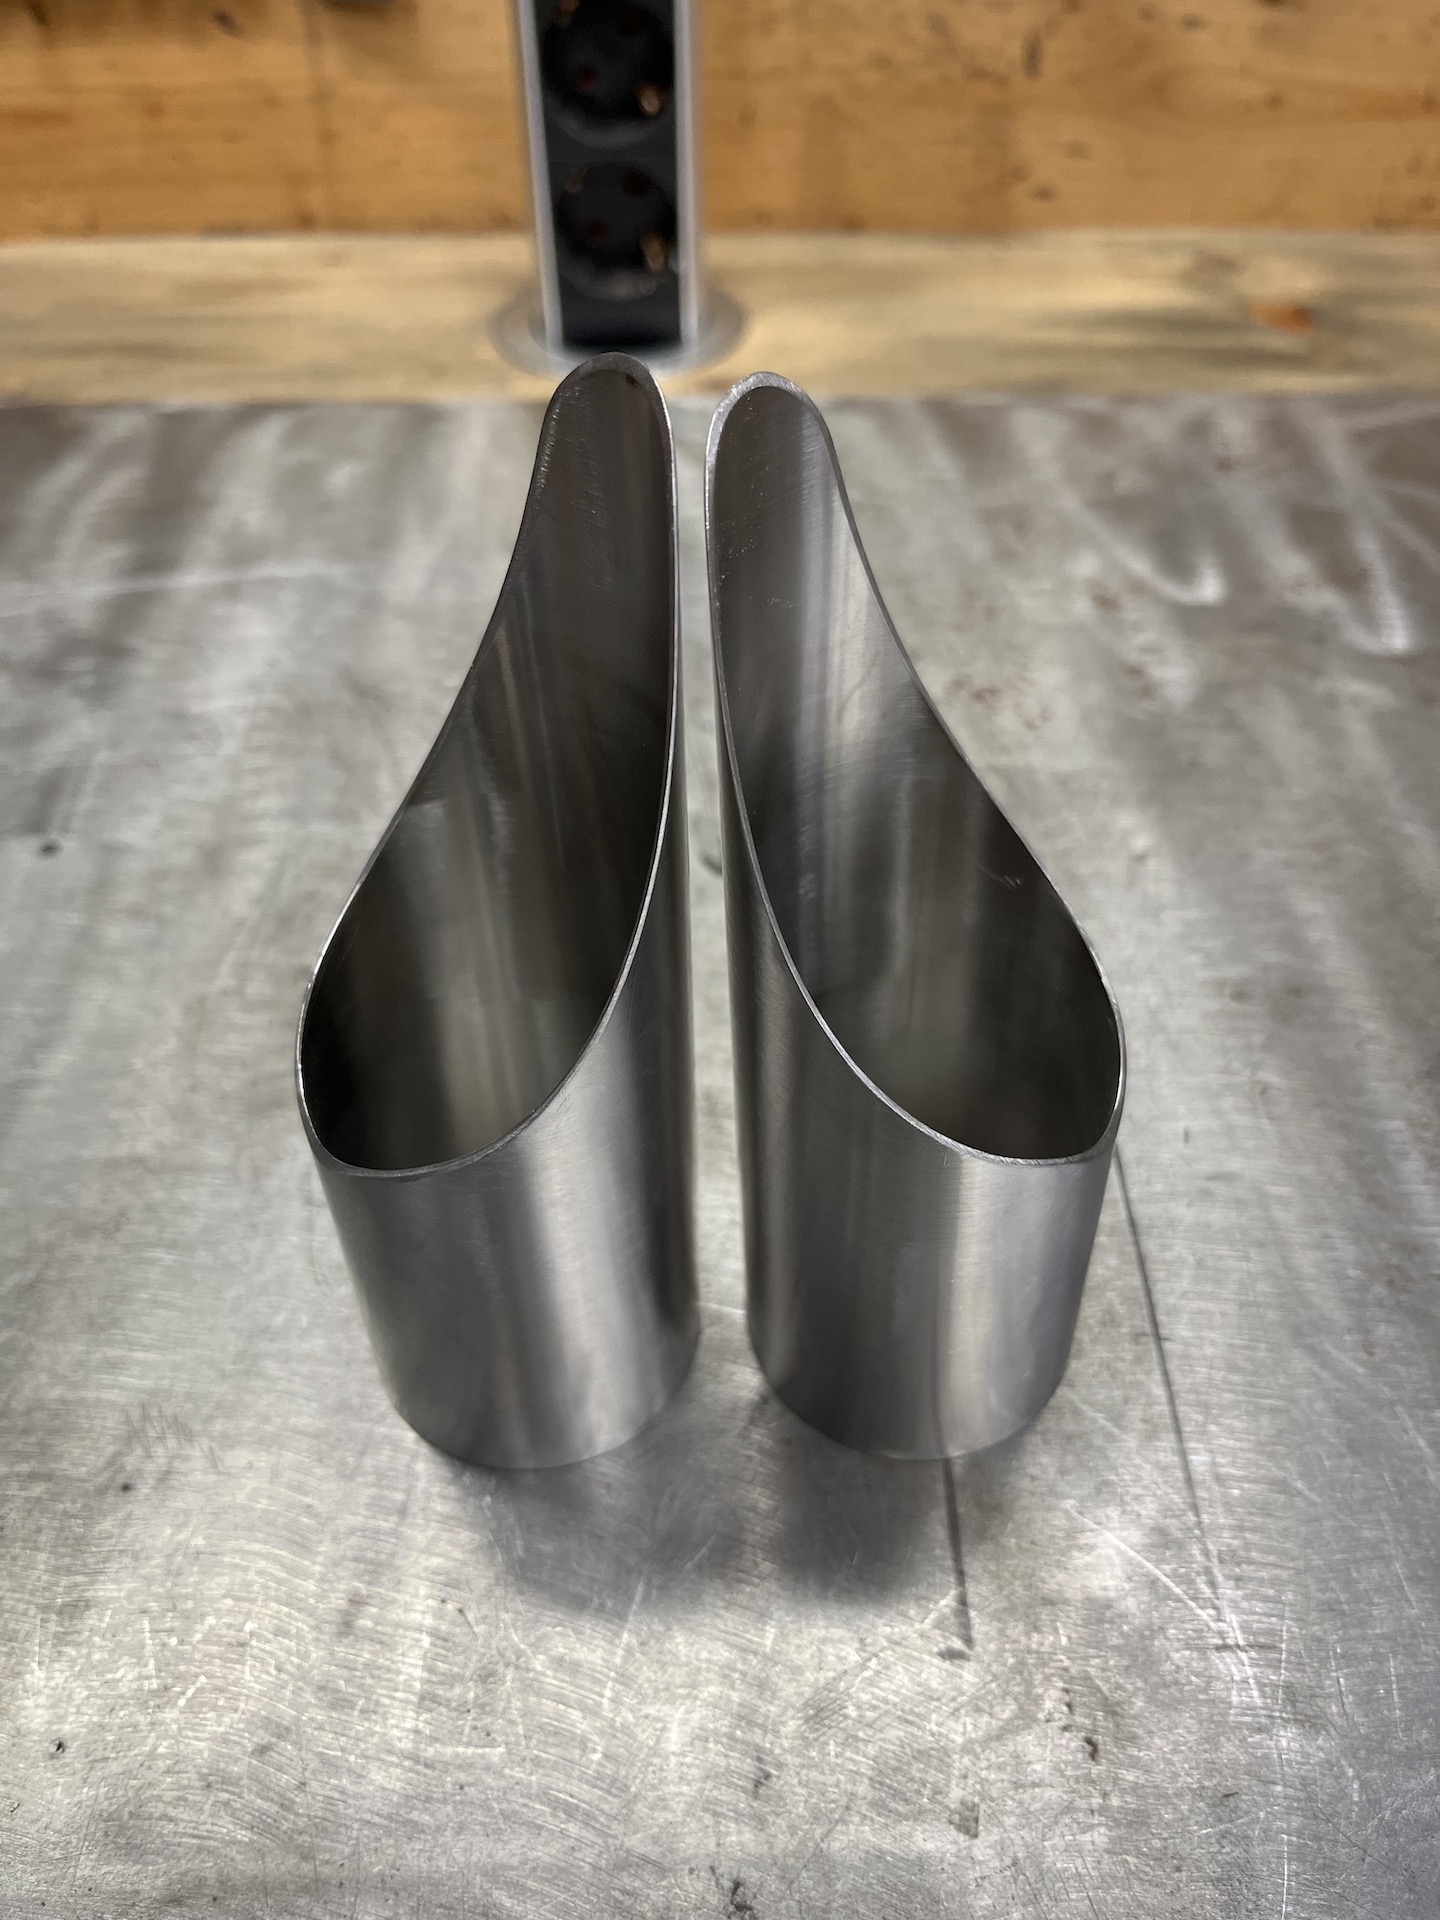
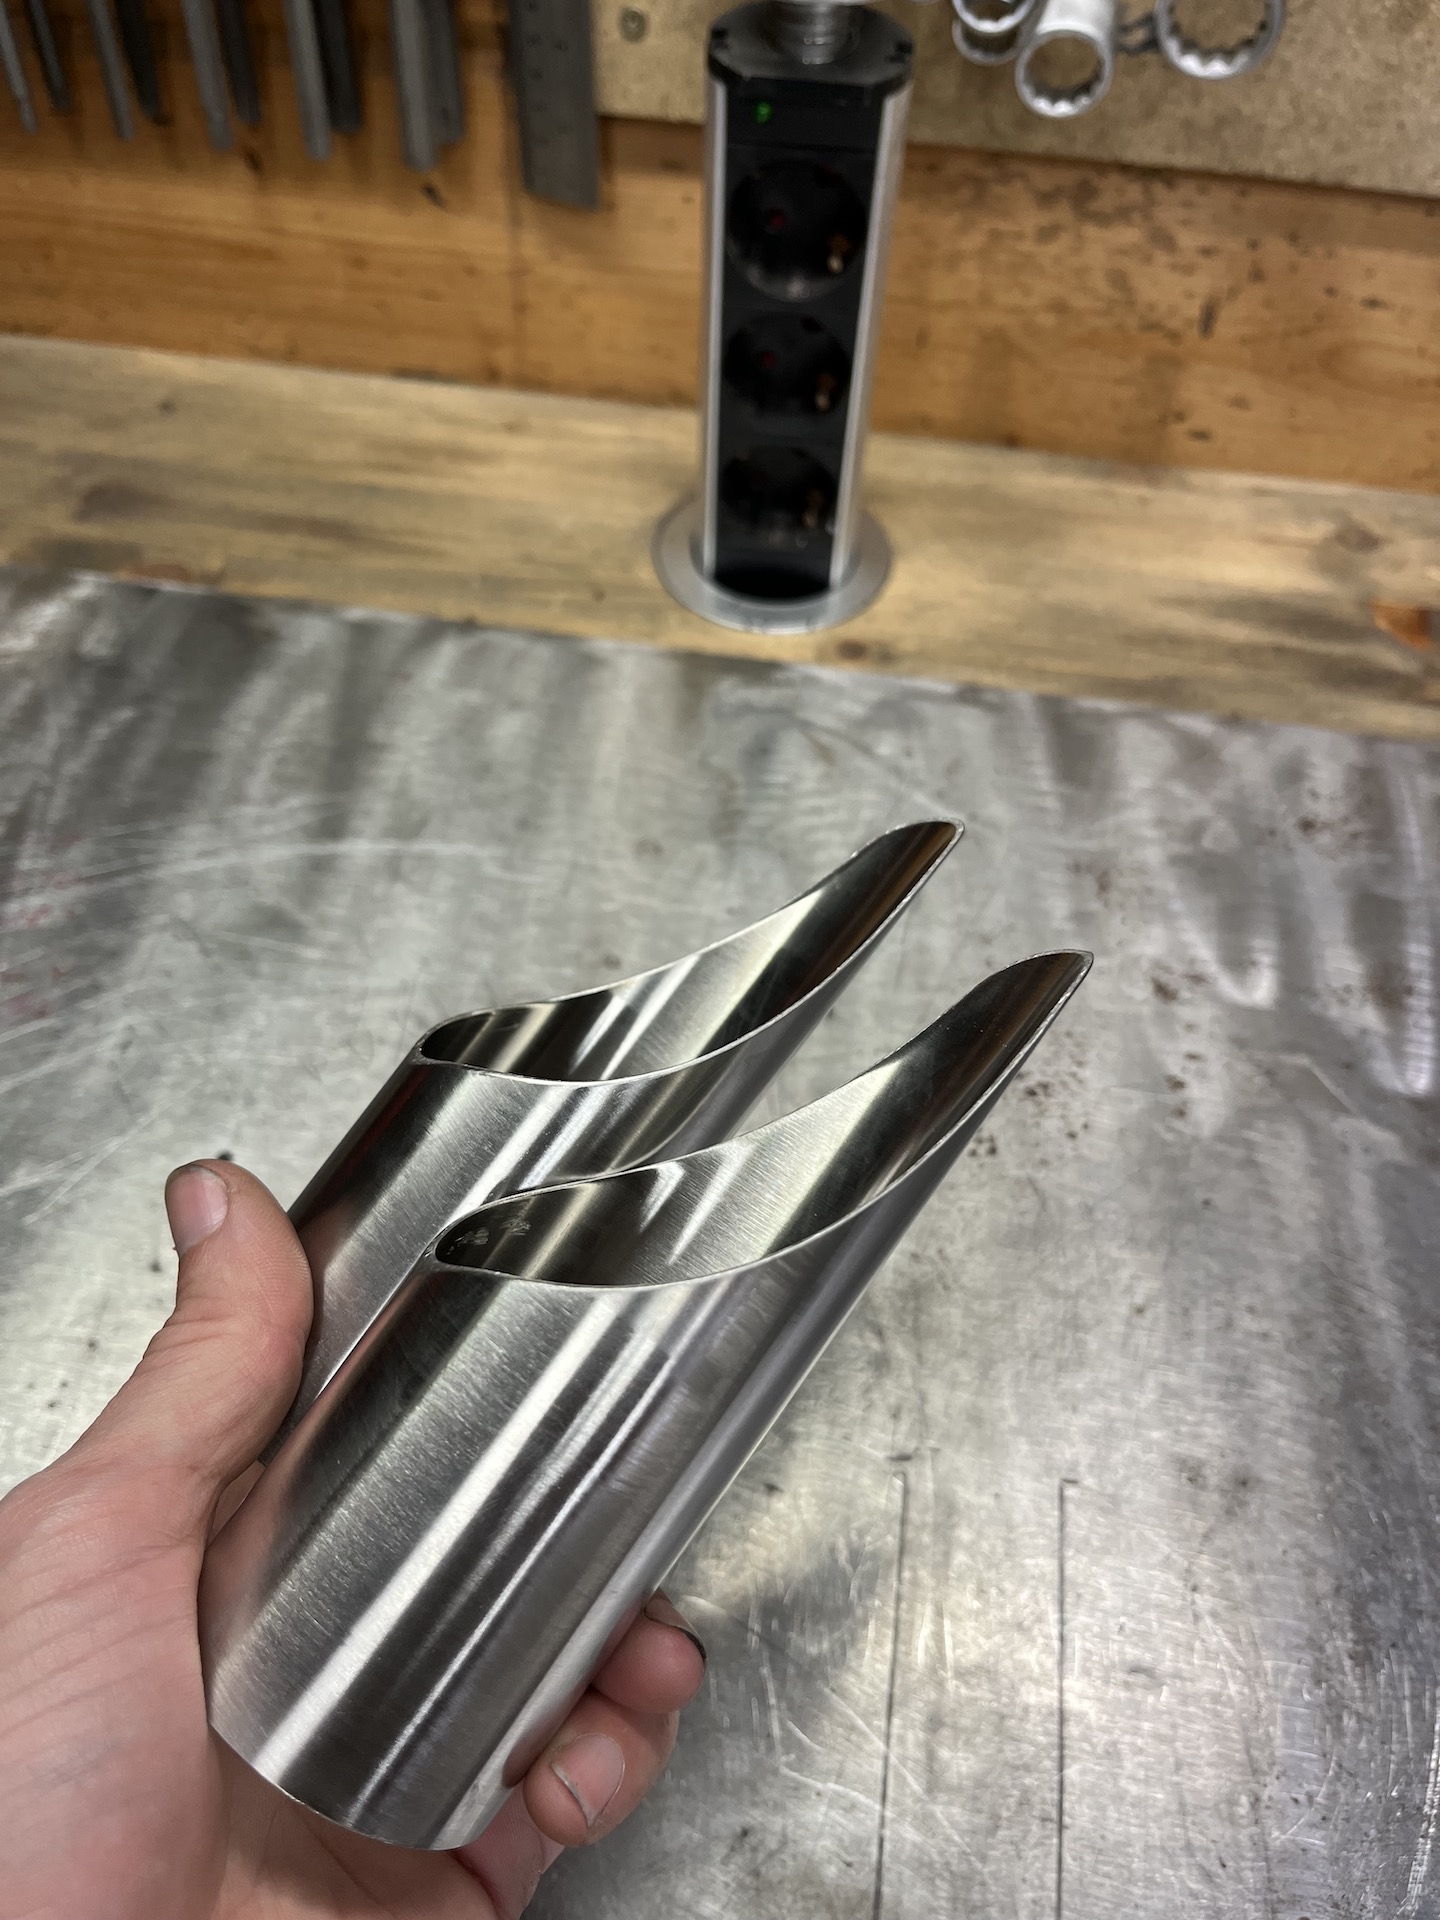
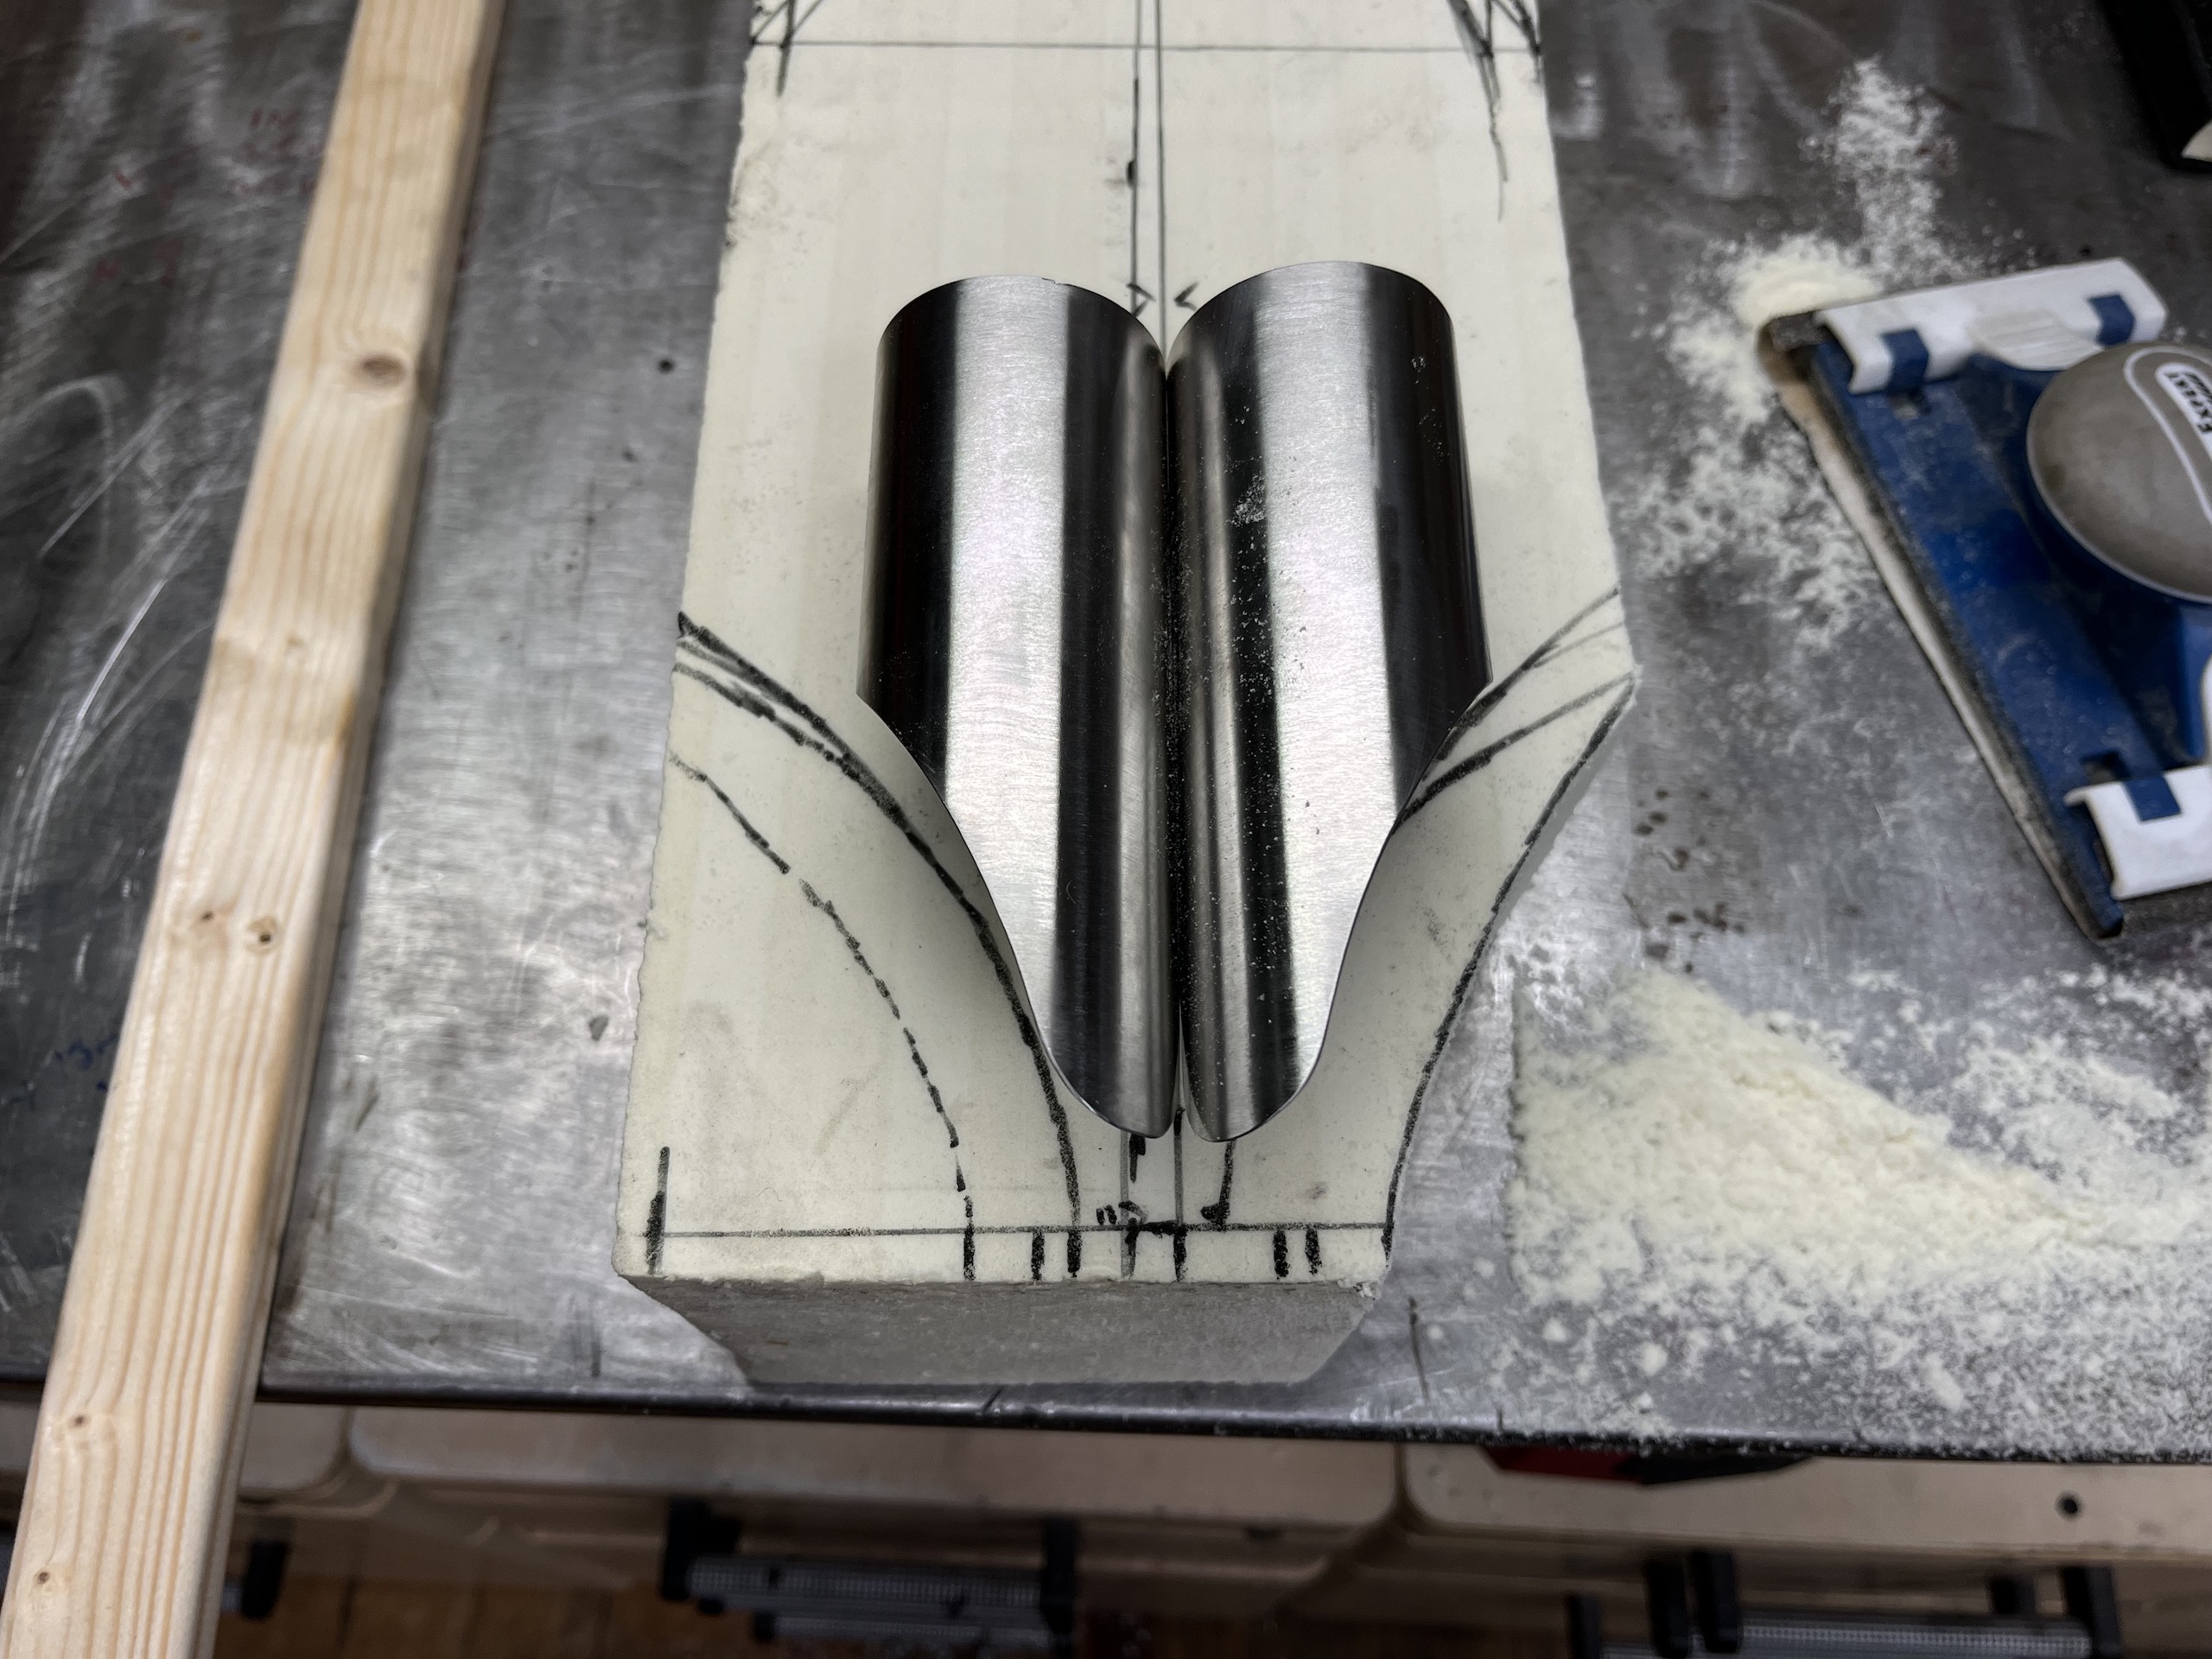
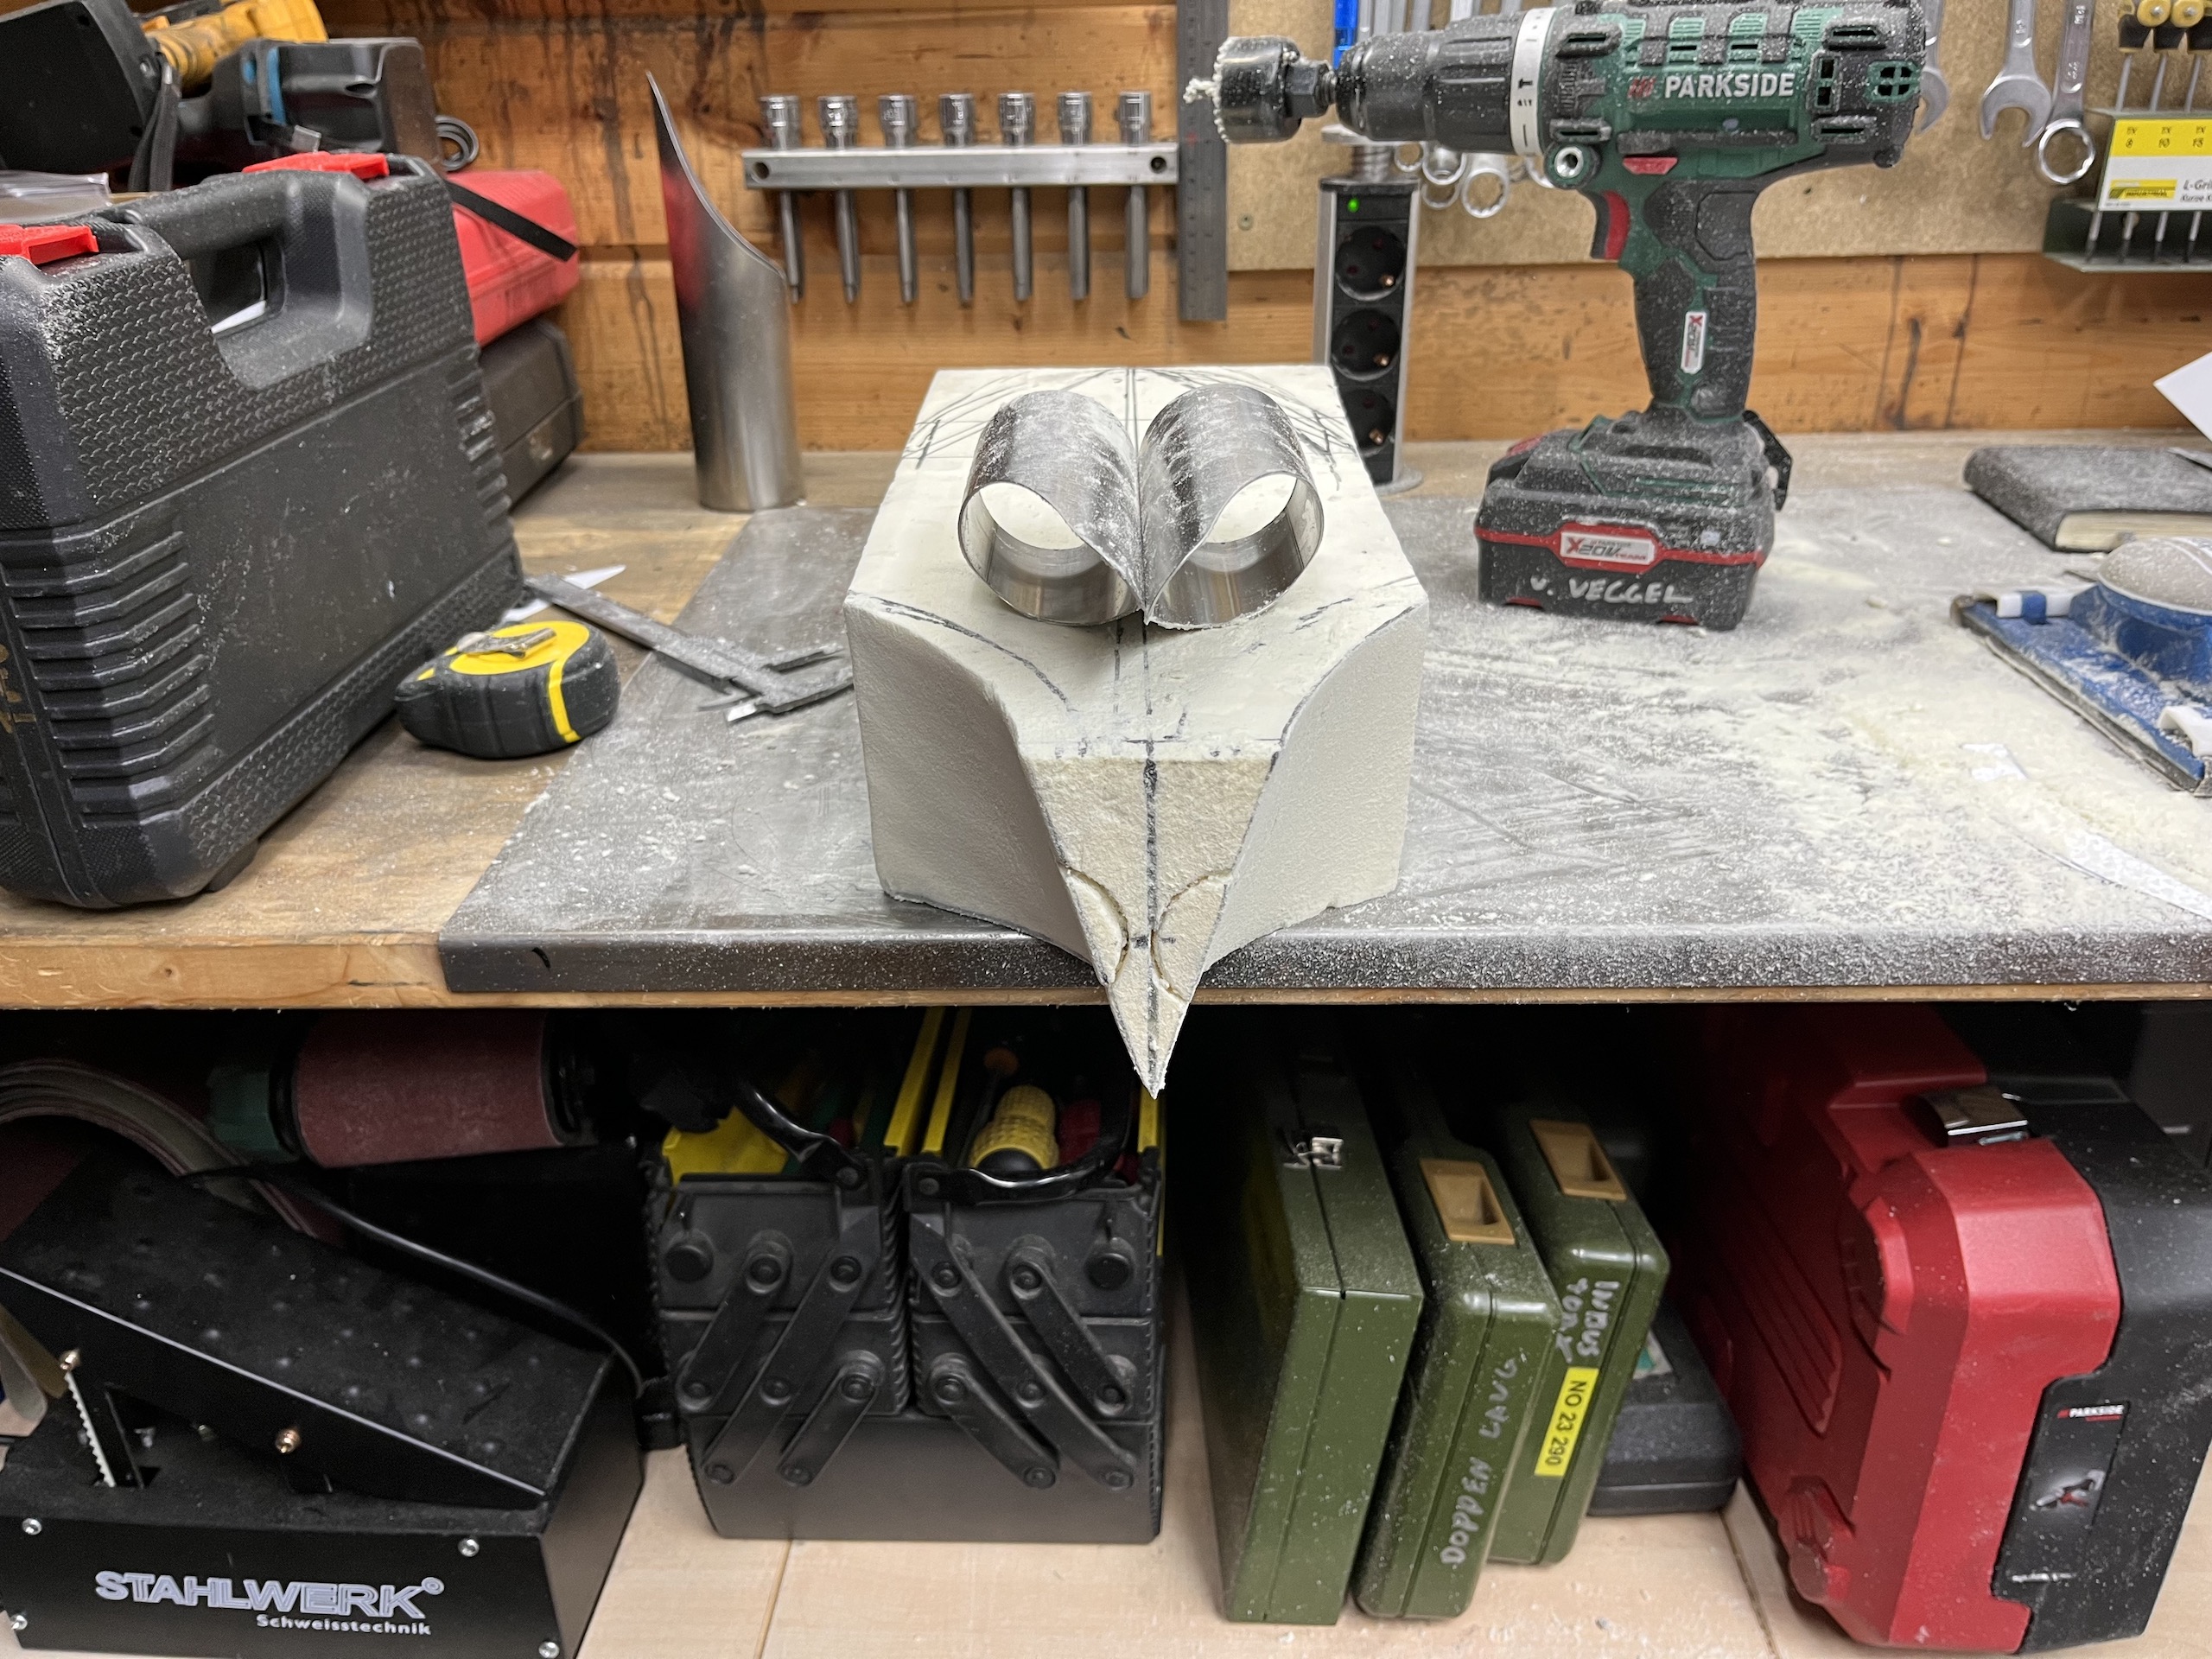
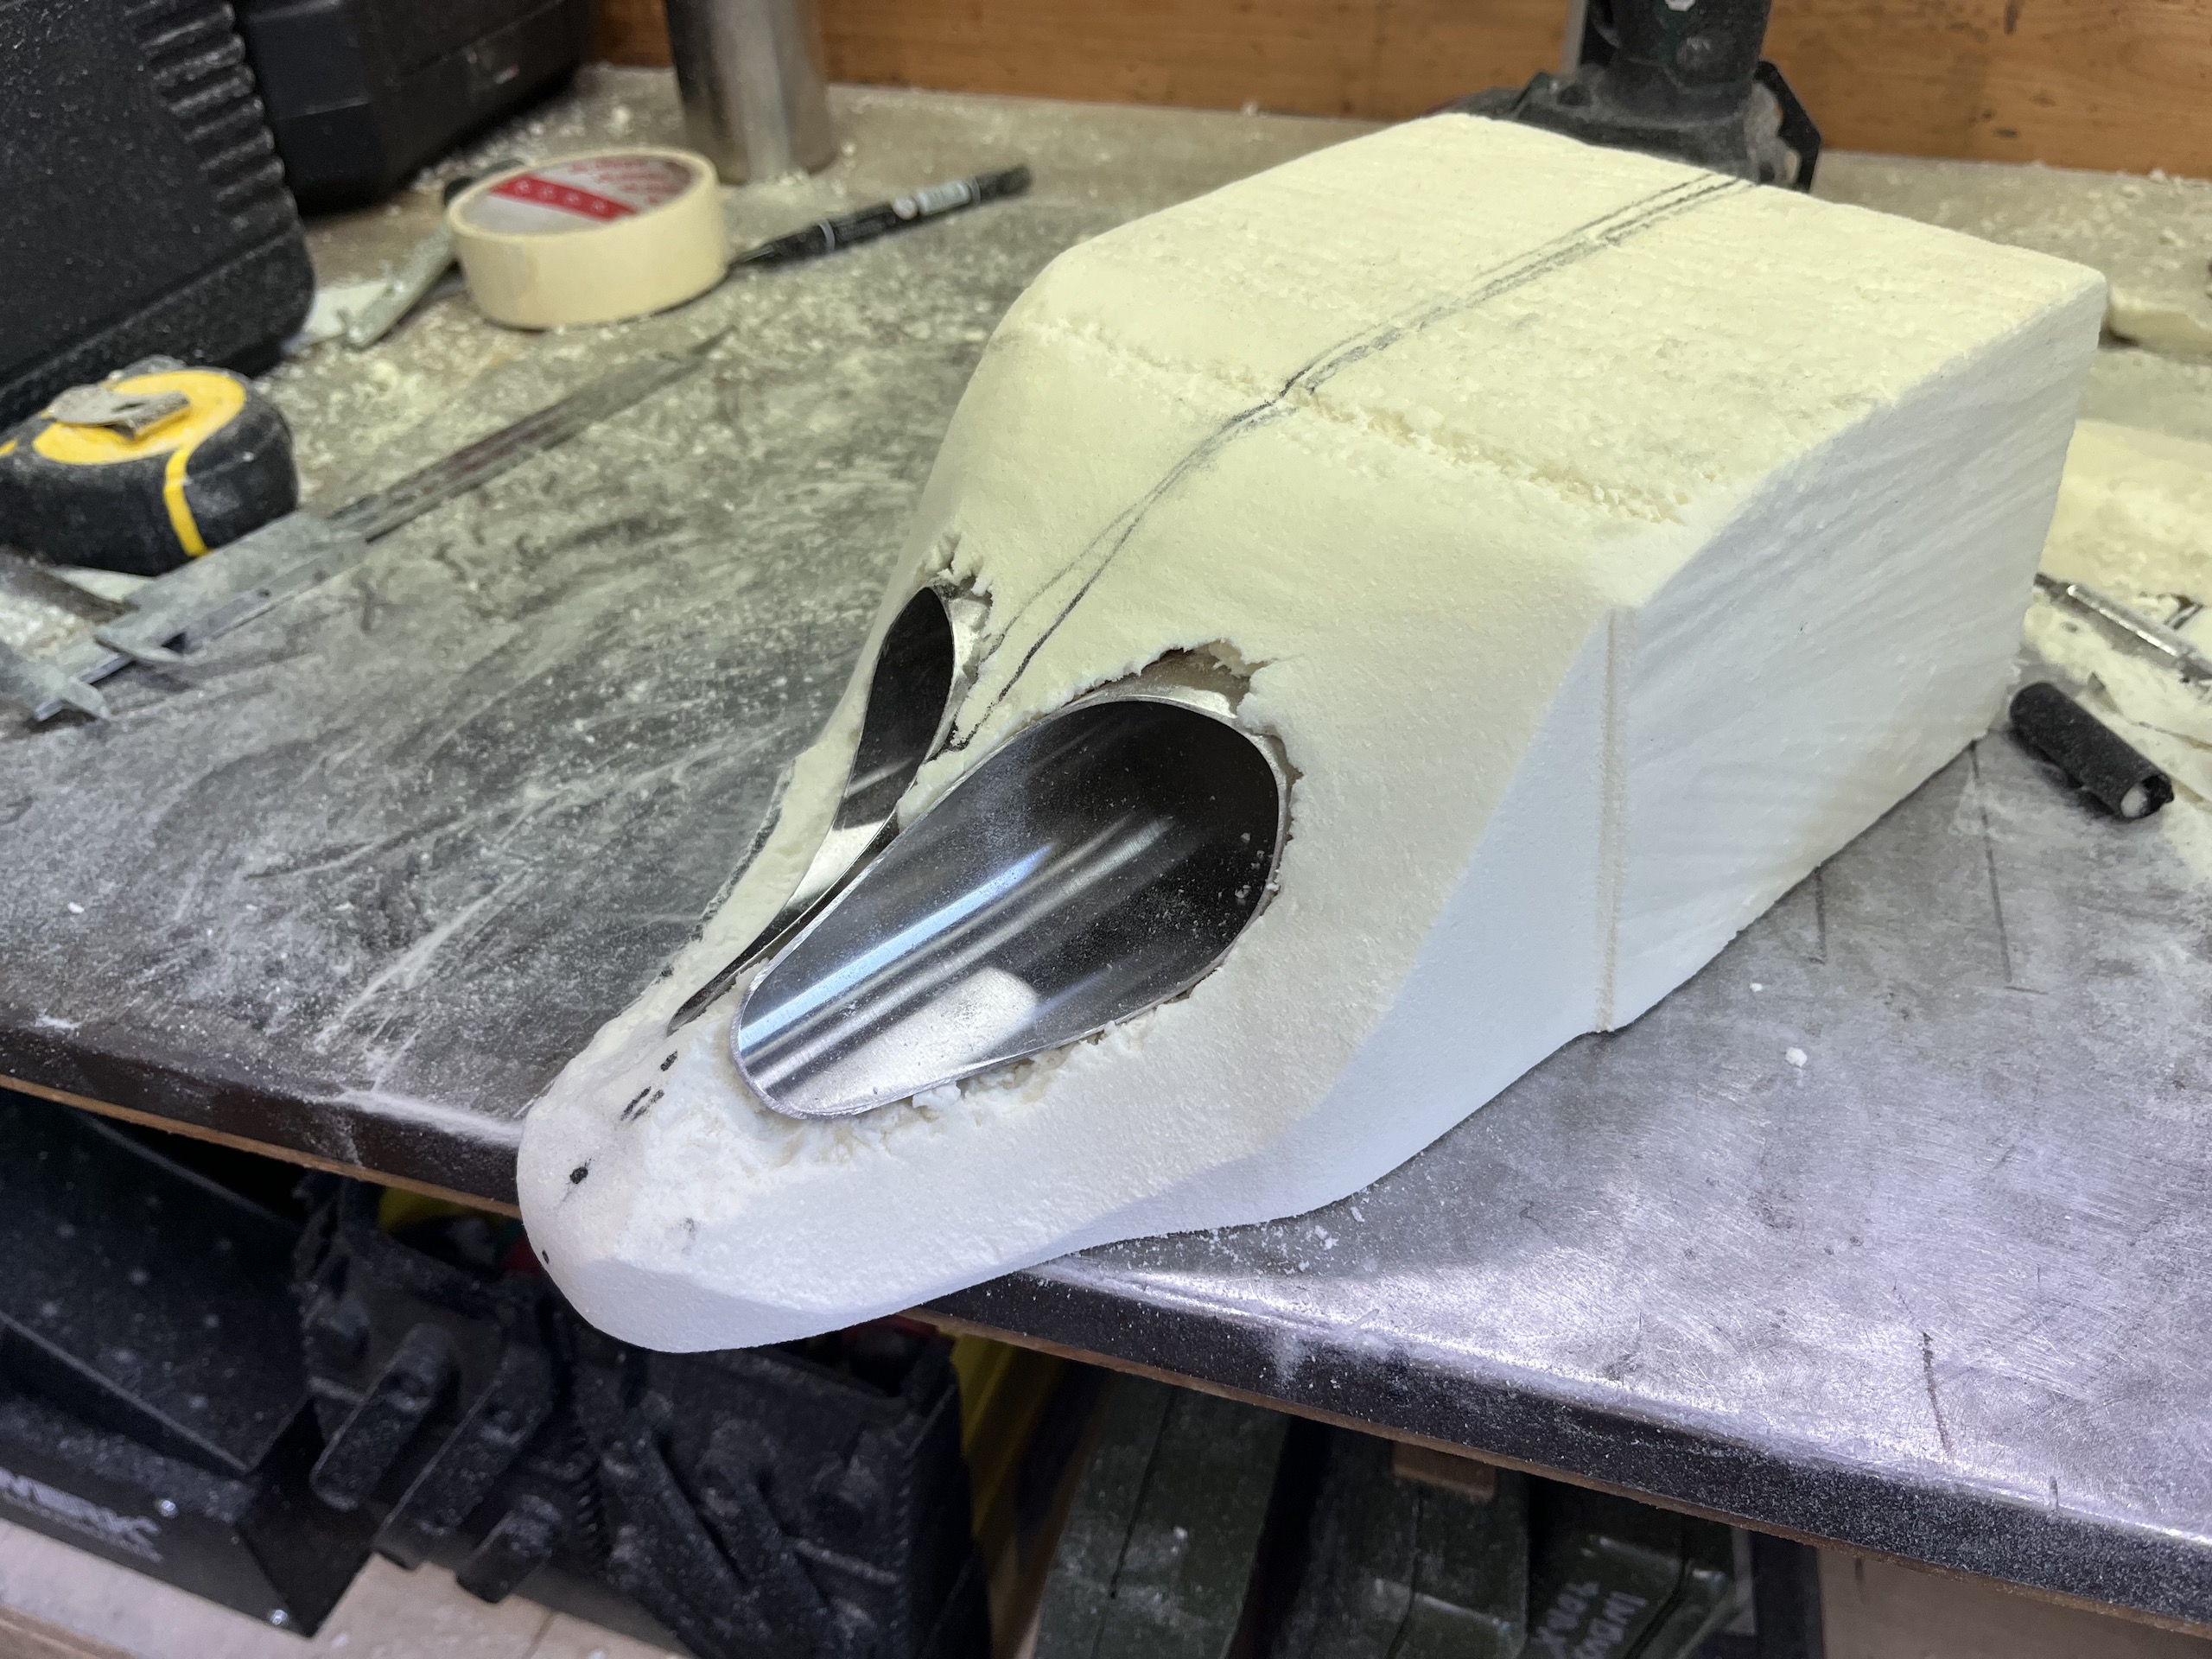
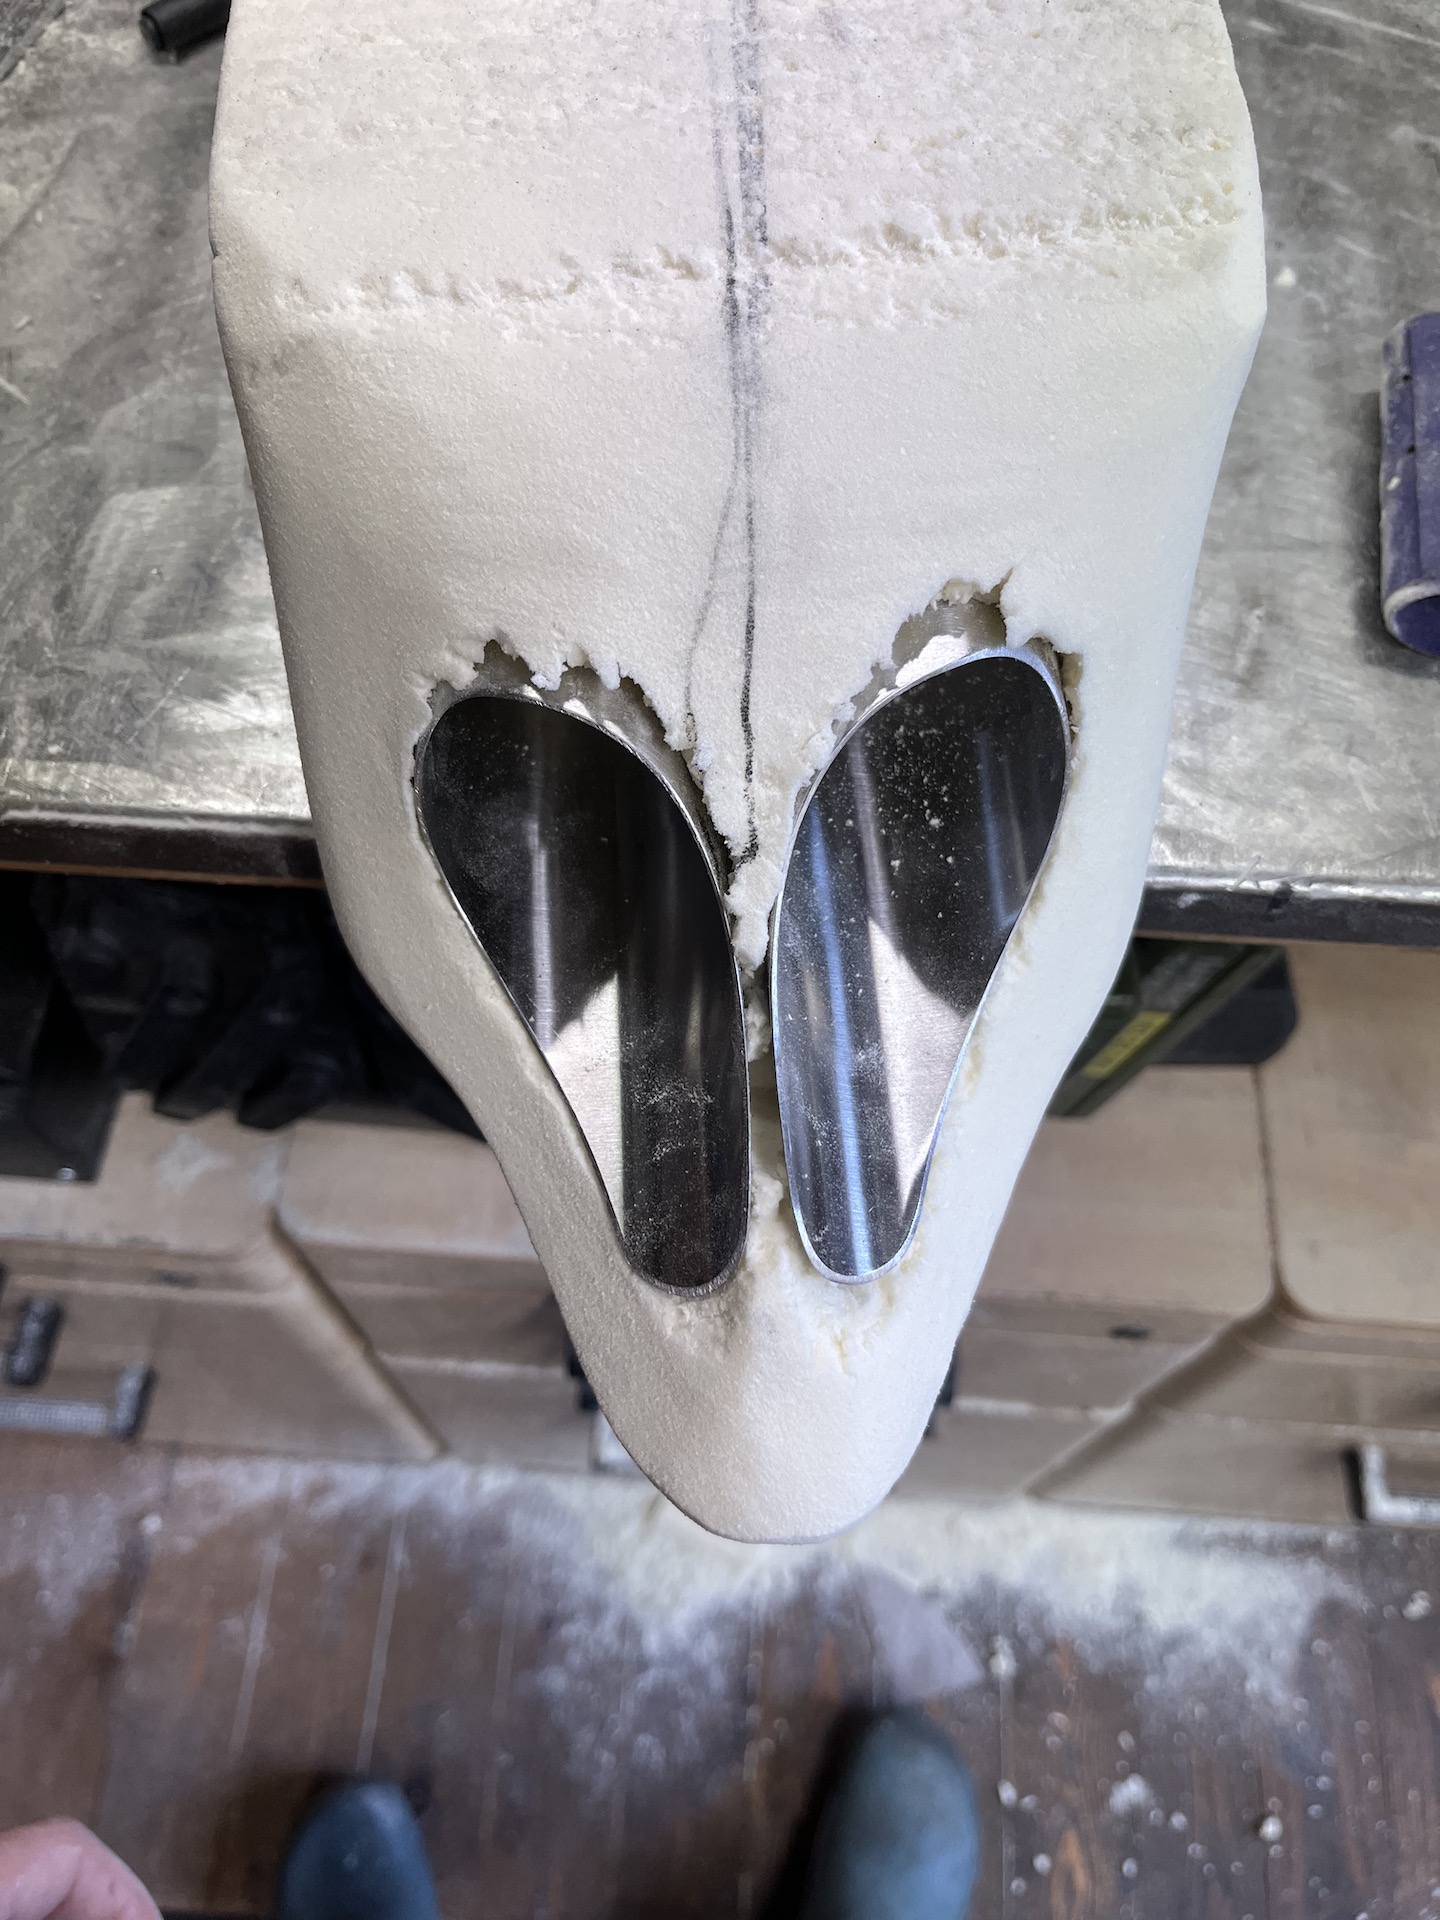
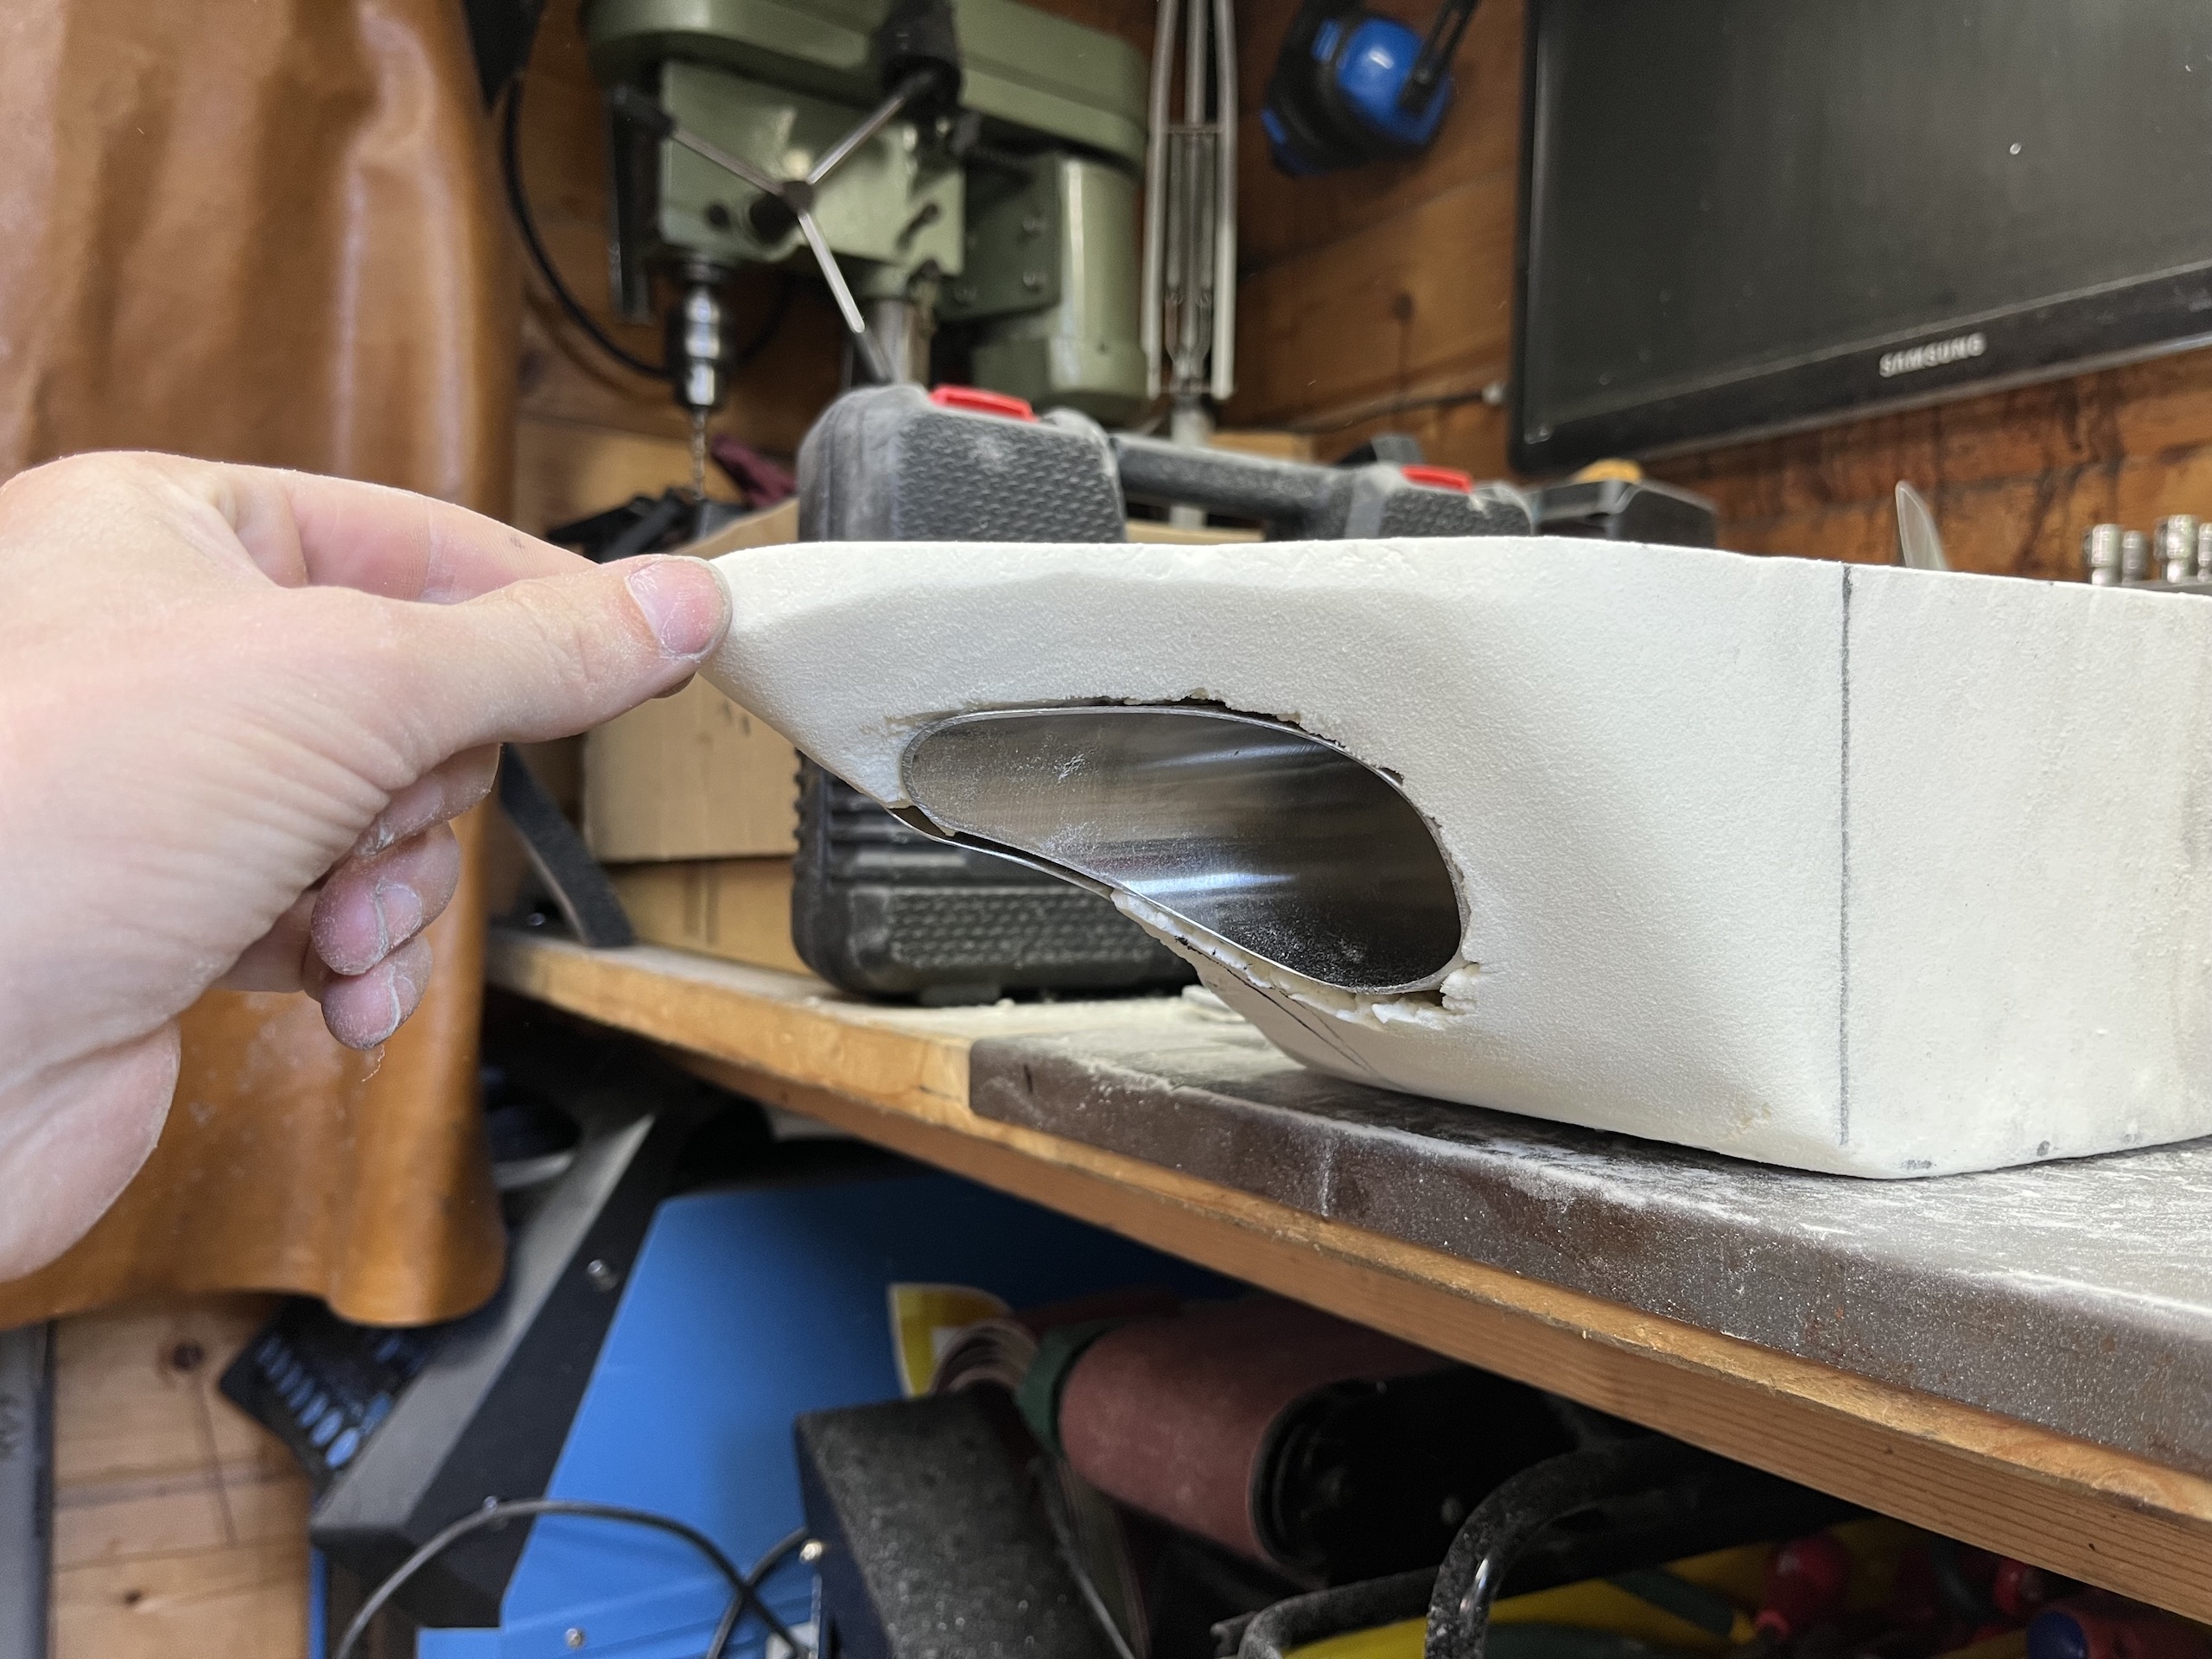
START ON THE CUSTOM EXHAUST SILENCER
Started working on the custom carbon exhaust silencer with double teardrop ends (50mm). This teardrop exhaust tip has been one of the key designs I have had in my head since day one.
All still very rough, starting shaping some foam to get the shape and test fit it on the bike. With that foam model I can create a puck and mold to make the carbon shell for the silencer.
Going to be a challenge to get everything fitted beneath the seat.
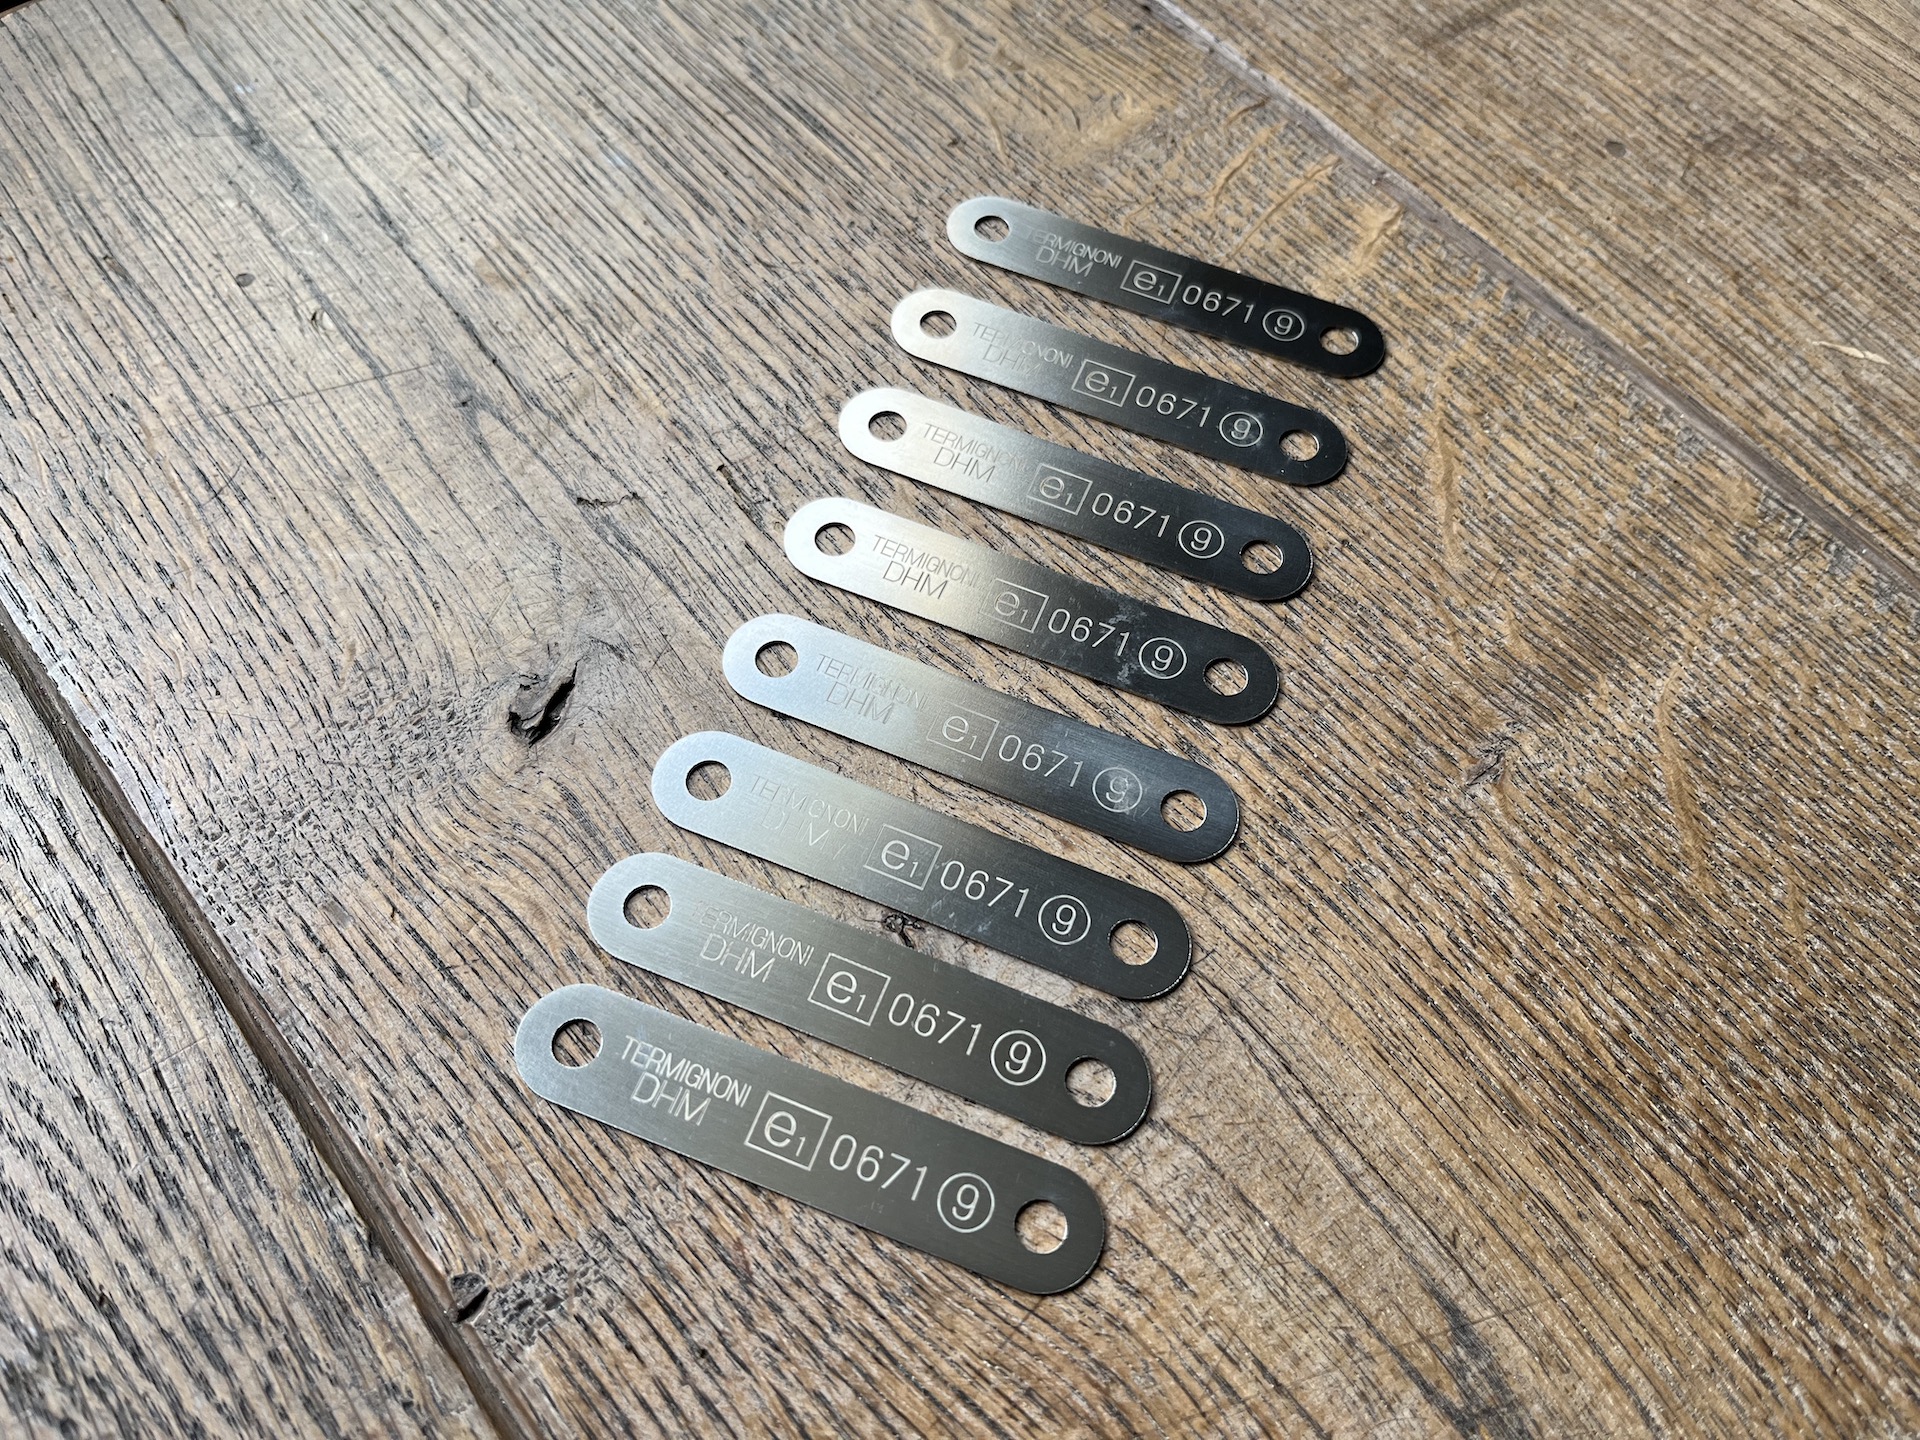
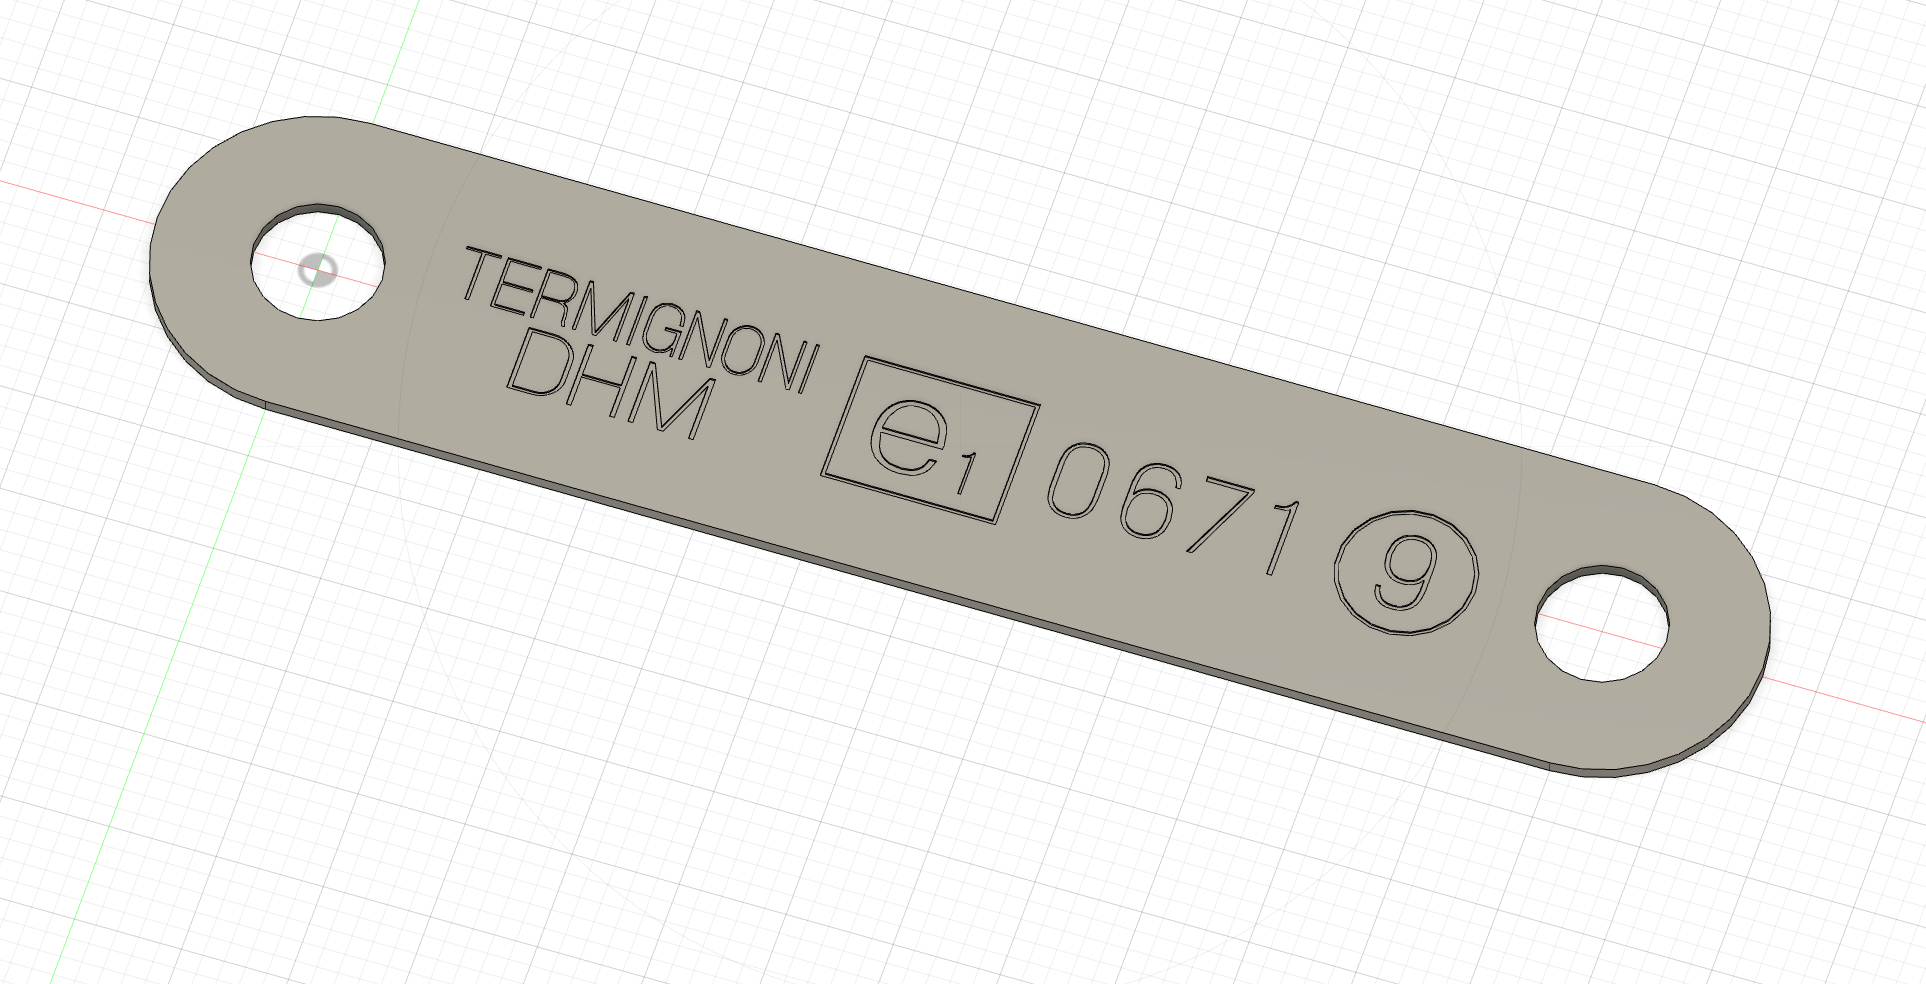
EXHAUST E-MARK PLATES
Stainless lasercut and laser engraved e-mark plates for the exhaust silencer.
Im building a custom exhaust silencer for this bike, and to make it look even somewhat legal these e-mark plates will be mounted. A direct copy from a Termignoni Hypermotard 2-2 silencer.
Lets not have a discussion if this is allowed because this is a grey area…

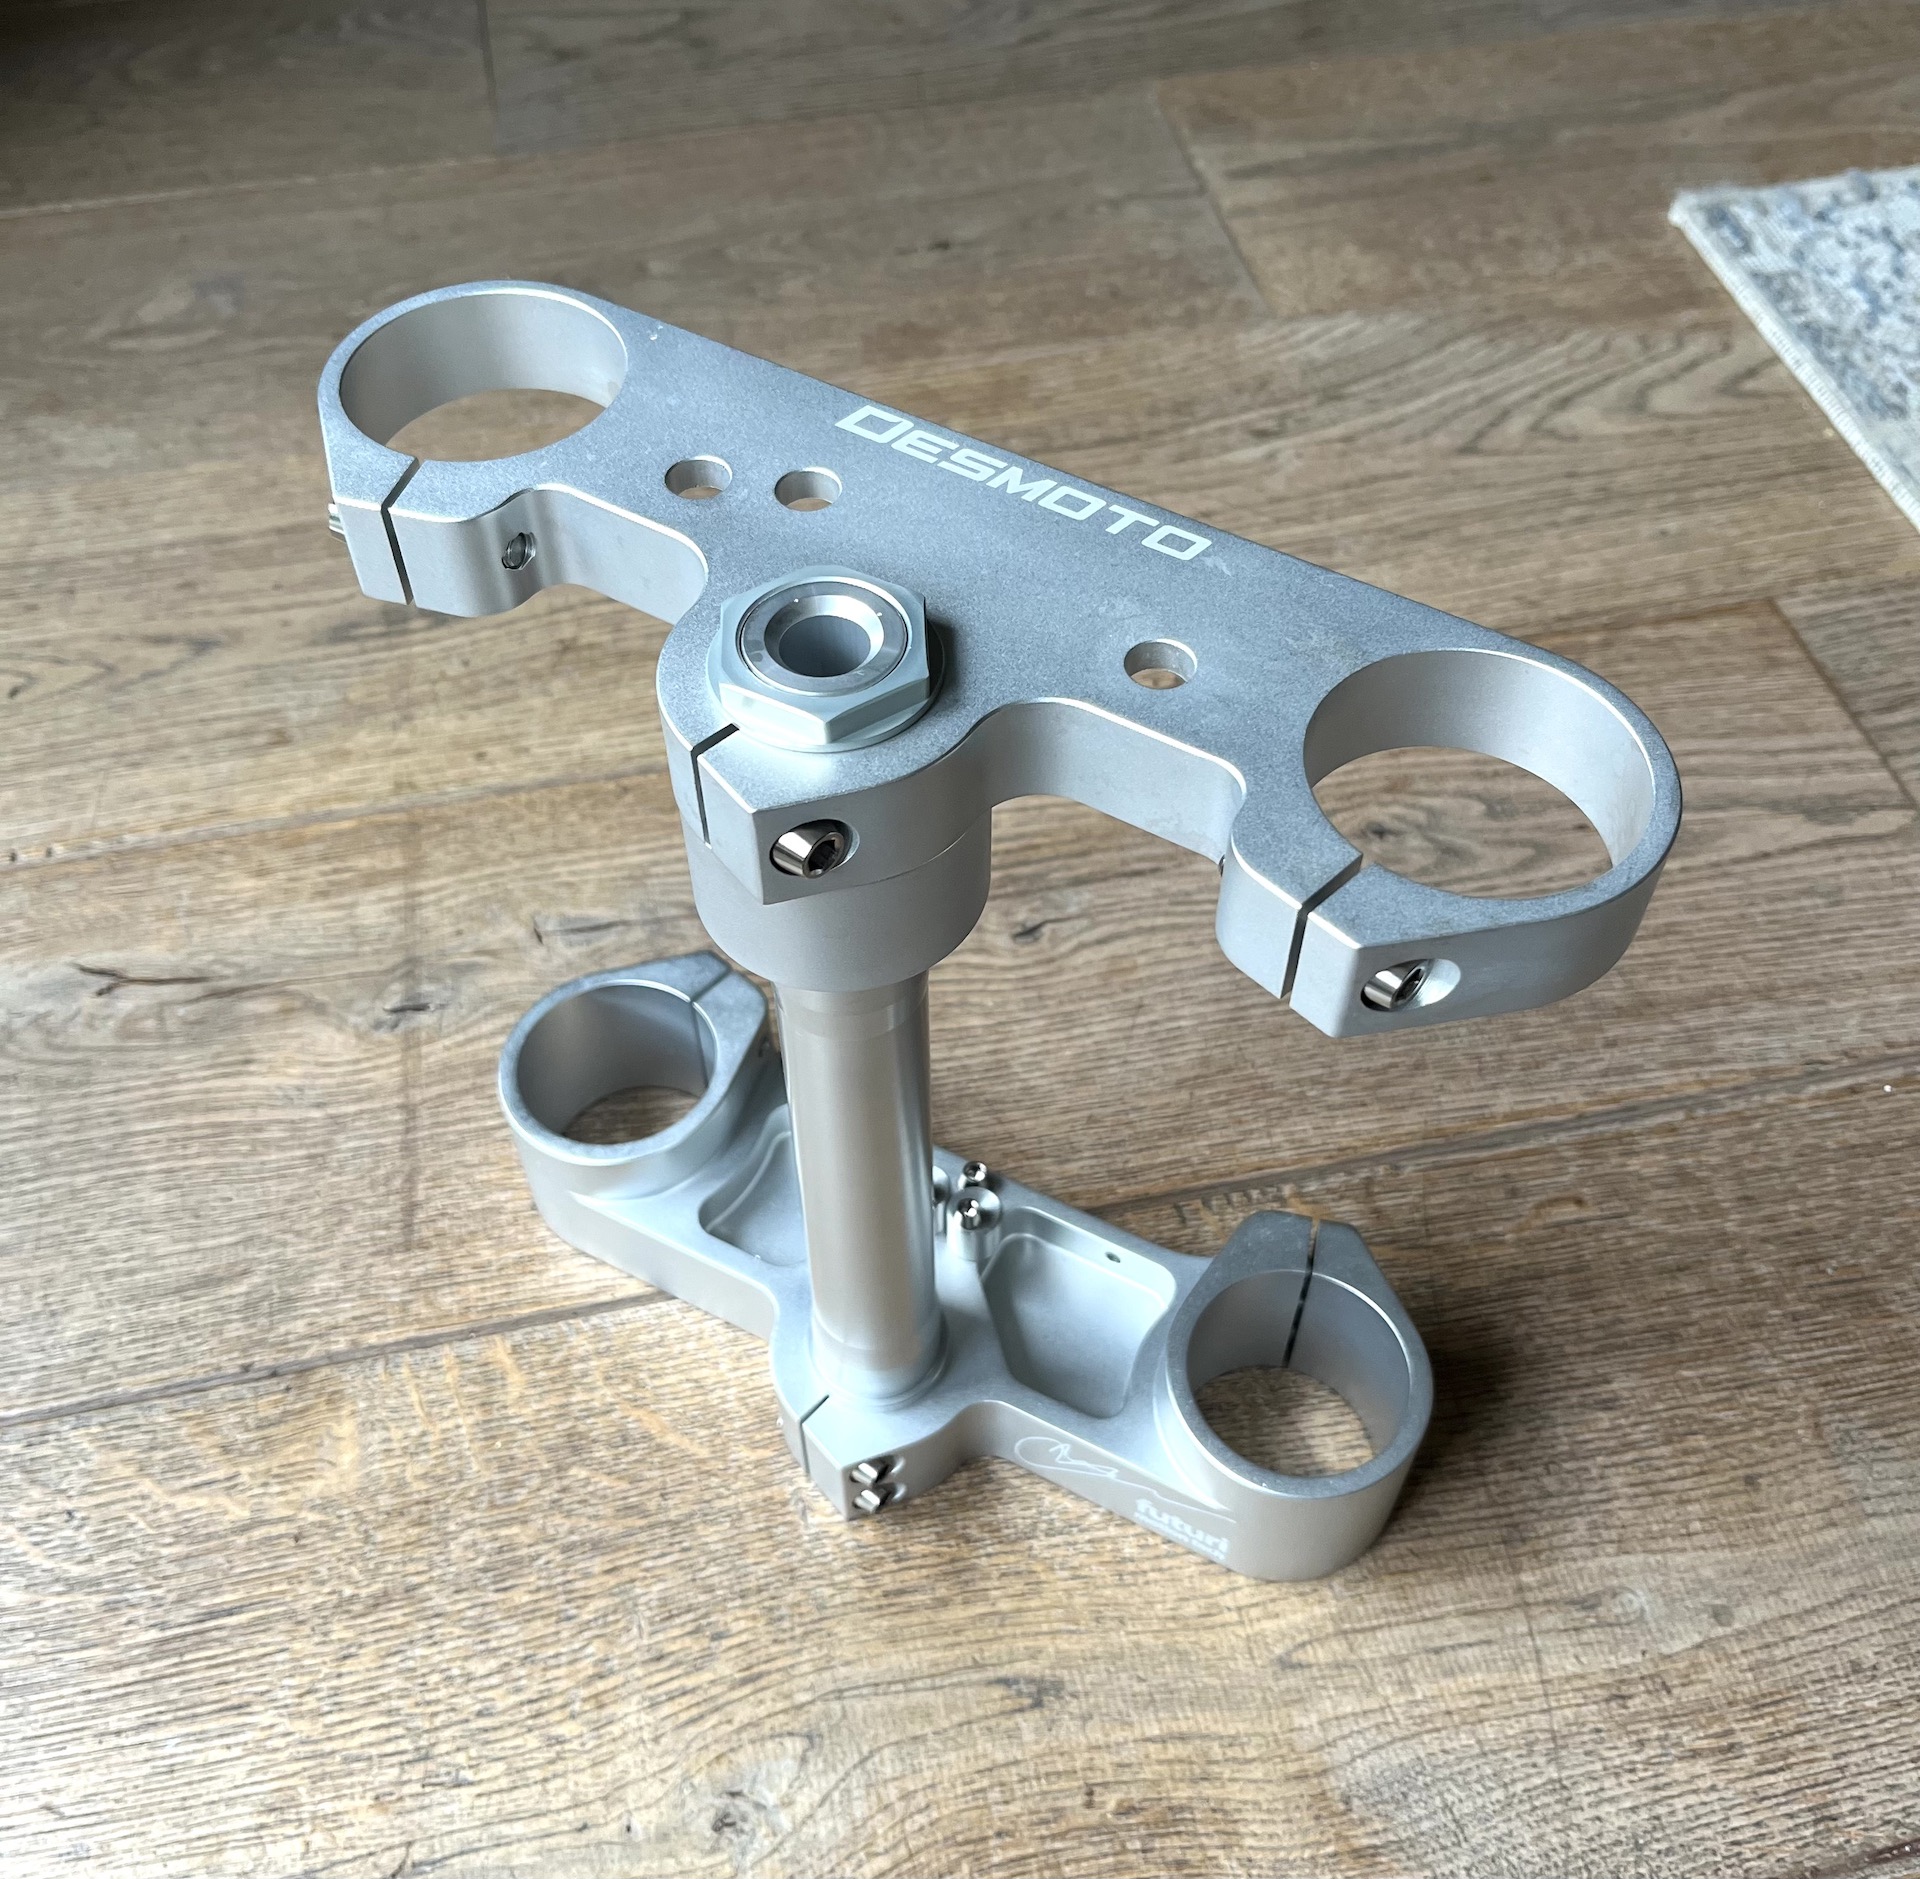
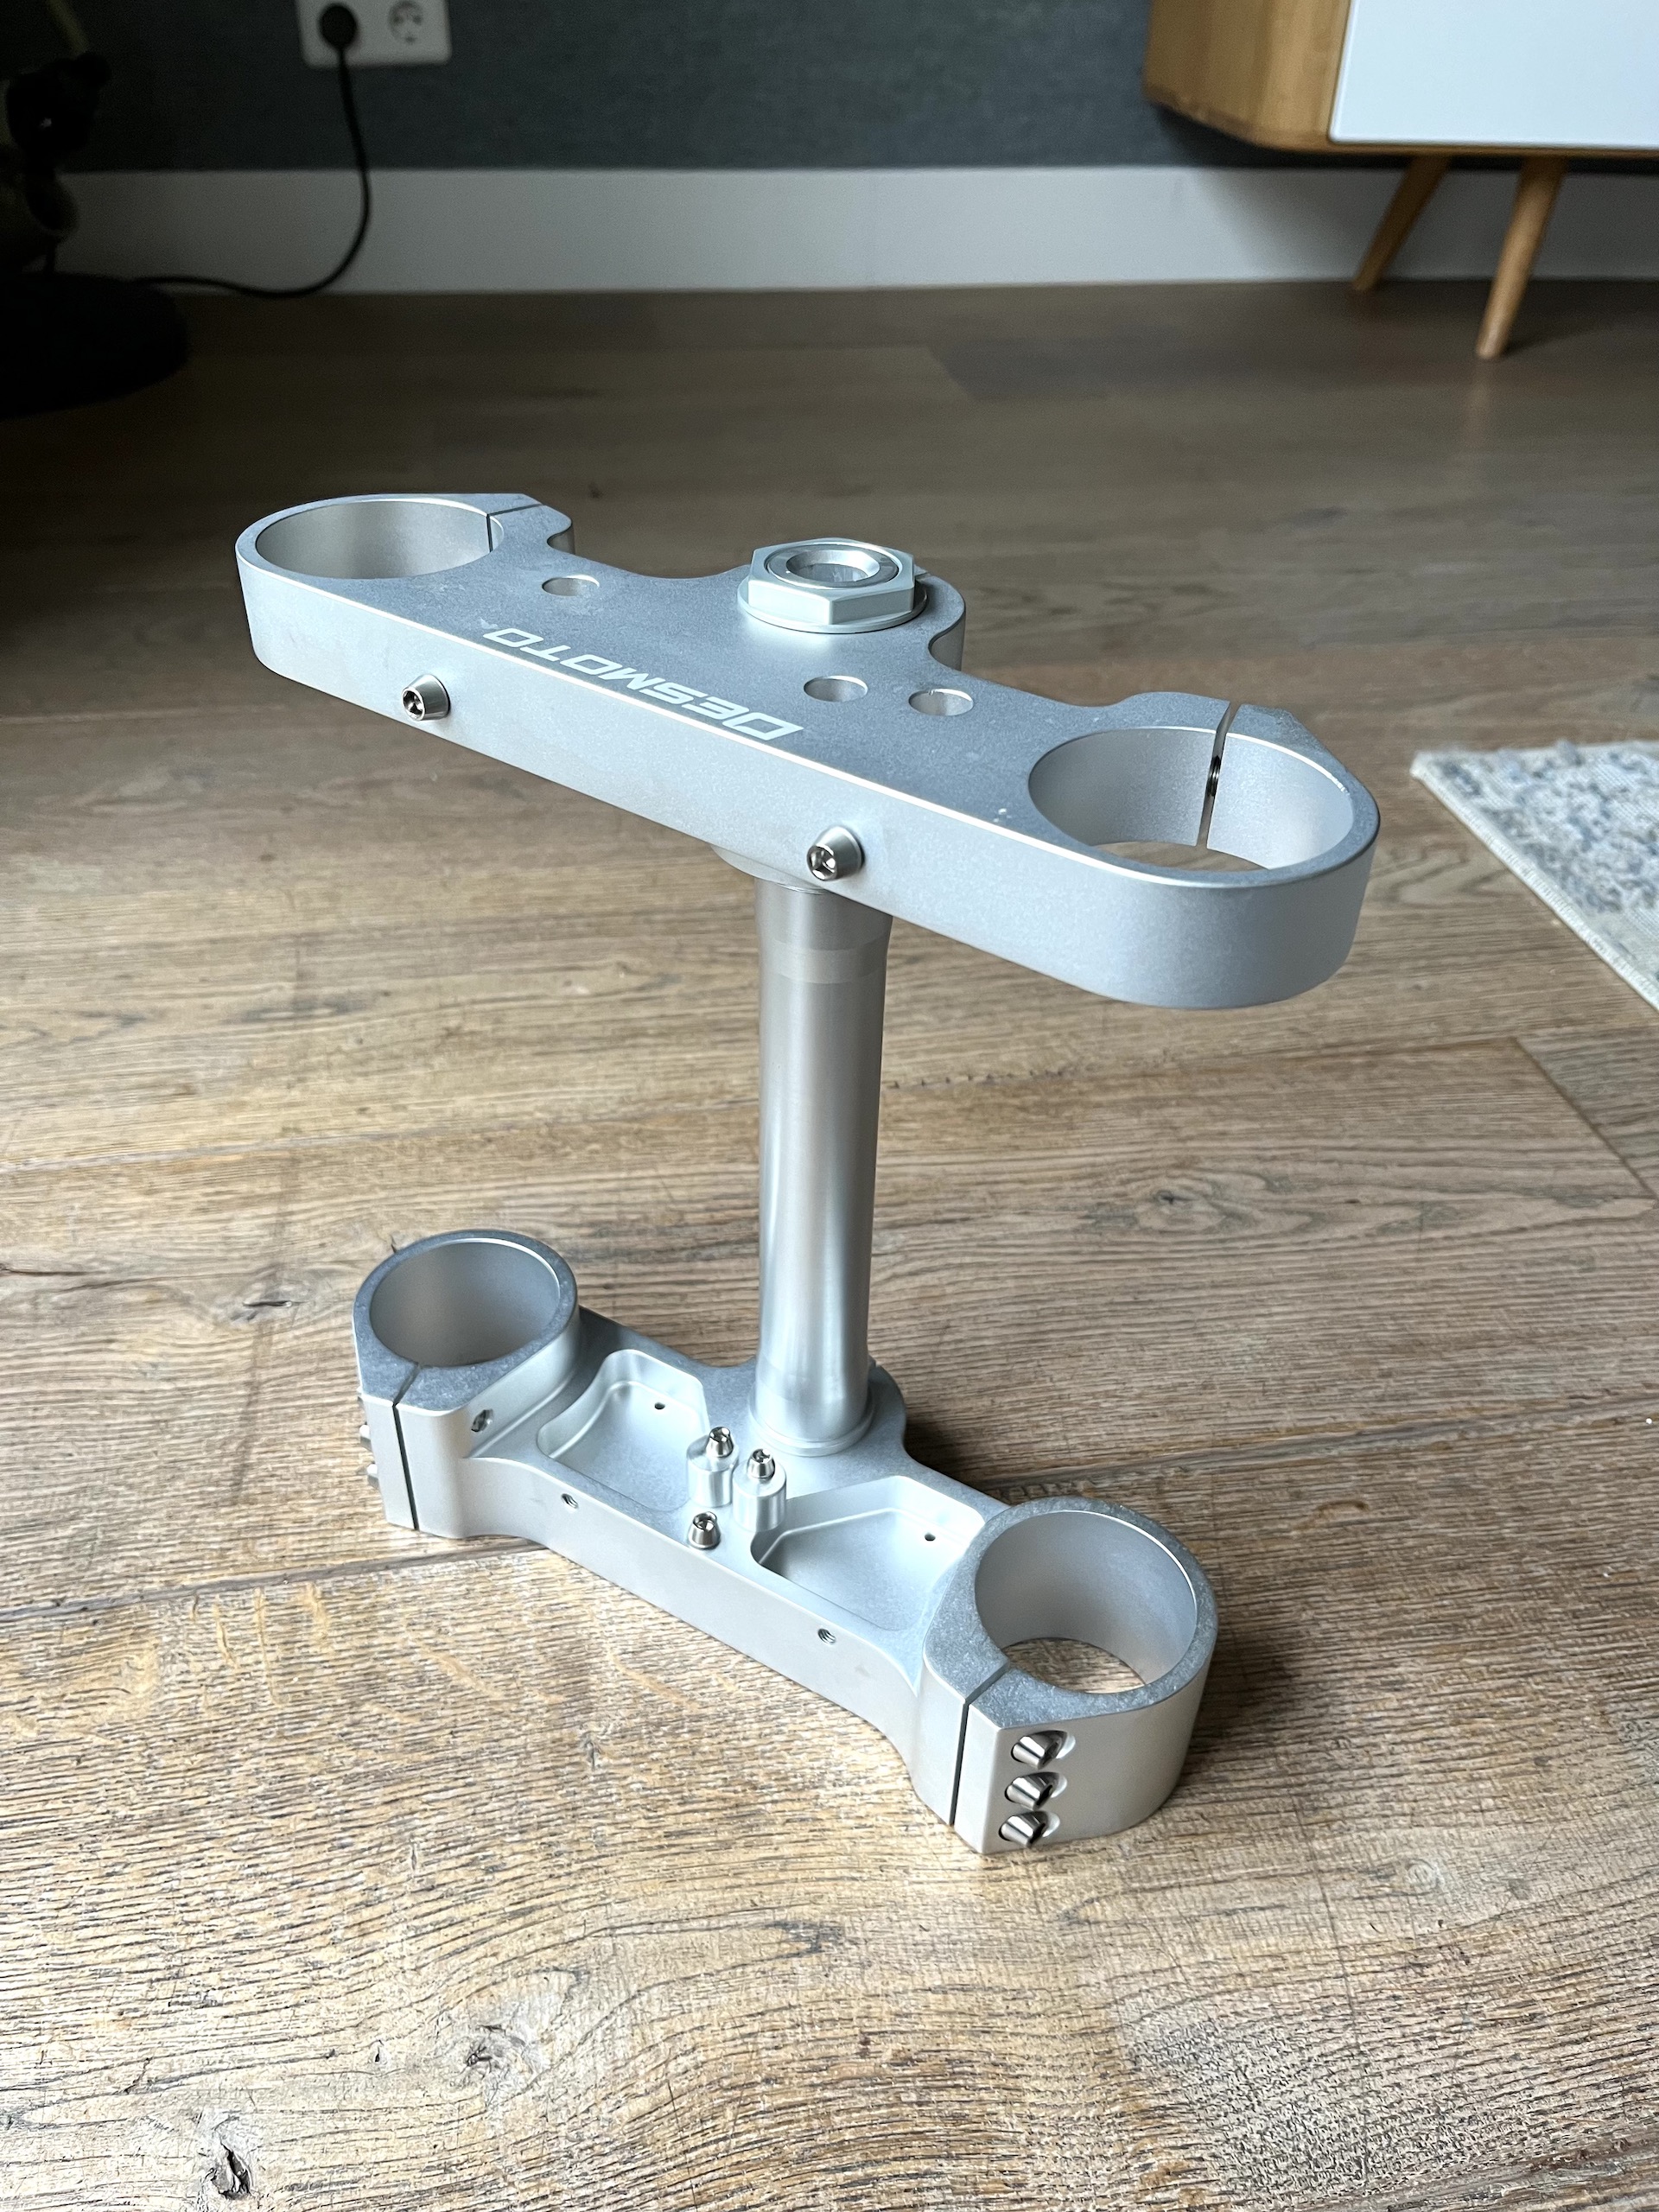
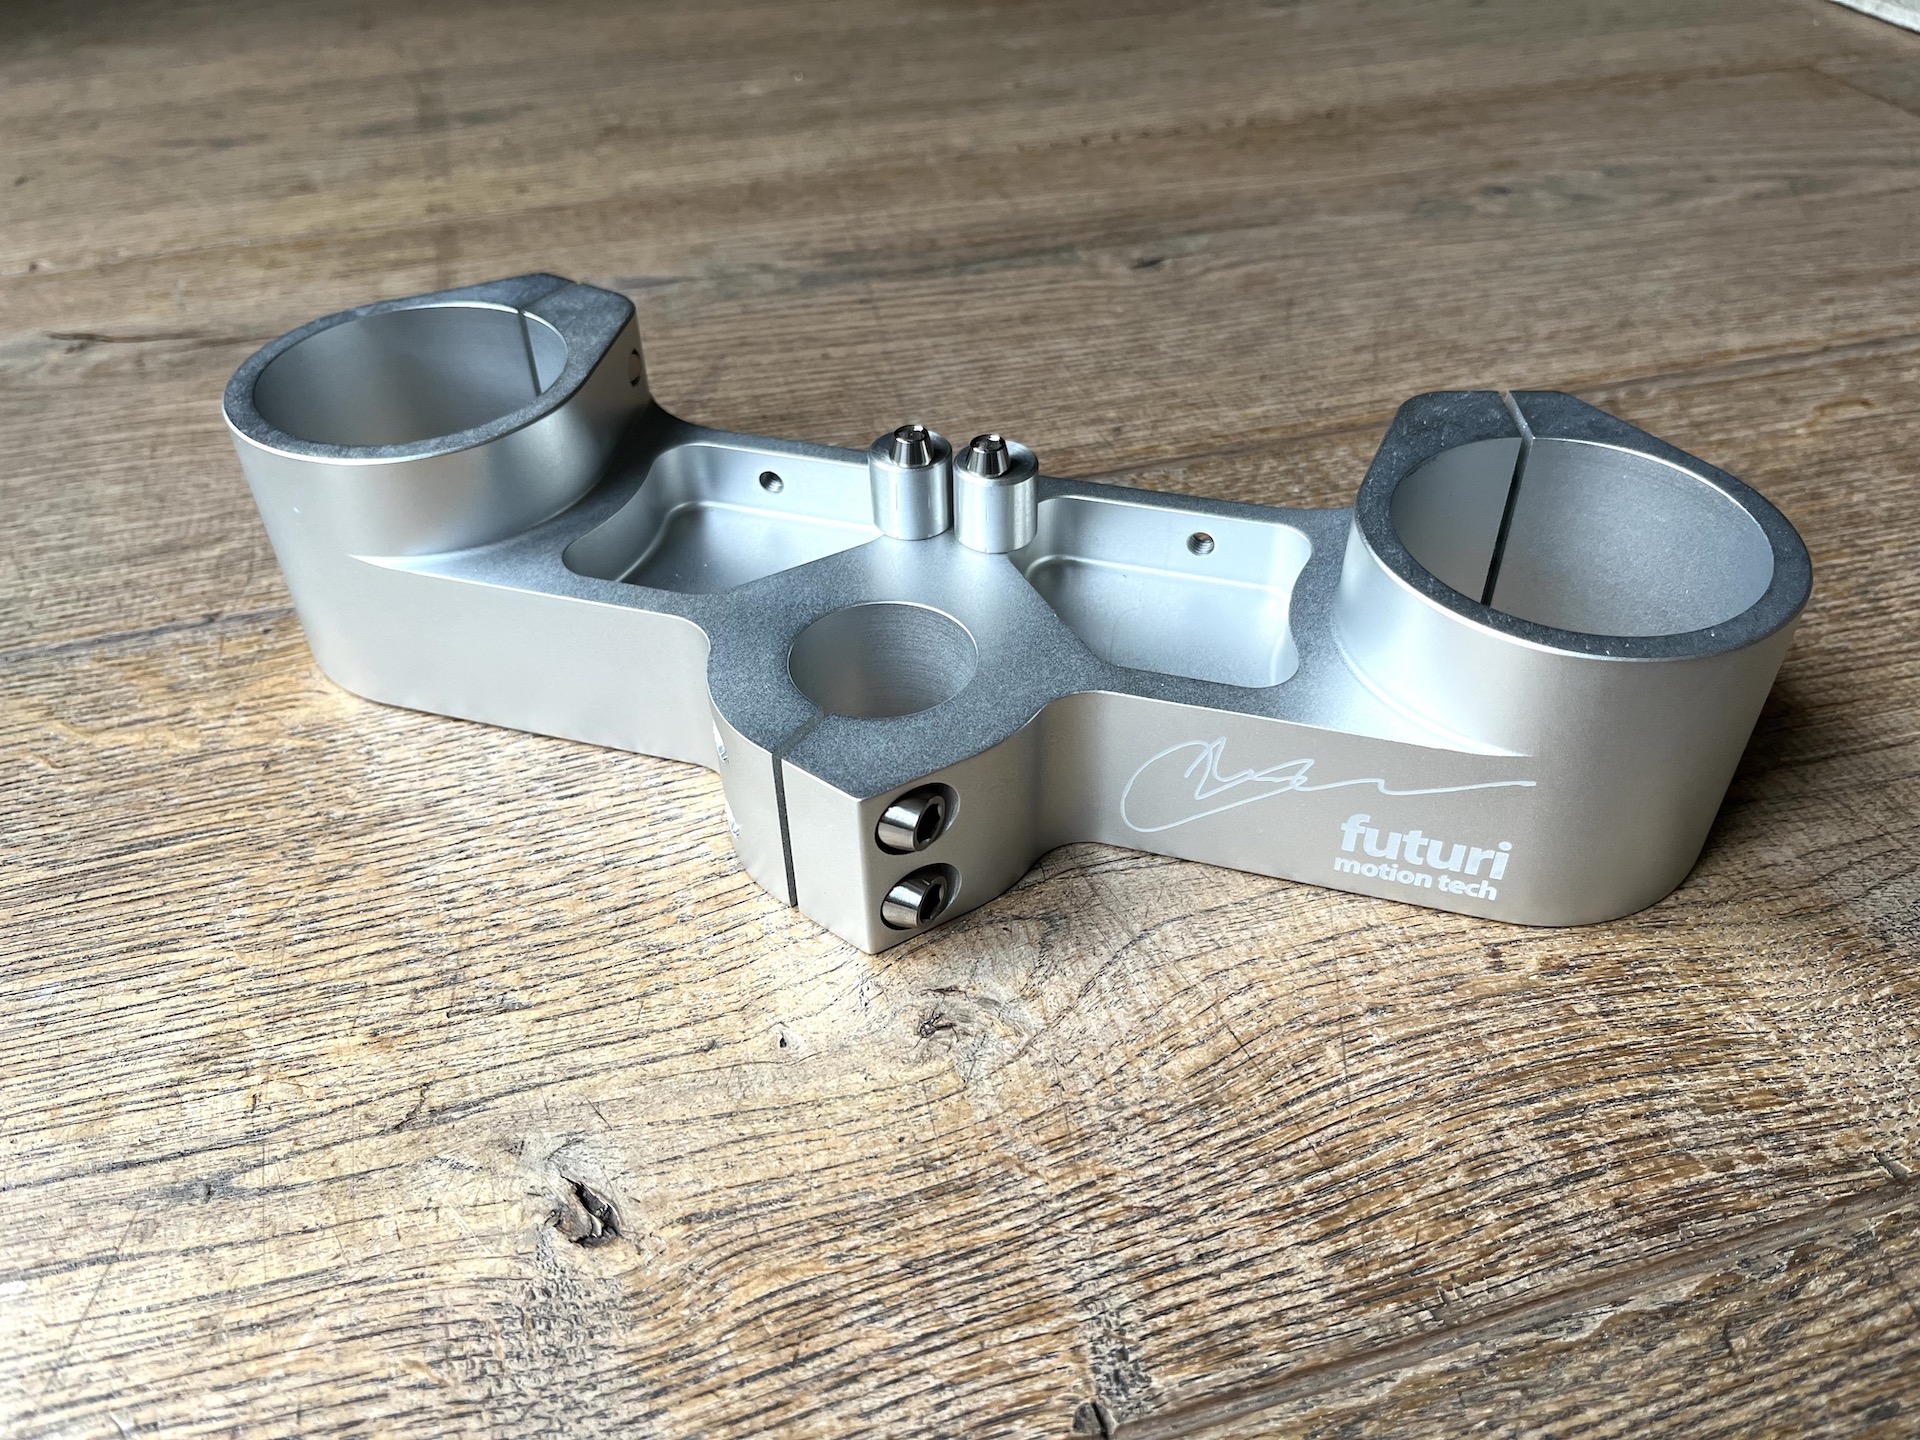
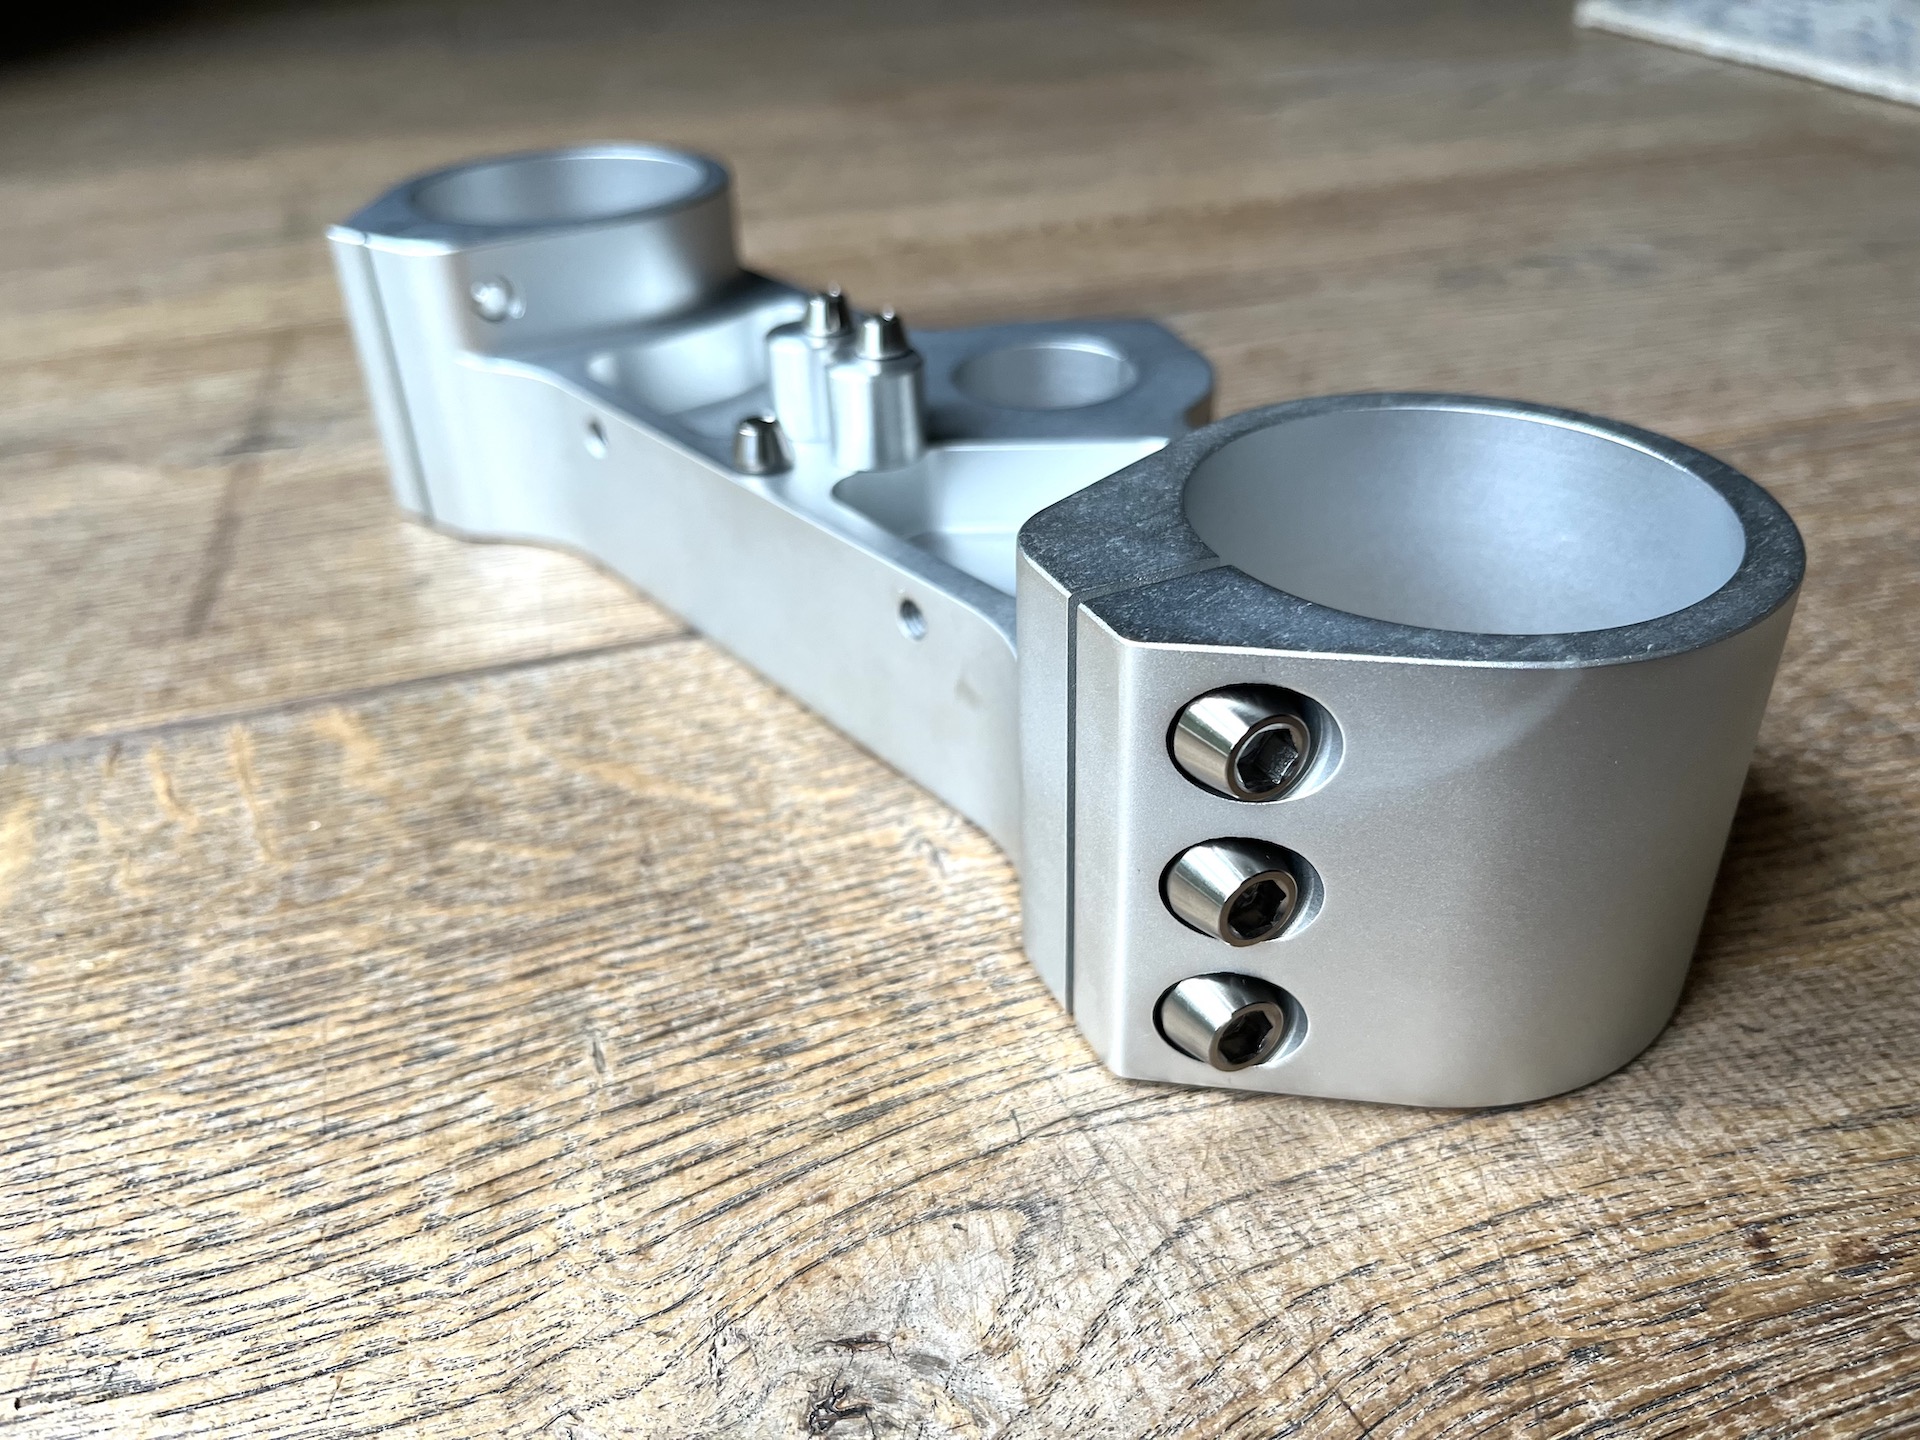
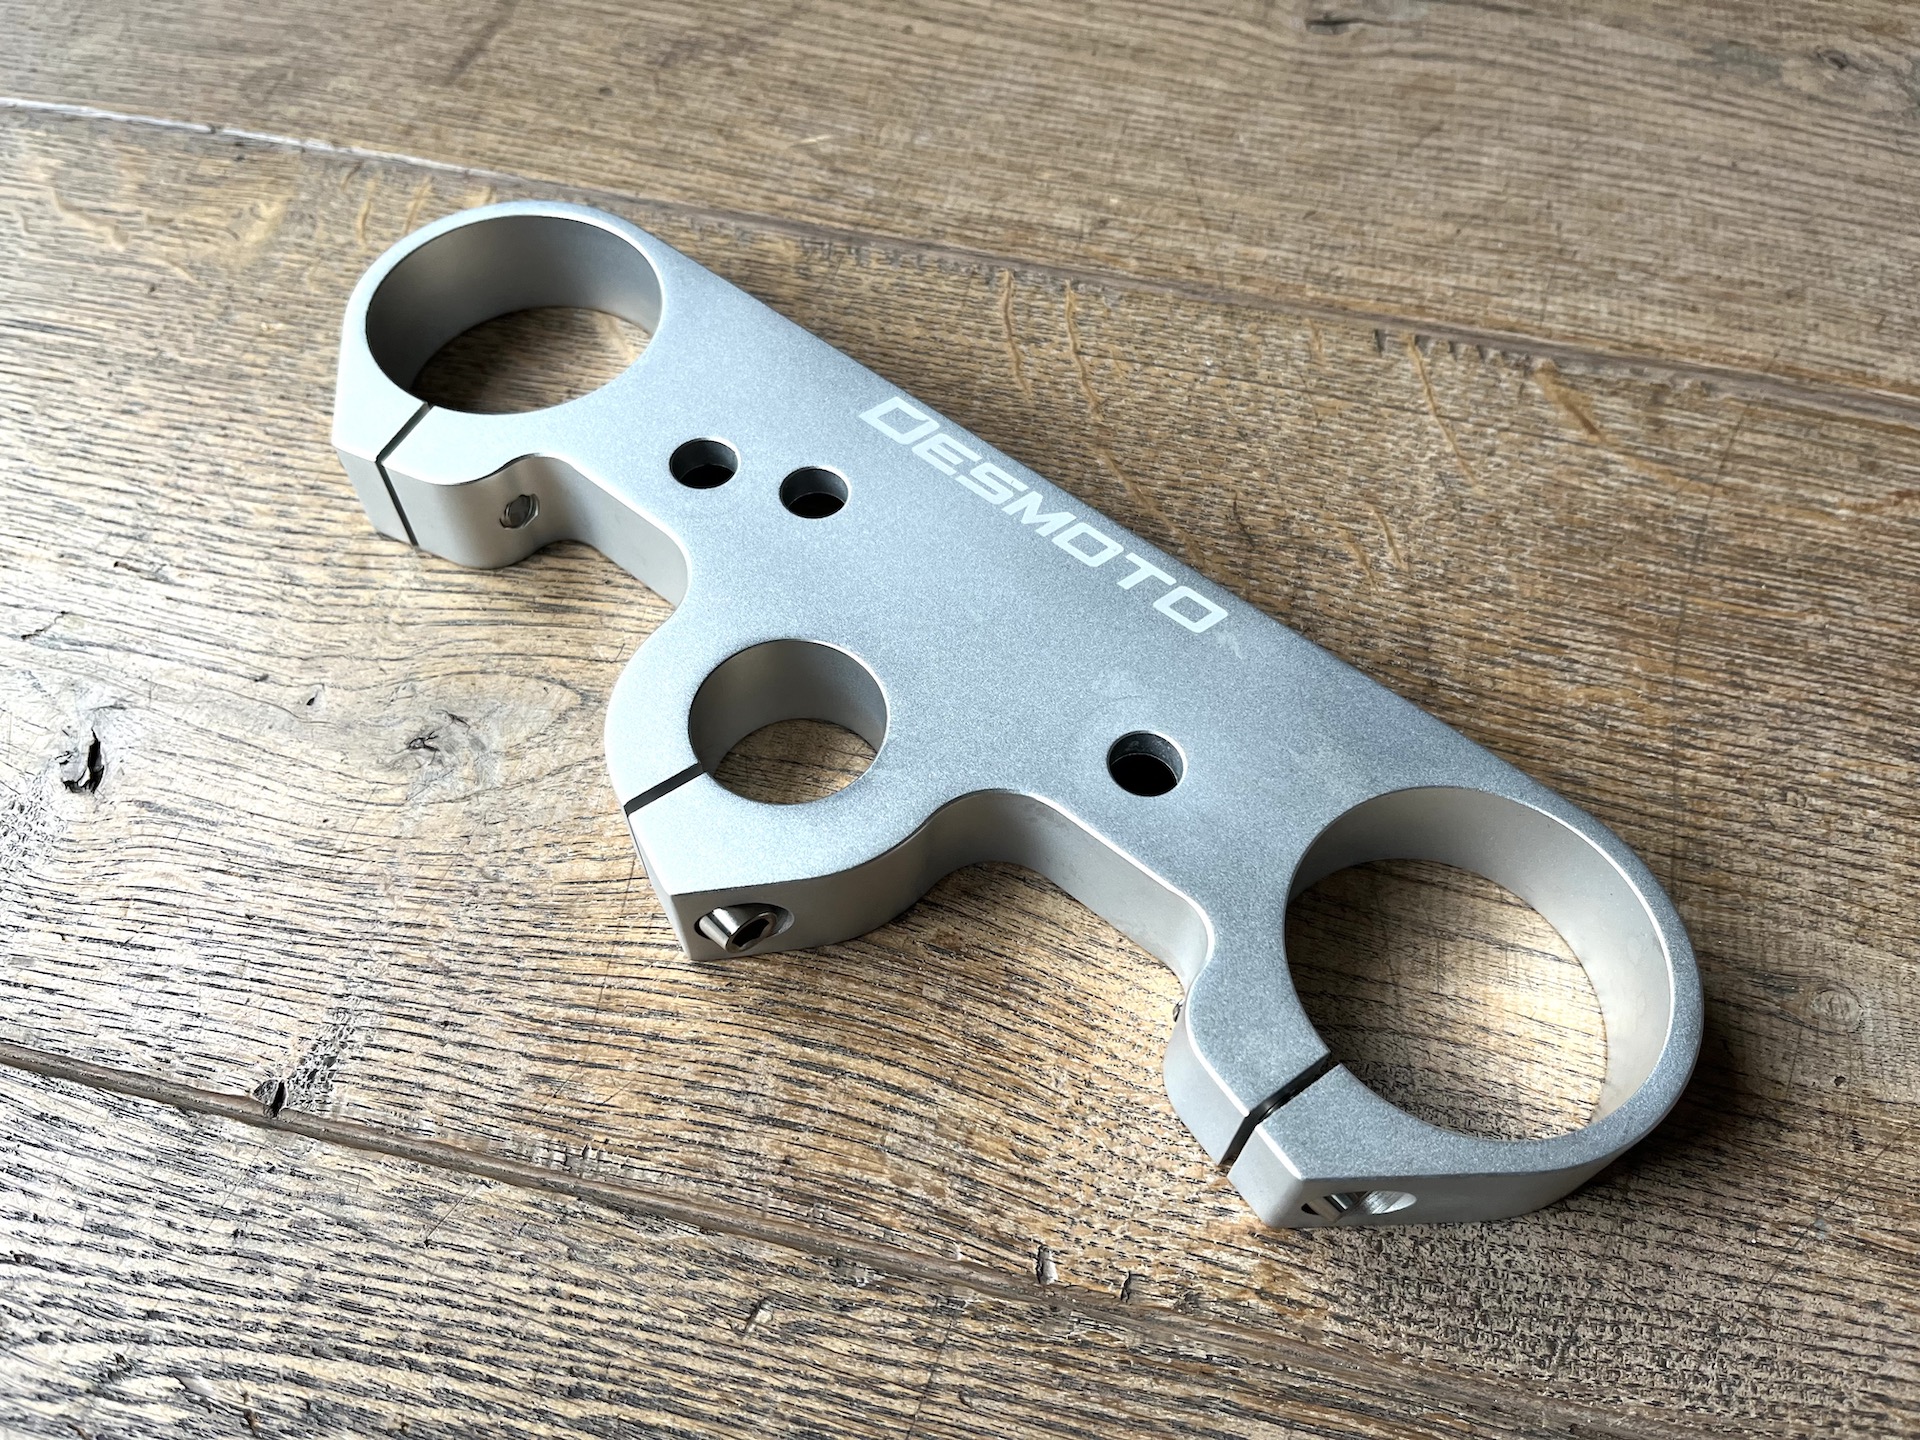
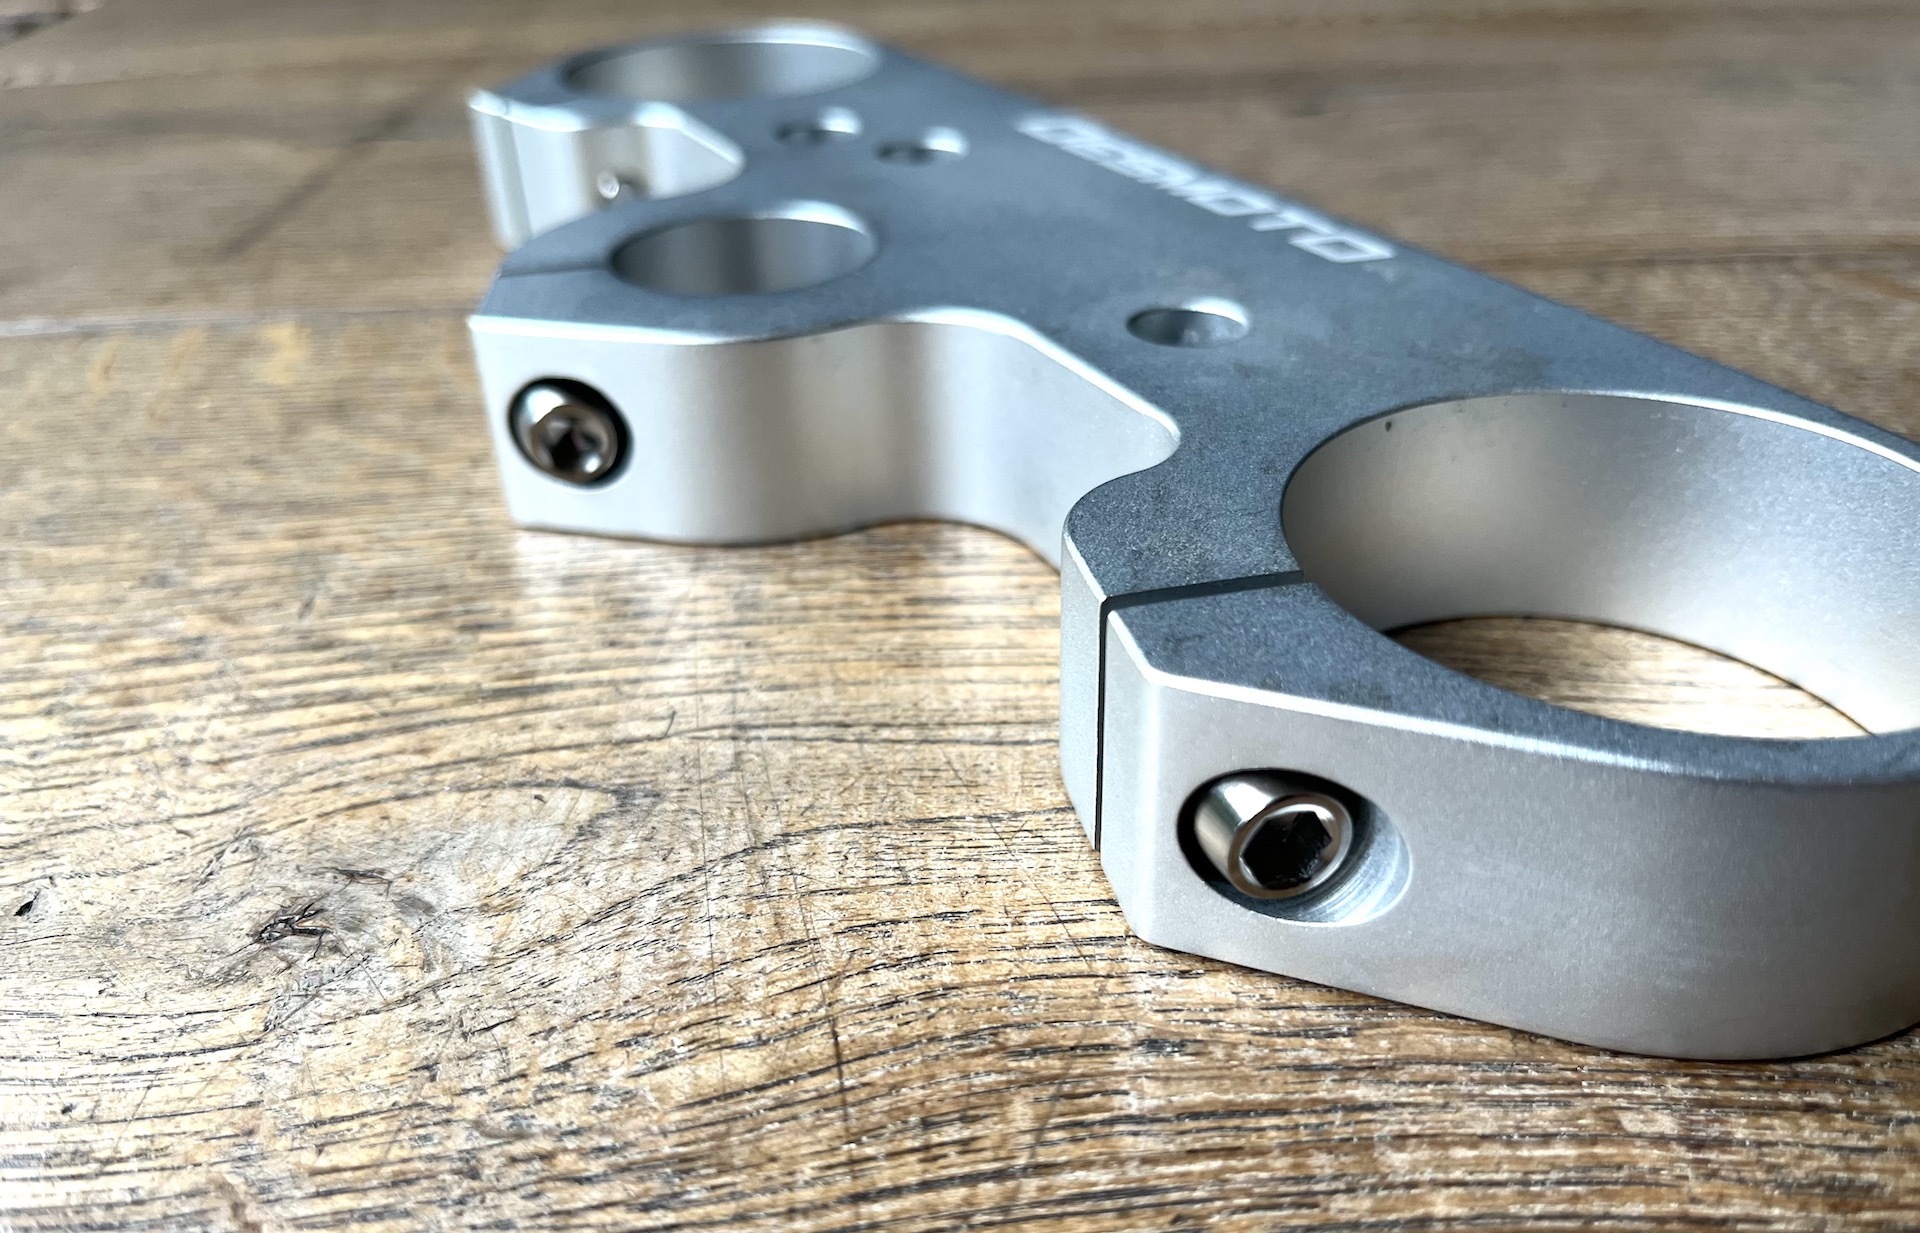
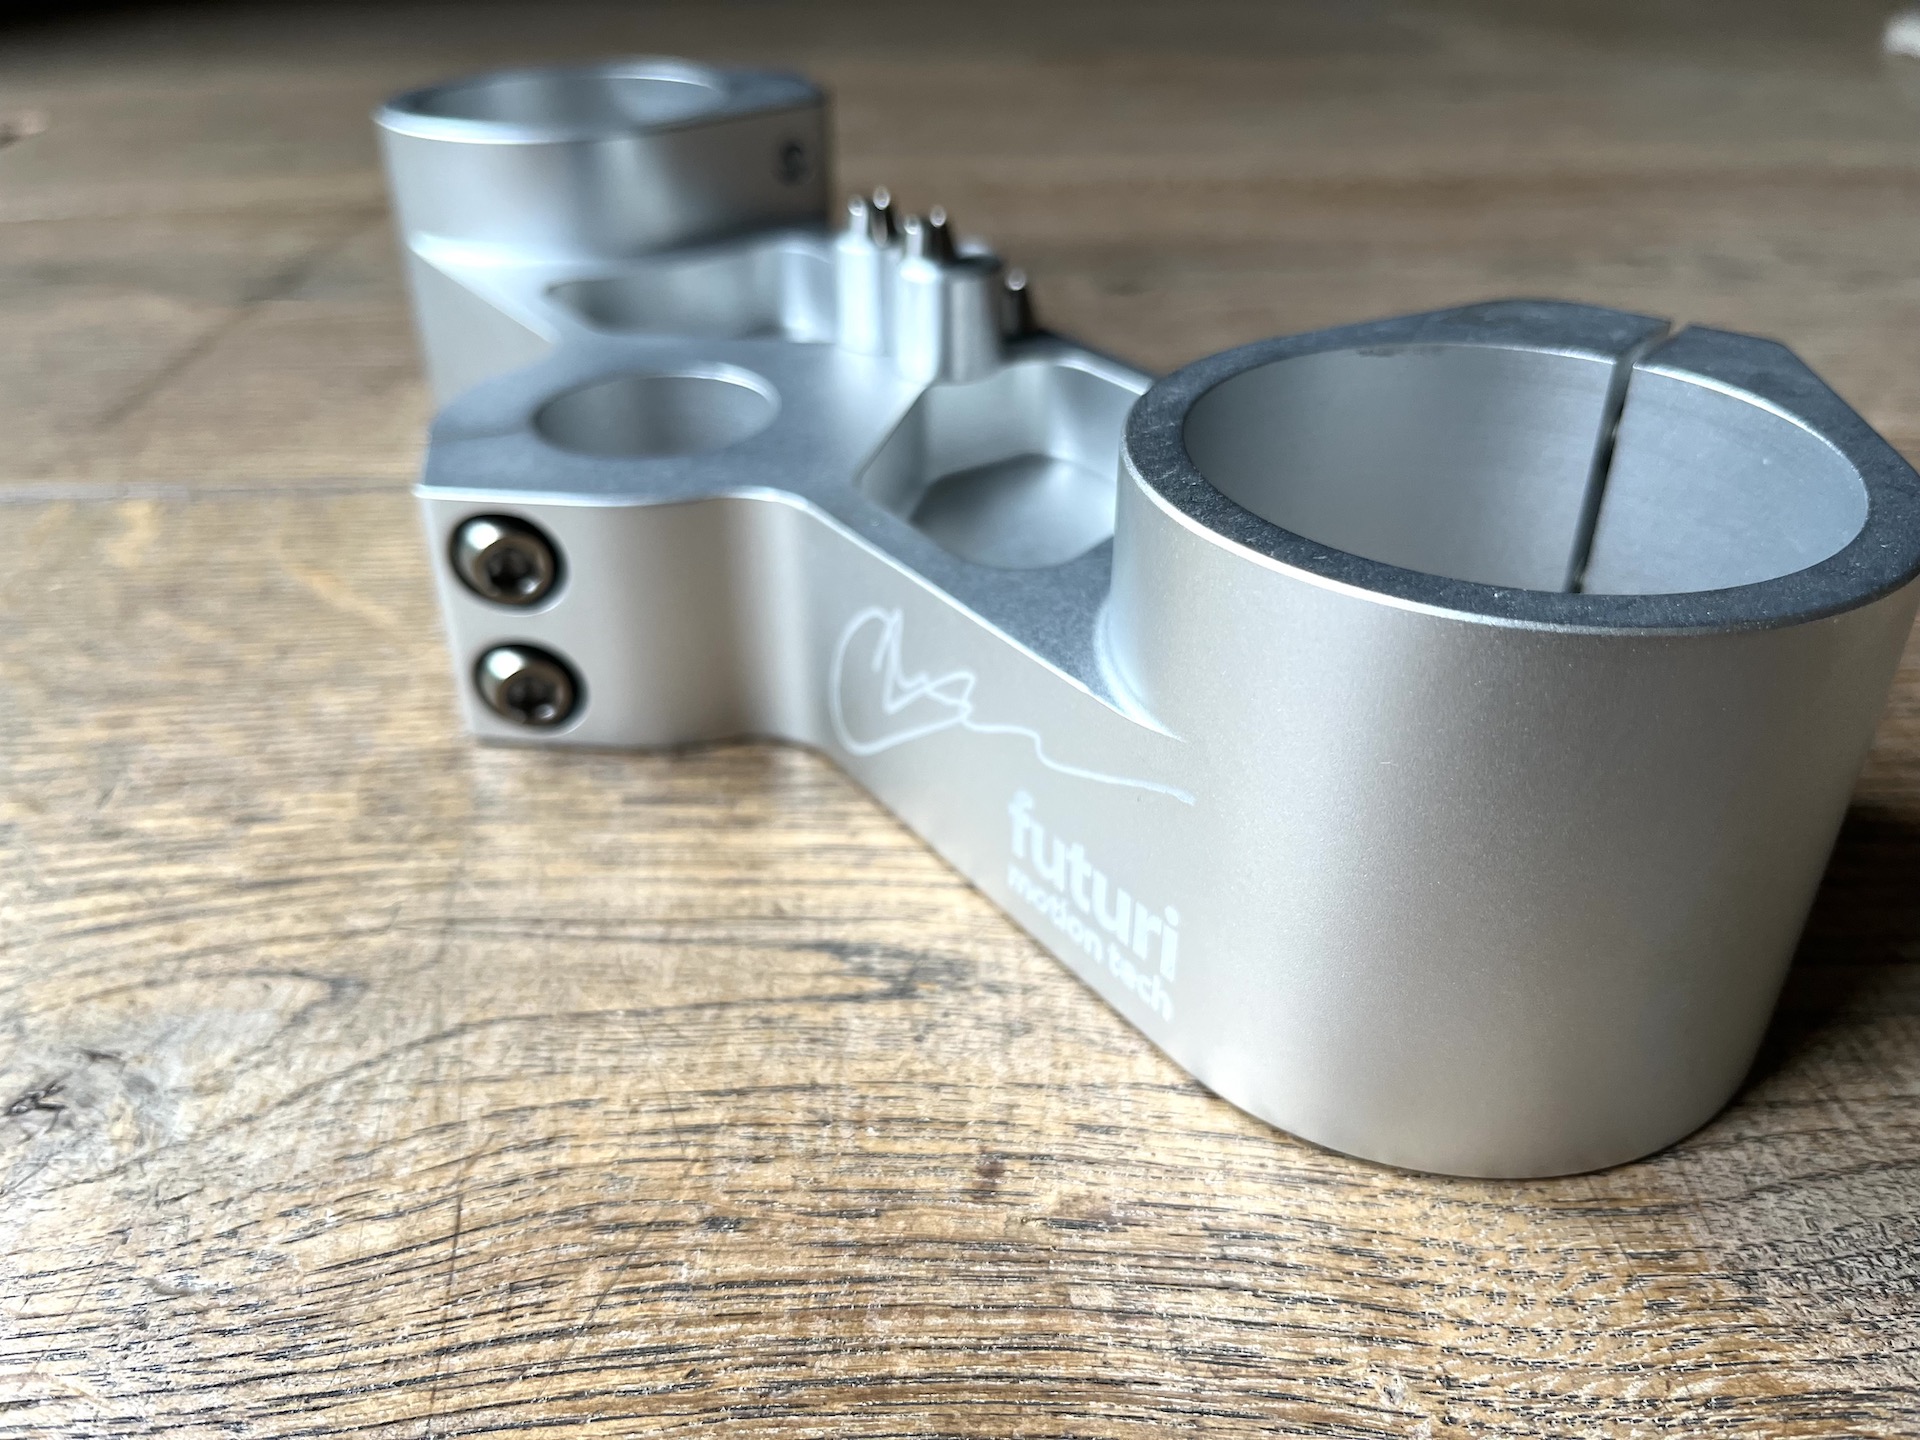
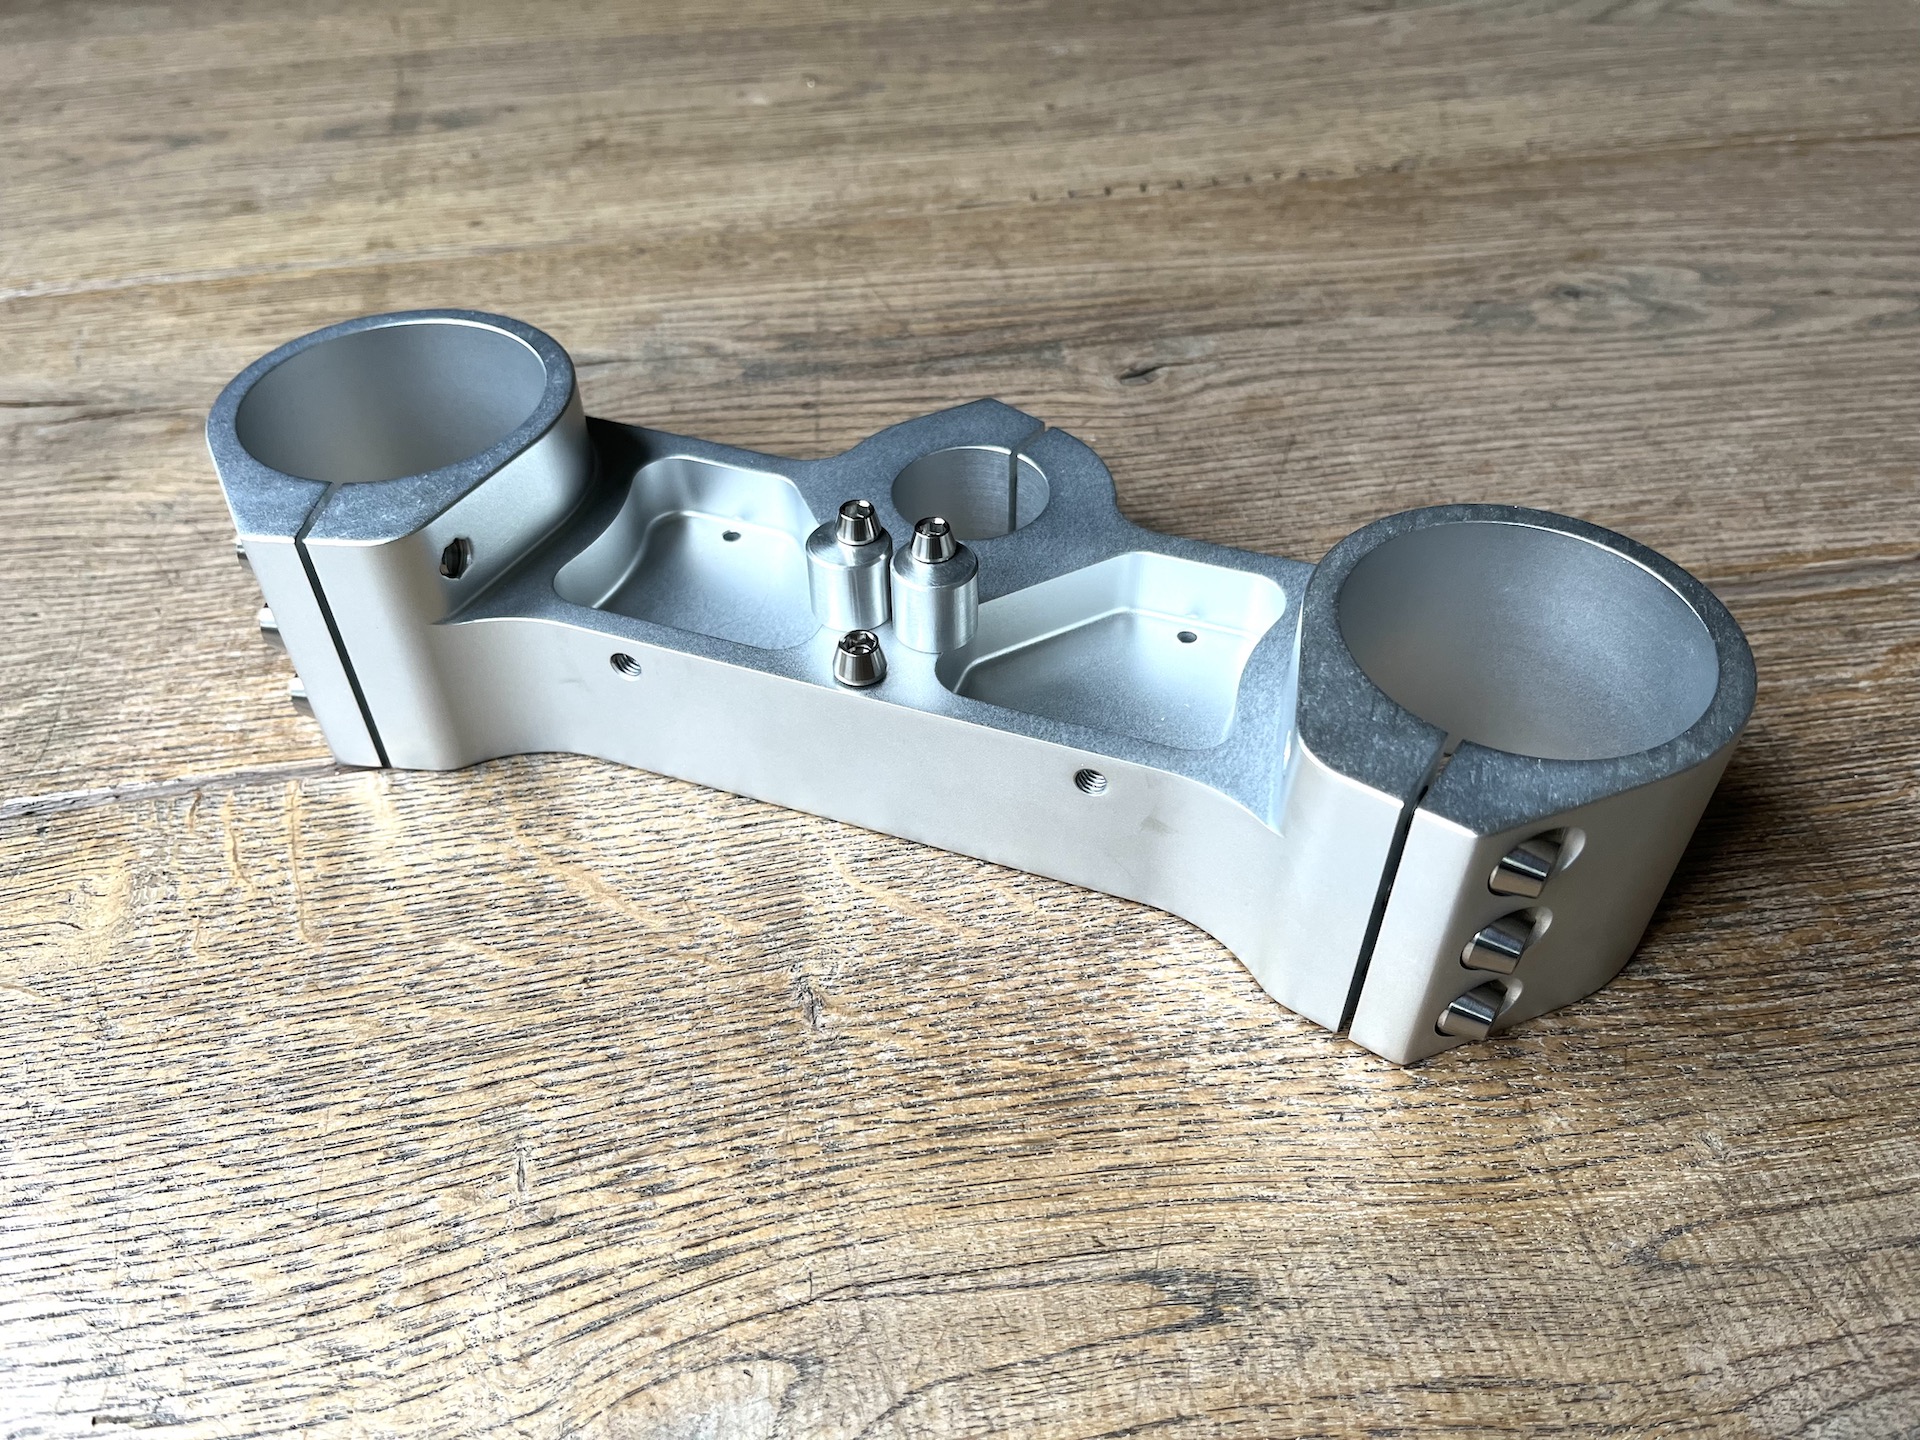
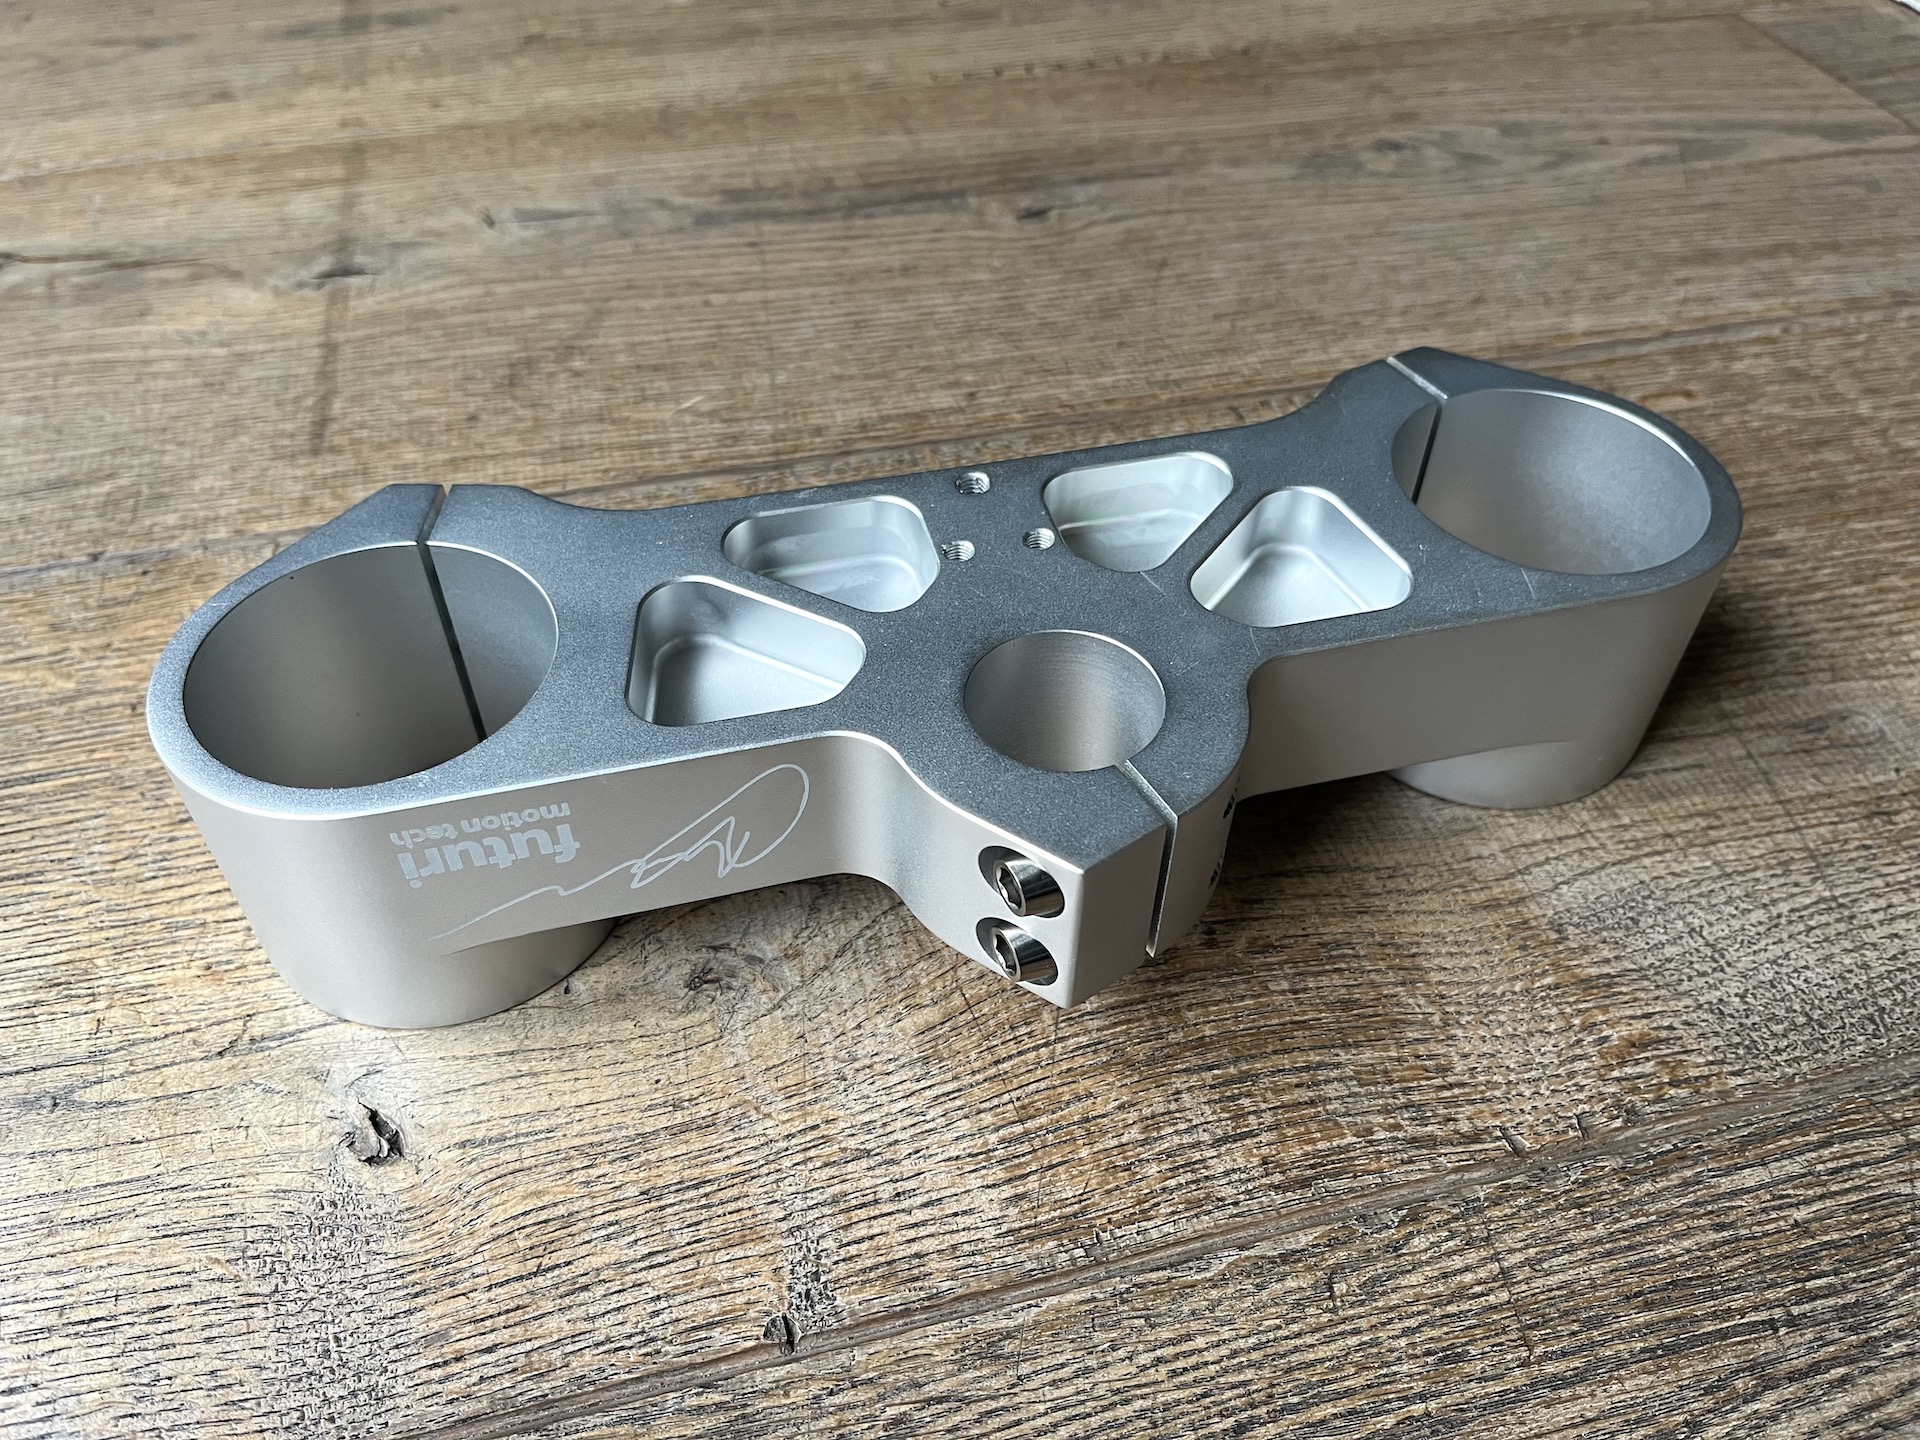
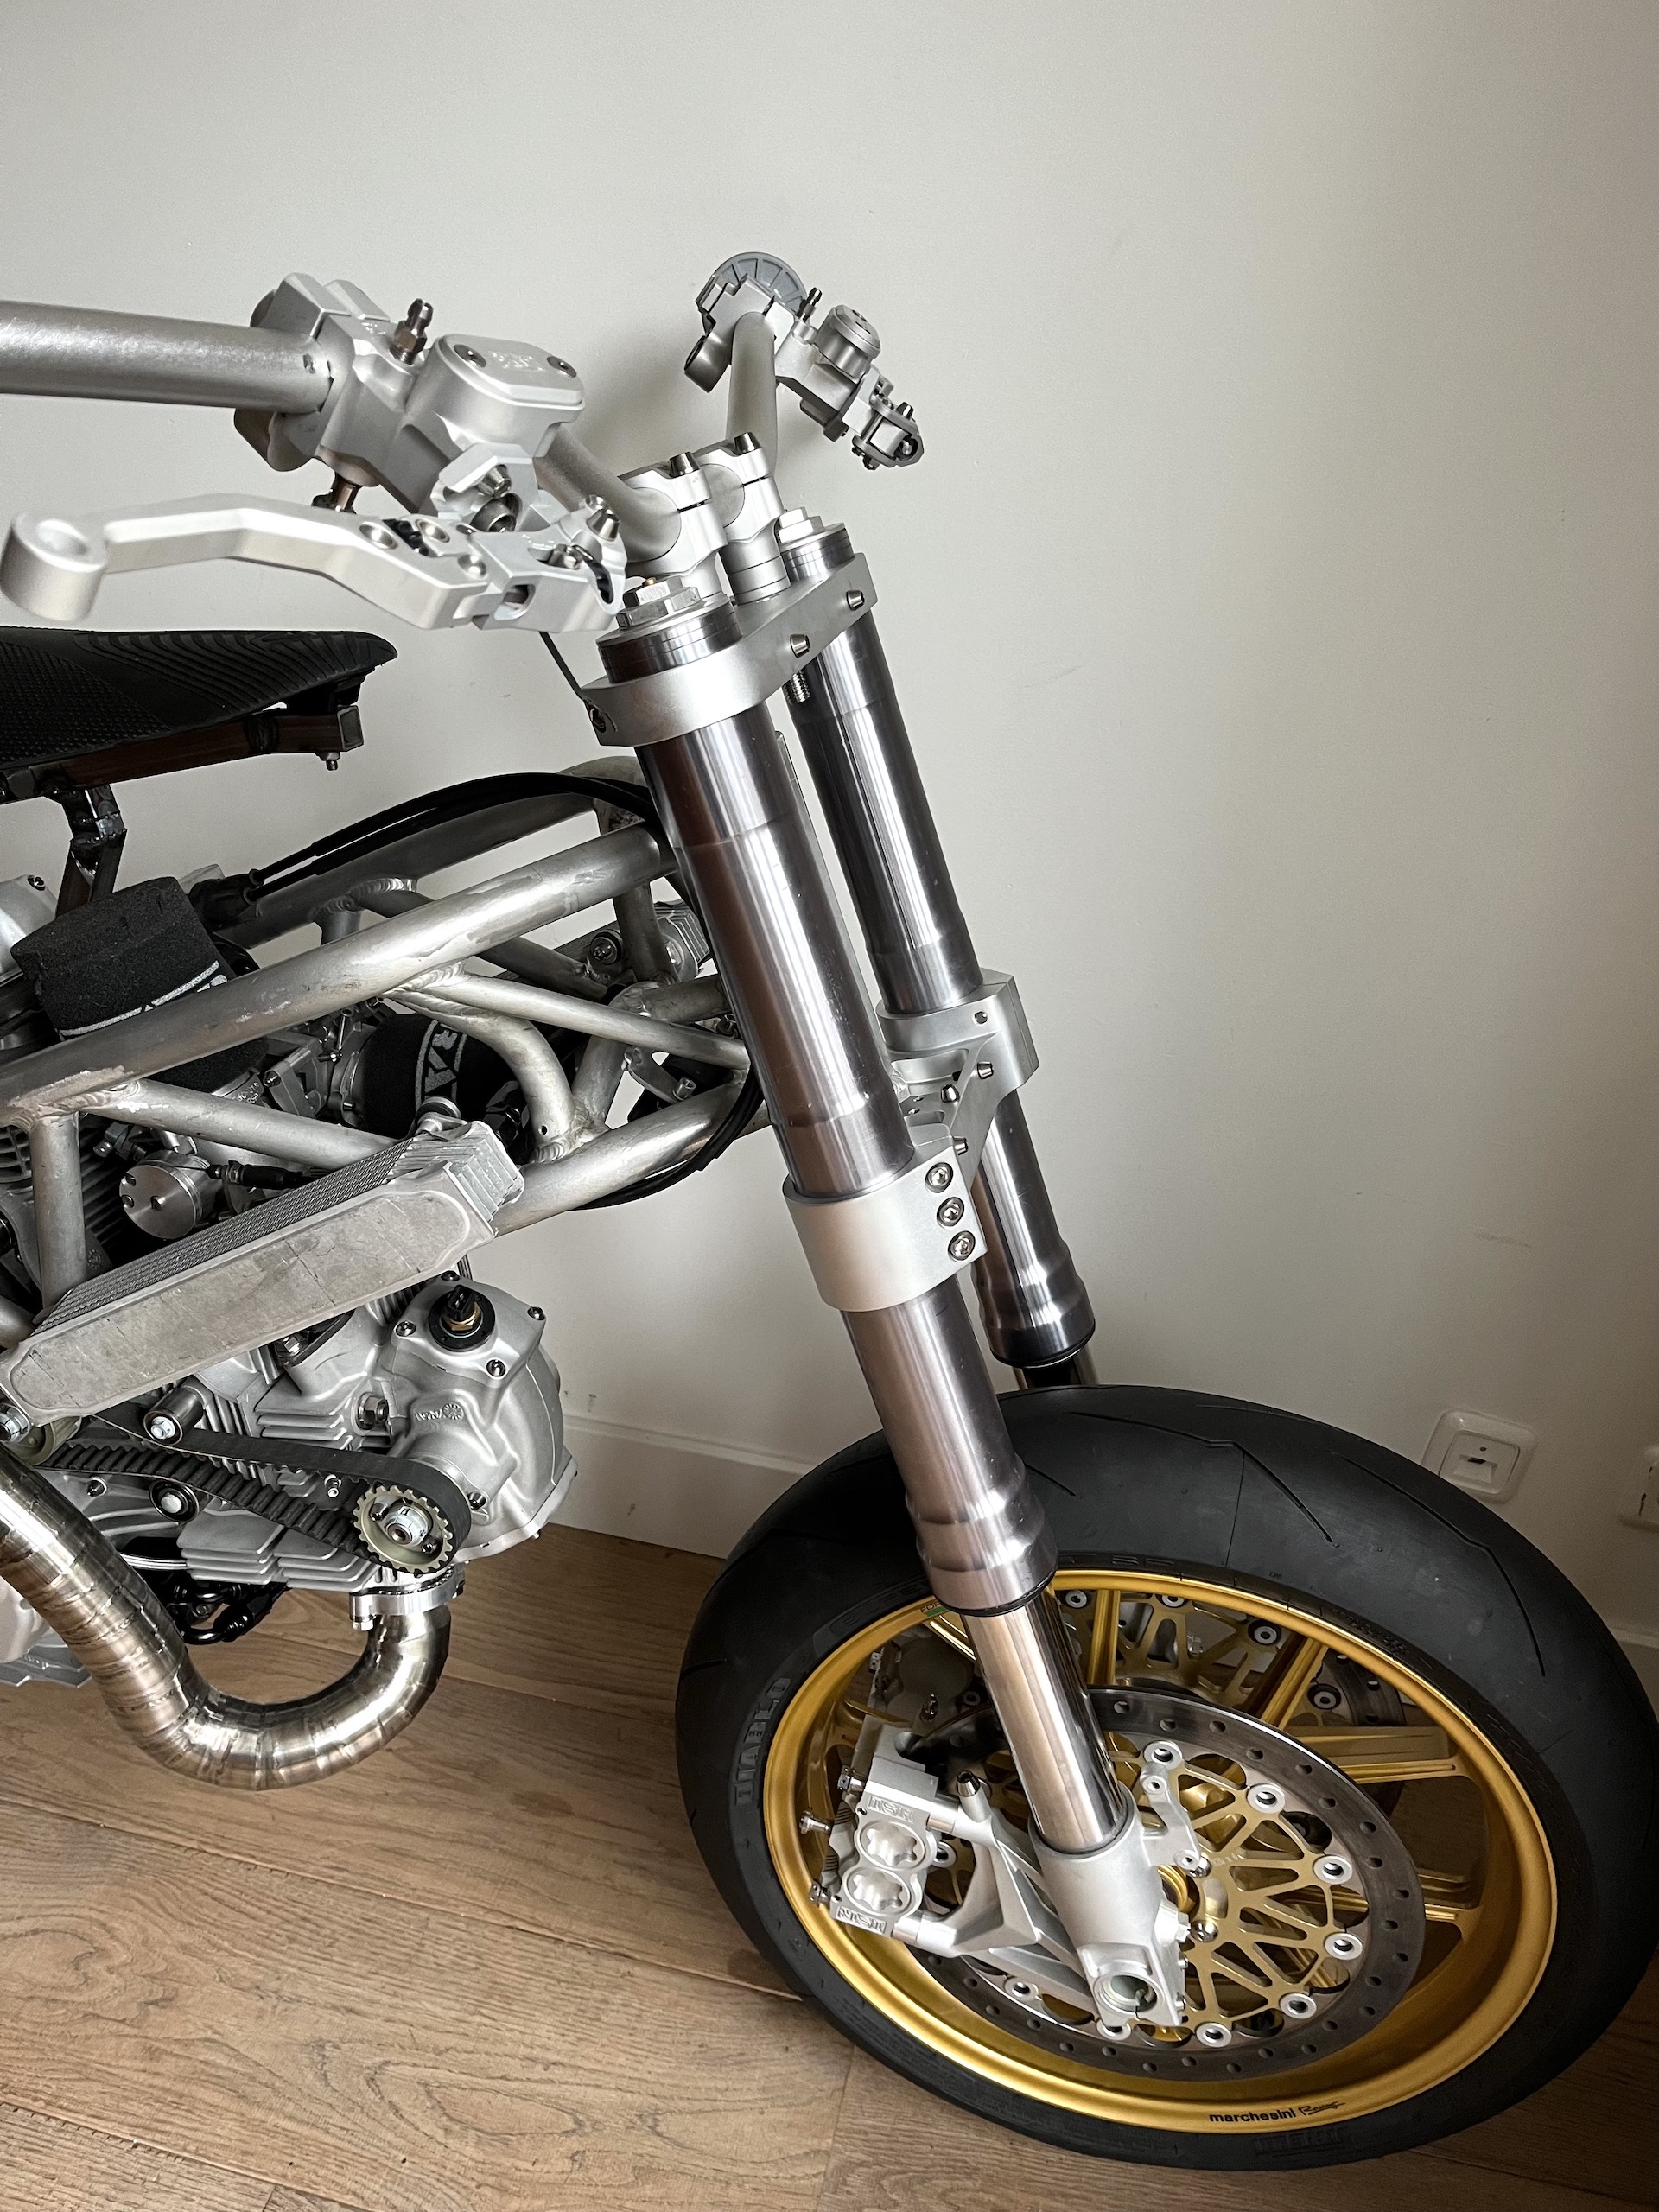
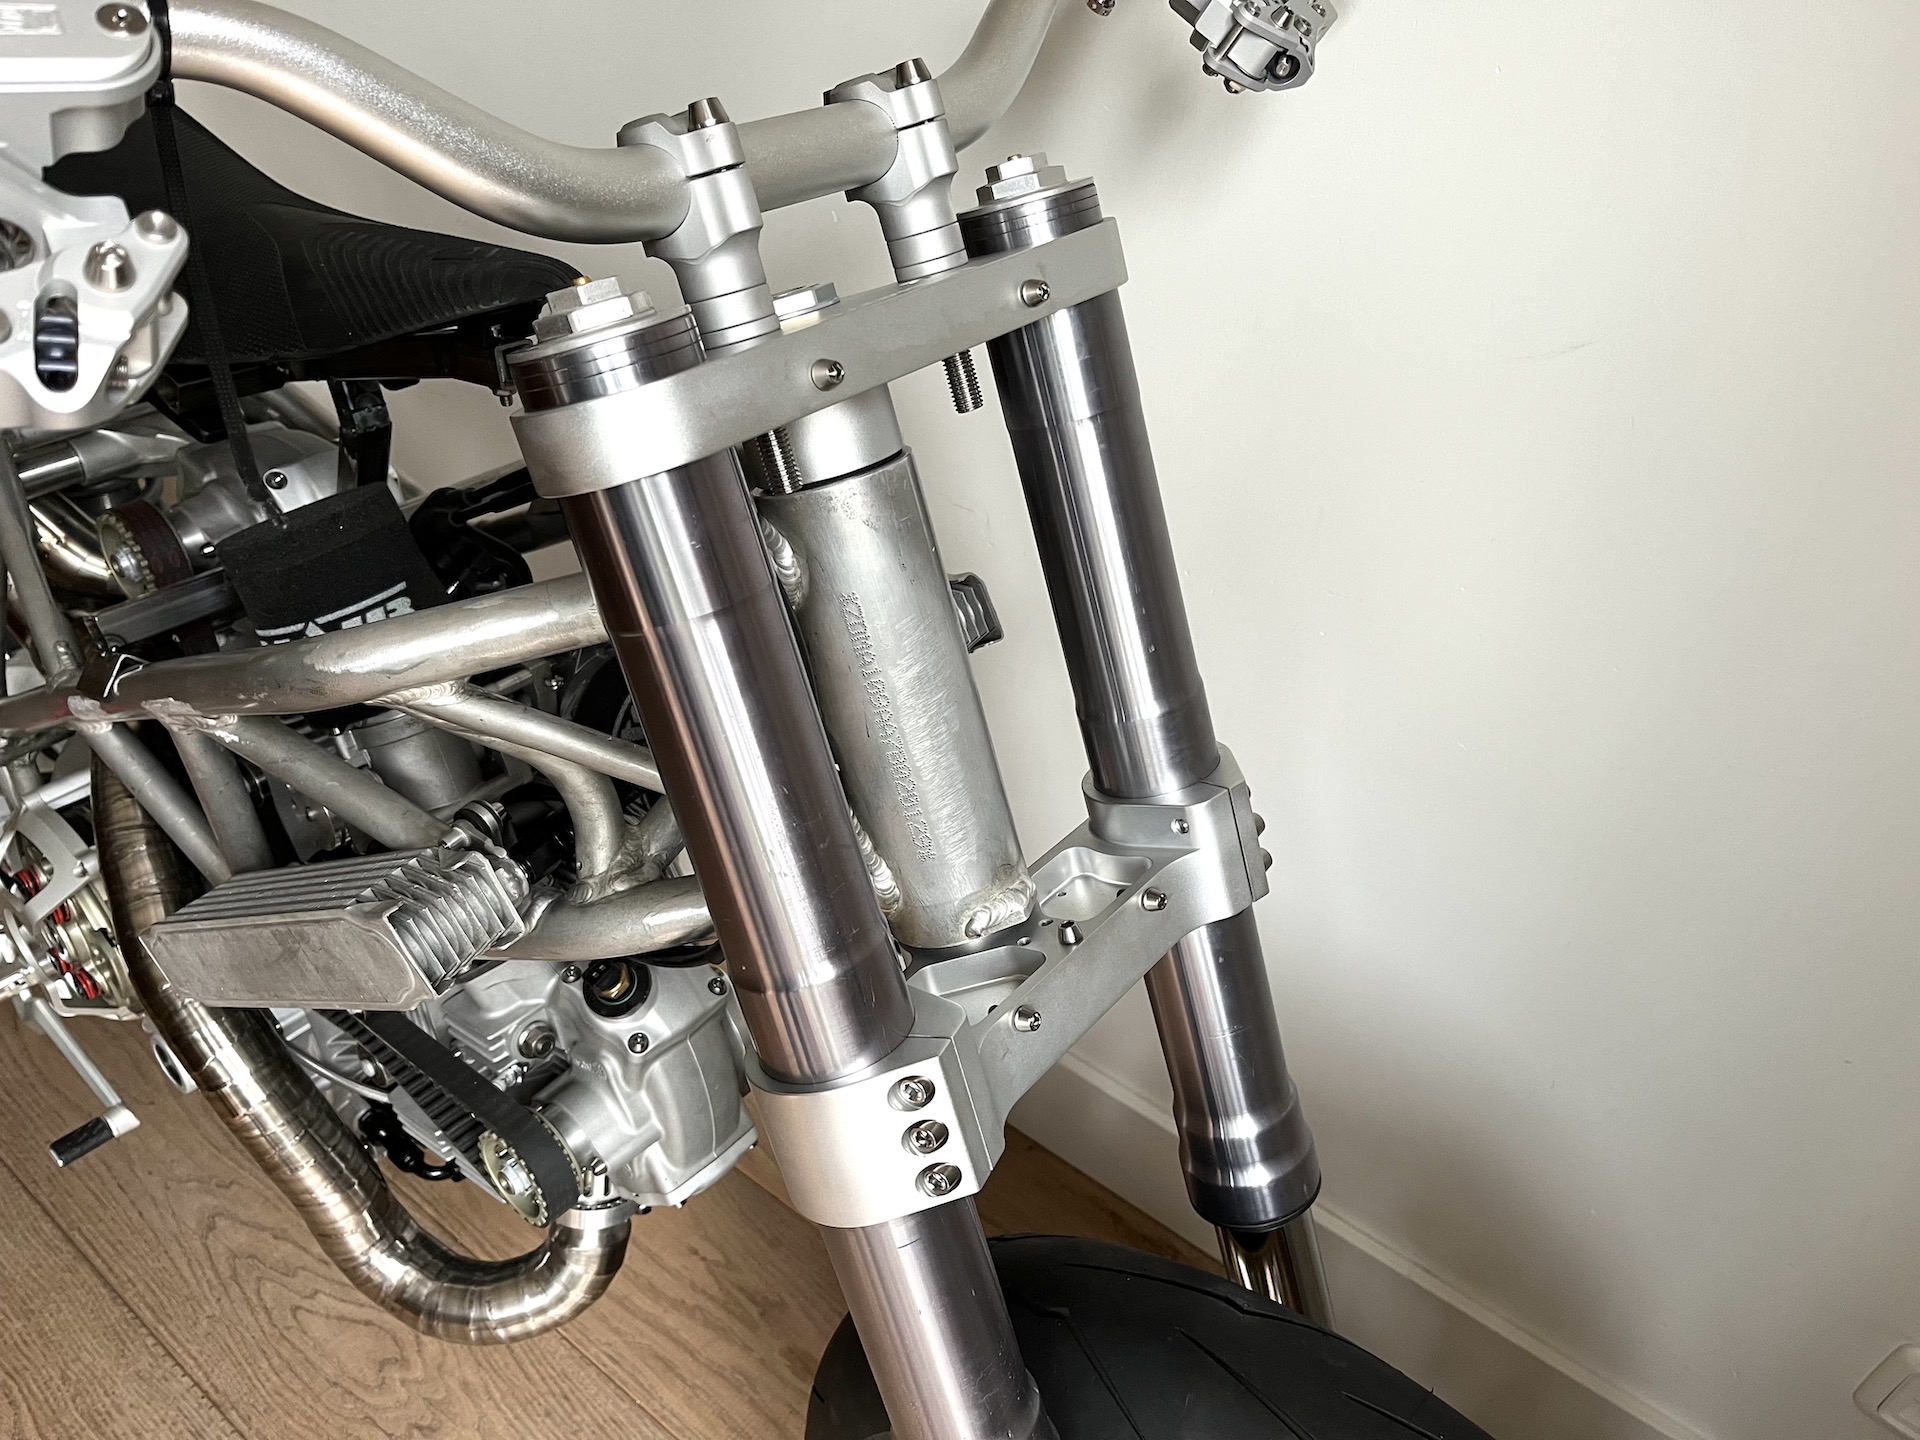
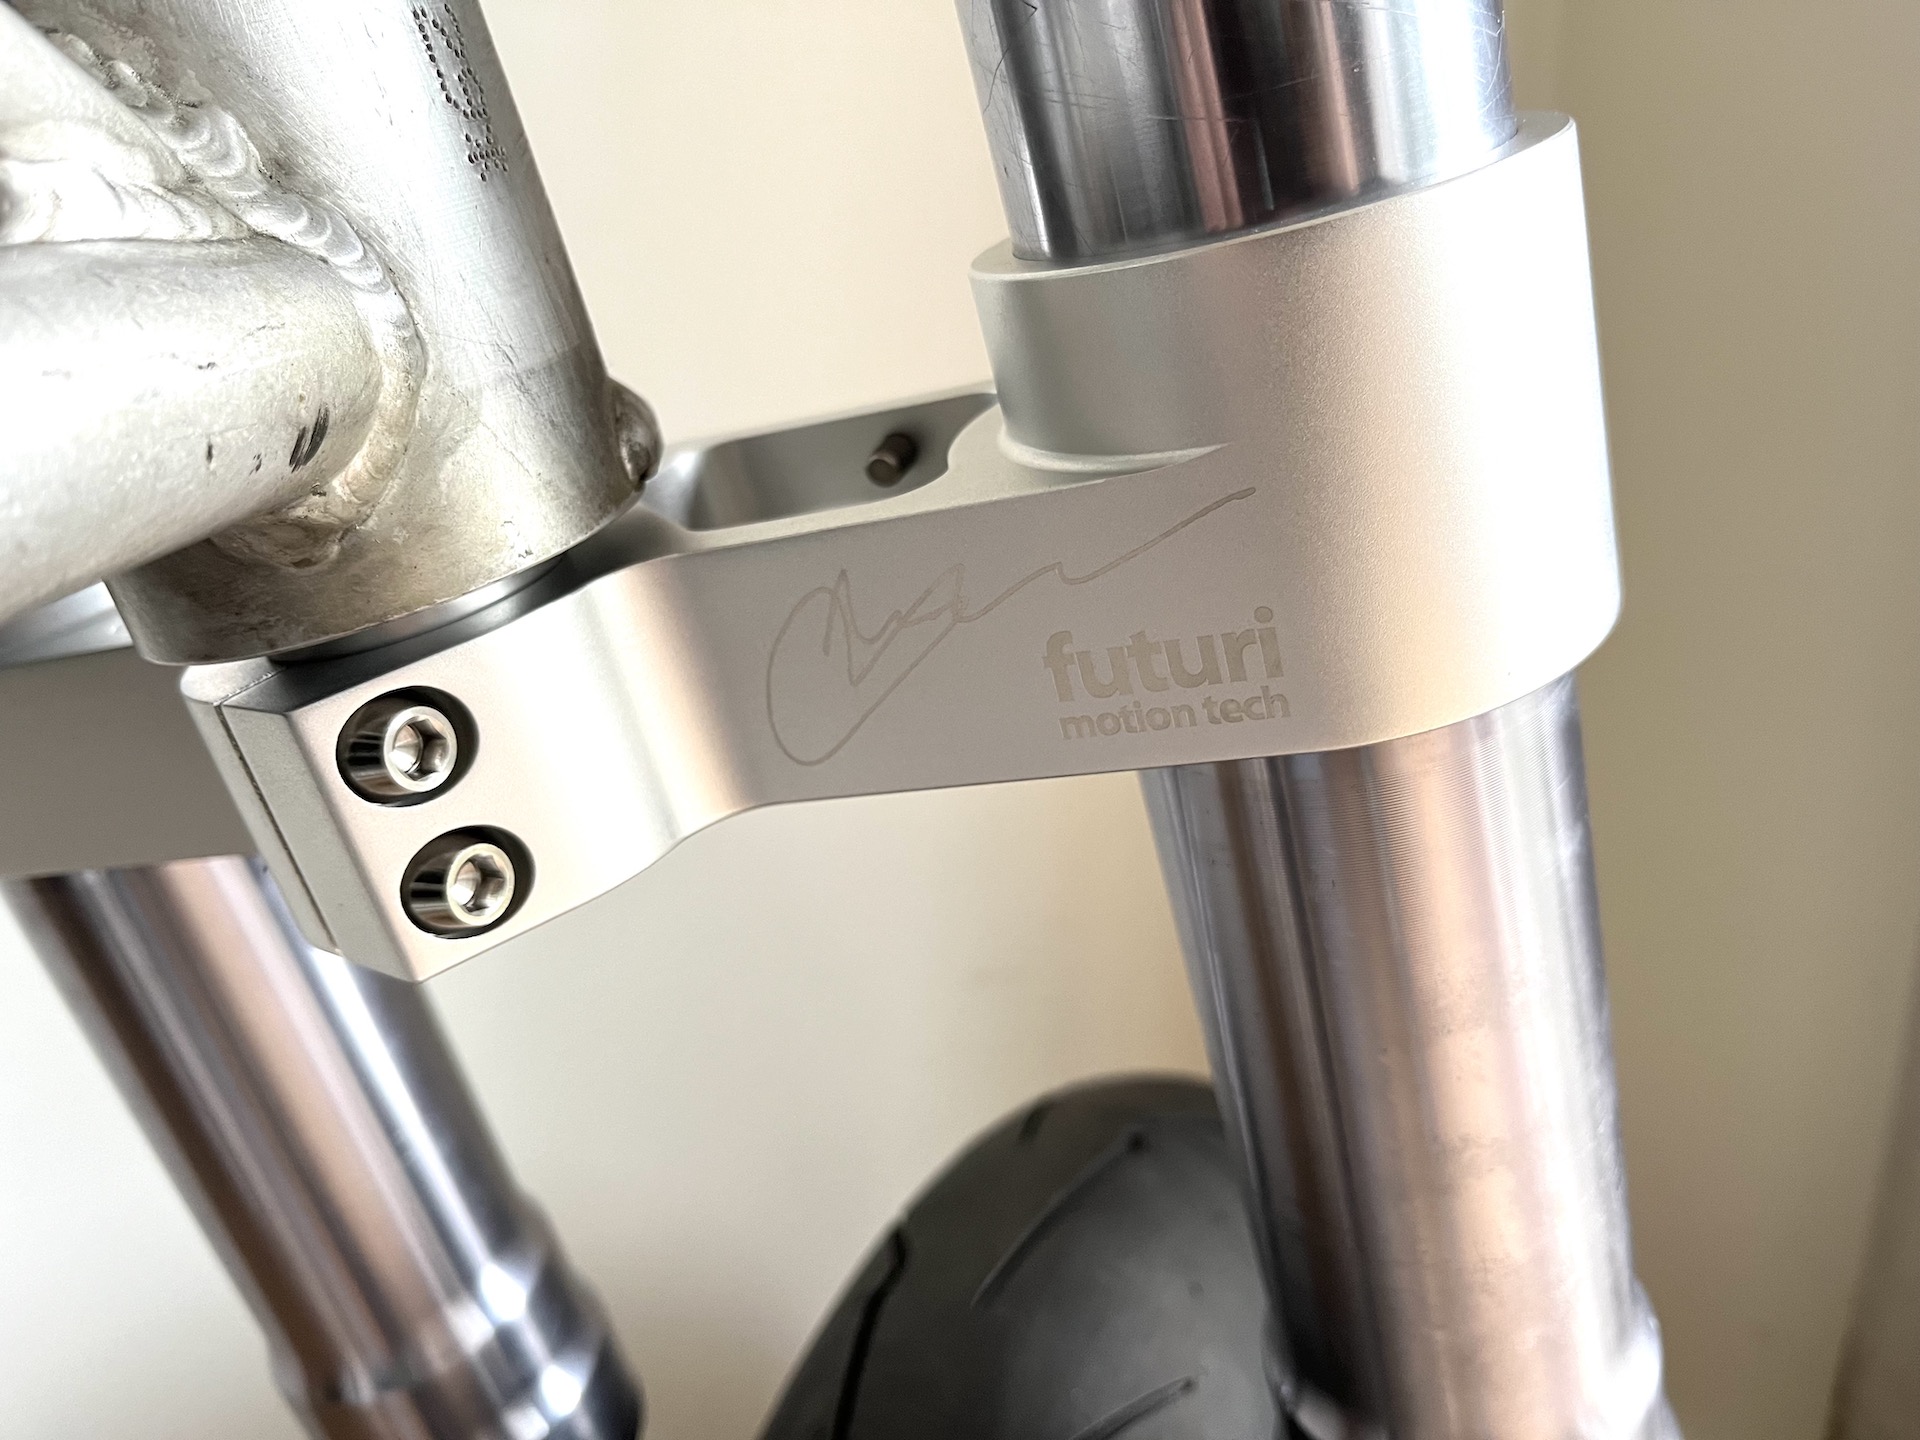
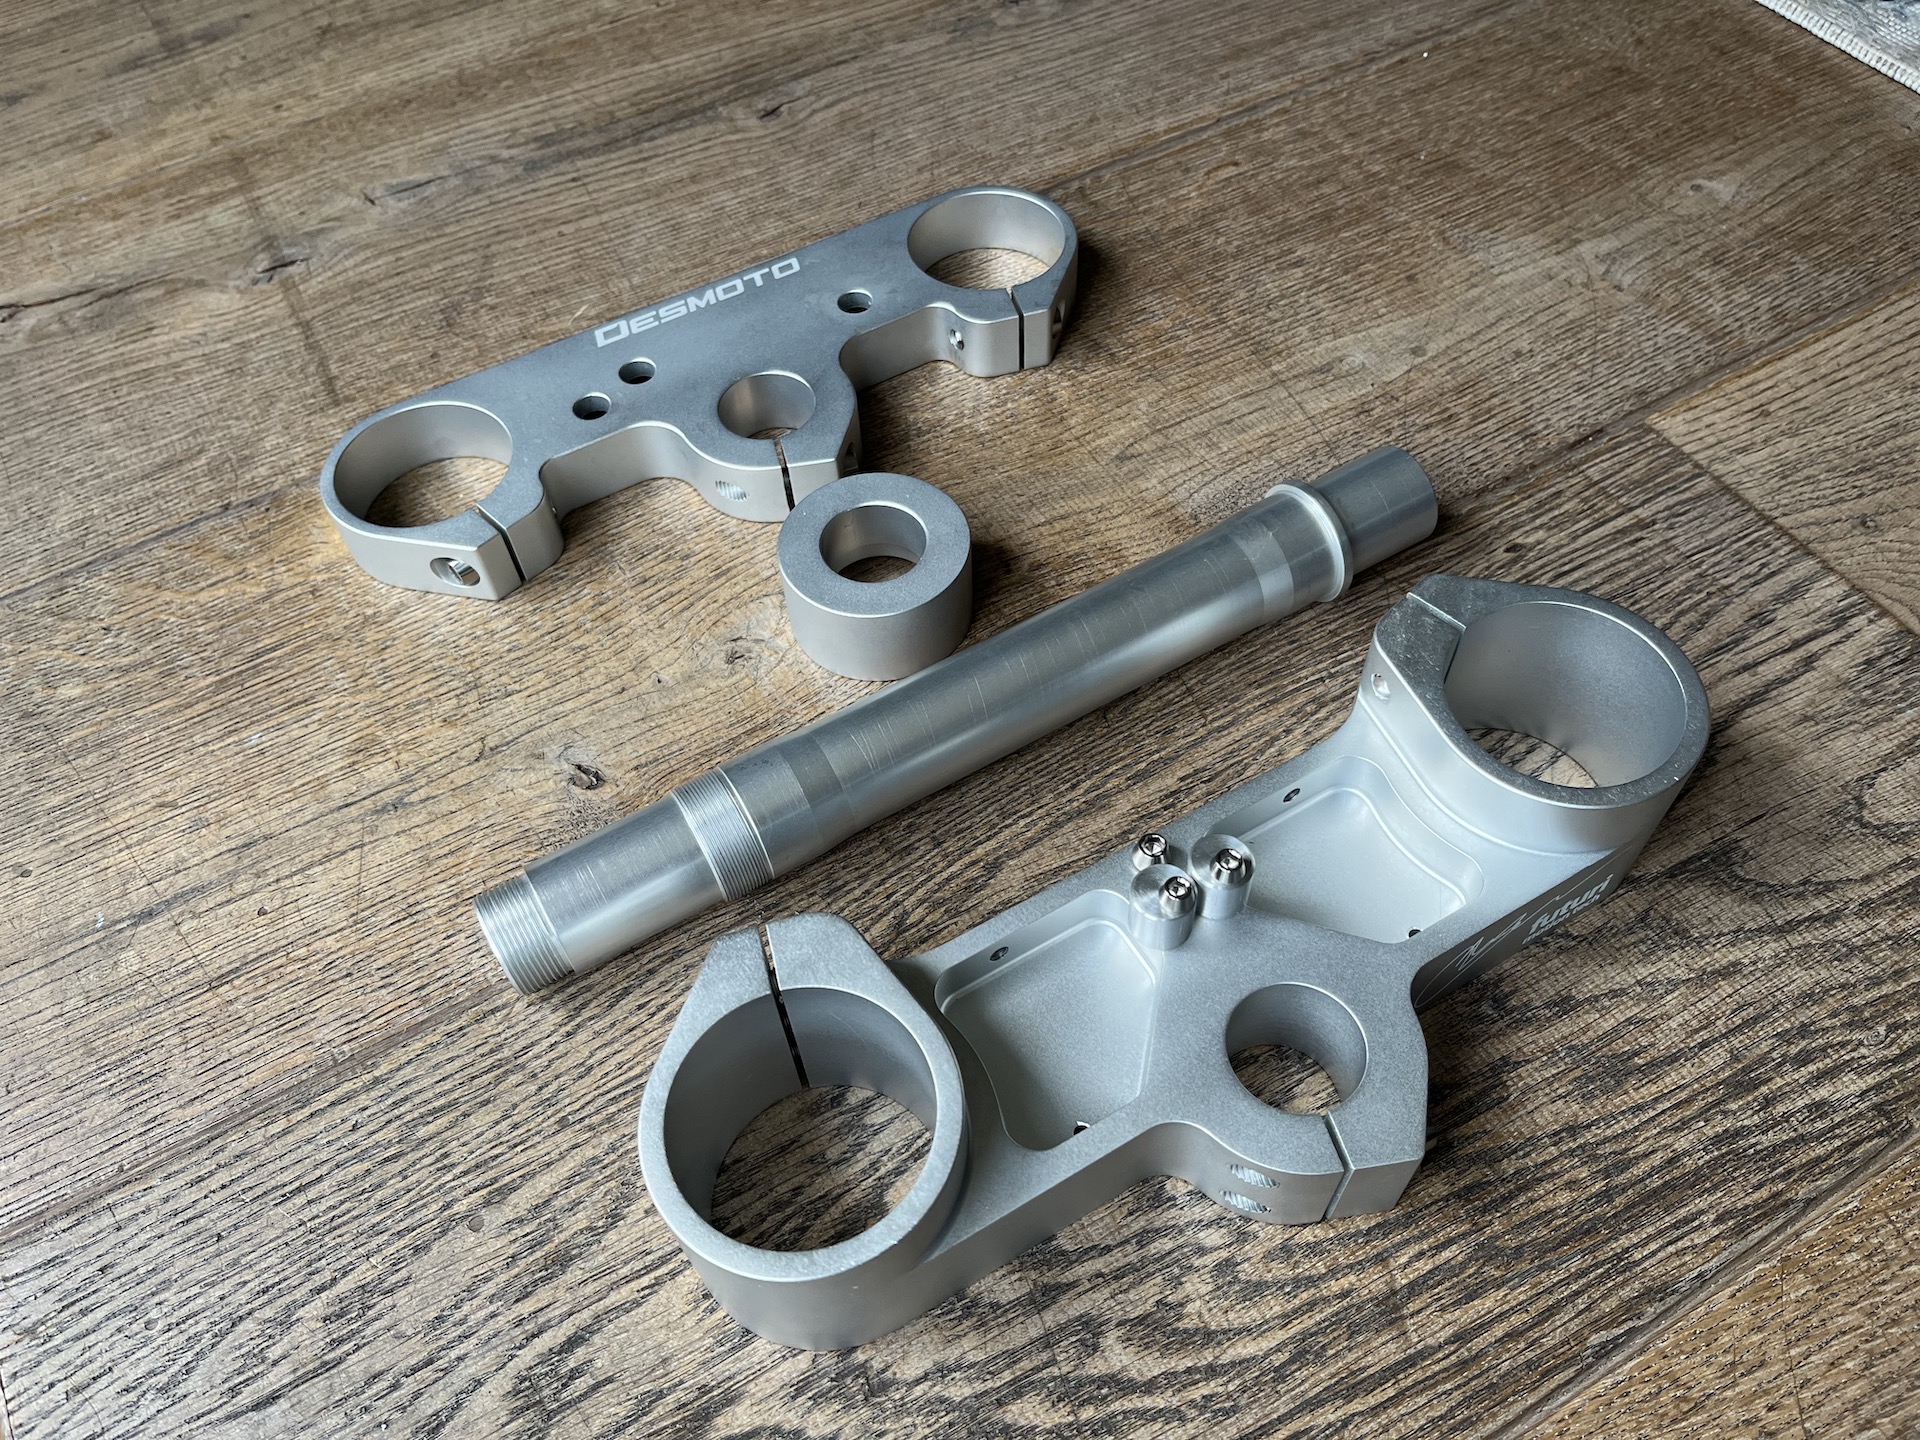
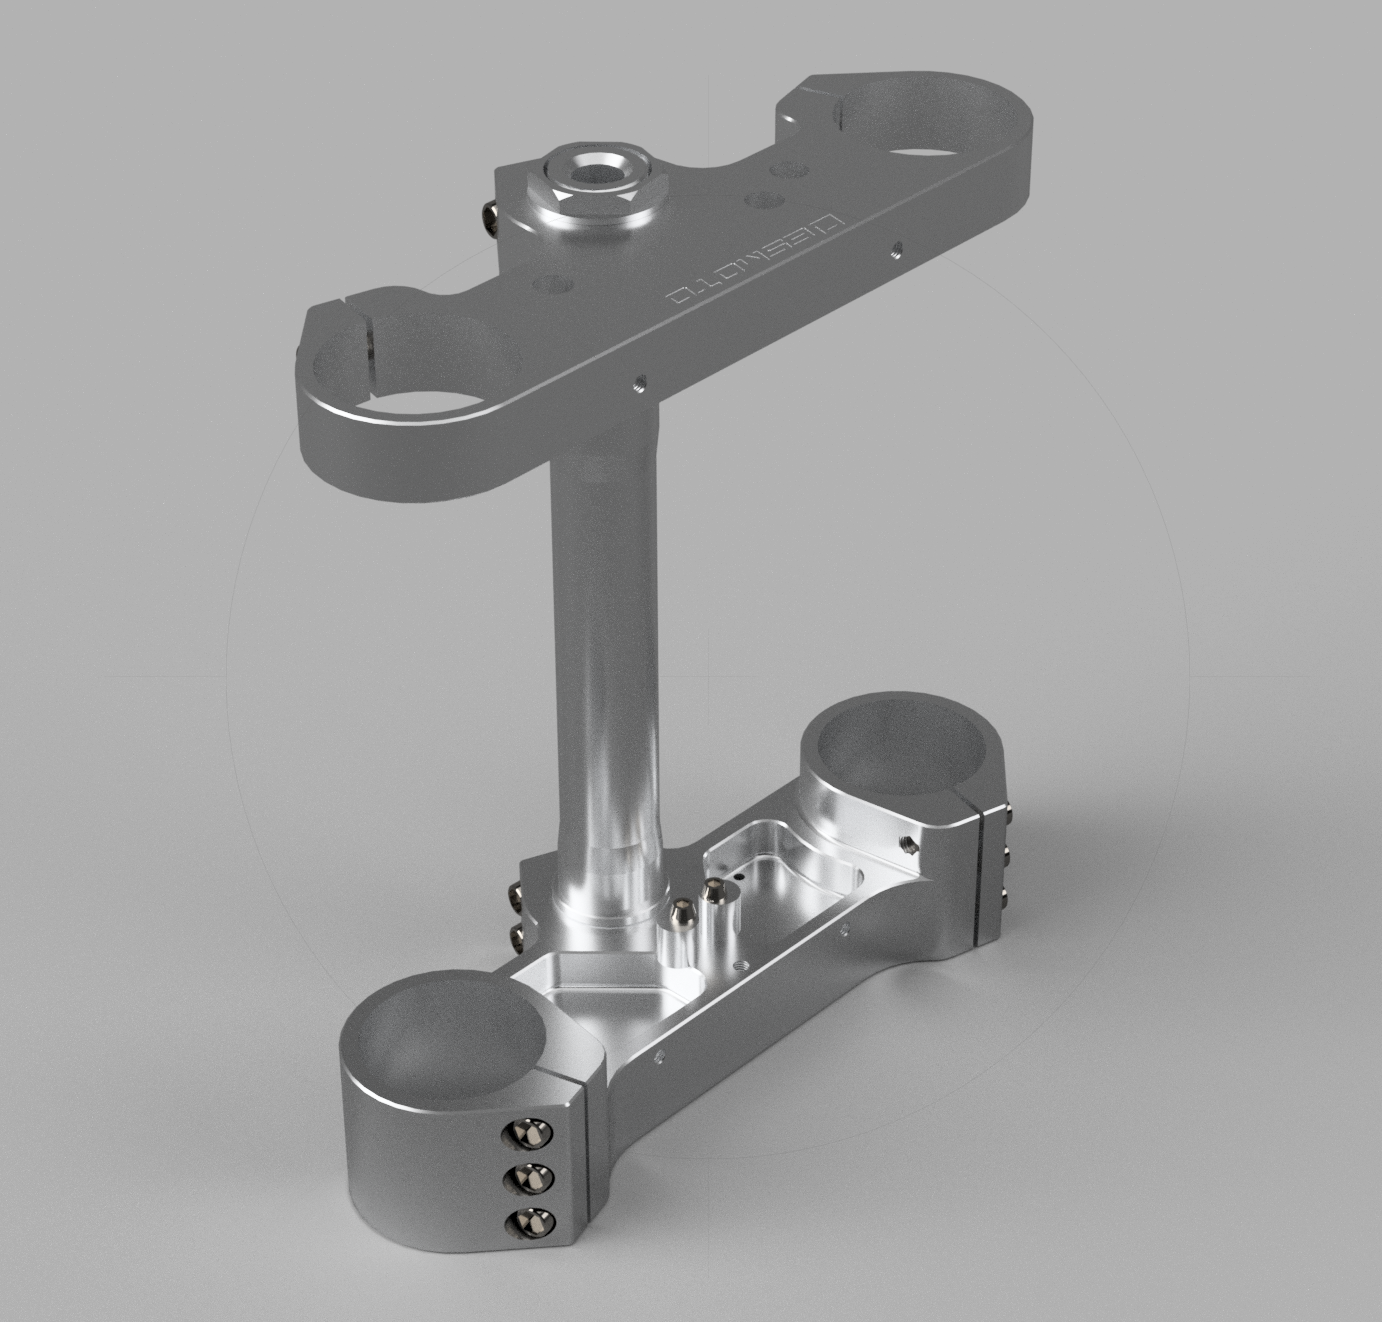
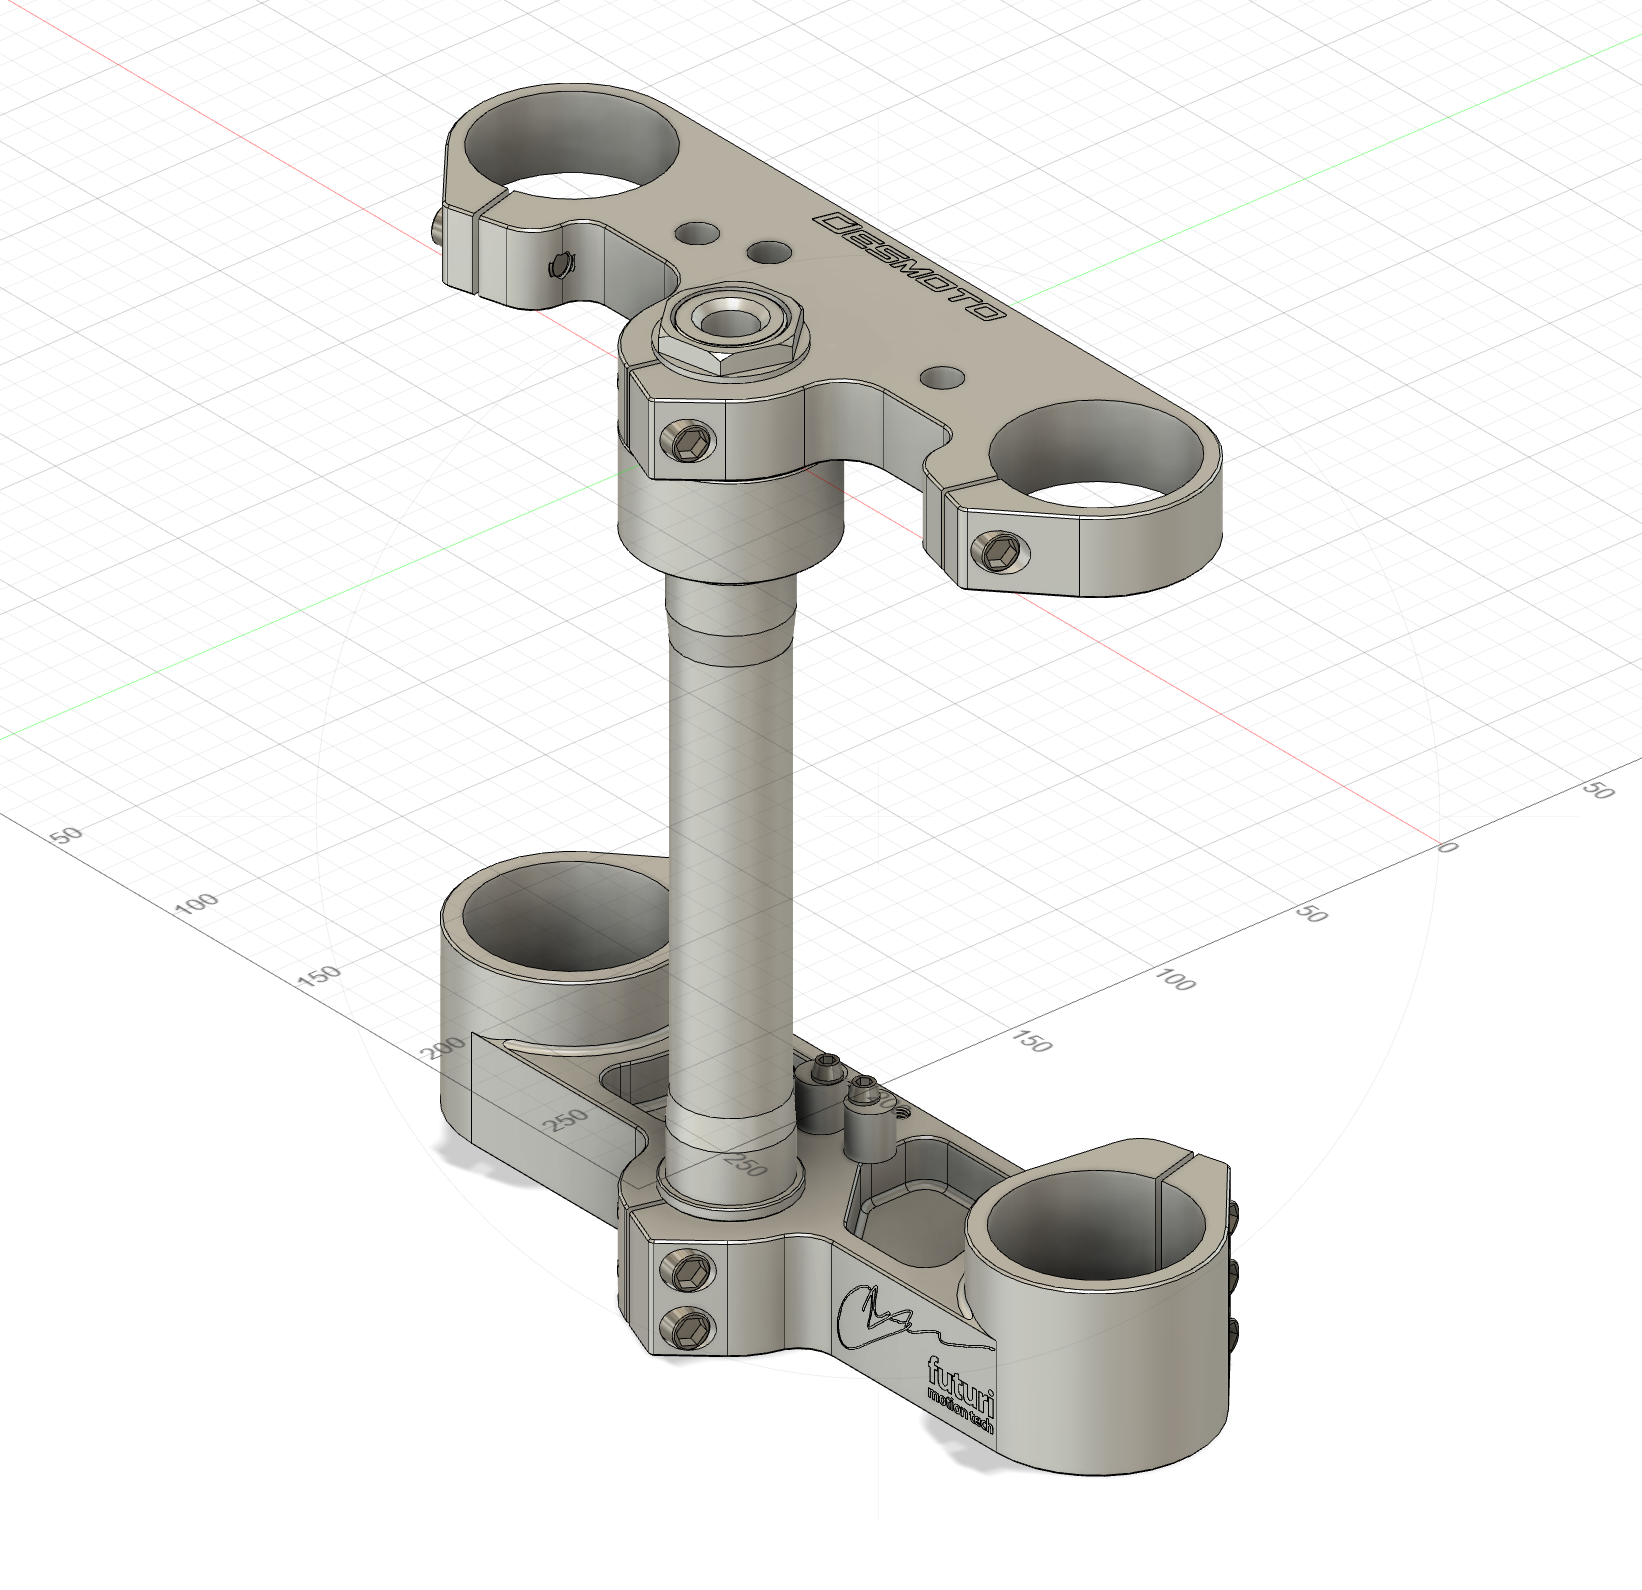
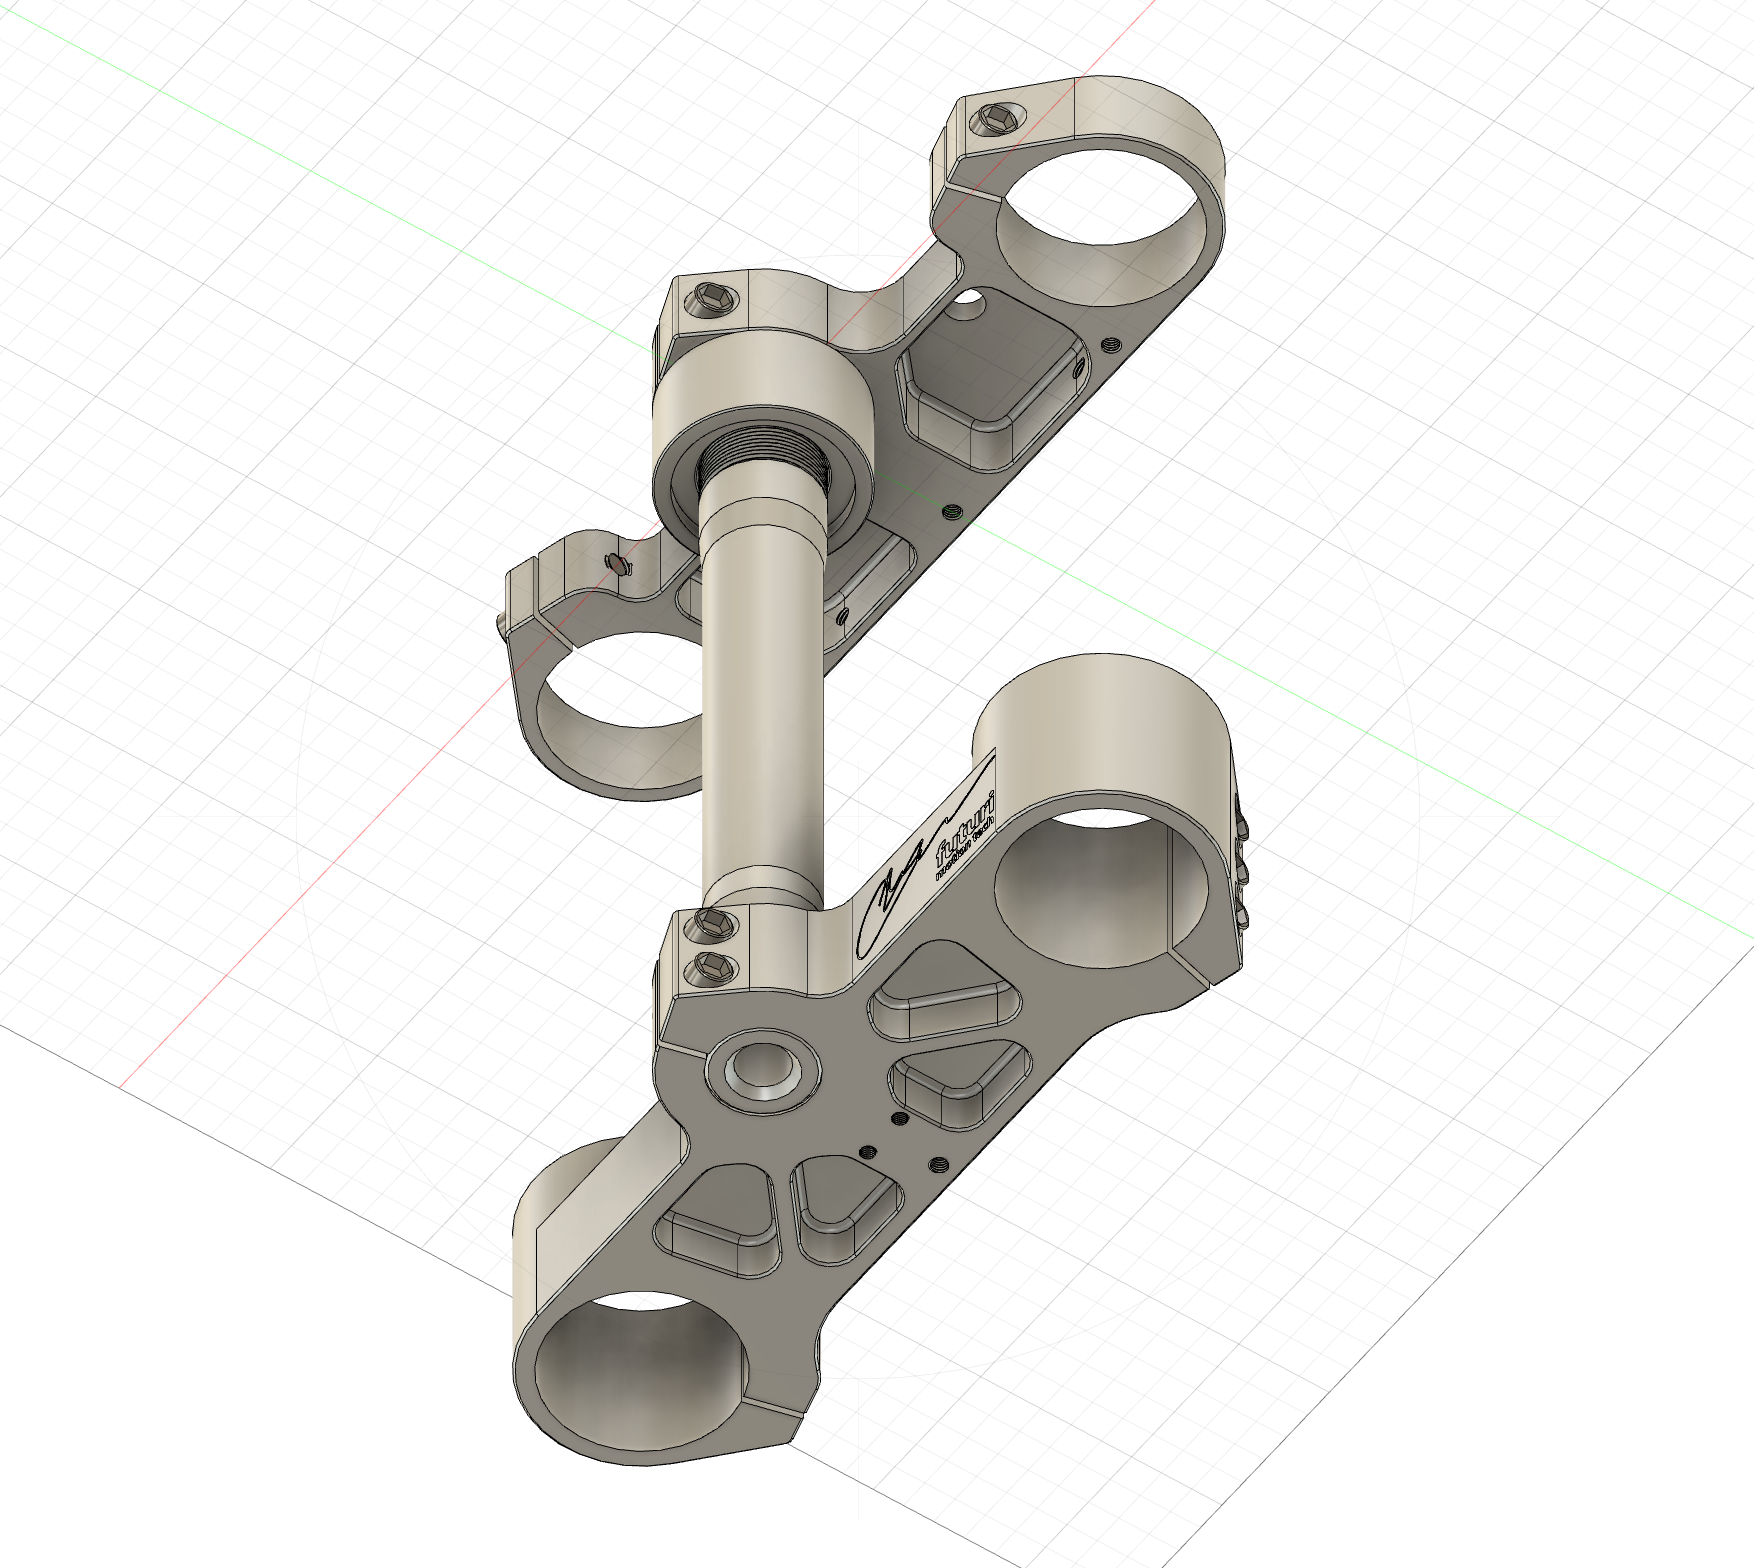
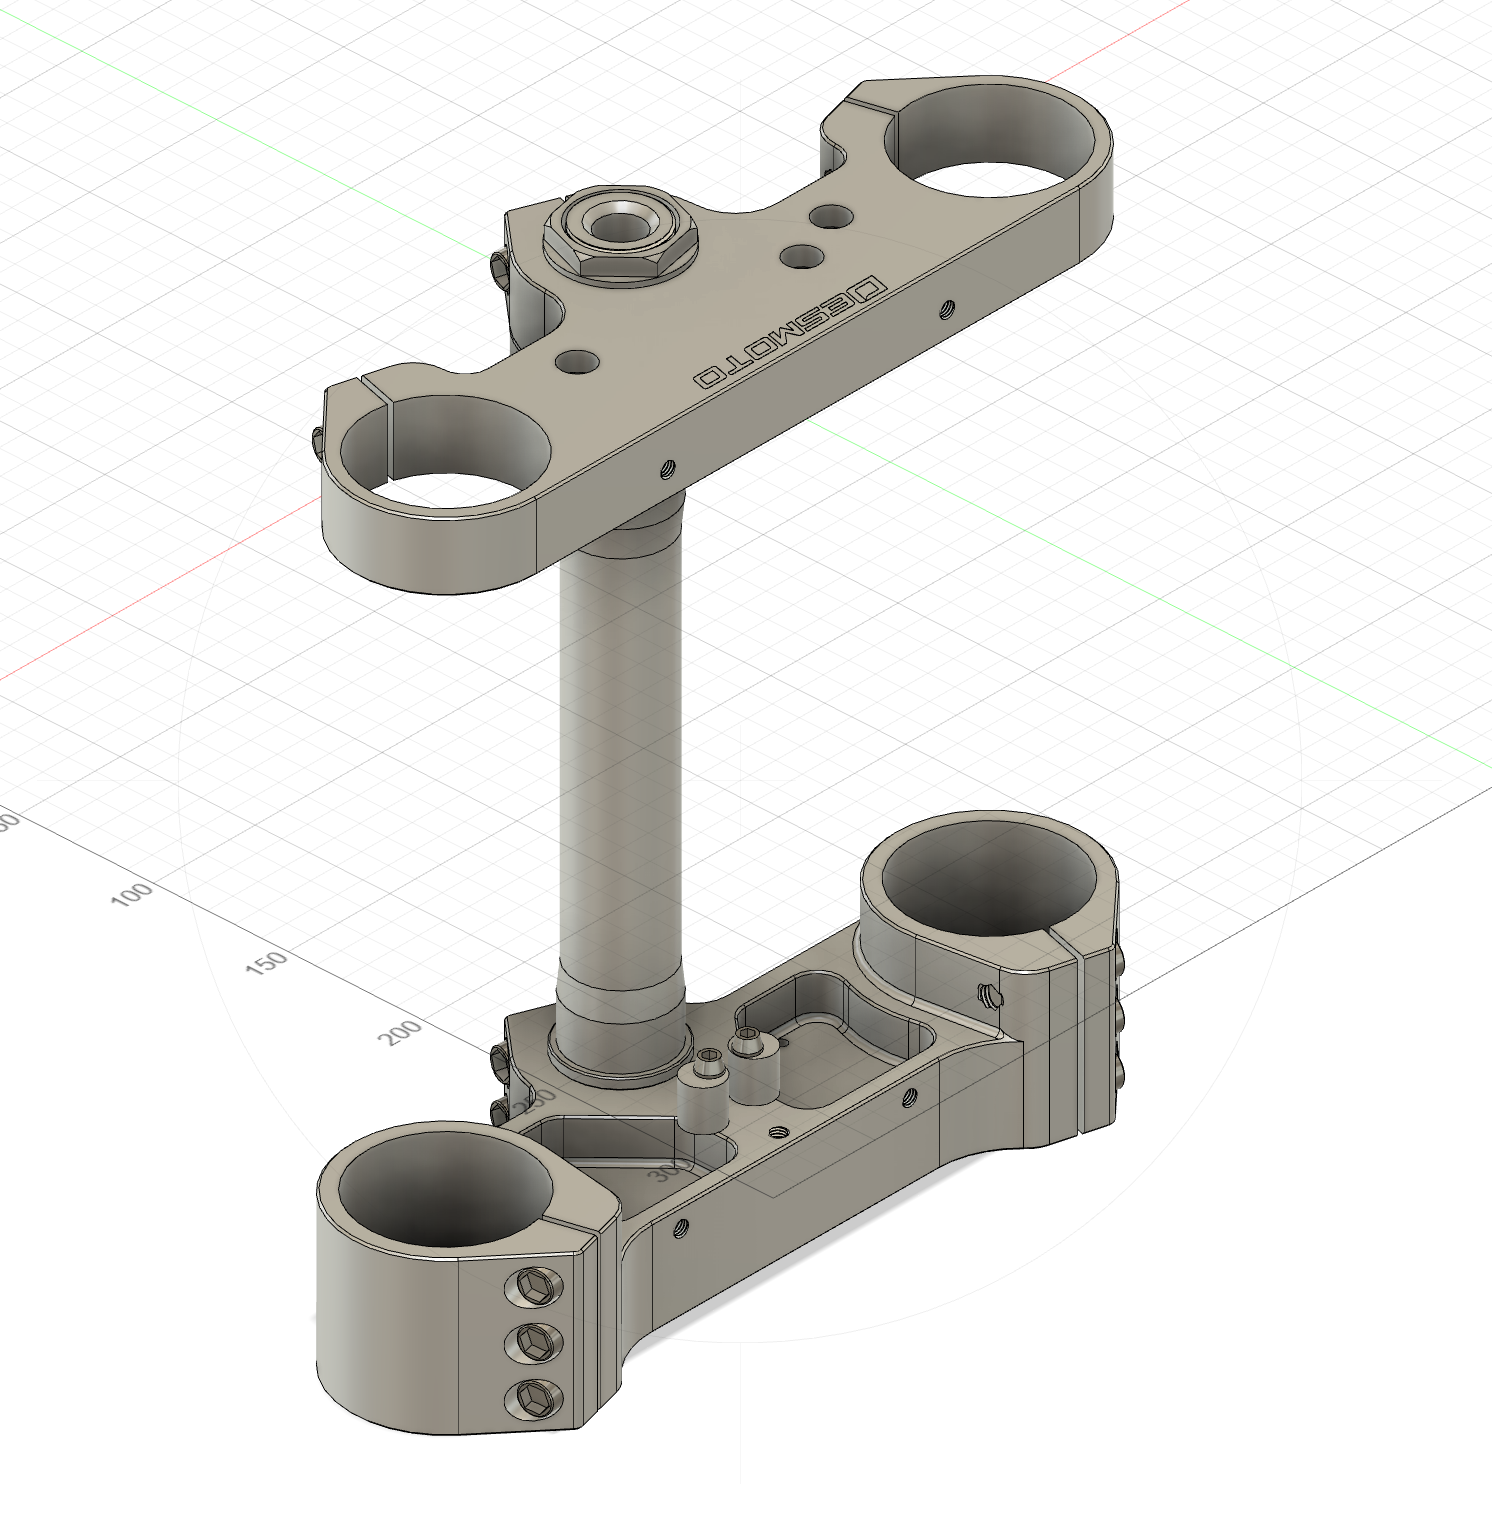
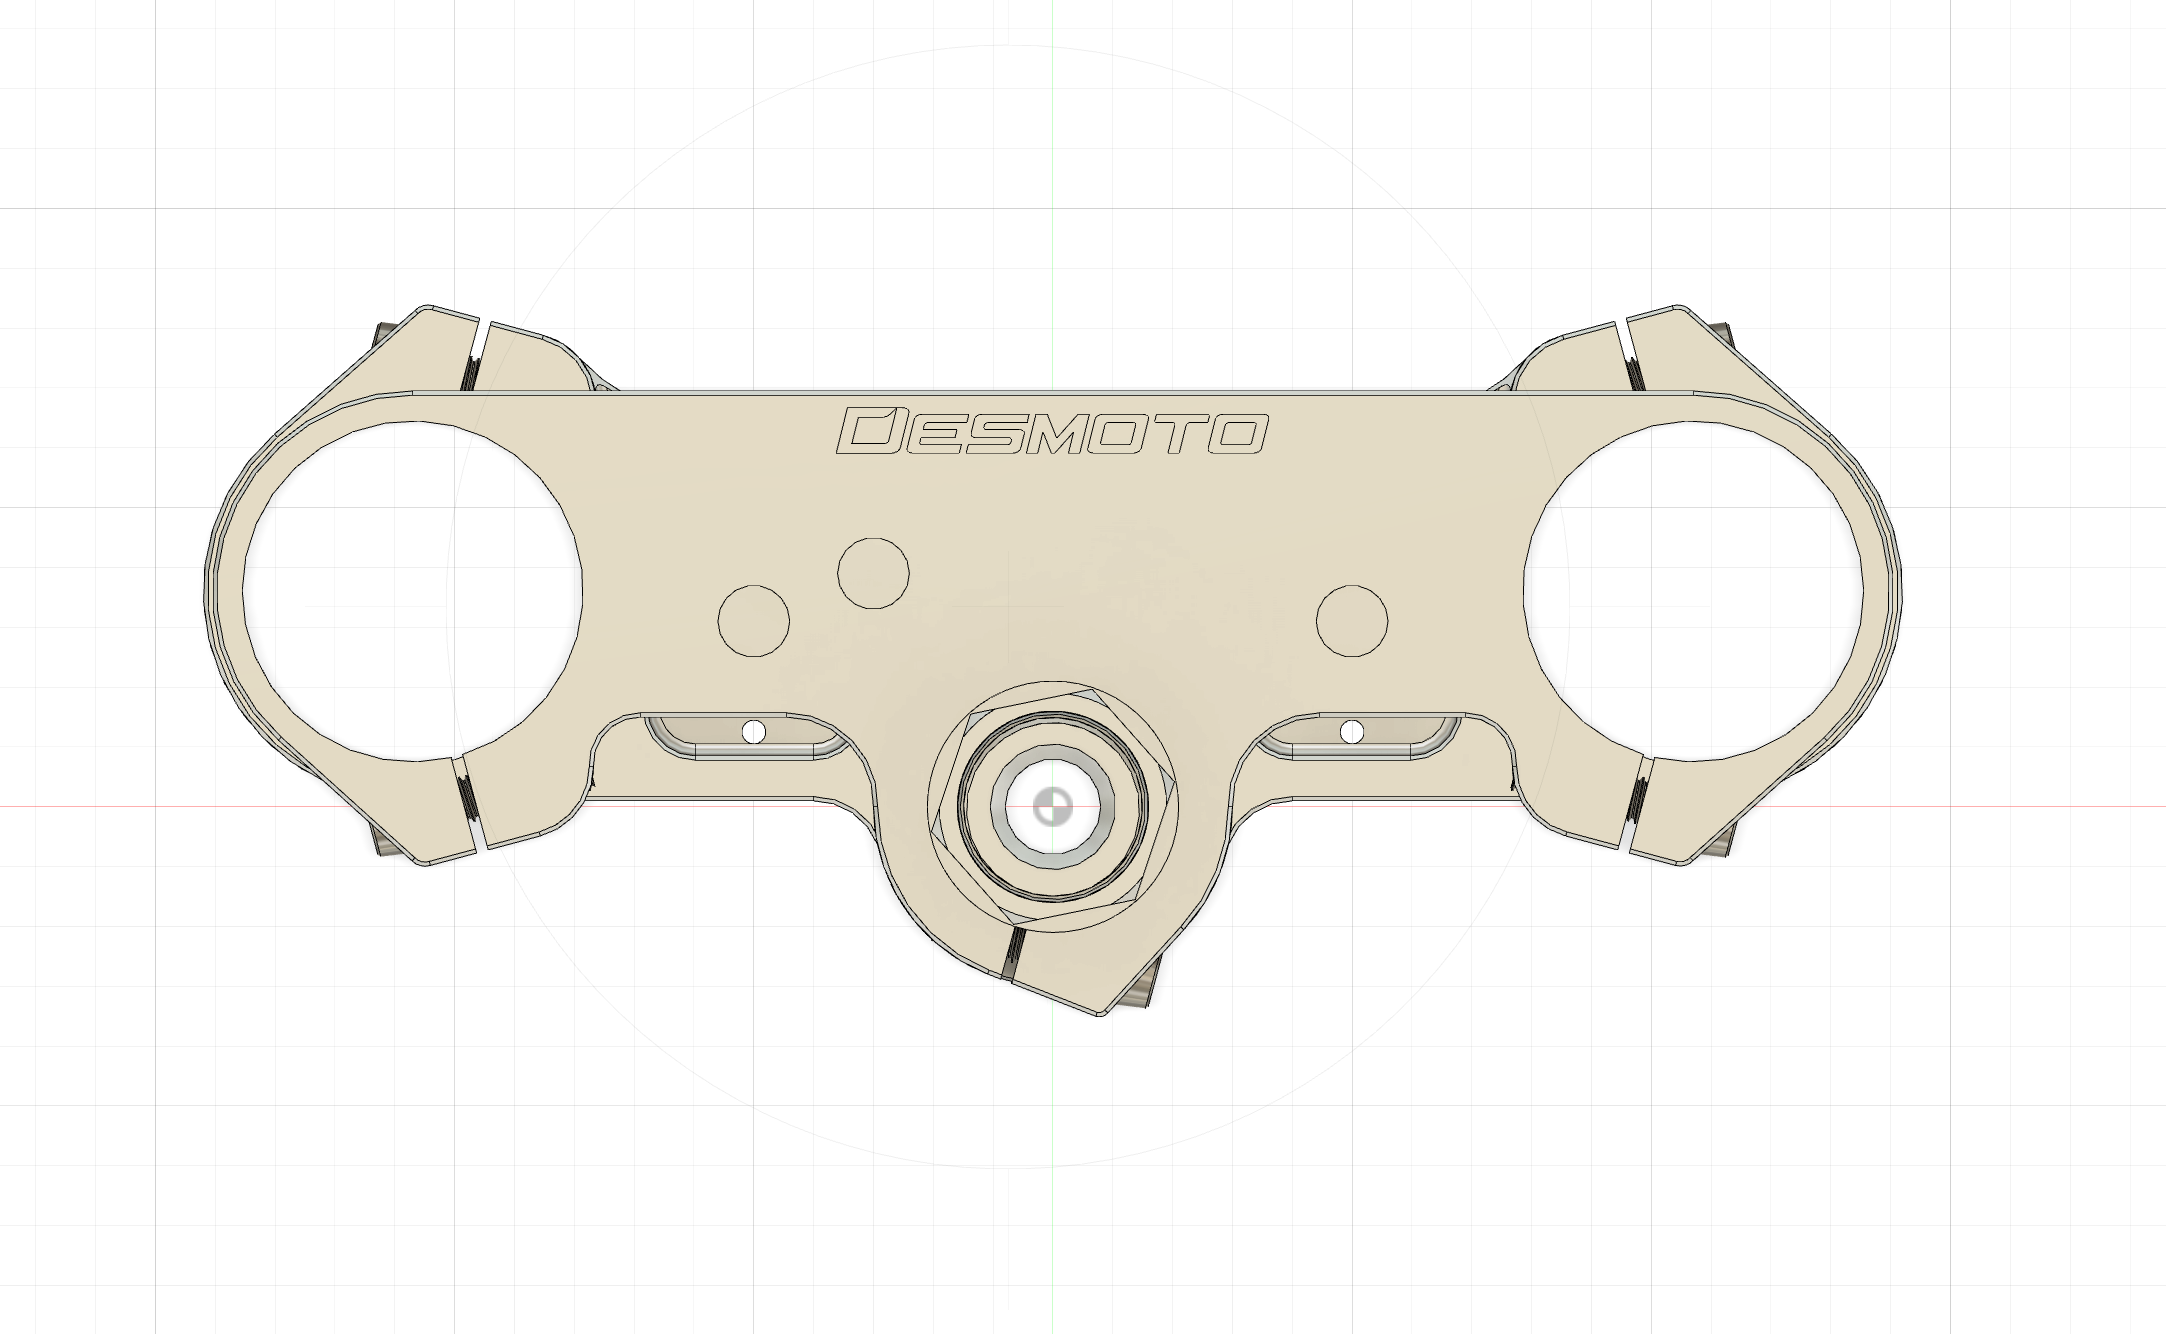
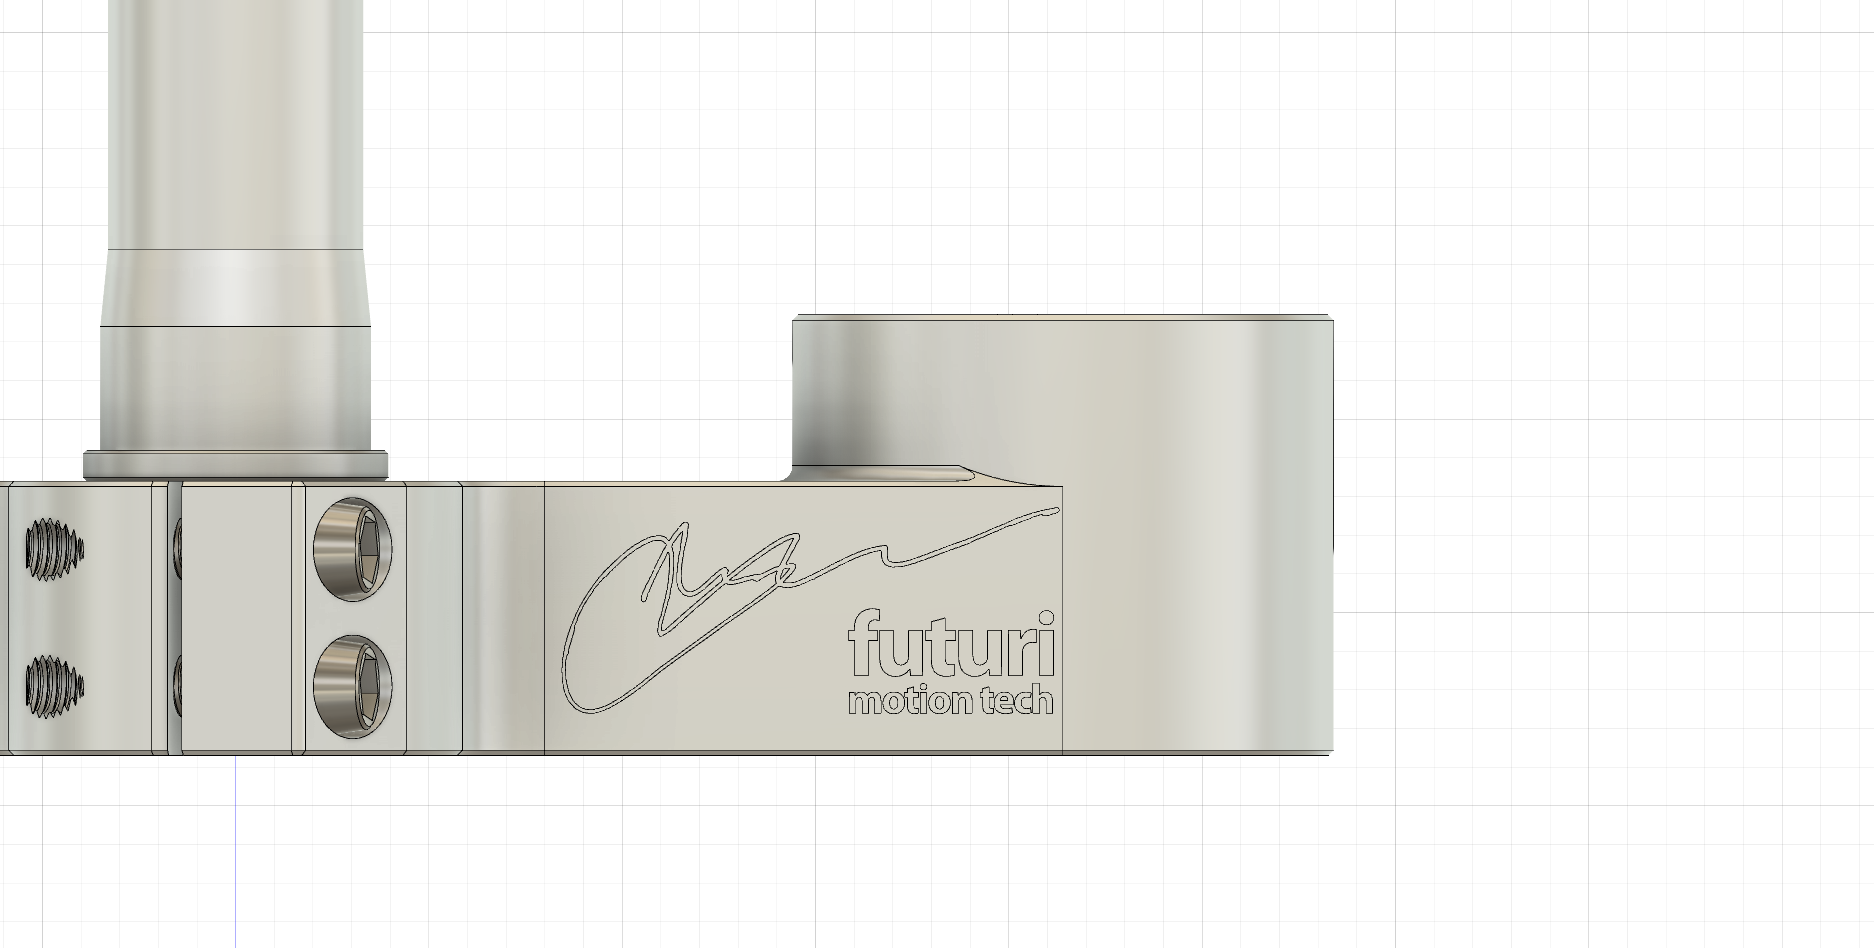
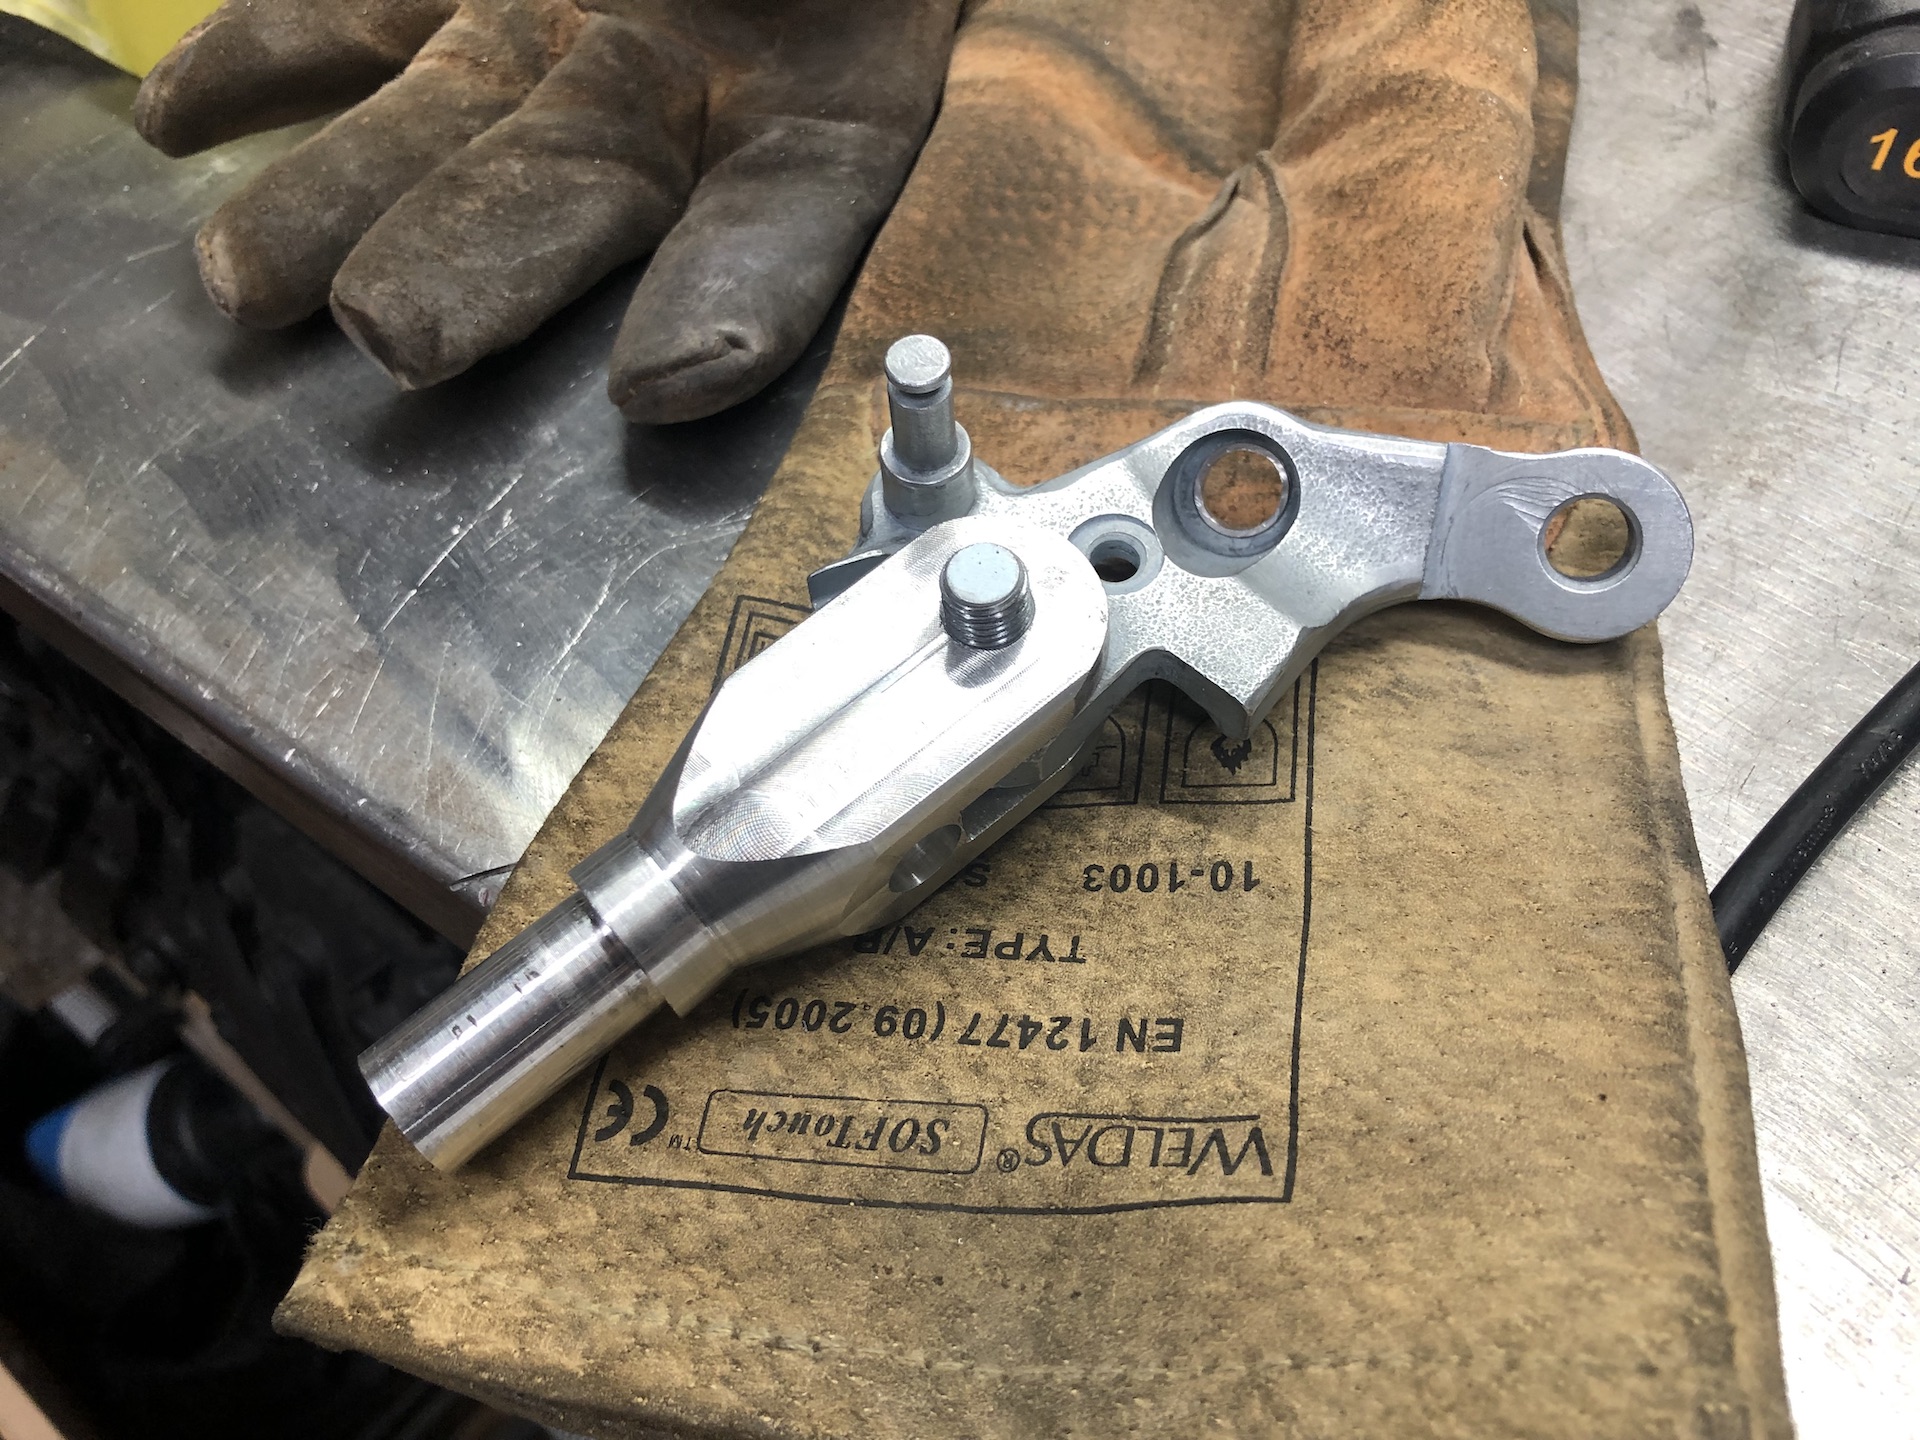
WOW! CUSTOM TRIPLE TREE P*RN
Christmas started early this year… My order of custom parts arrived!!
You can see the specs of the triple tree in a previous post. Lets enjoy these pictures and let them speak for themself!
Really happy with how everything turned out. I would however next time change the bearing surfaces tolerances to a slightly tighter fit. There is no play at all, but could have been a little bit more snug to my liking.

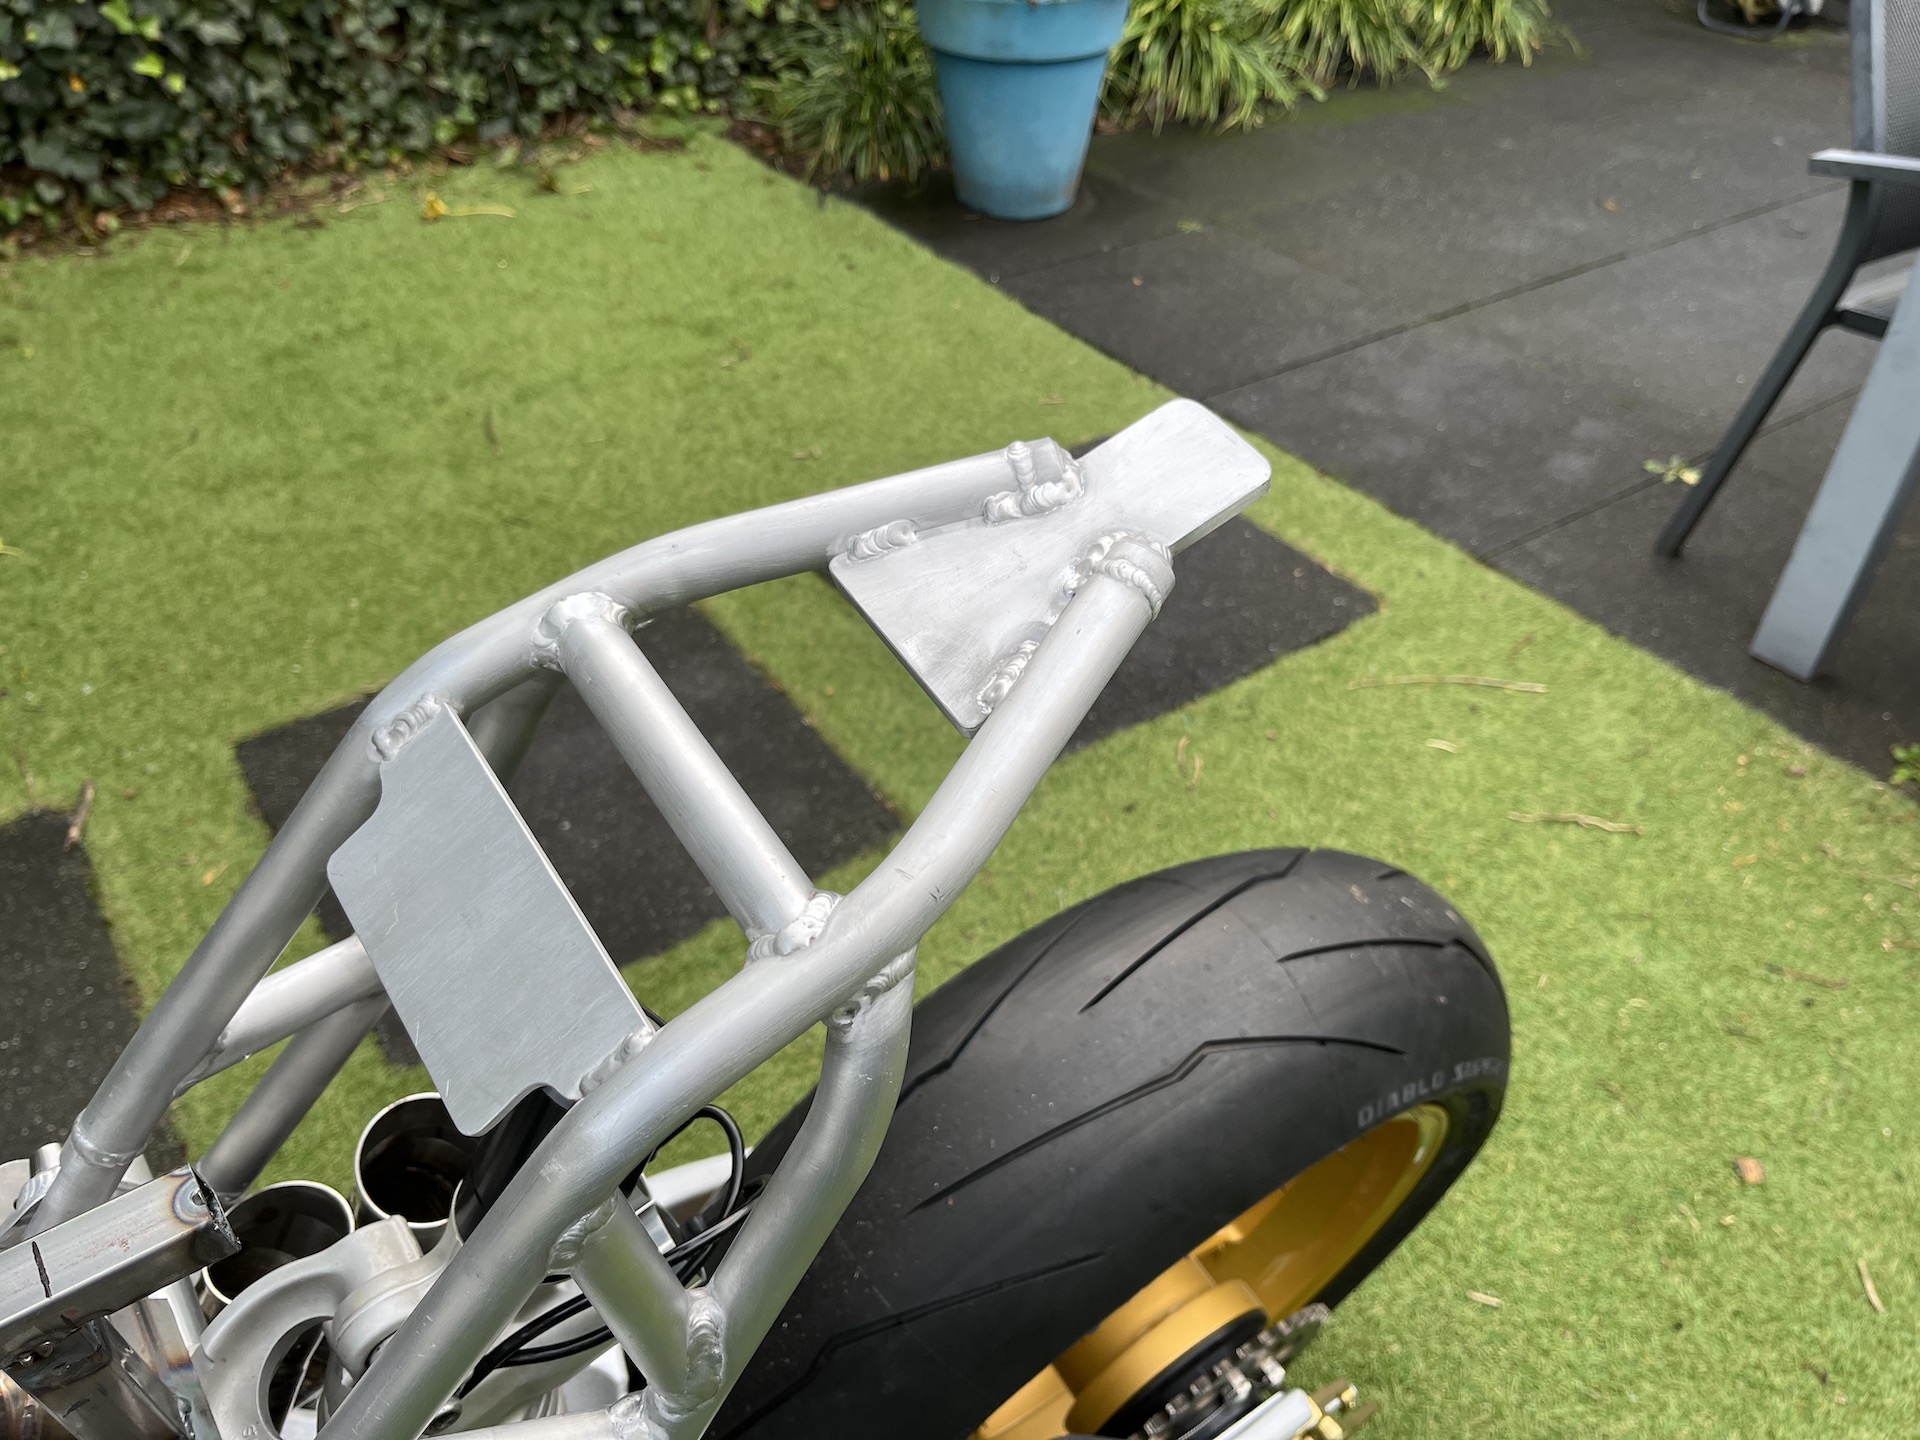
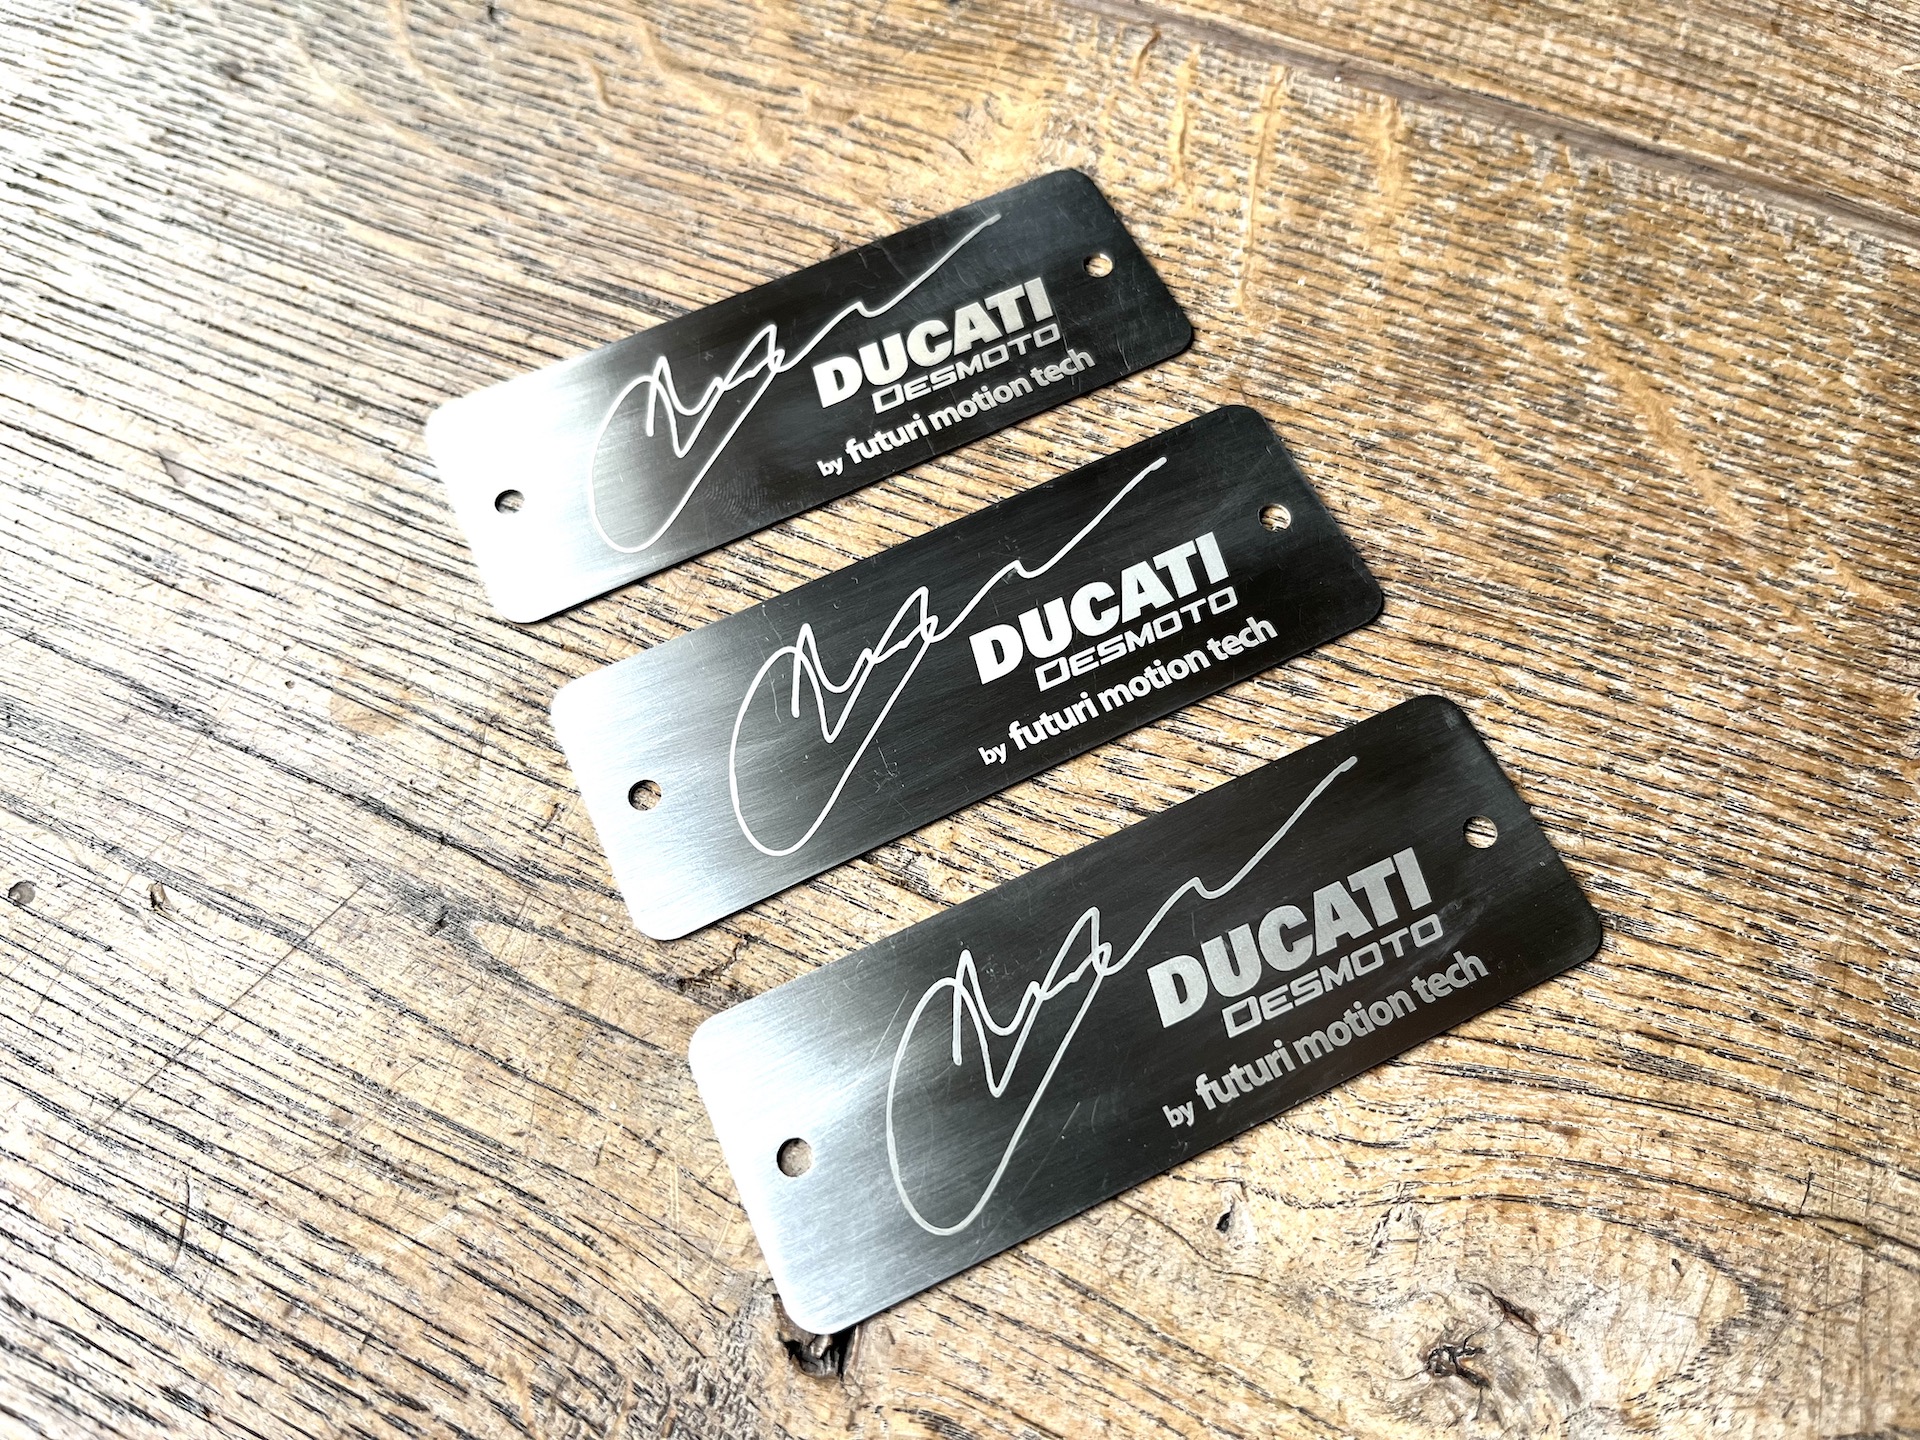
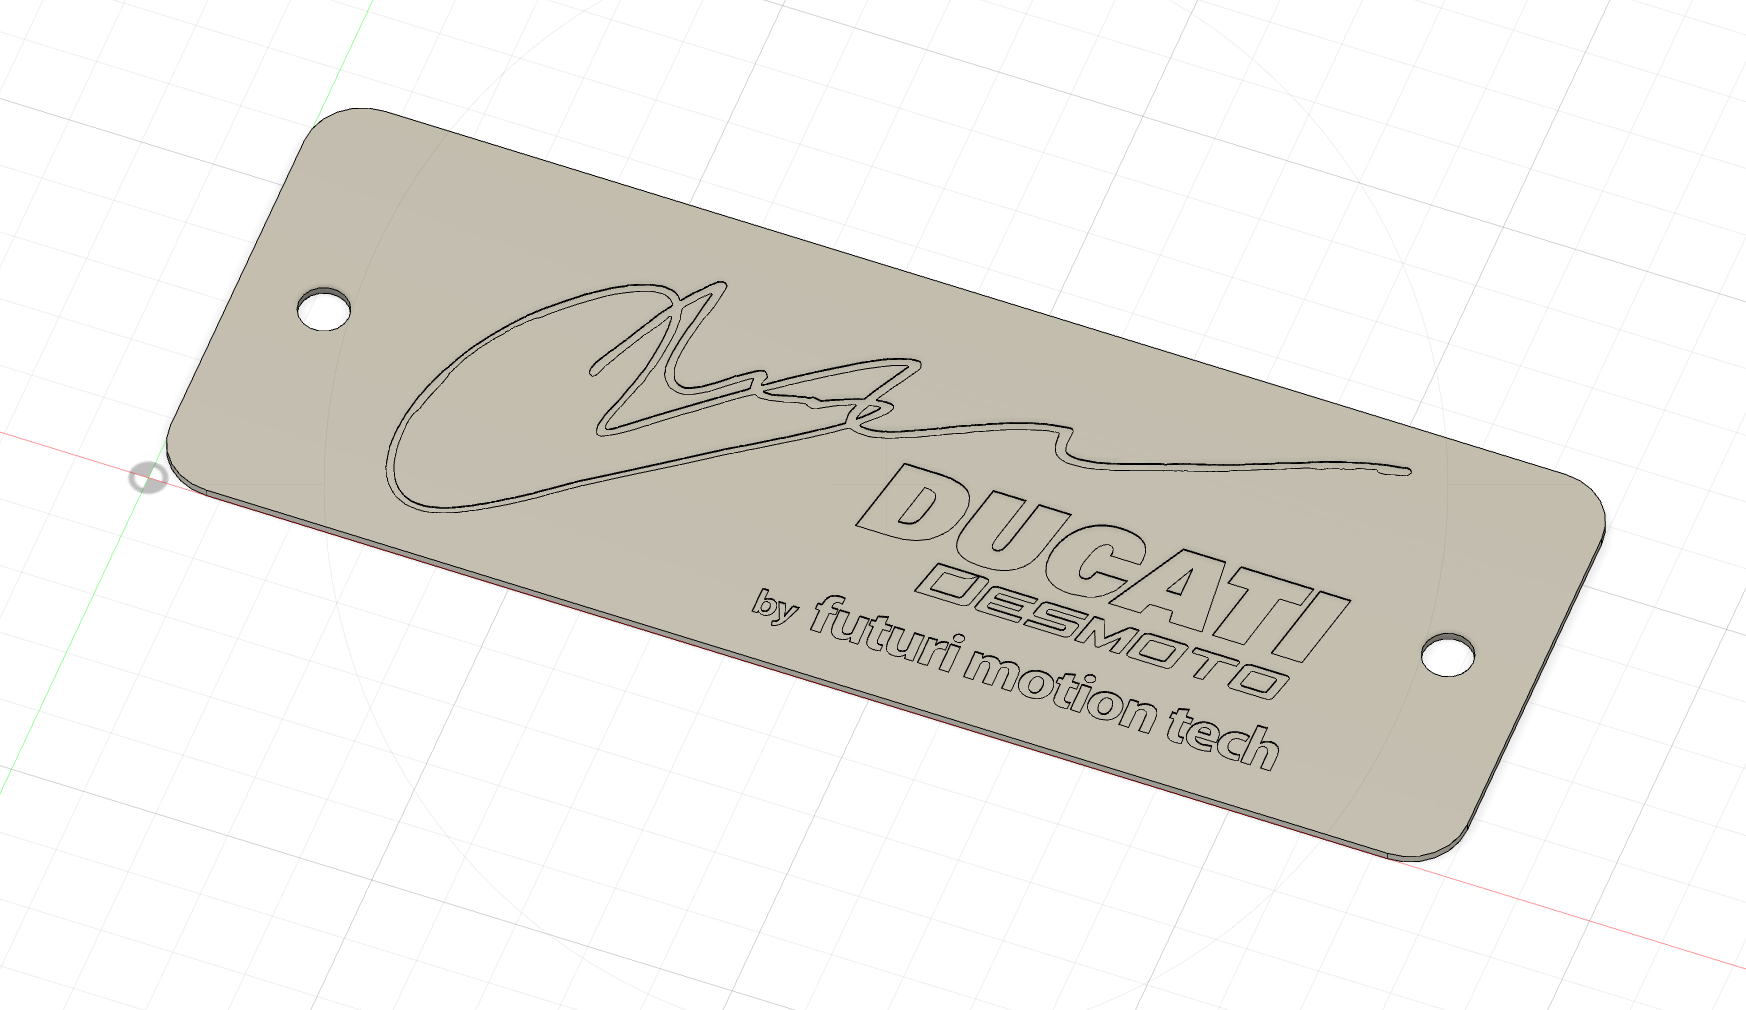
STAINLESS SIGNATURE FRAME PLATES
An artist or a inventor mark their work with their signature right? Not sure if I am neither but this project does make me proud of looking at every time I see it in my living room. Can also say the same for other people that see the project in progress..
So I want to sign my work. That’s what these plates are for when the project is done. My signature and company name laser engraved on a stainless plate to mount somewhere on the frame :).
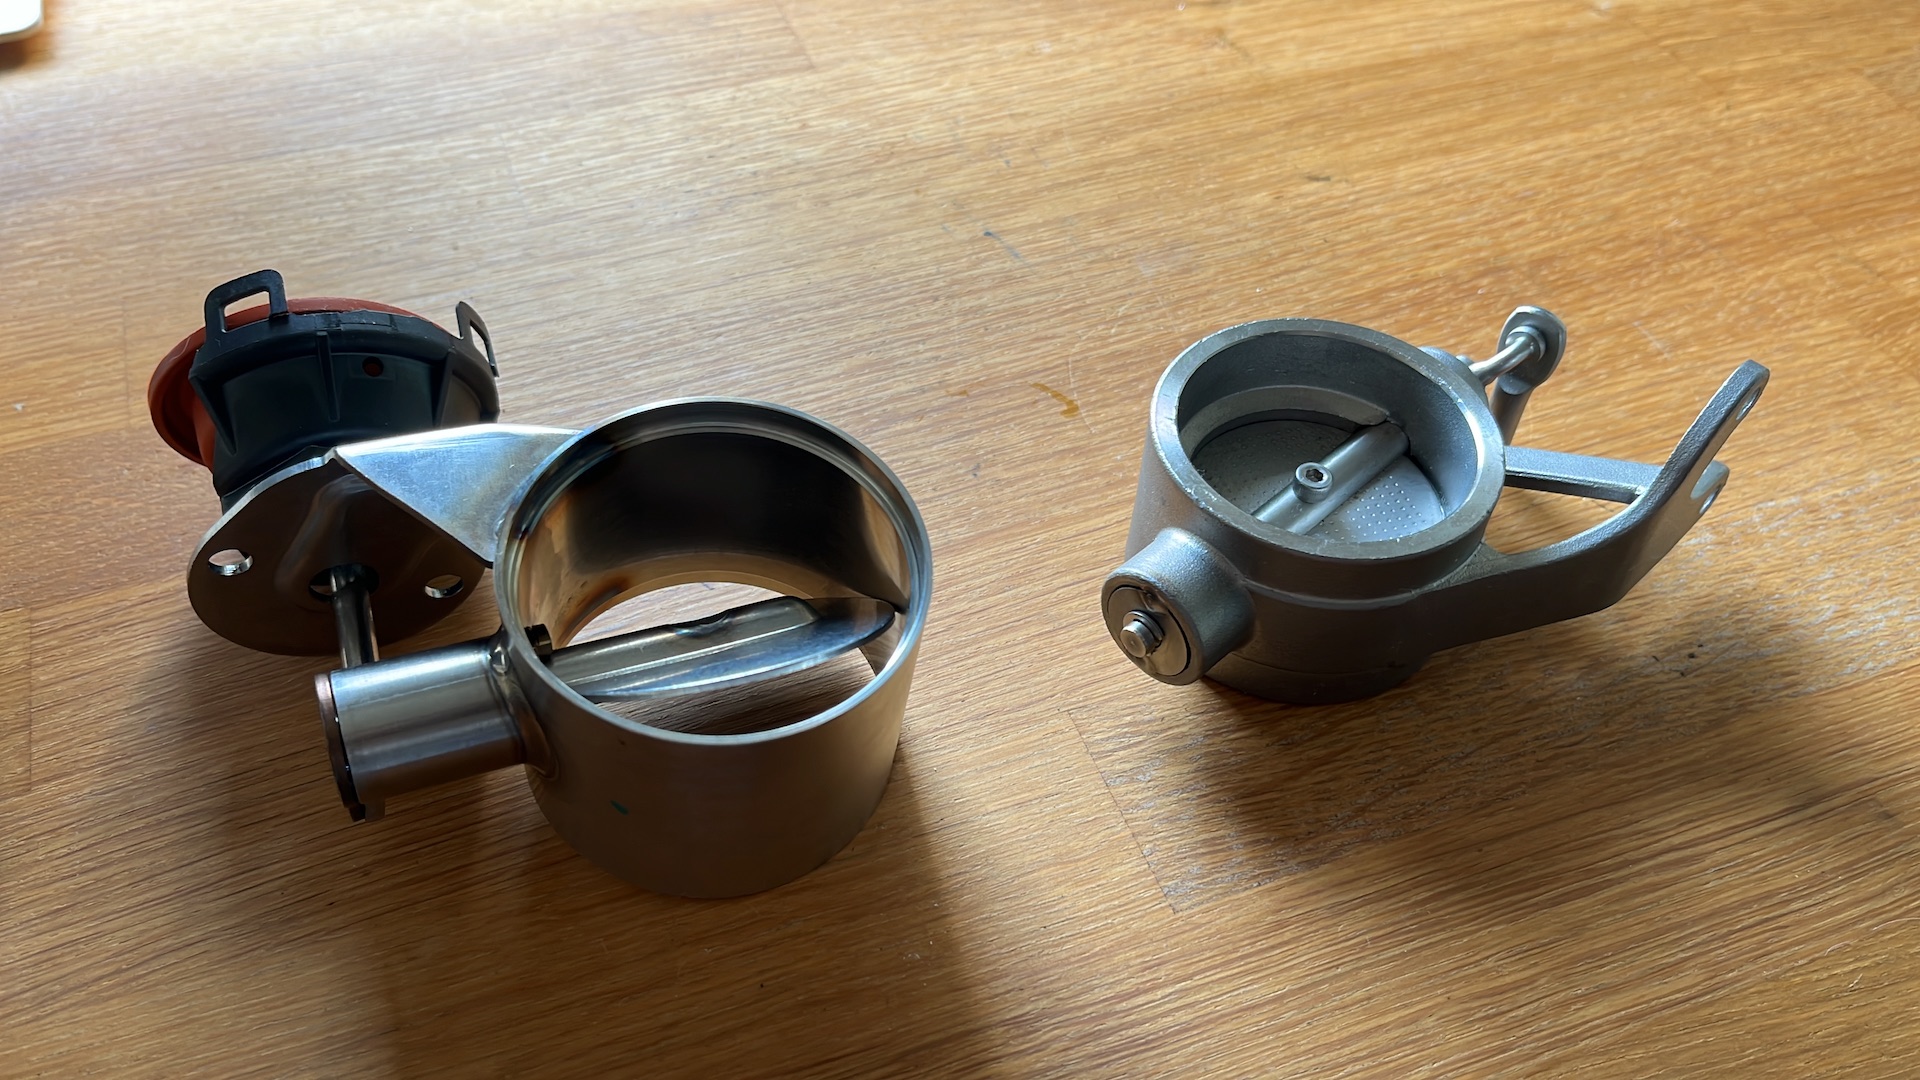
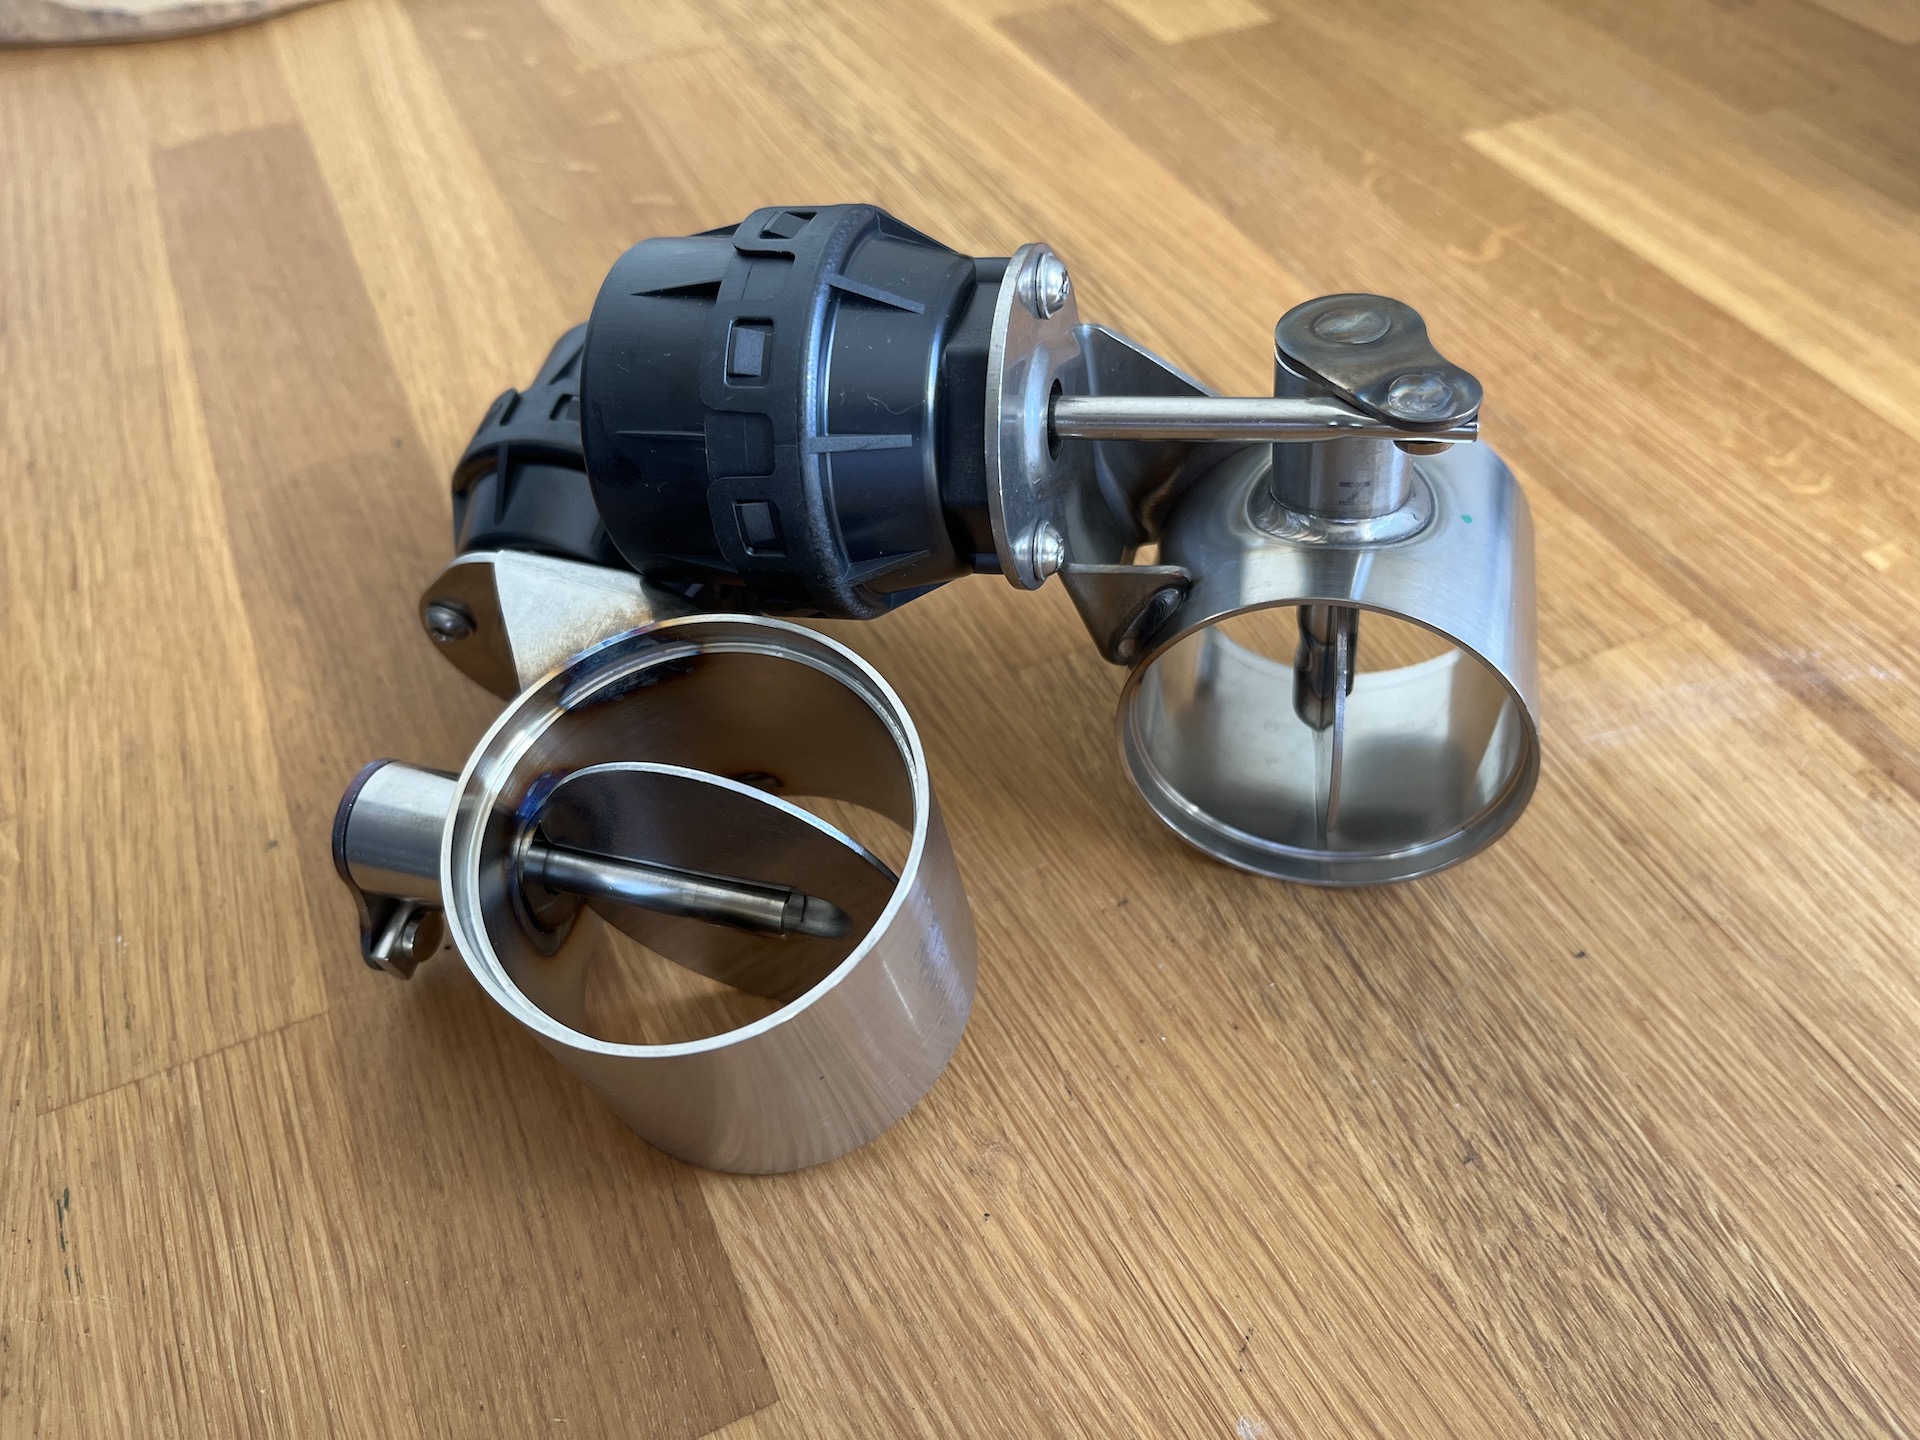
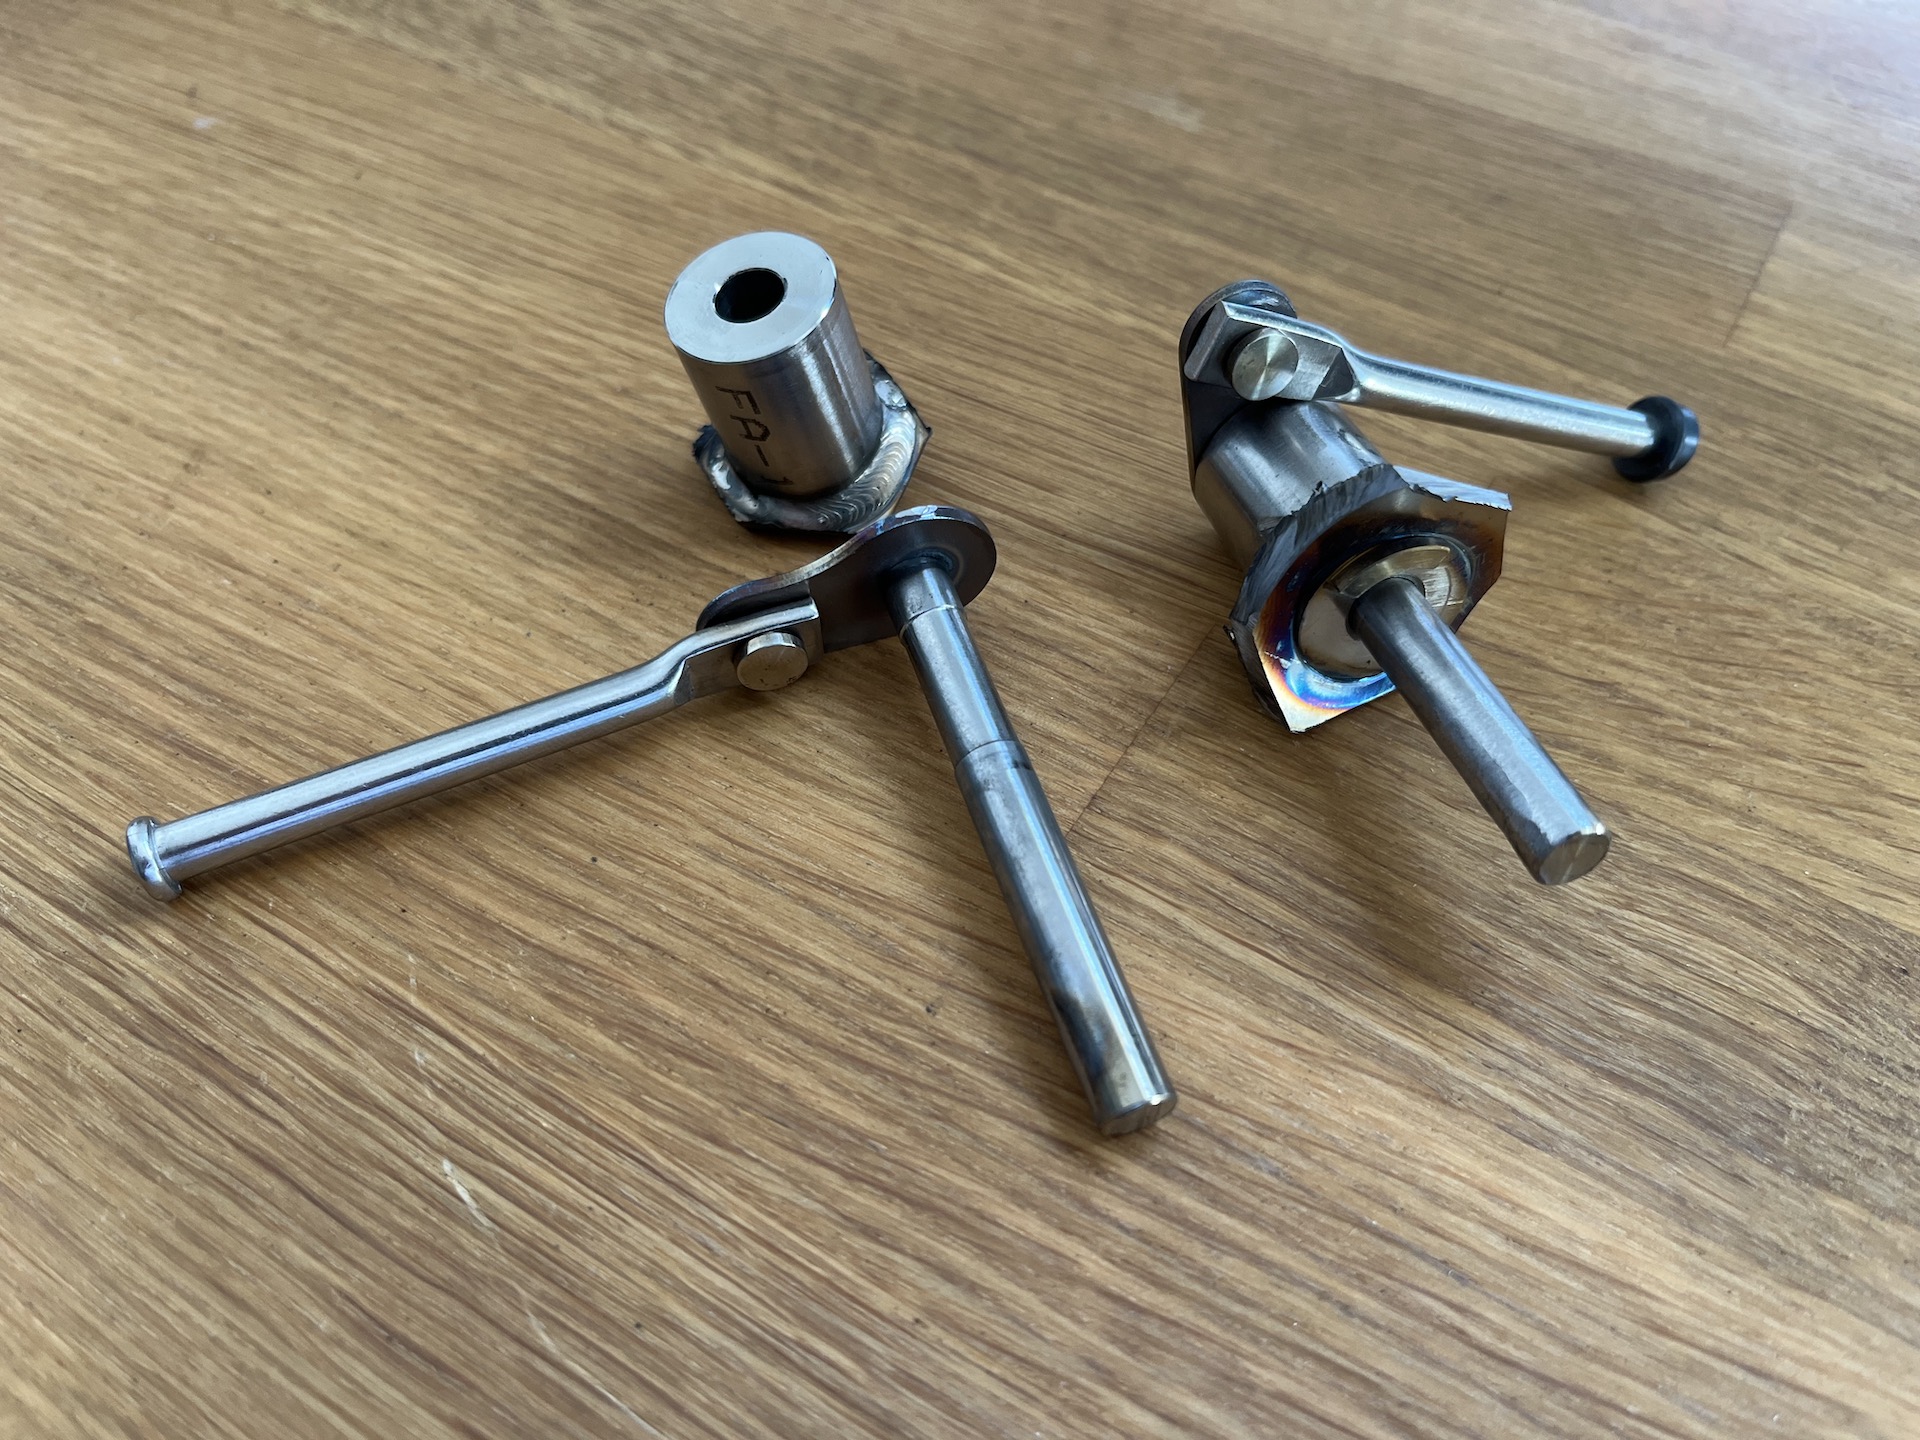
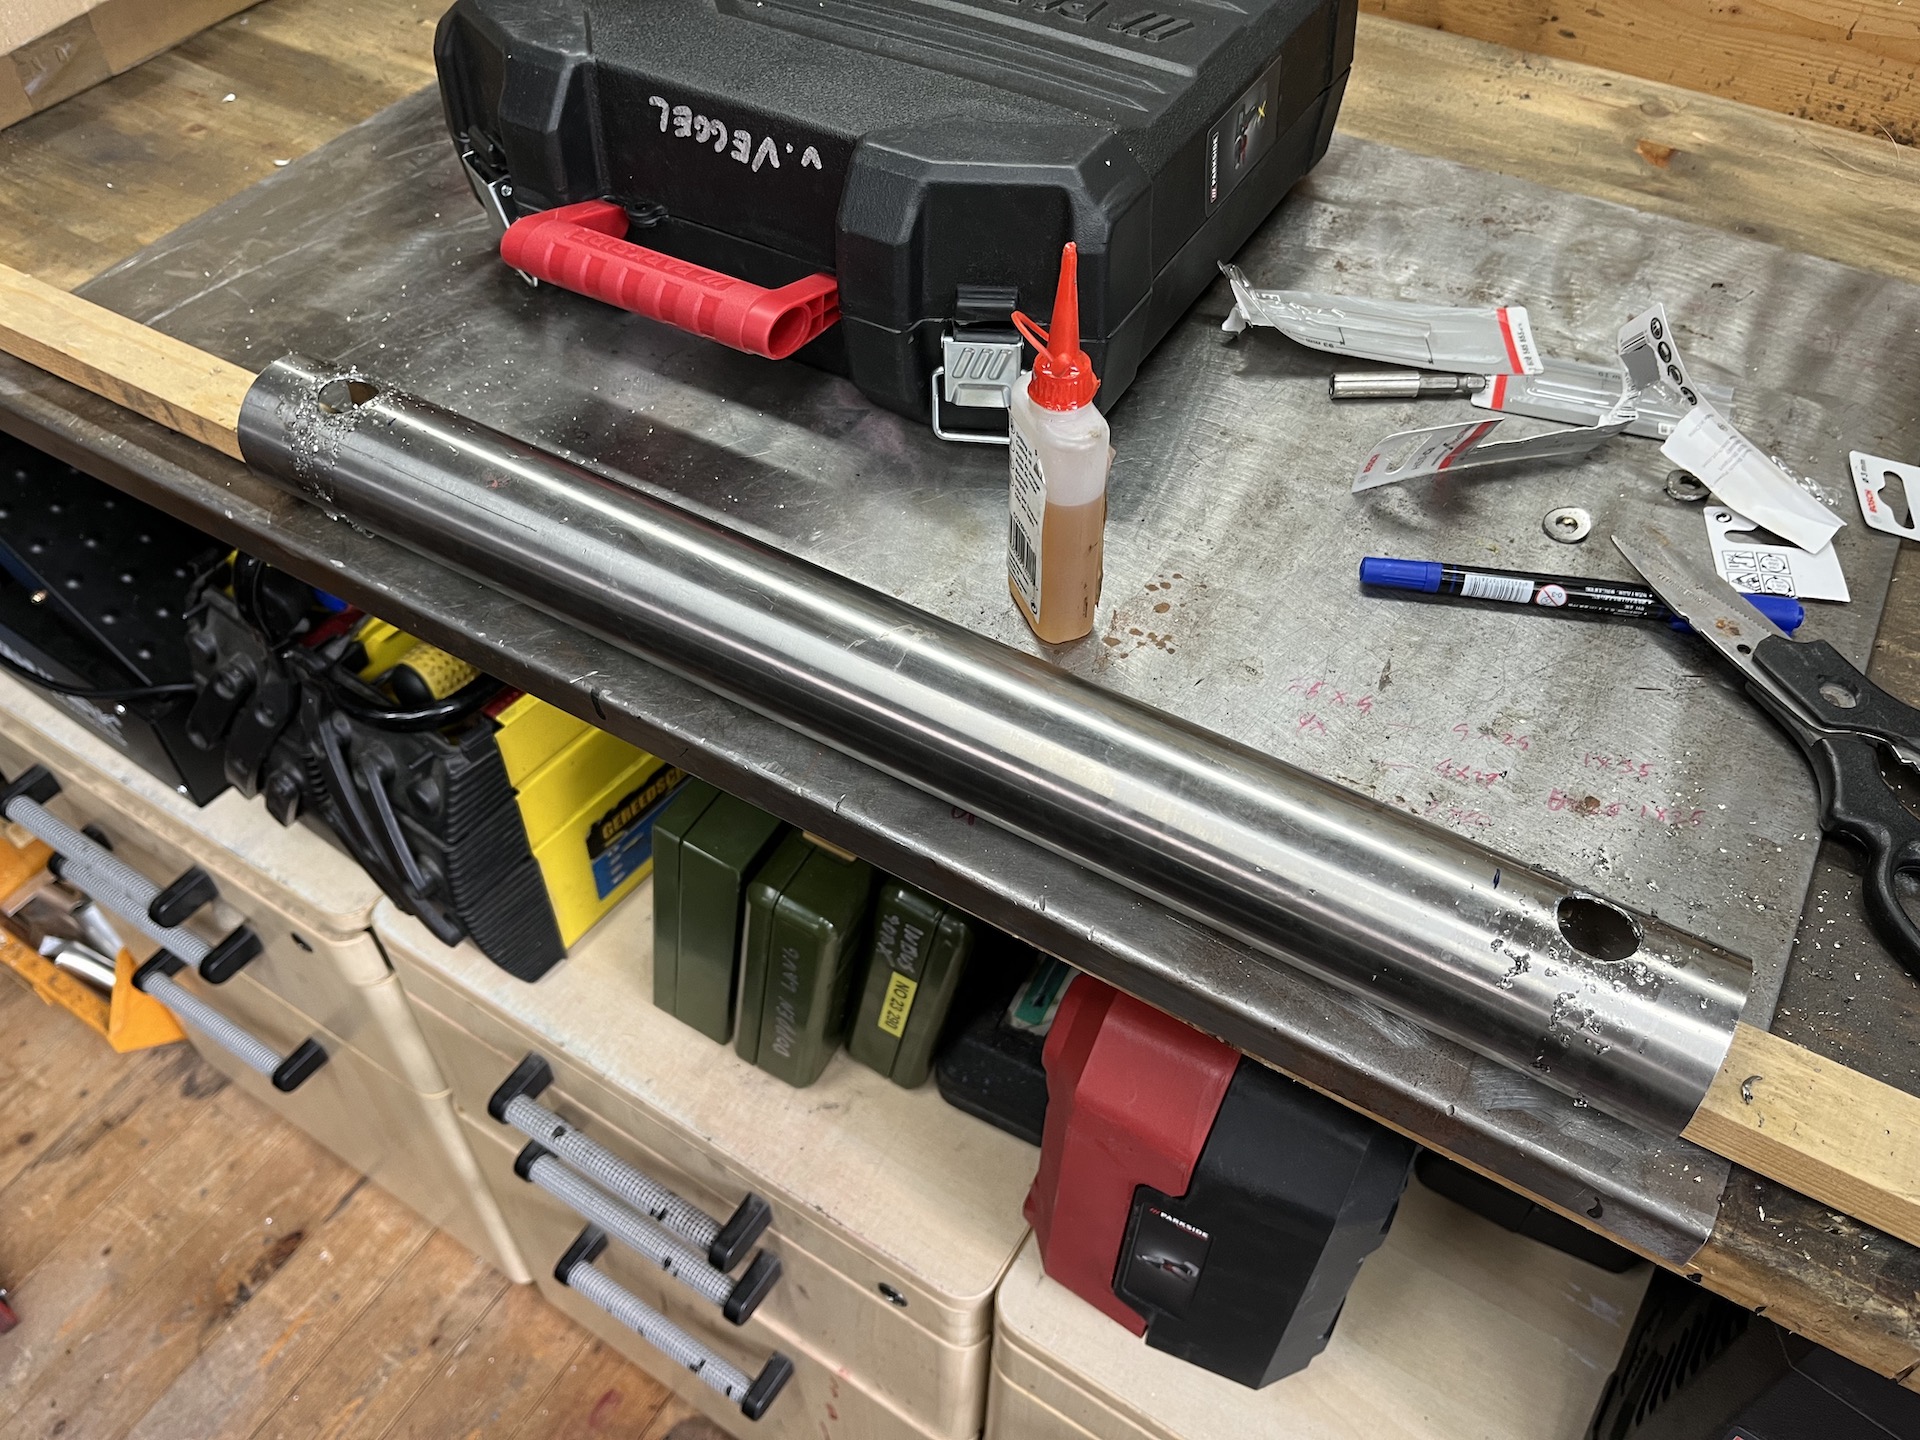
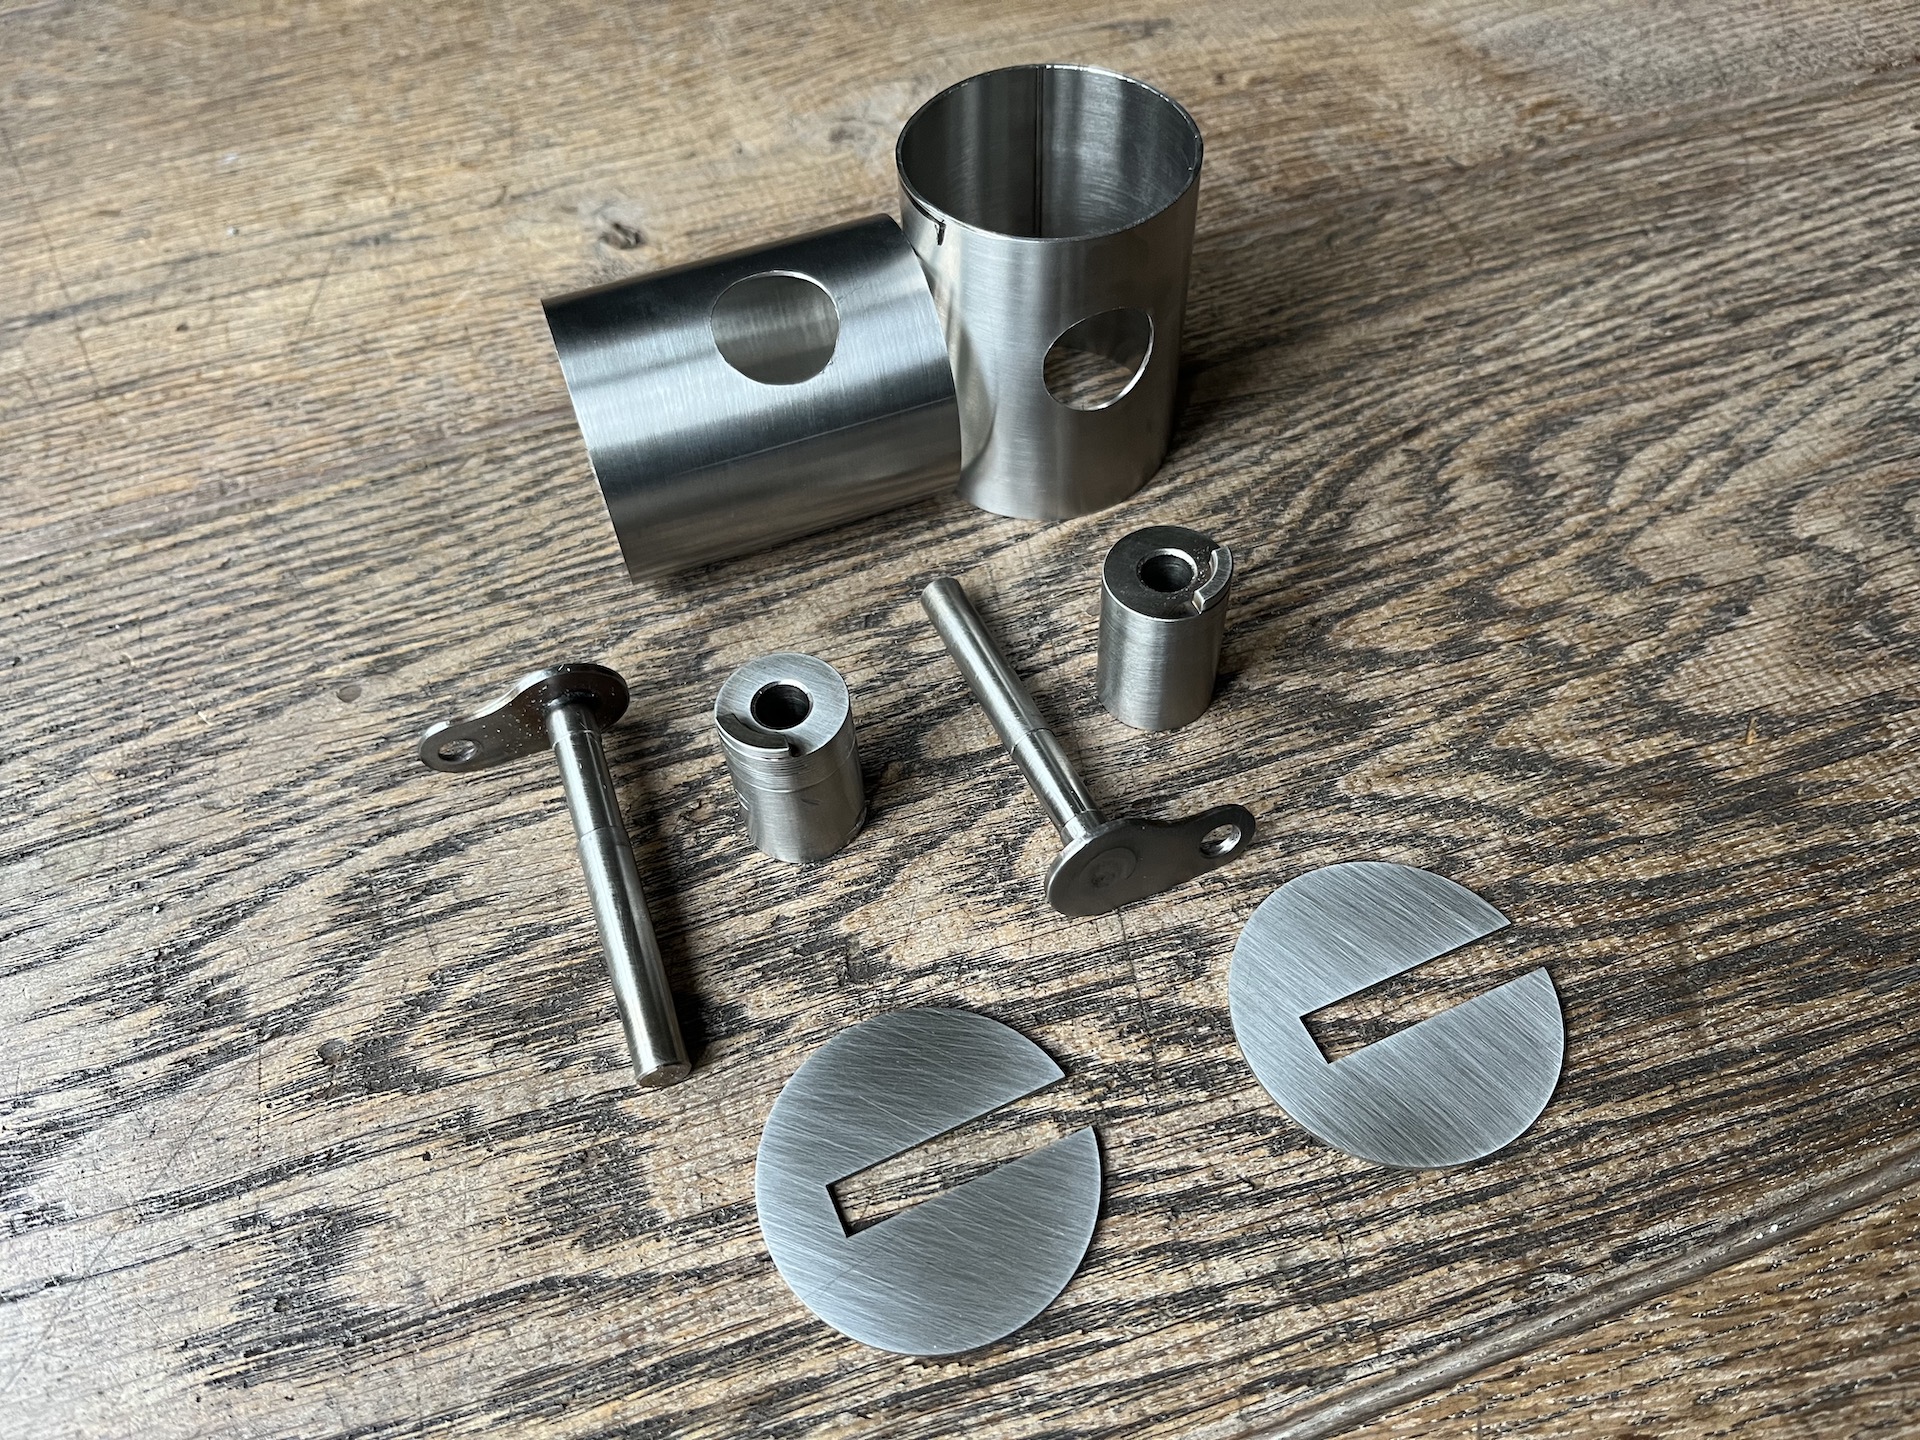
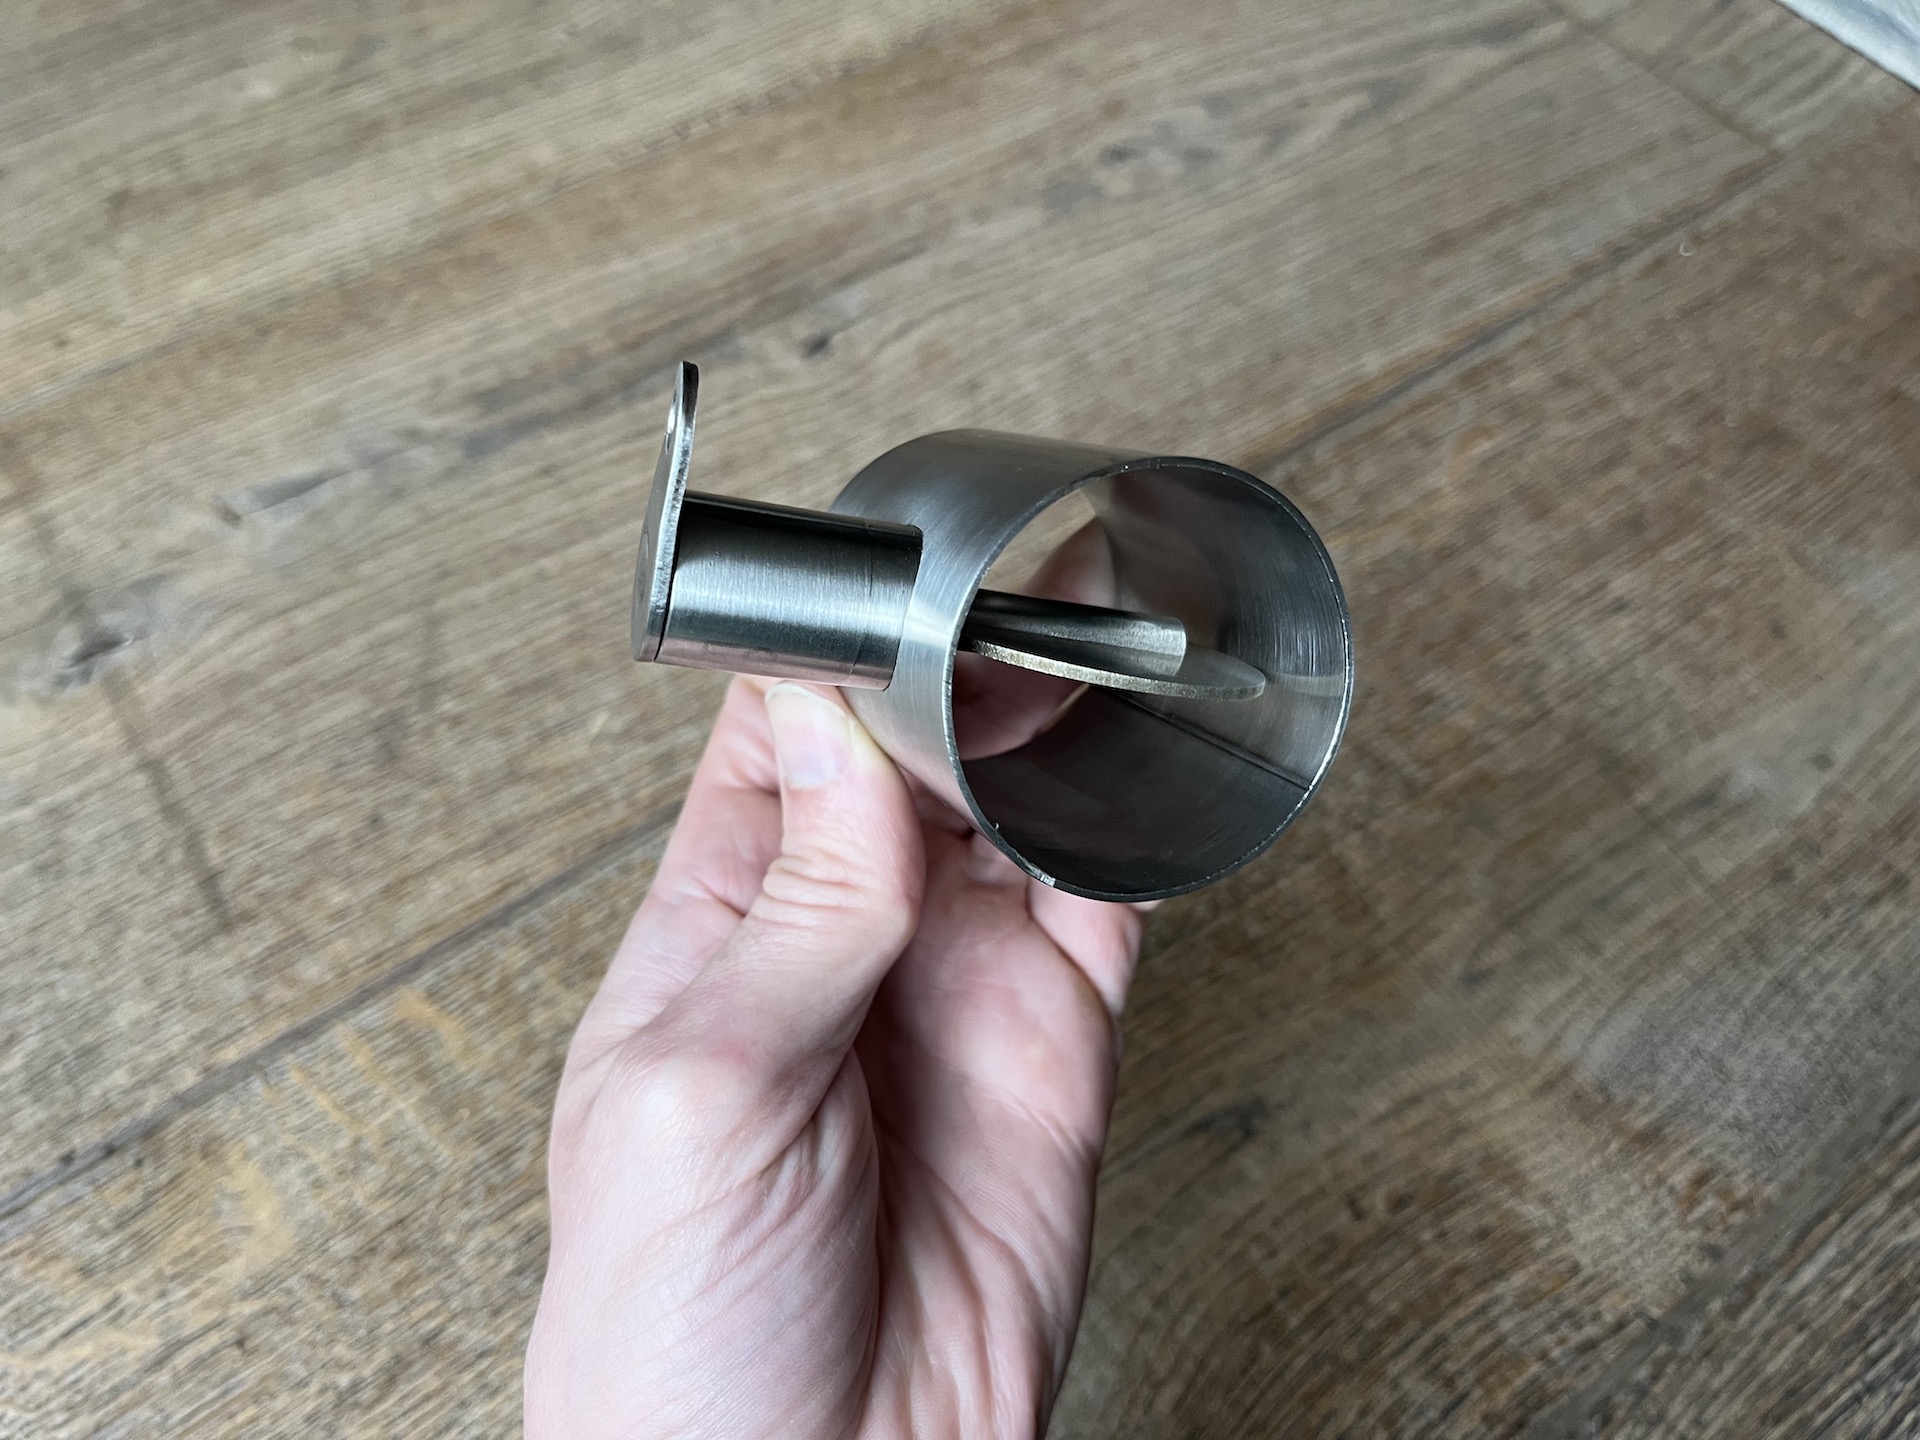
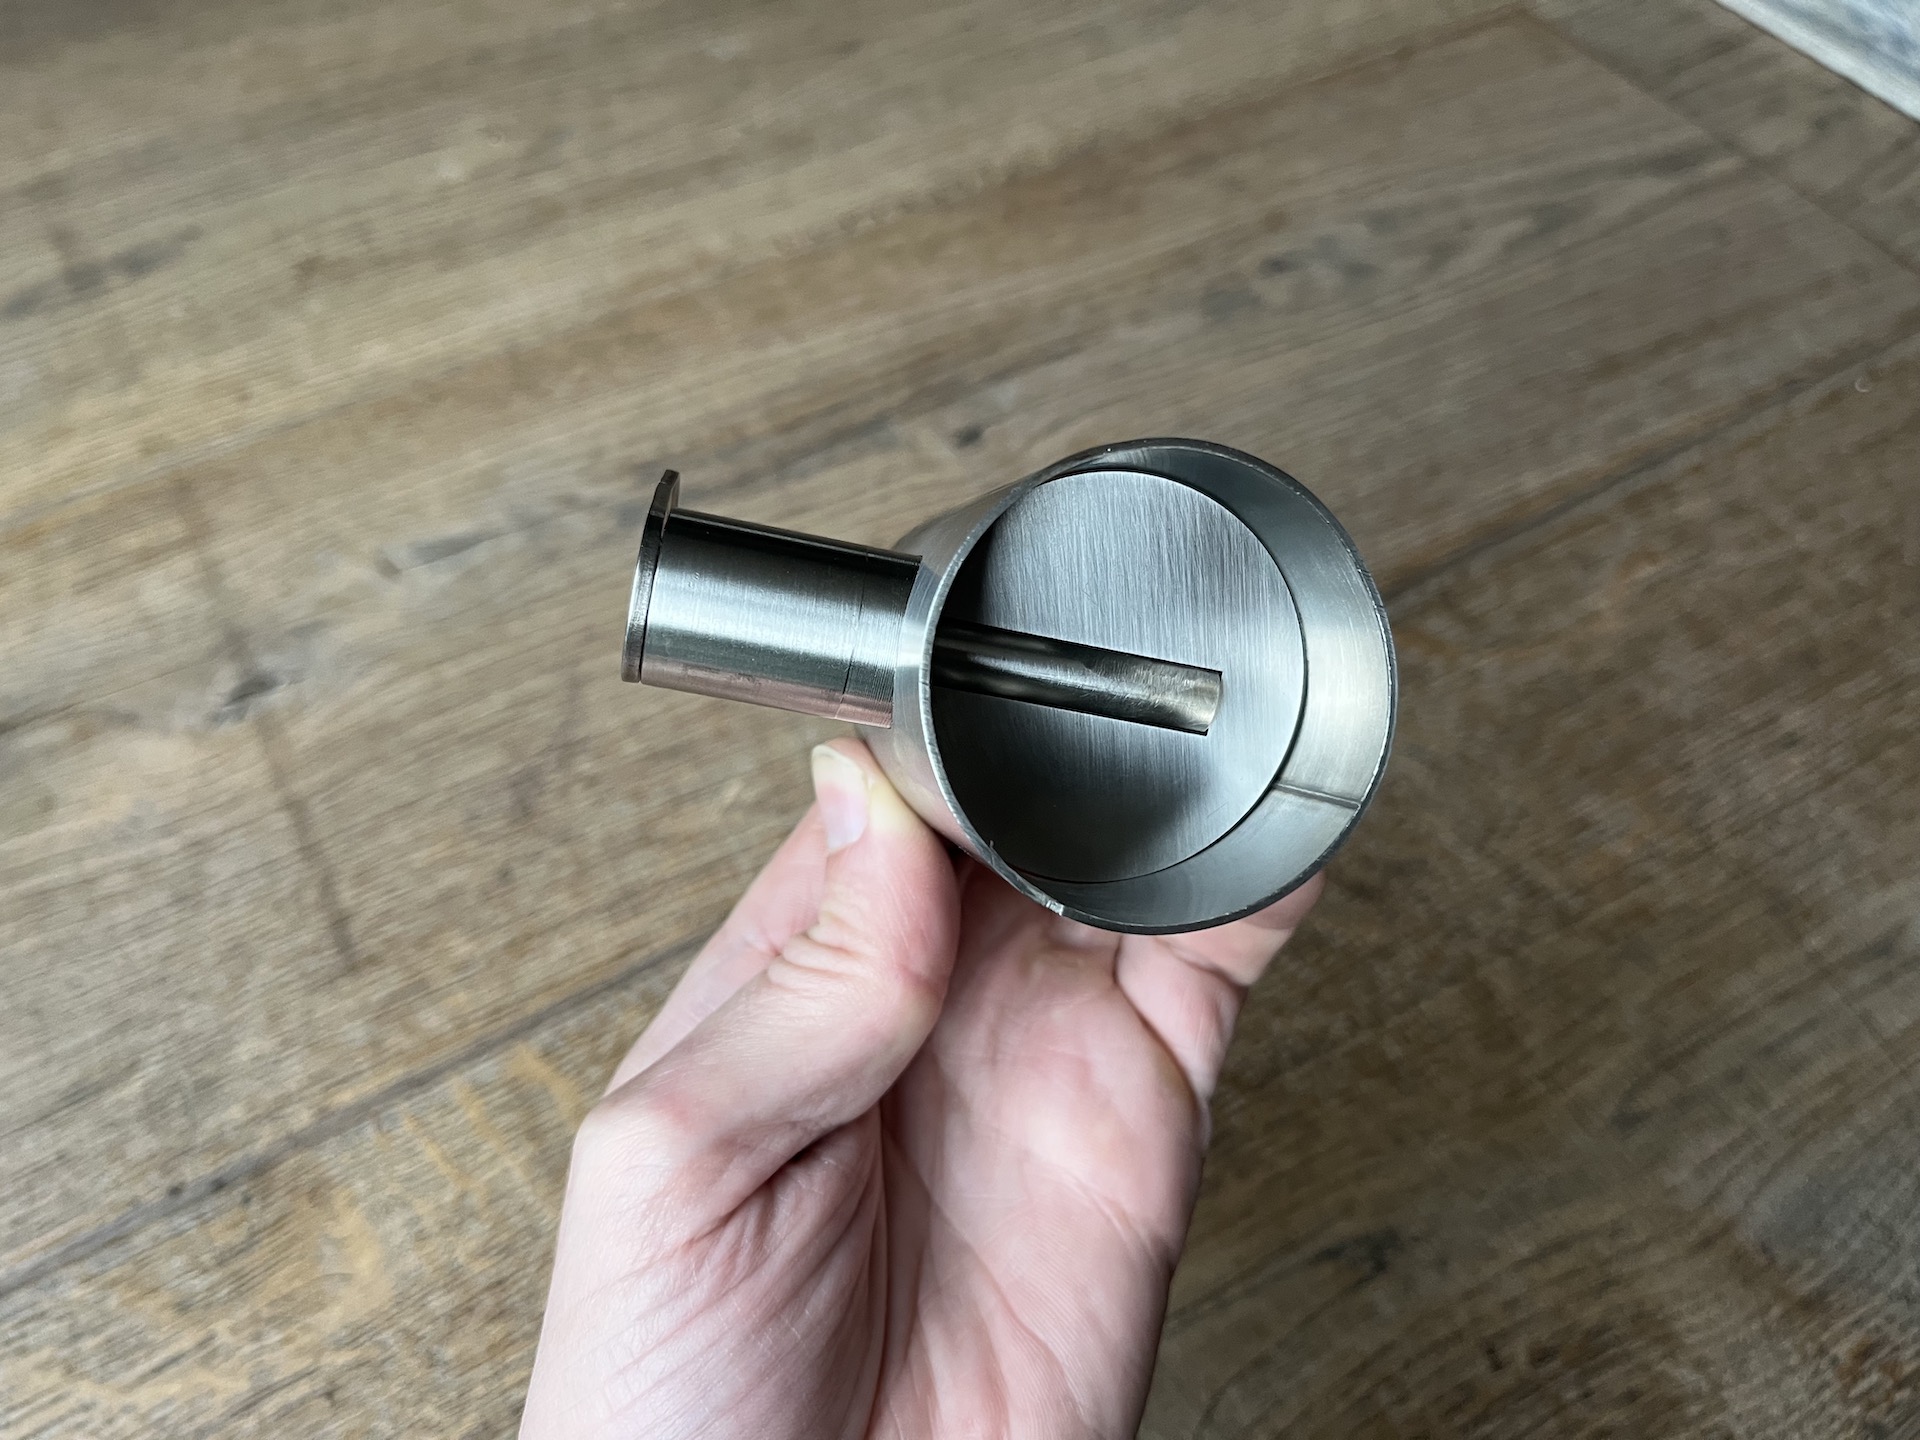
CUSTOM 50MM EXHAUST VALVE
The exhaust valves I was planning to use were just to heavy. No way I can get those to a acceptable weight. So its time to build our own custom ones since nothing is available in the right size of 50mm.
For Project Venom Racing we have multiple 60mm BMW exhaust valves available. Thin walled and really lightweight. Also has a simpler axle/valve design then the other model. I donated 2 of those valves to the Desmoto project and decided to cut them up to use as a base. Nothing special, just an axle with a cylinder, but it already has hard stops milled in.
This is a situation where CAD is ideal to measure and test things out. Designed an oval valve with just the right clearances that will be laser cut to size.
Why exhaust valves? To allow me to somewhat reduce the sound of the exhaust when I get pulled over by the police… haha

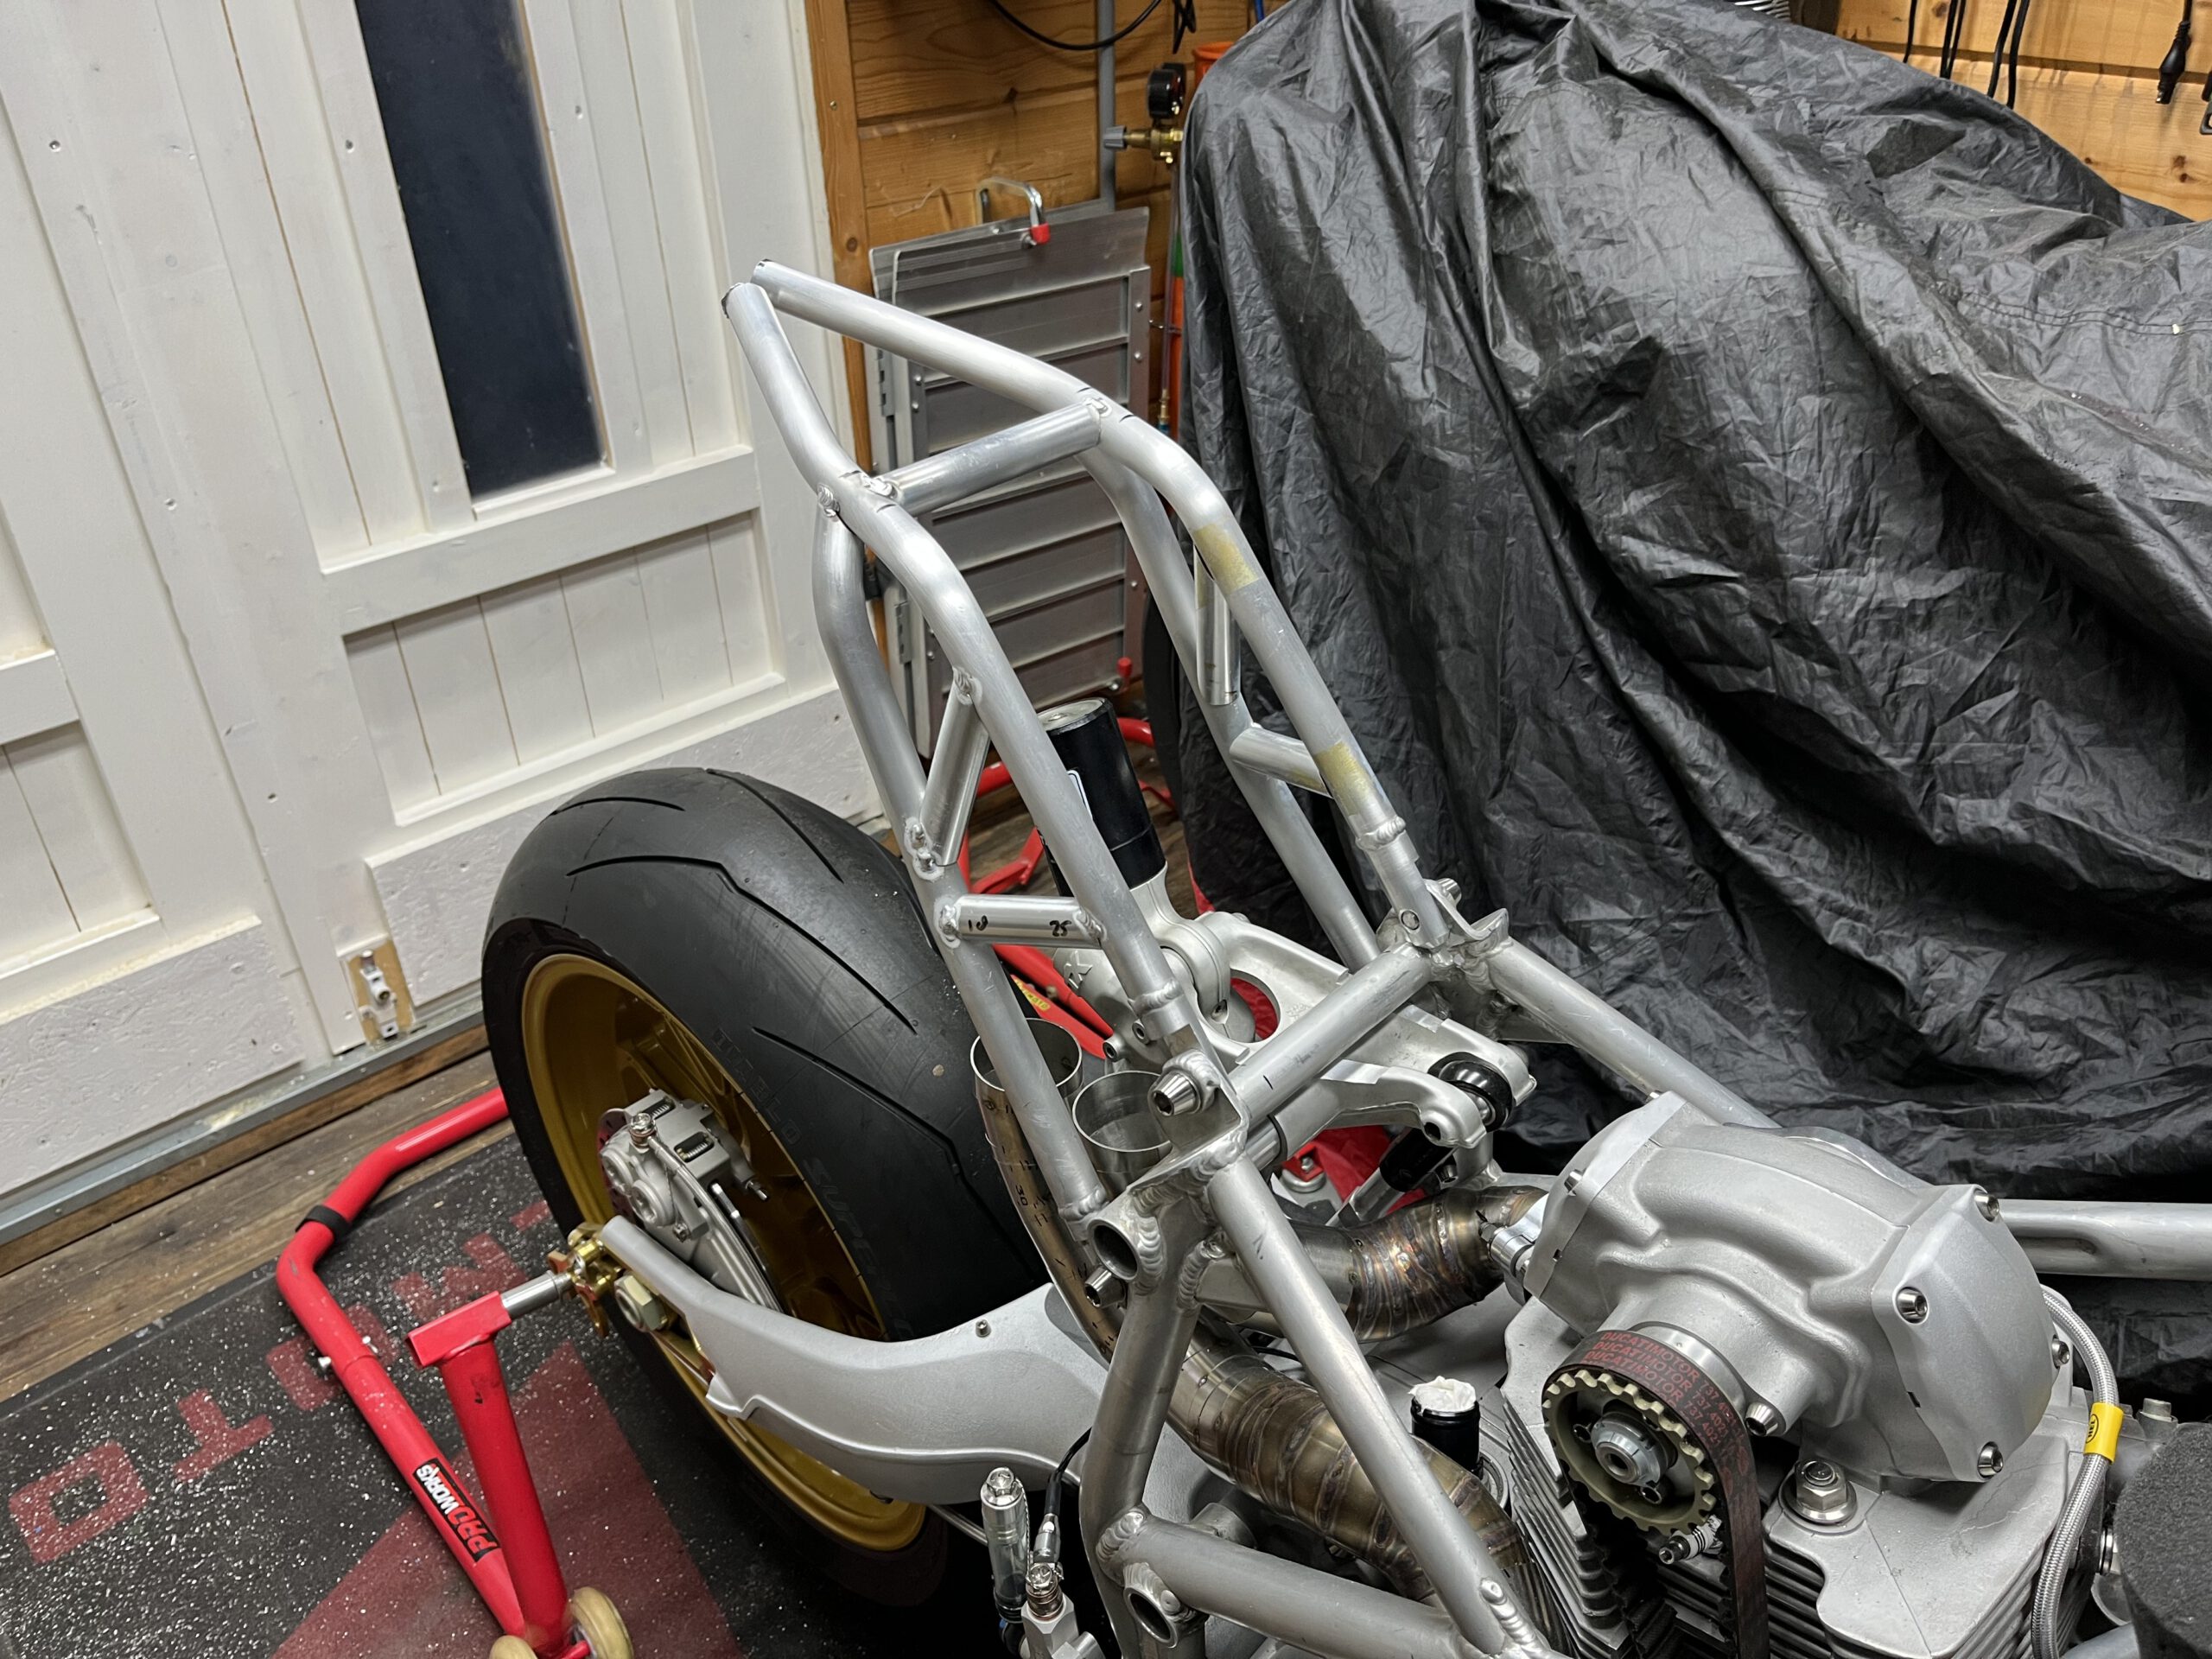
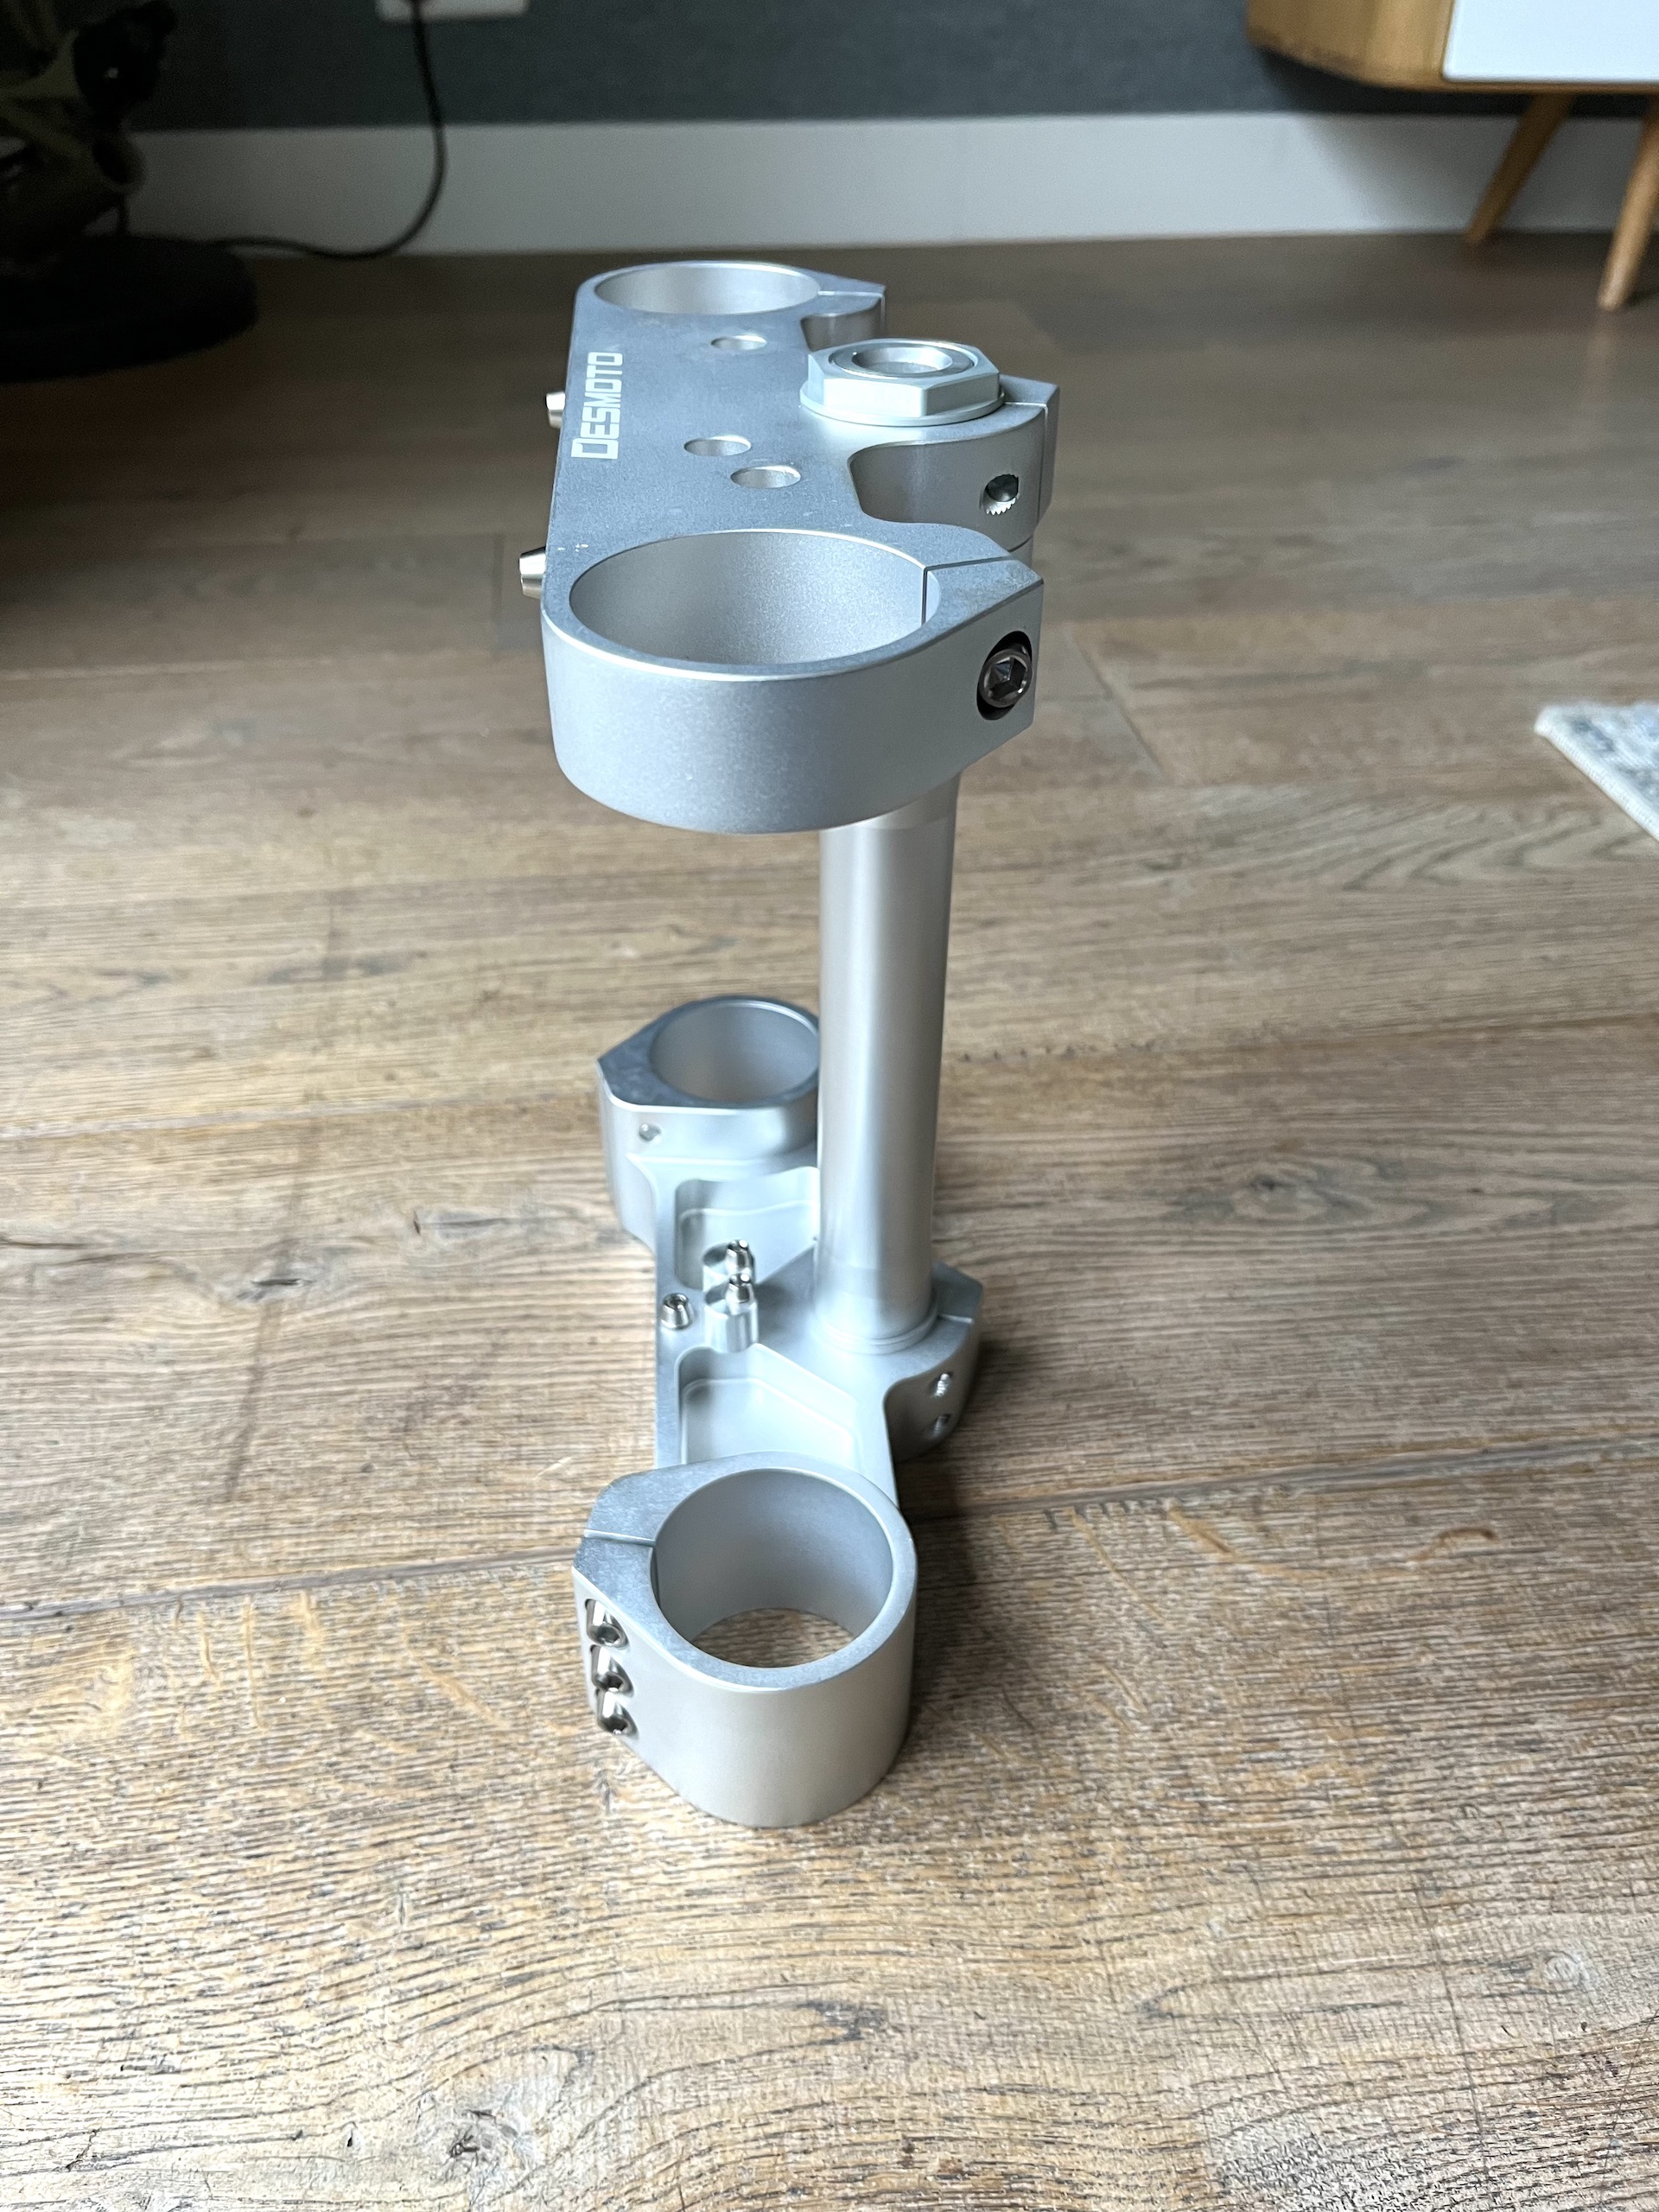
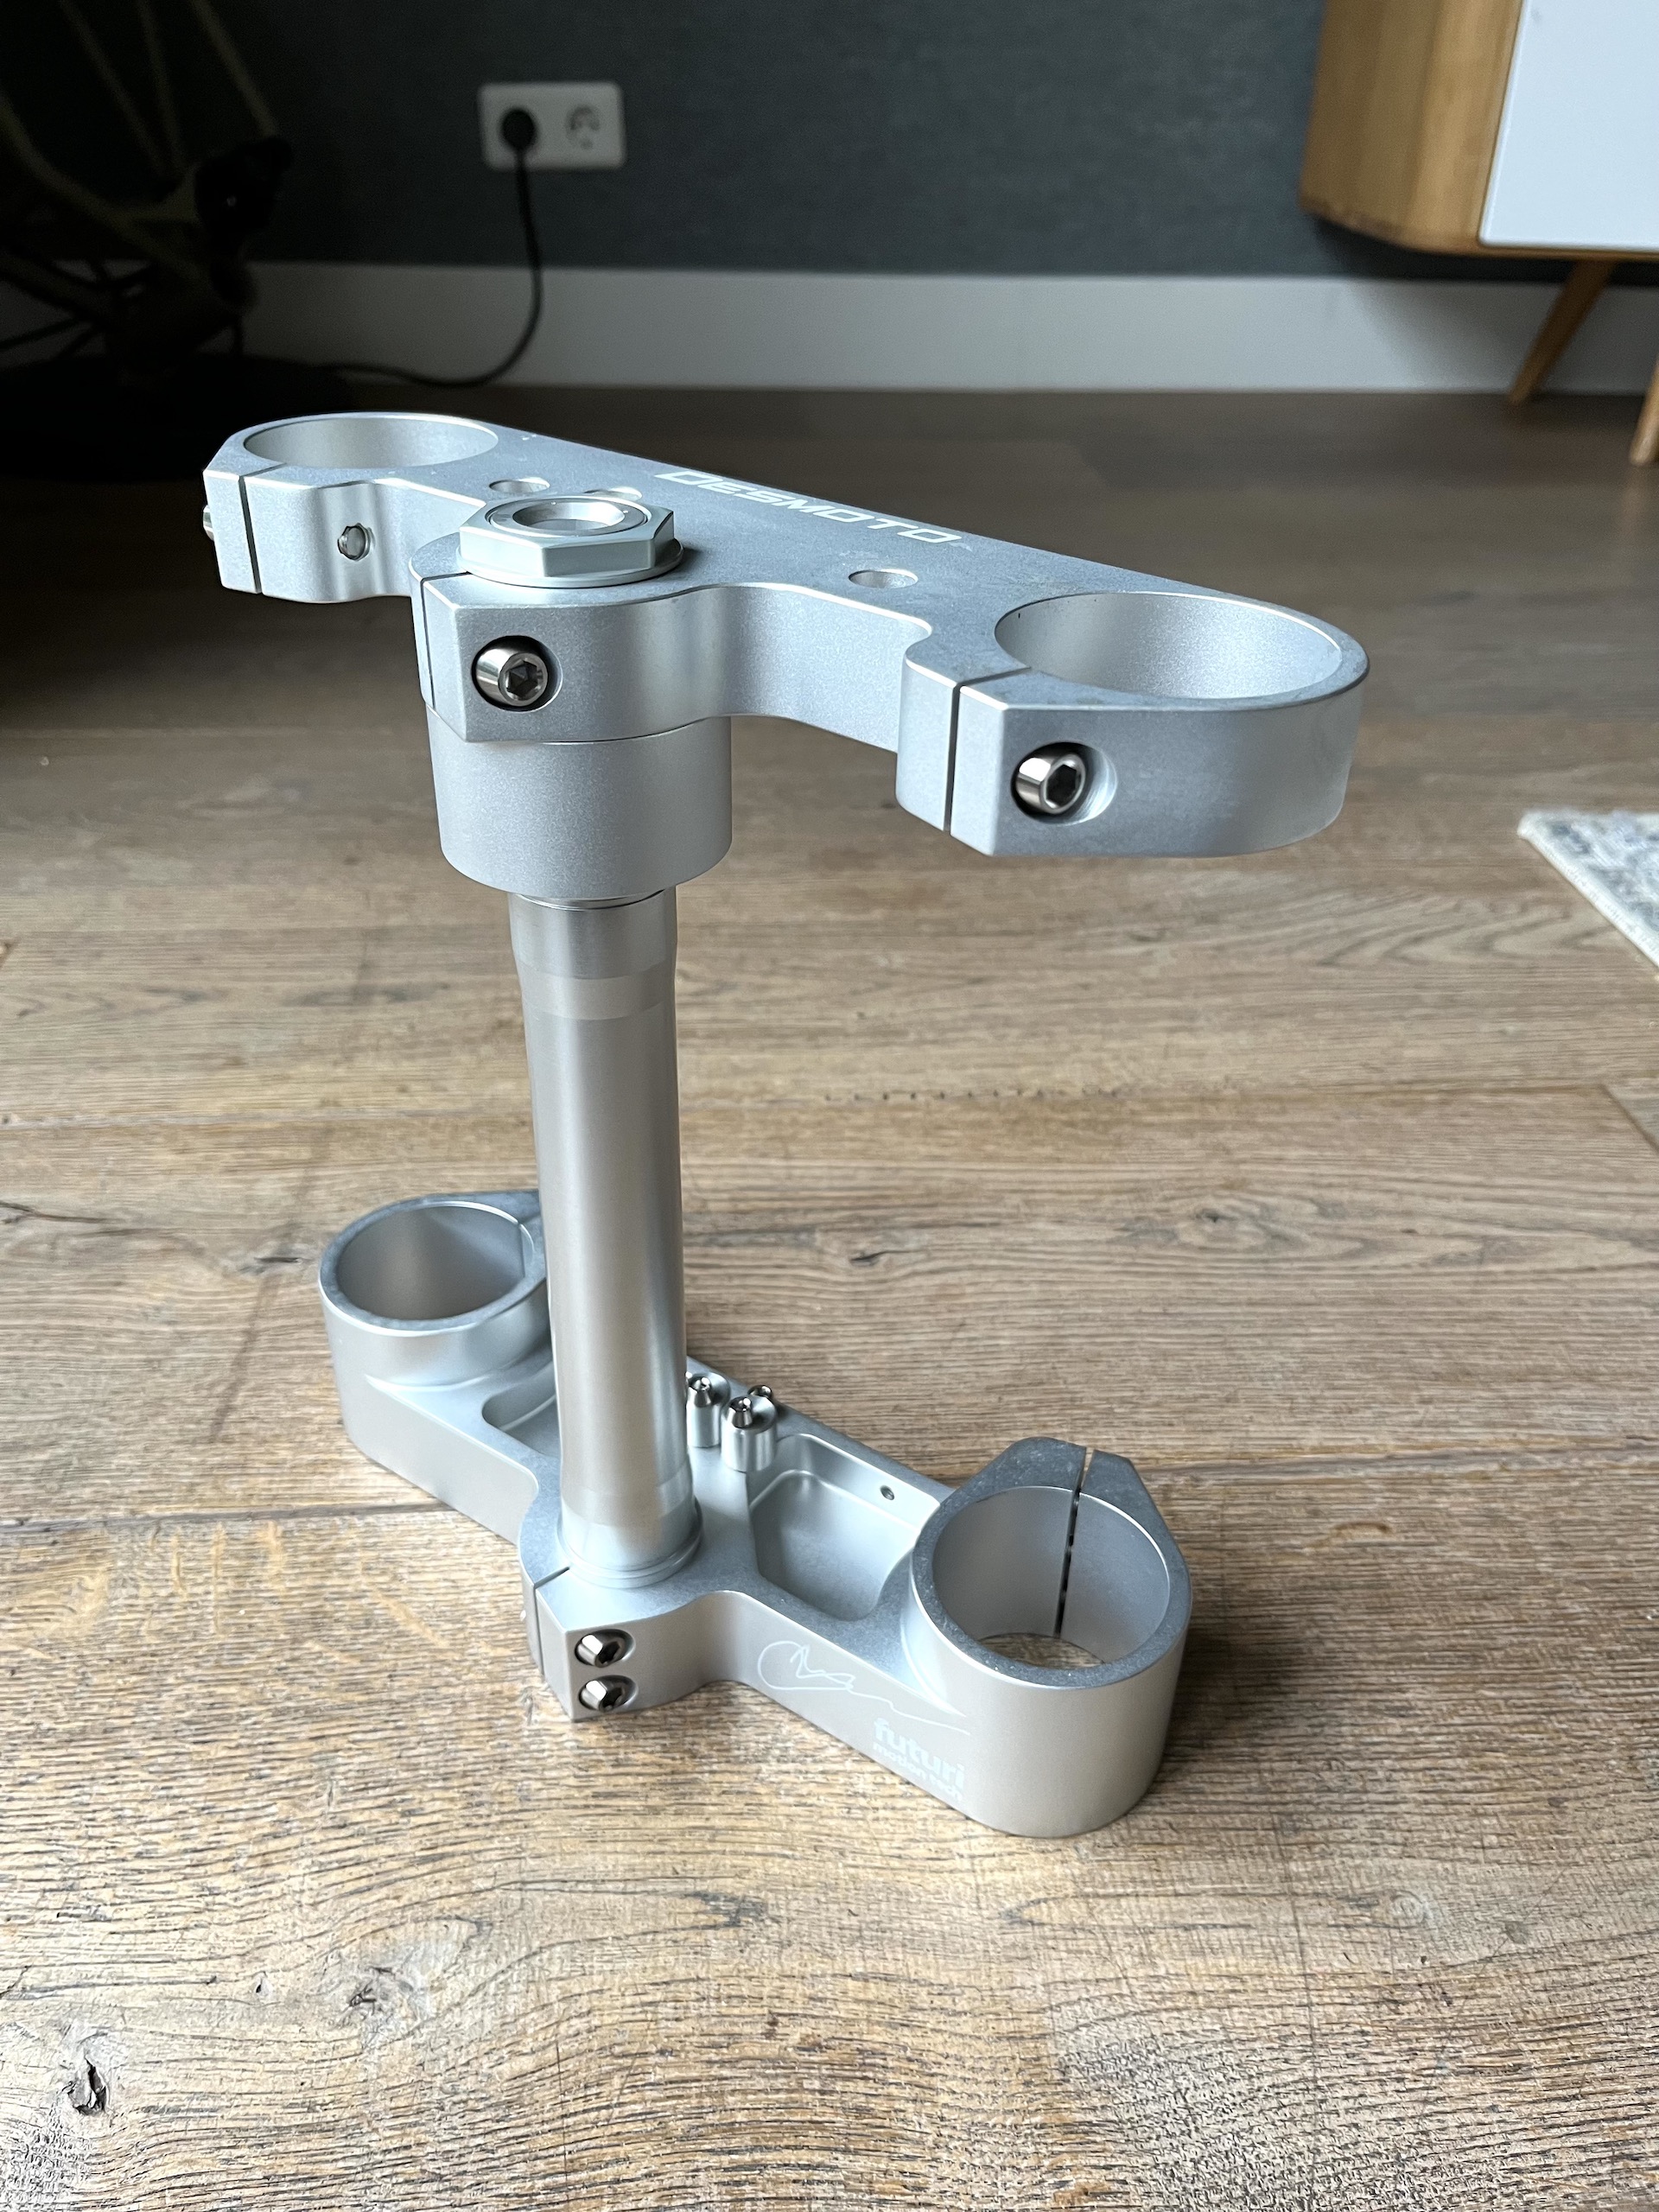
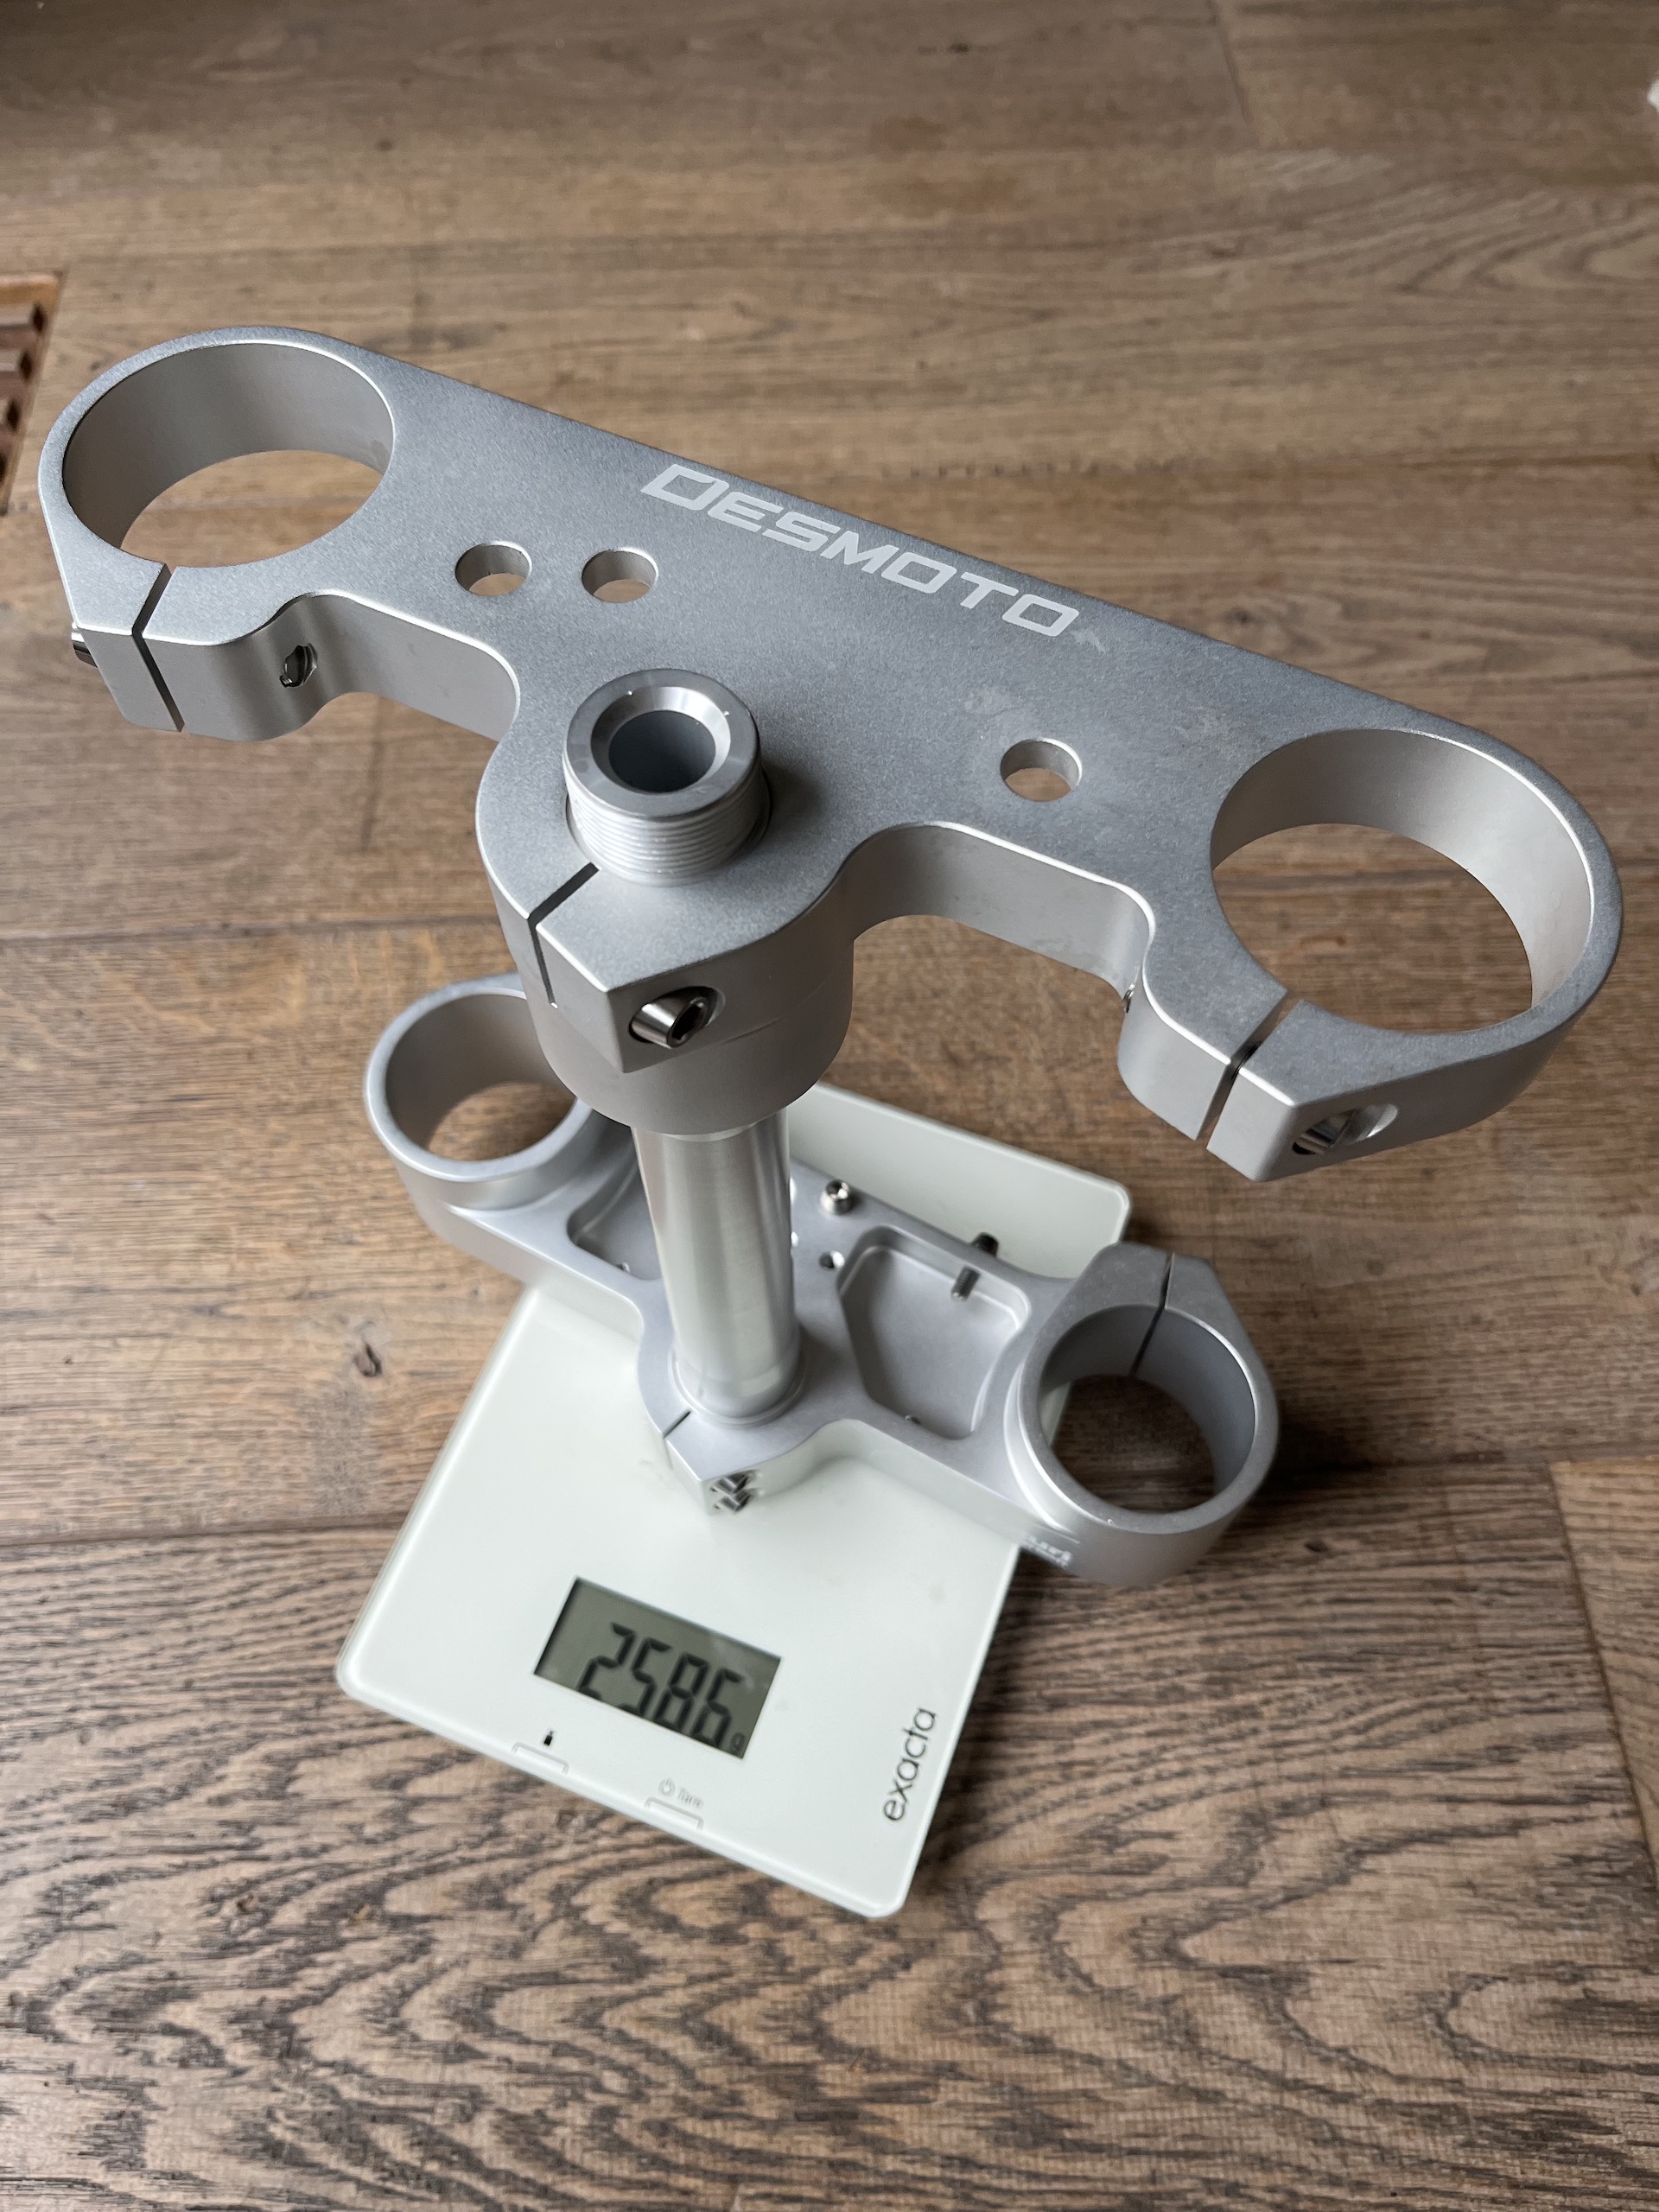
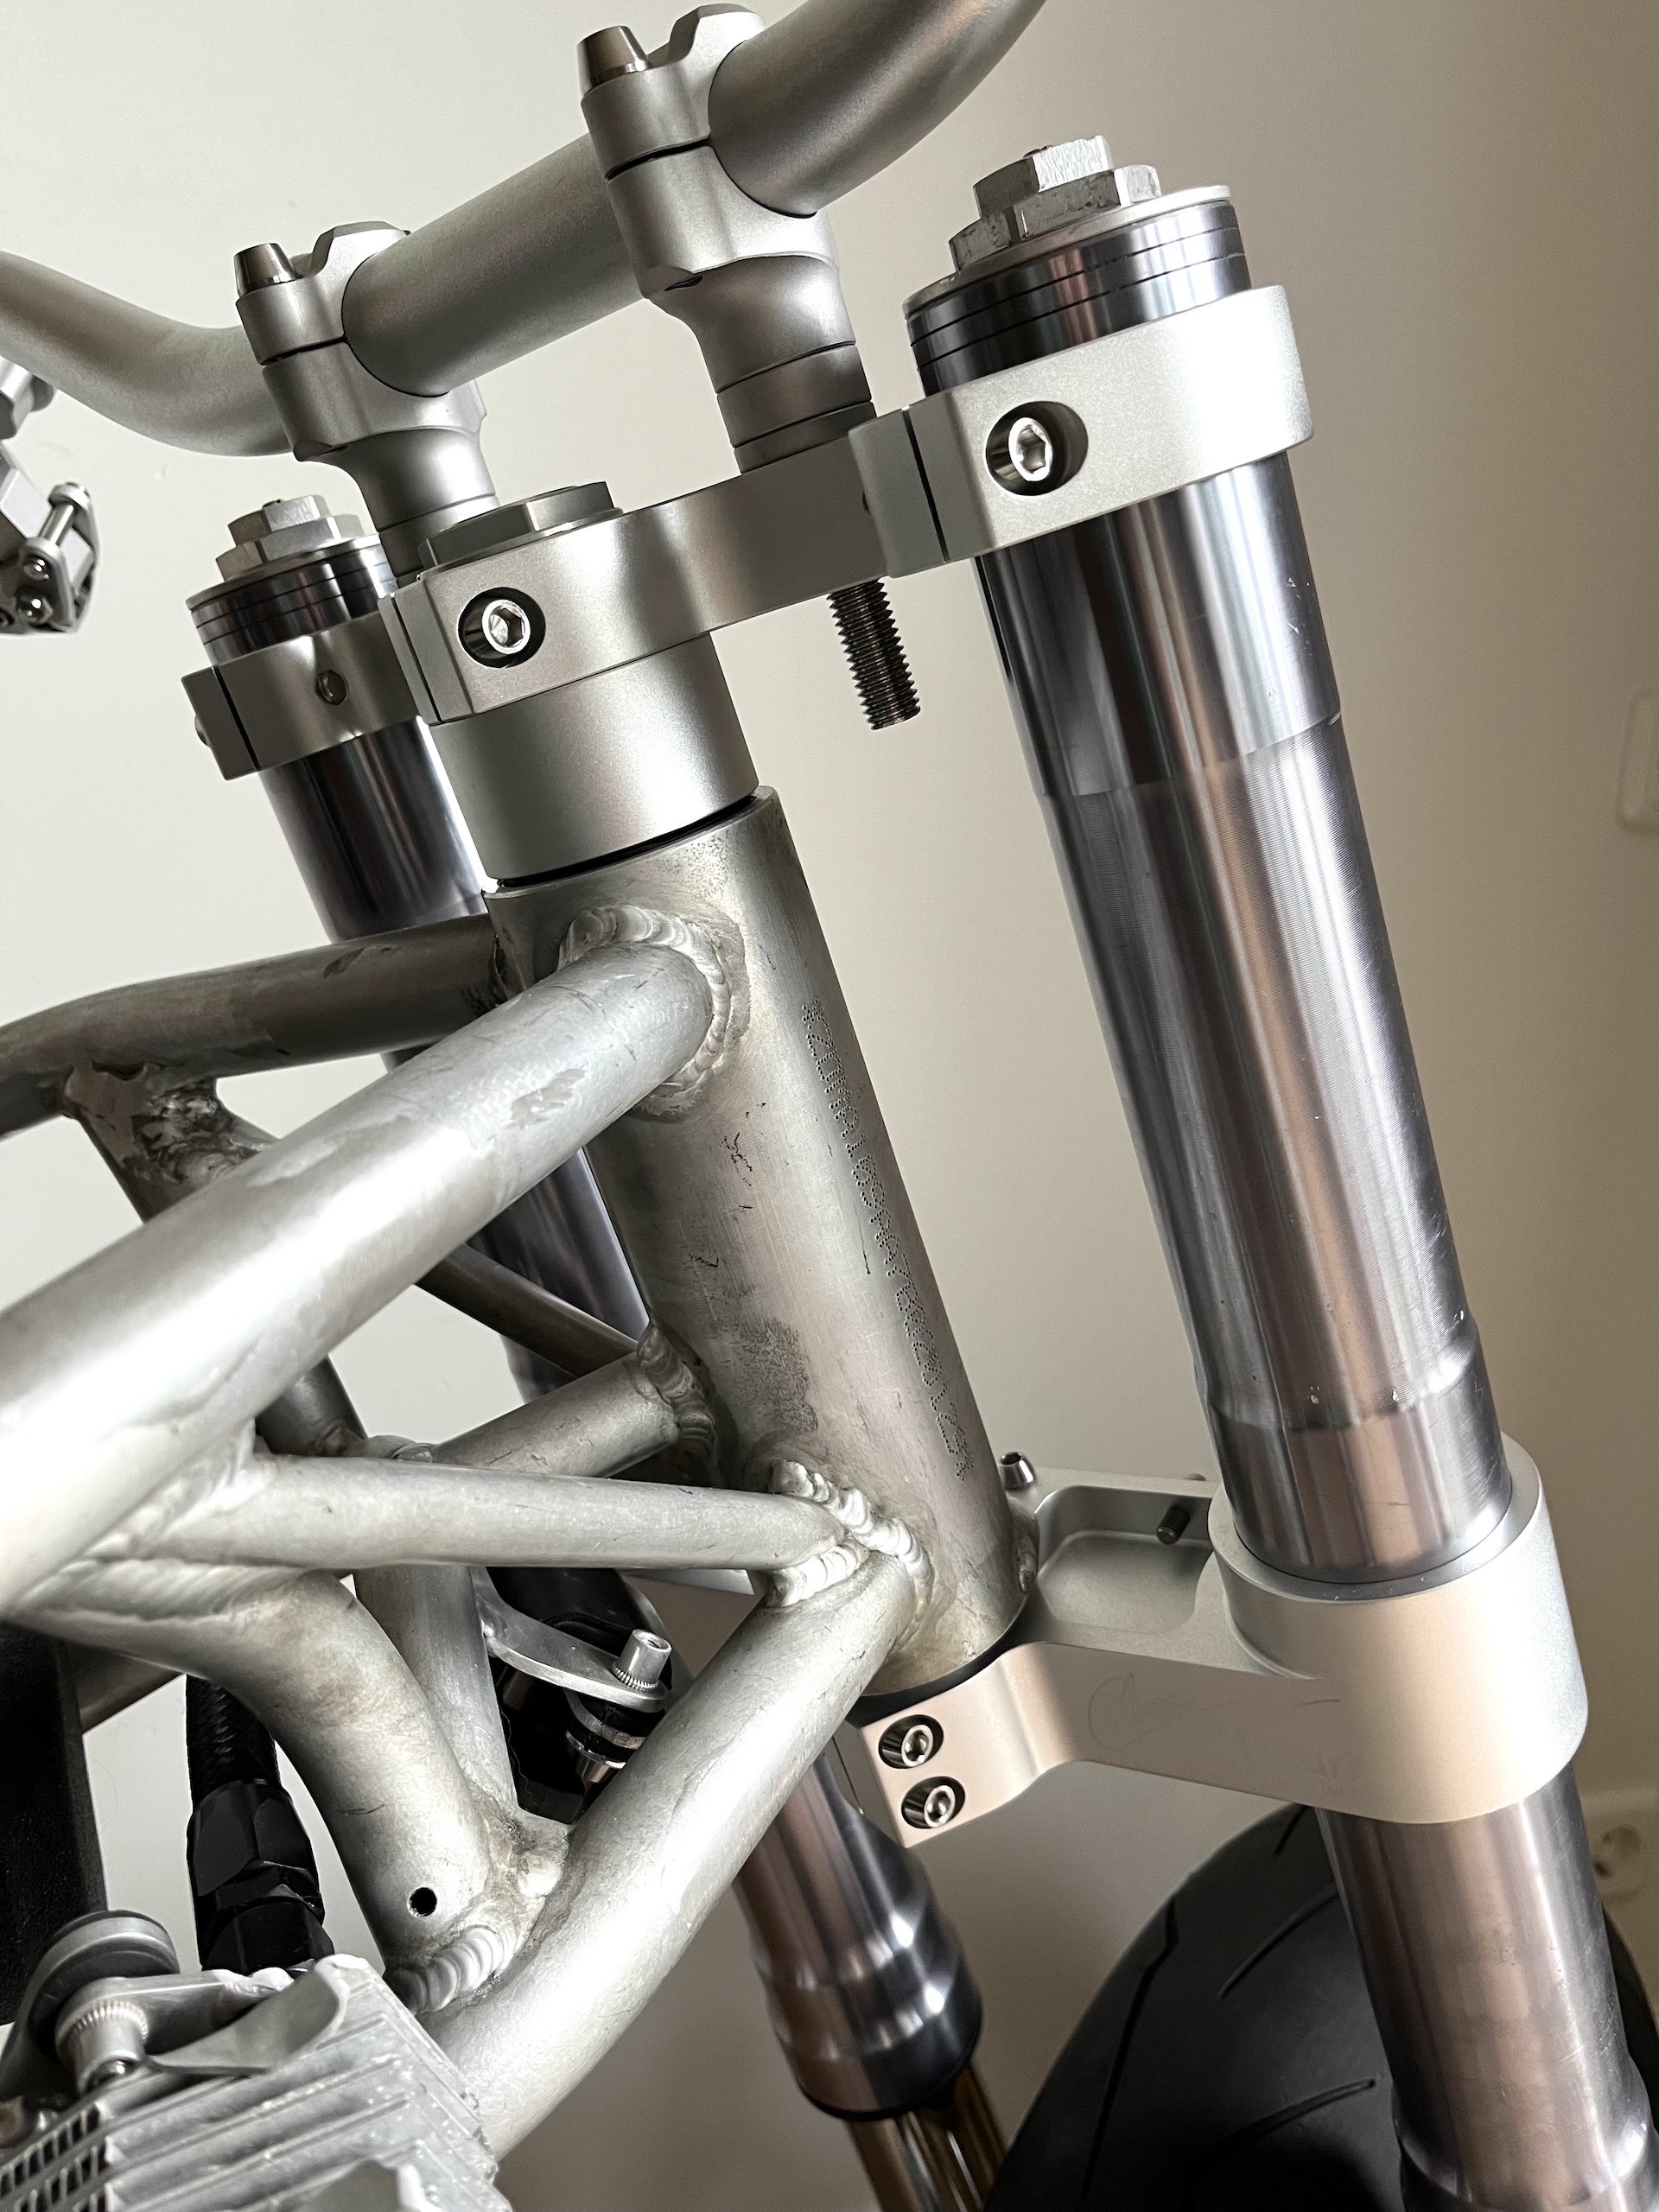
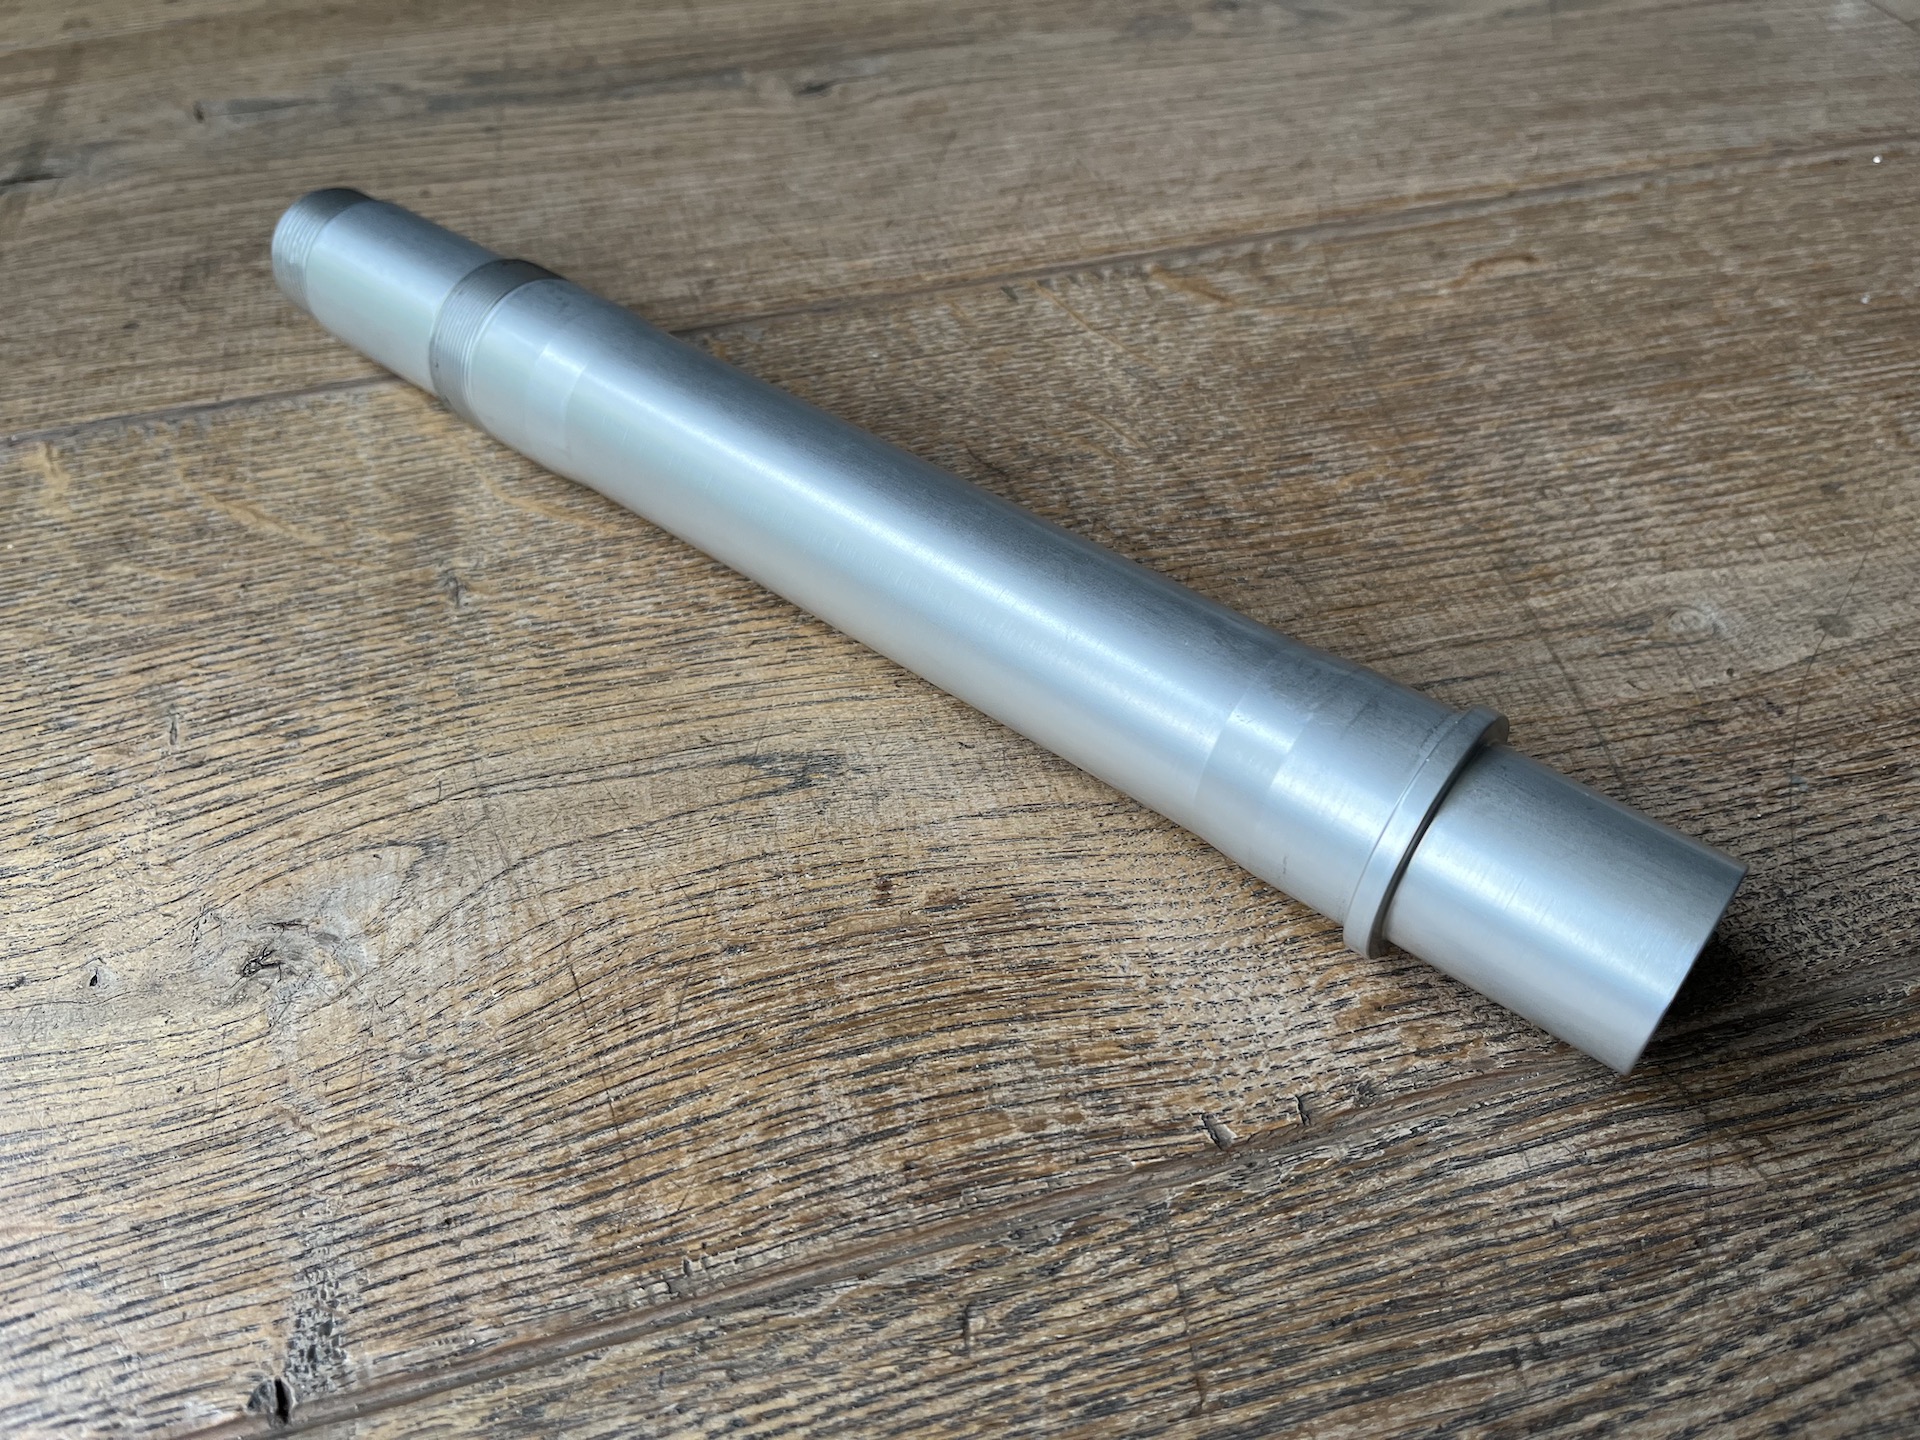
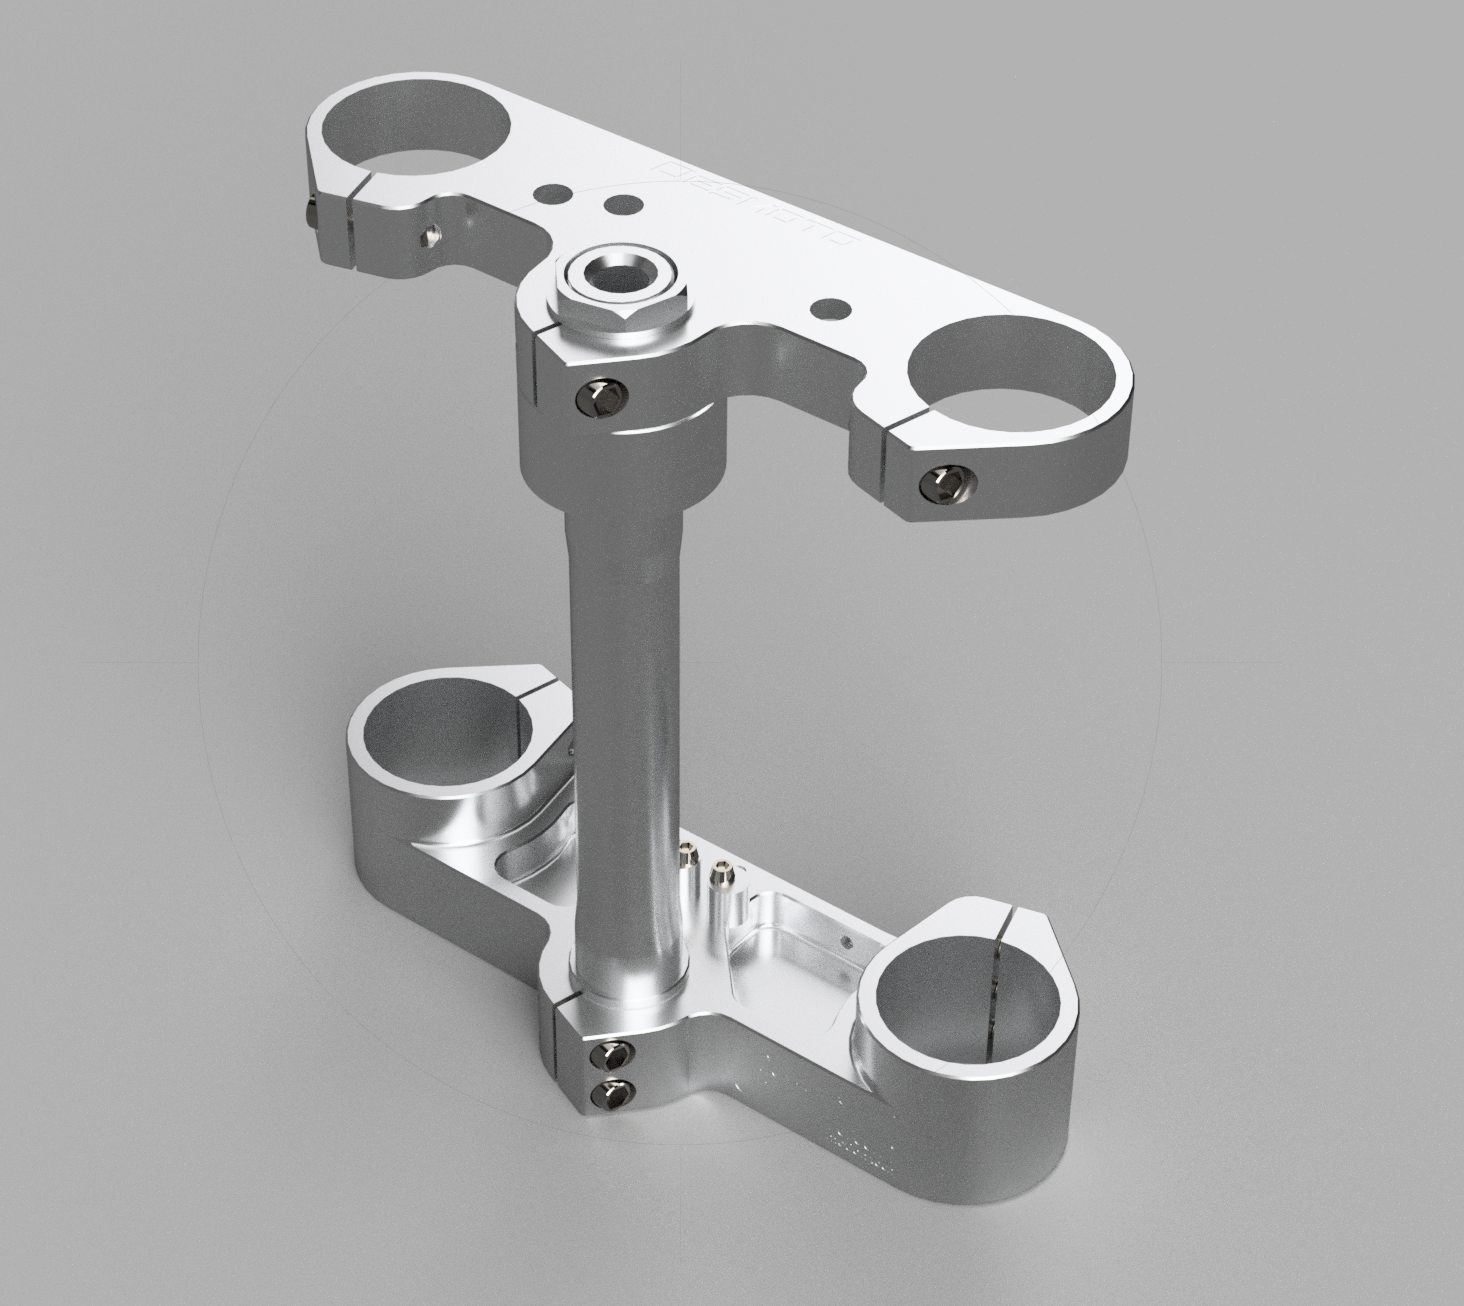
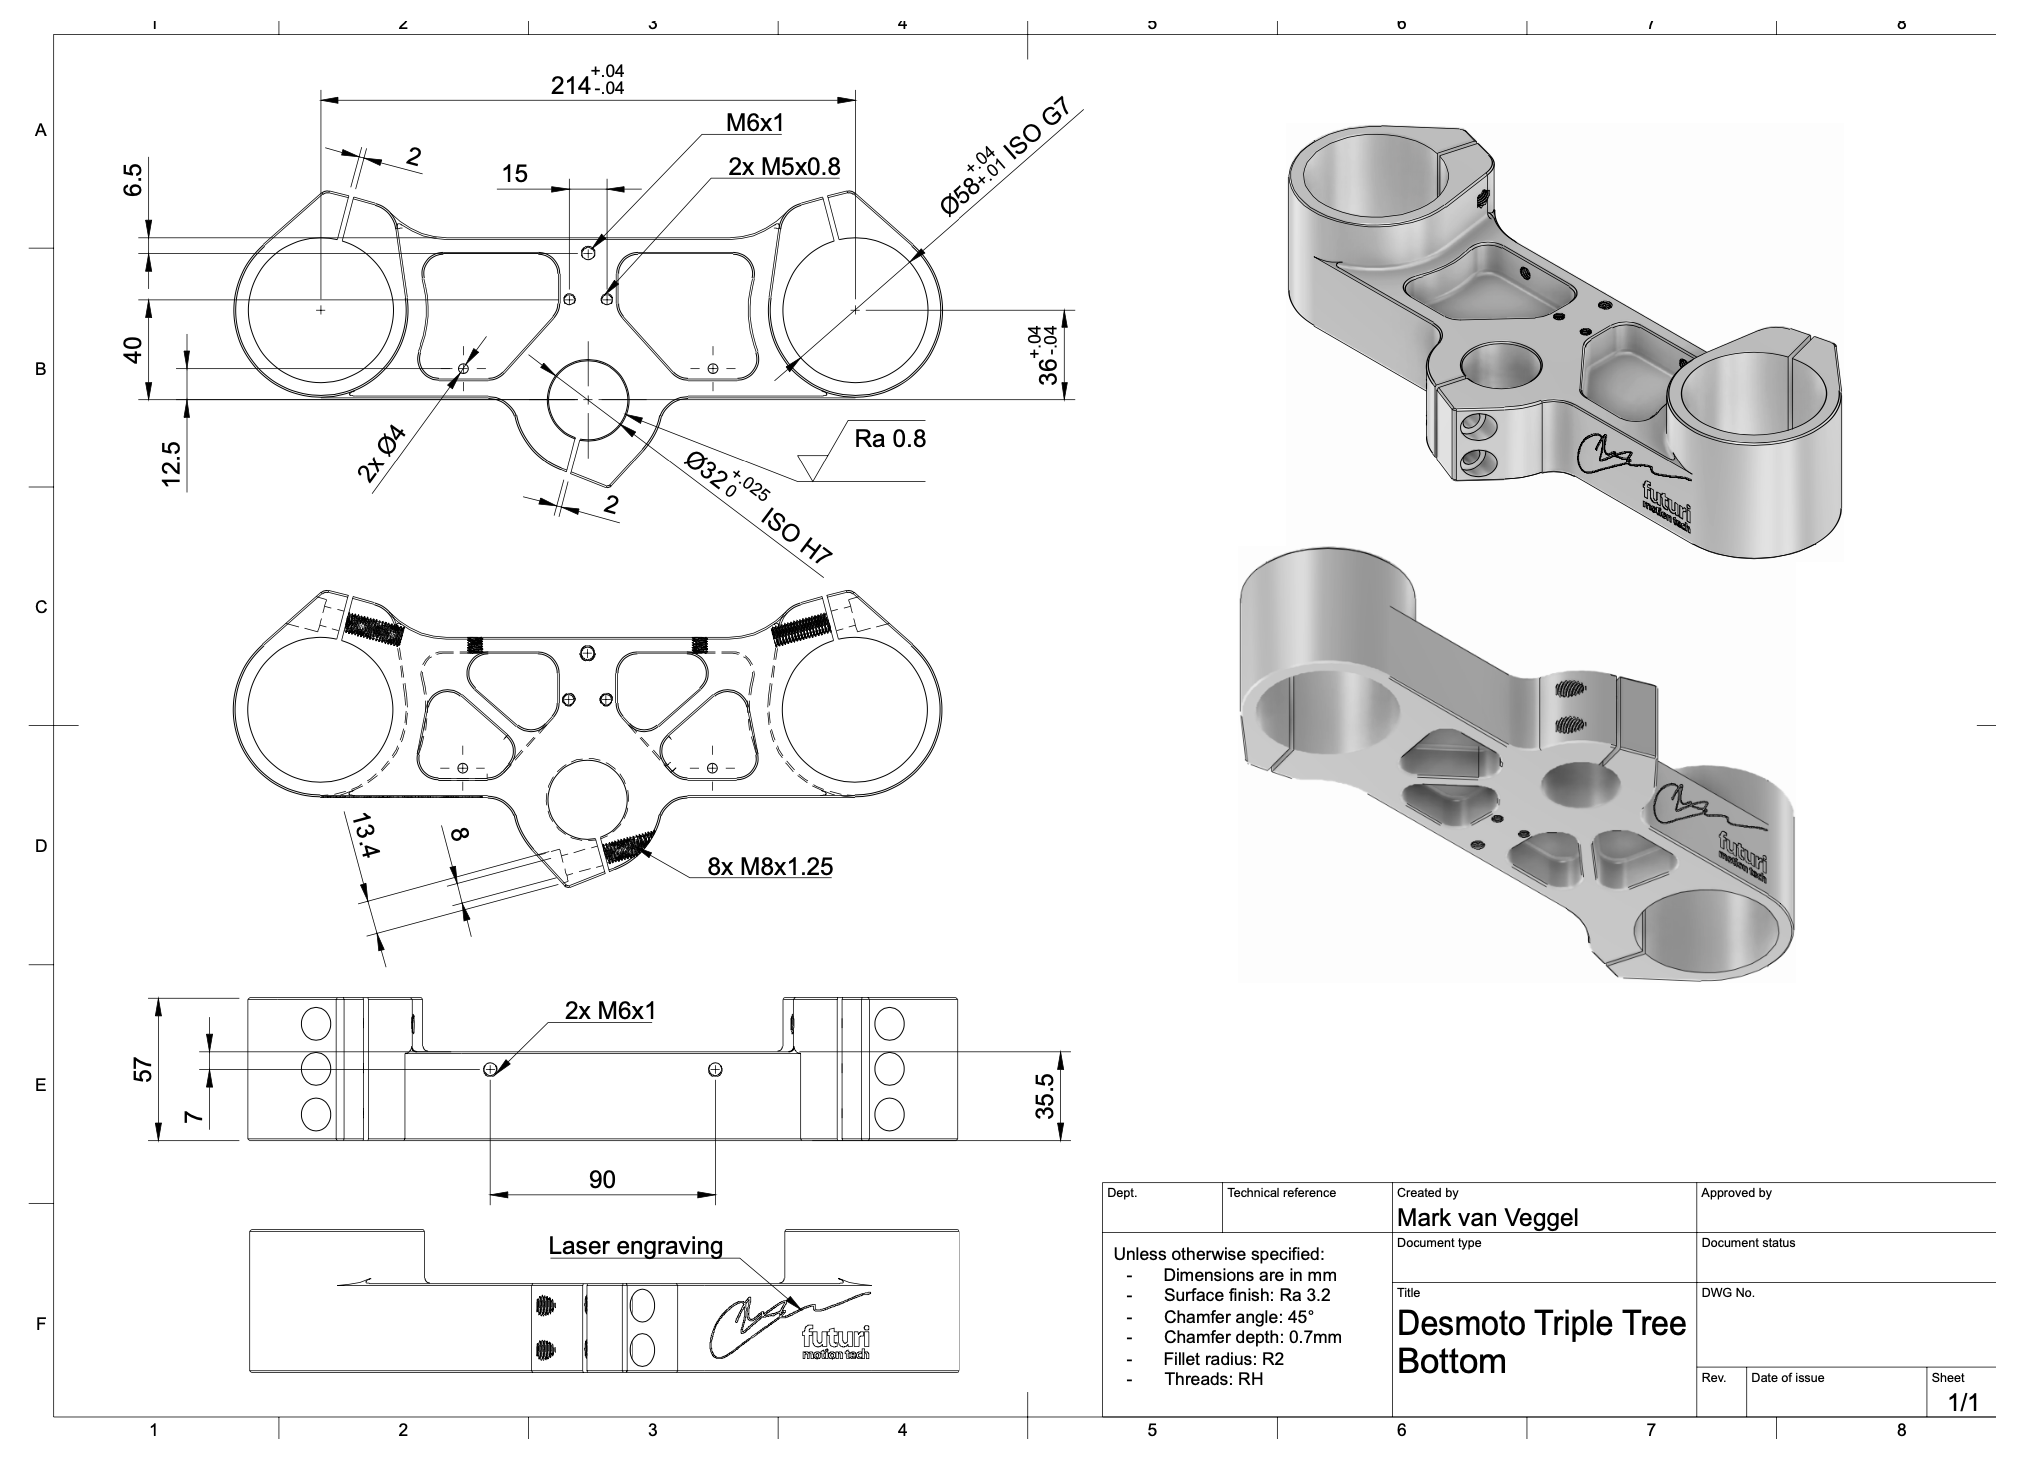
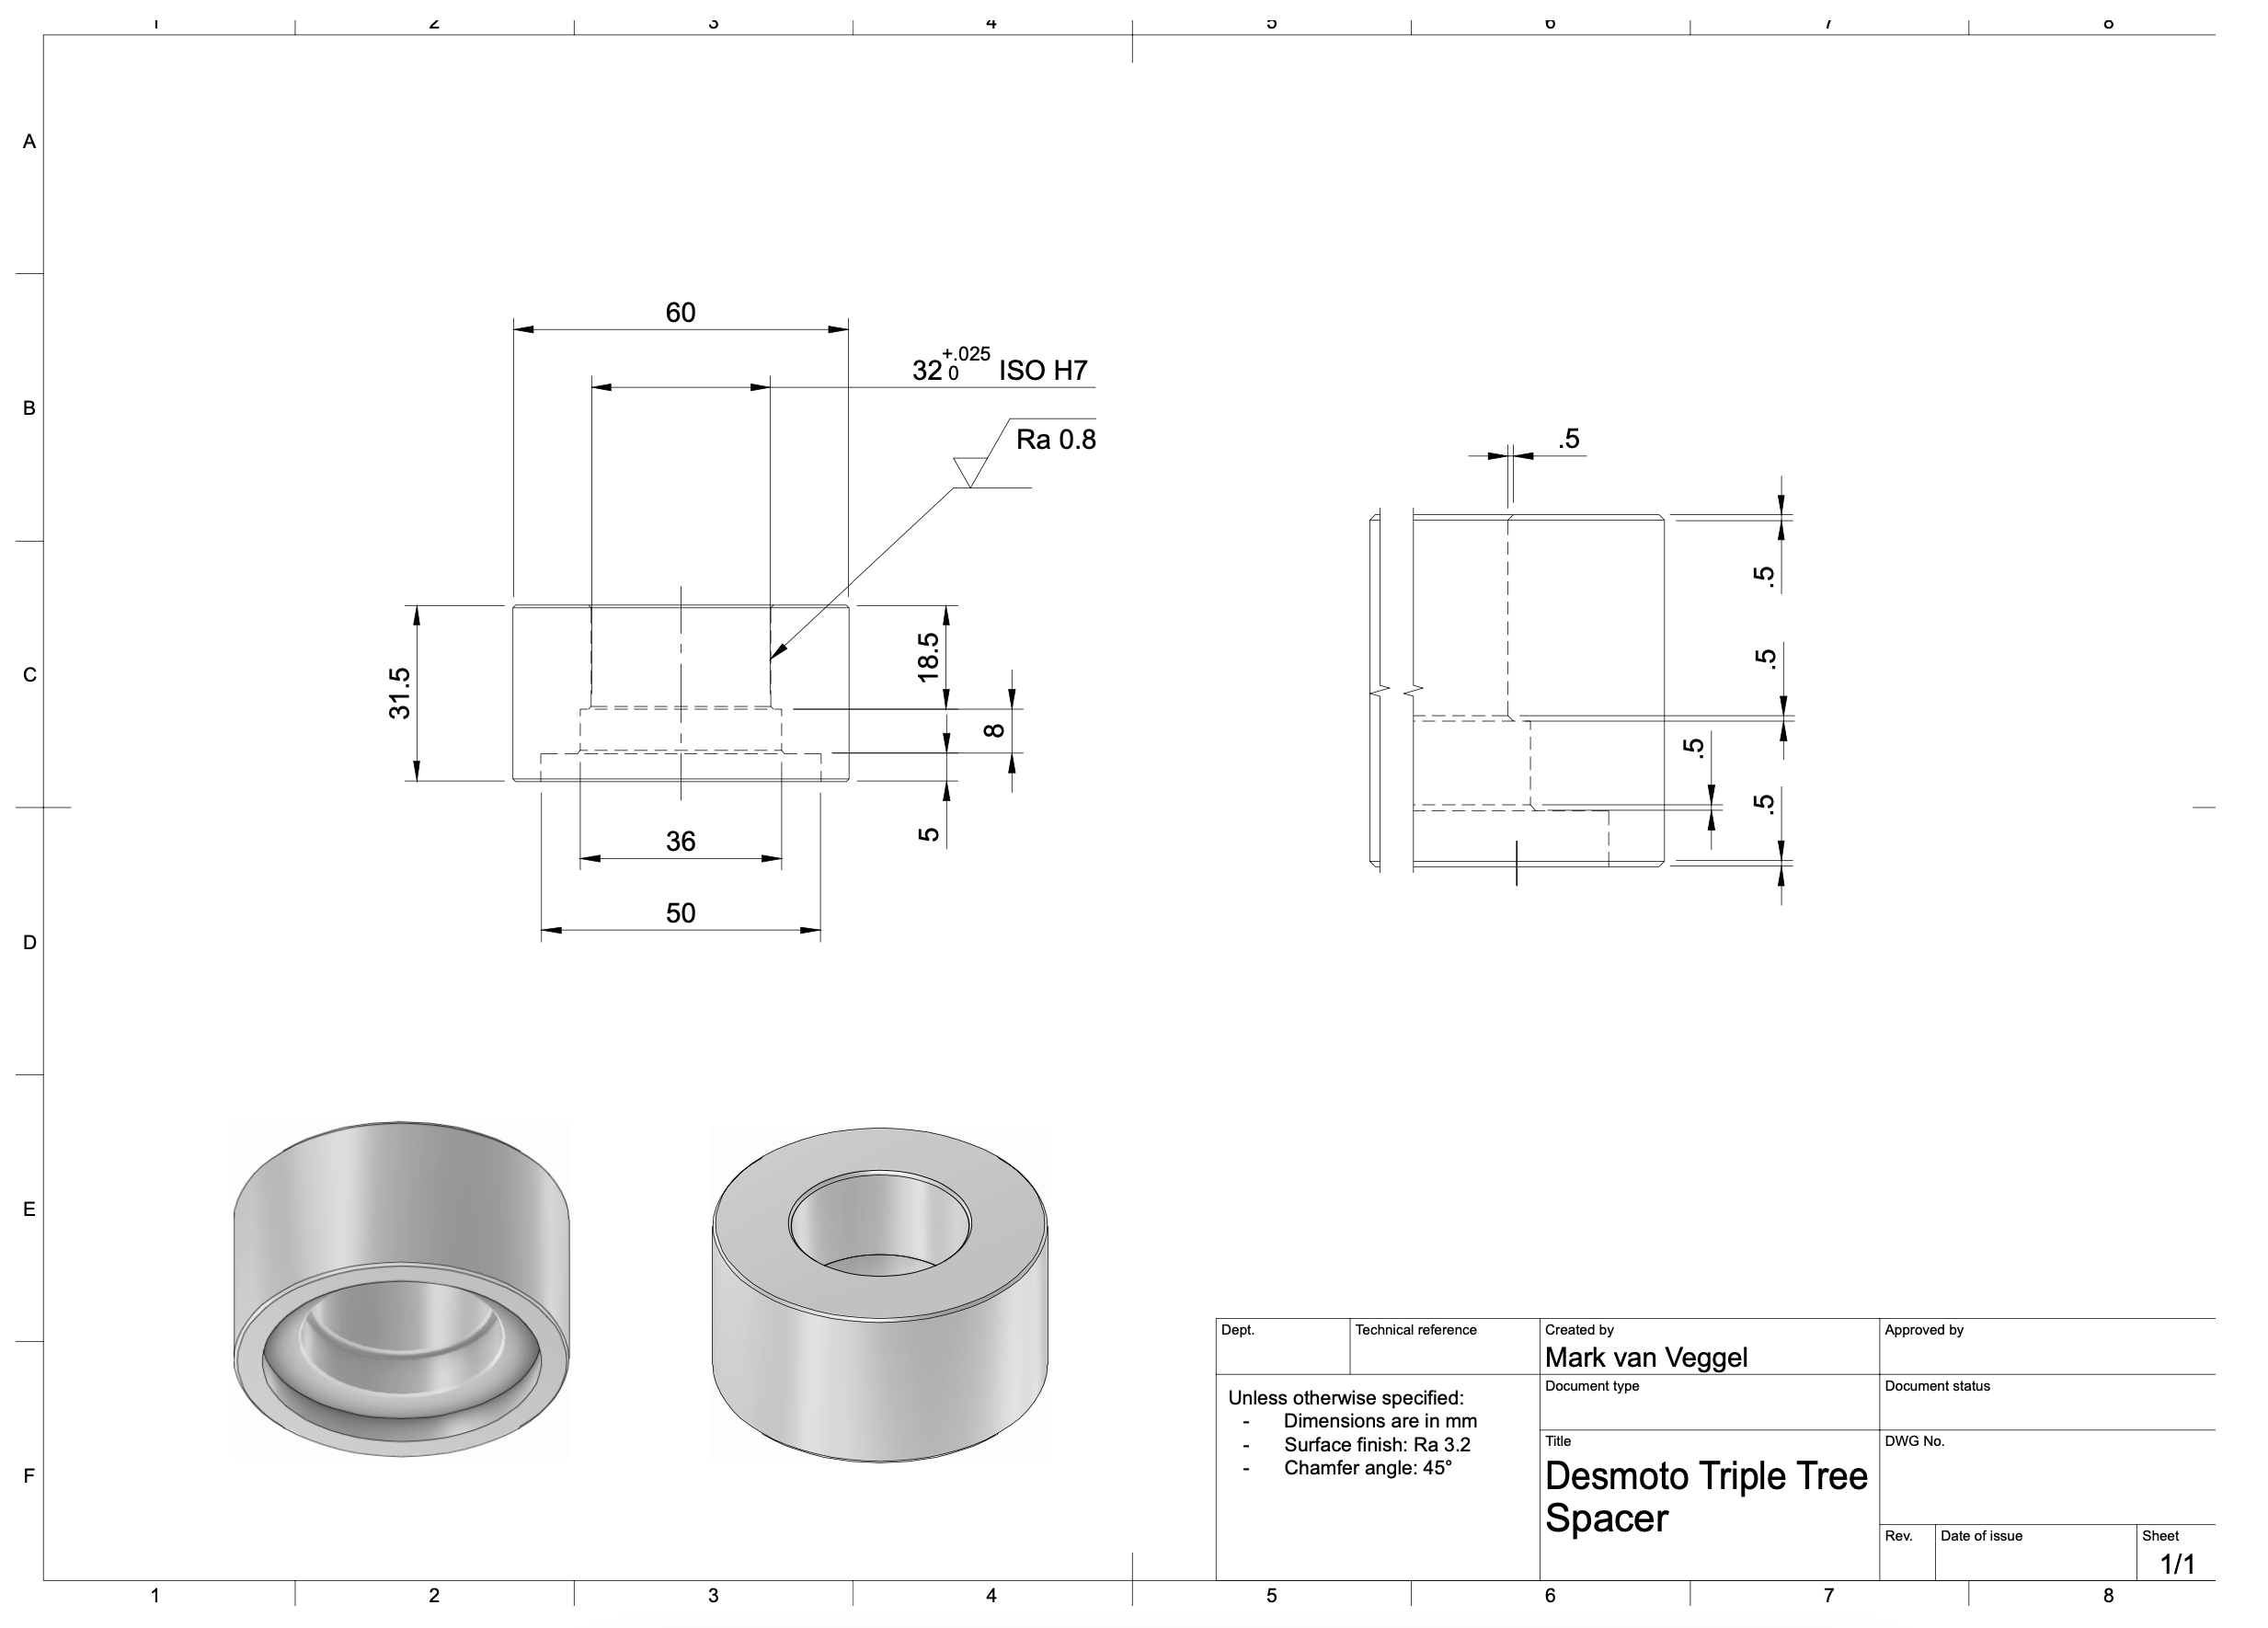
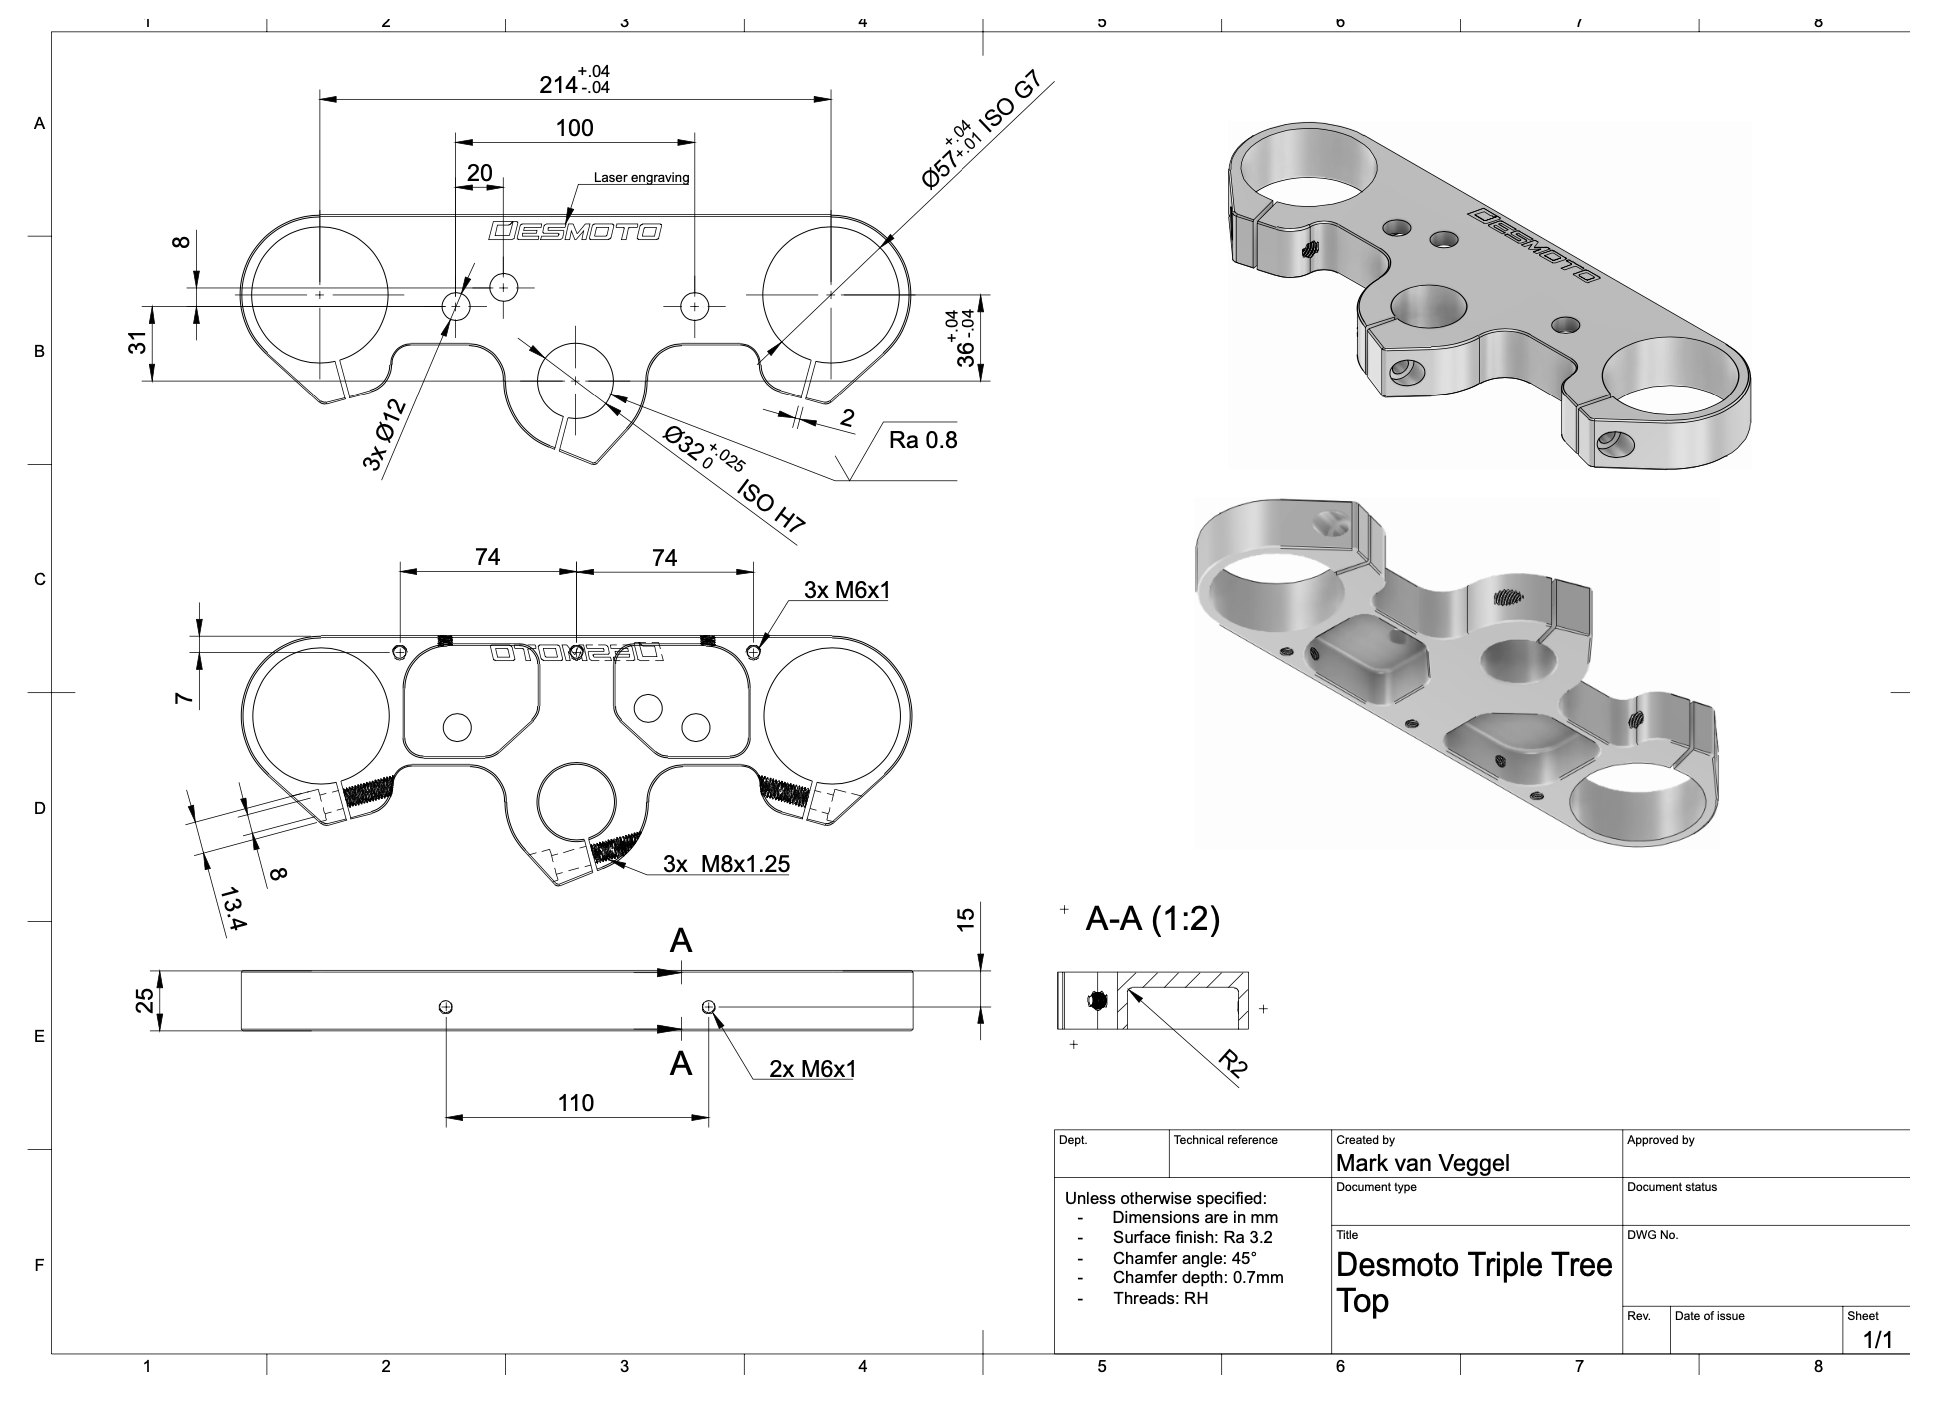
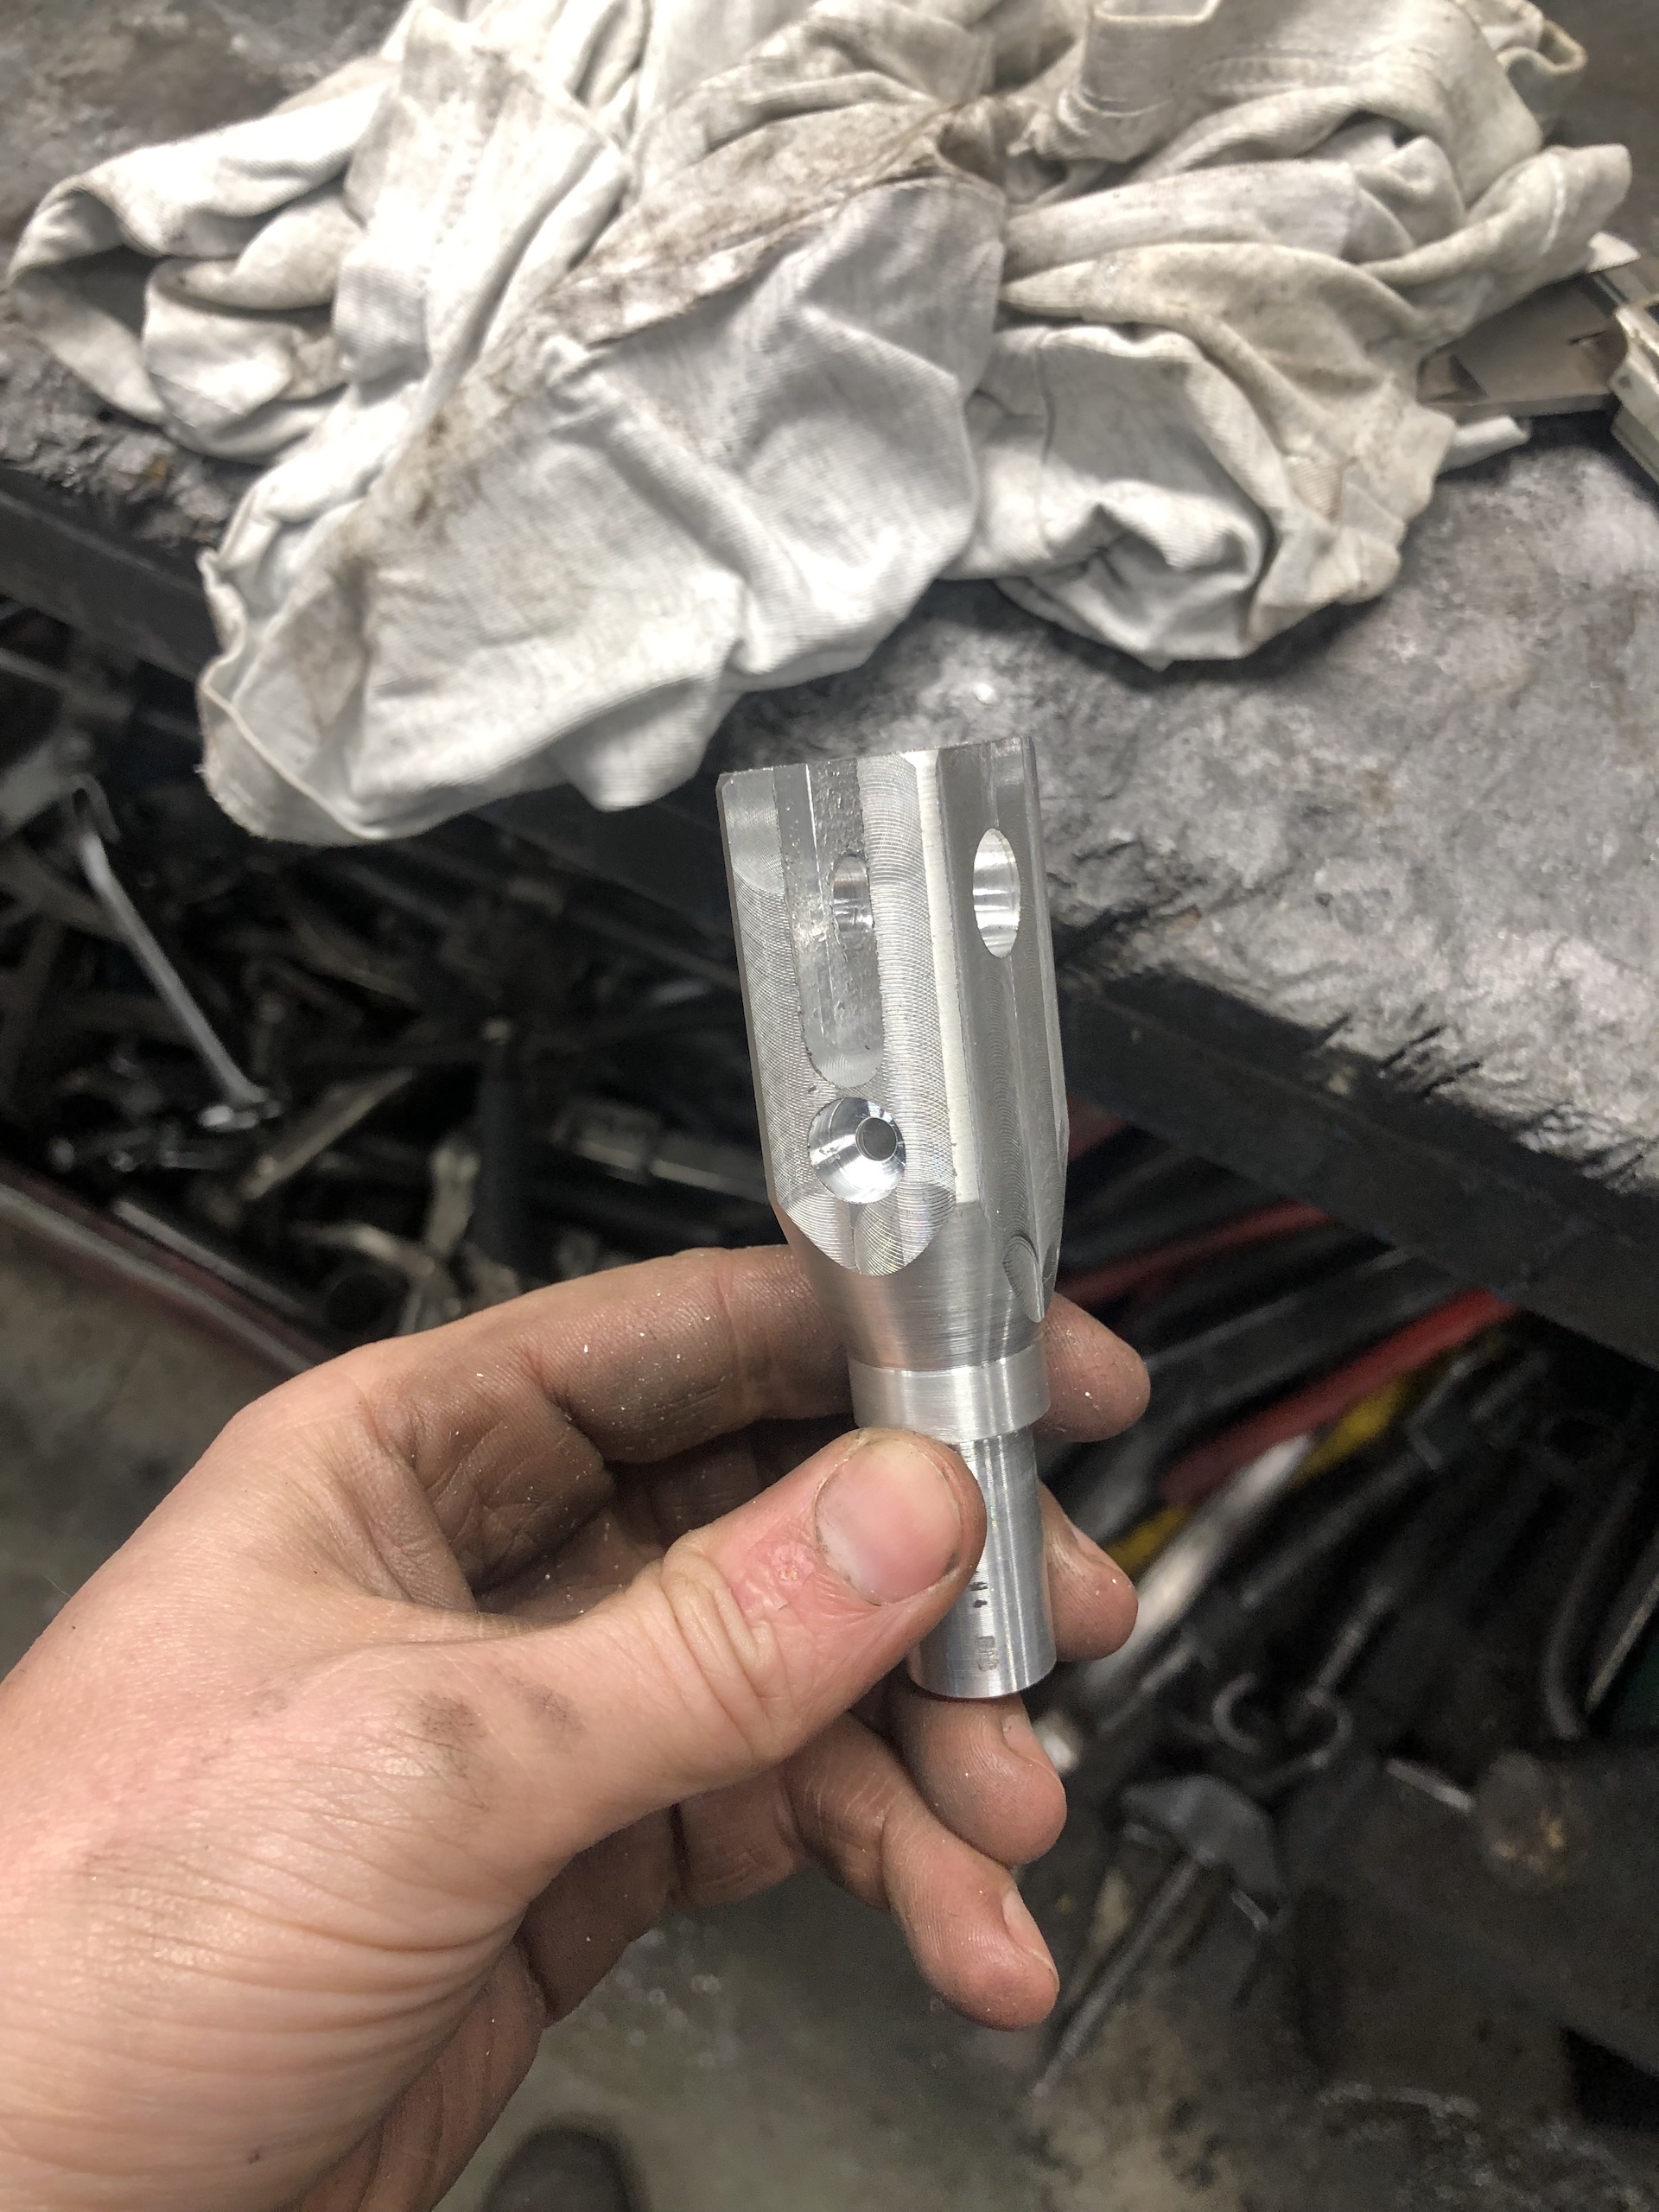
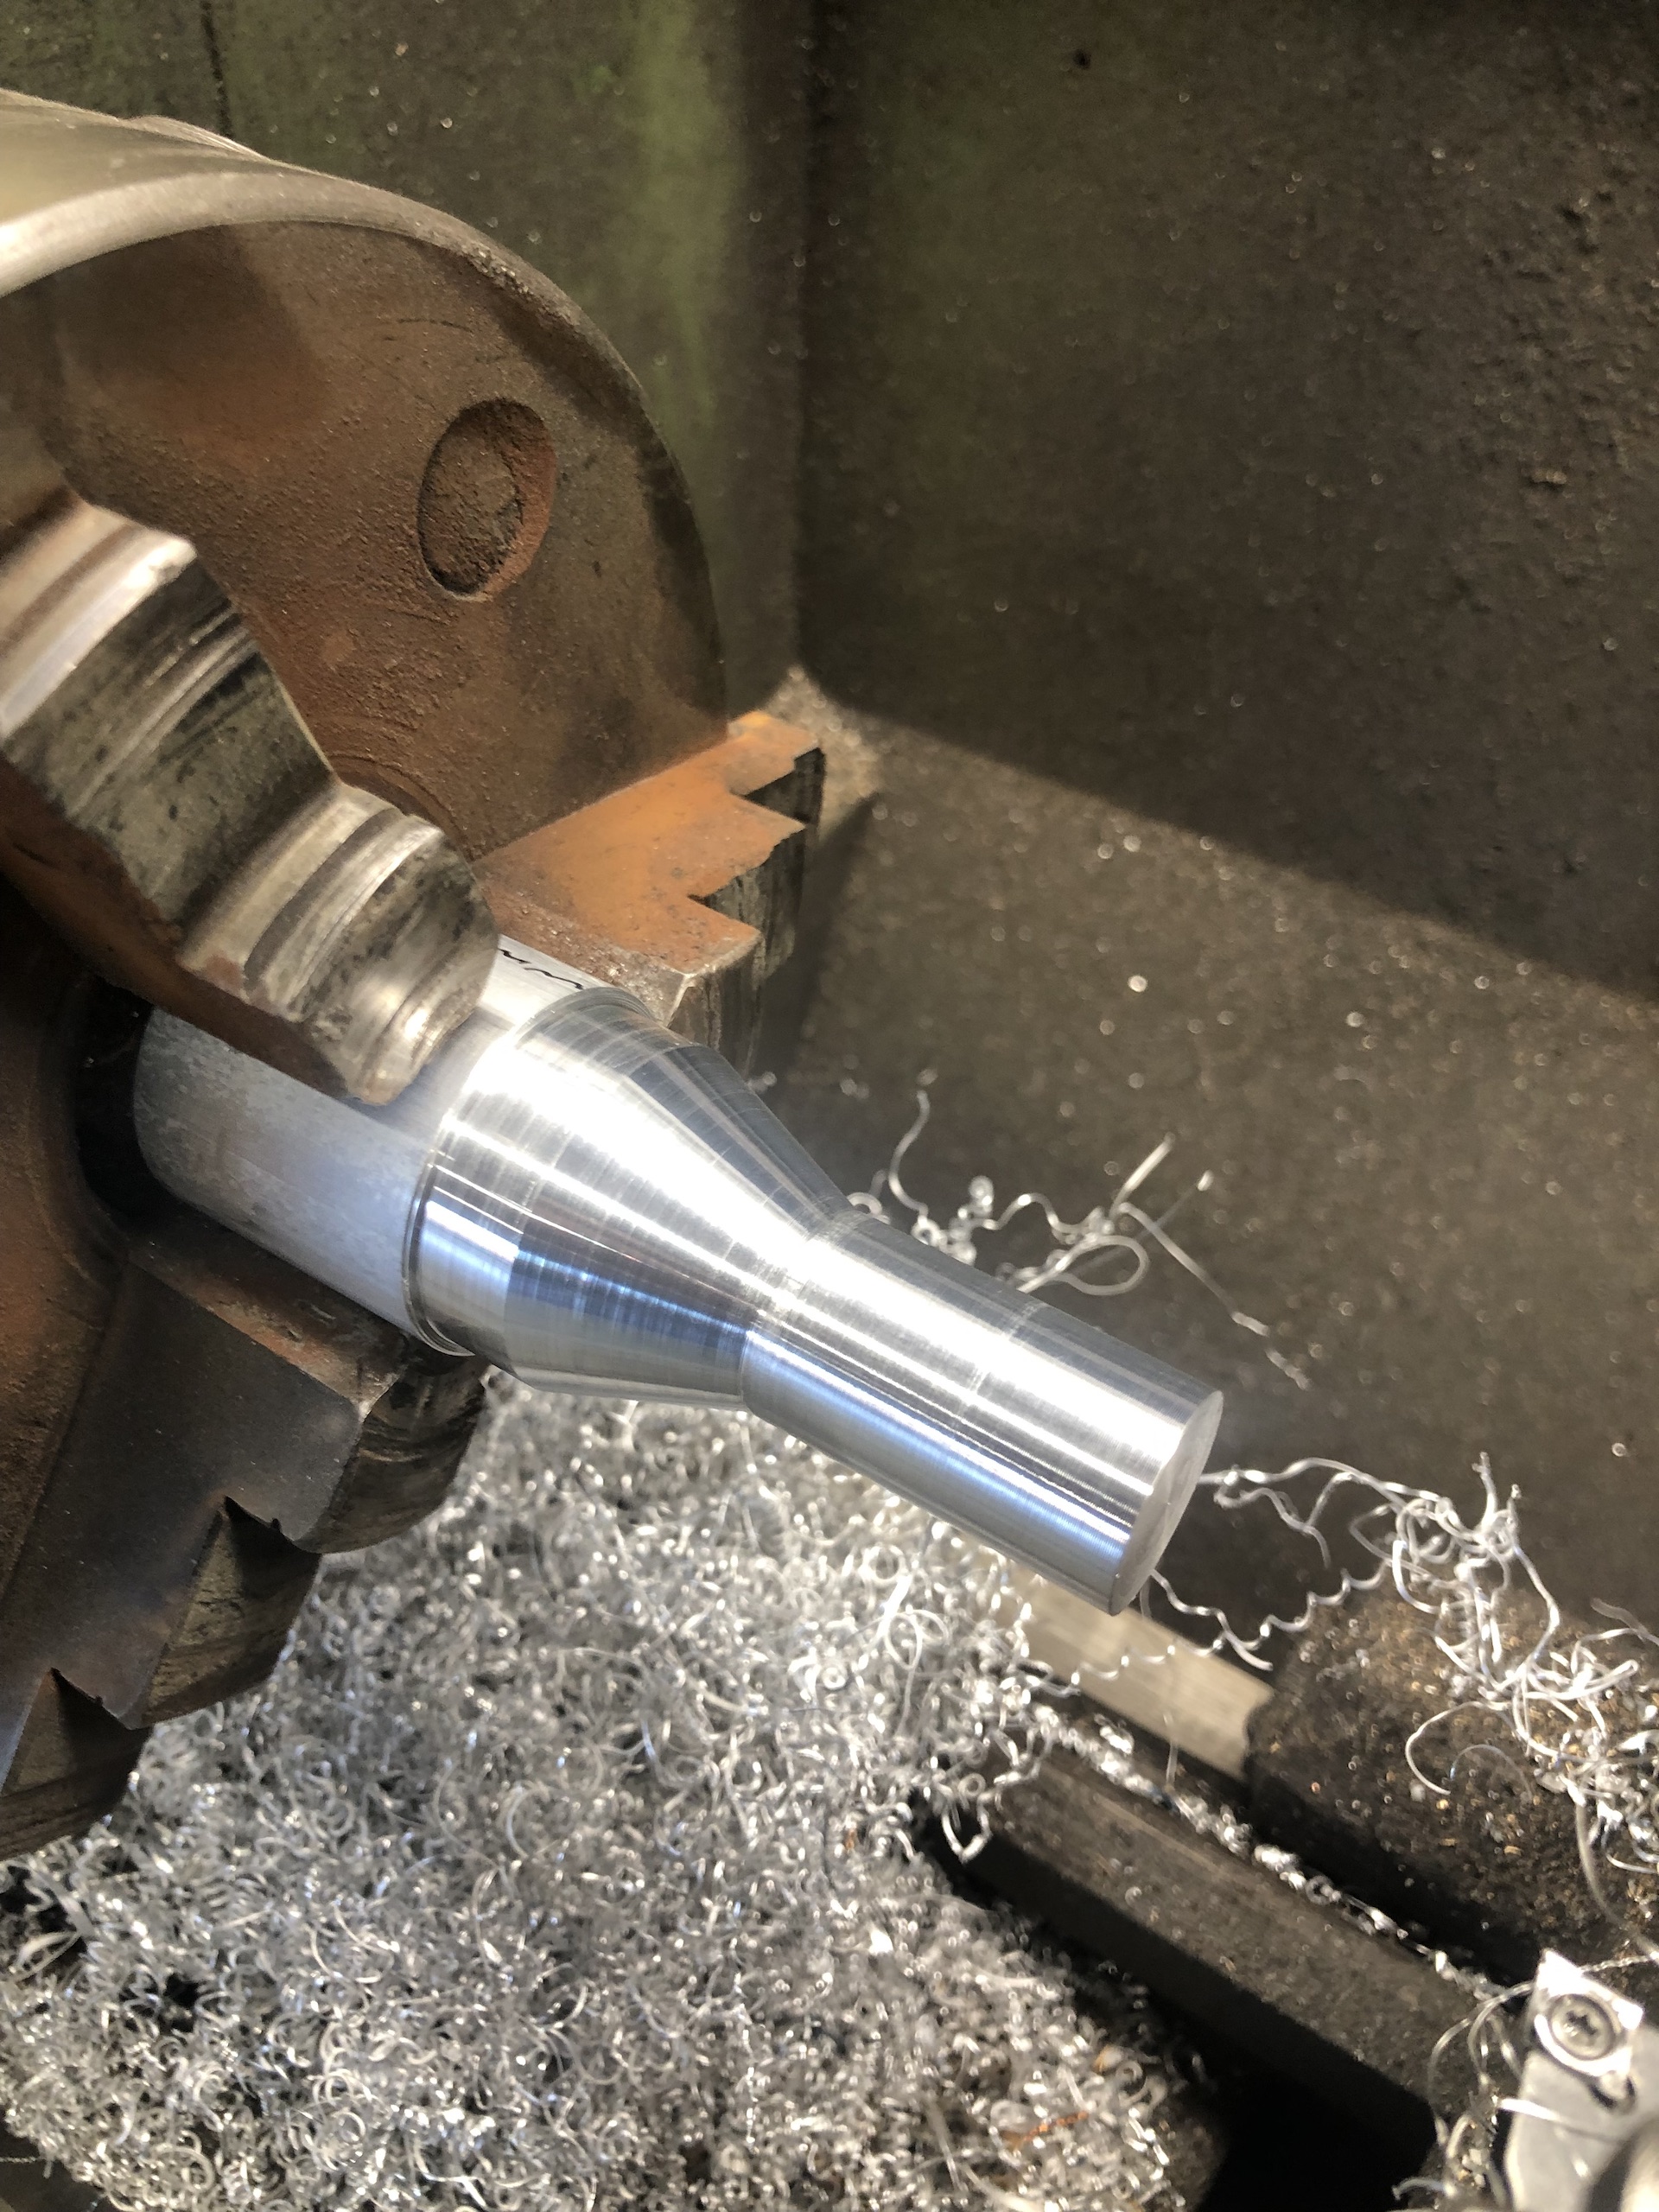
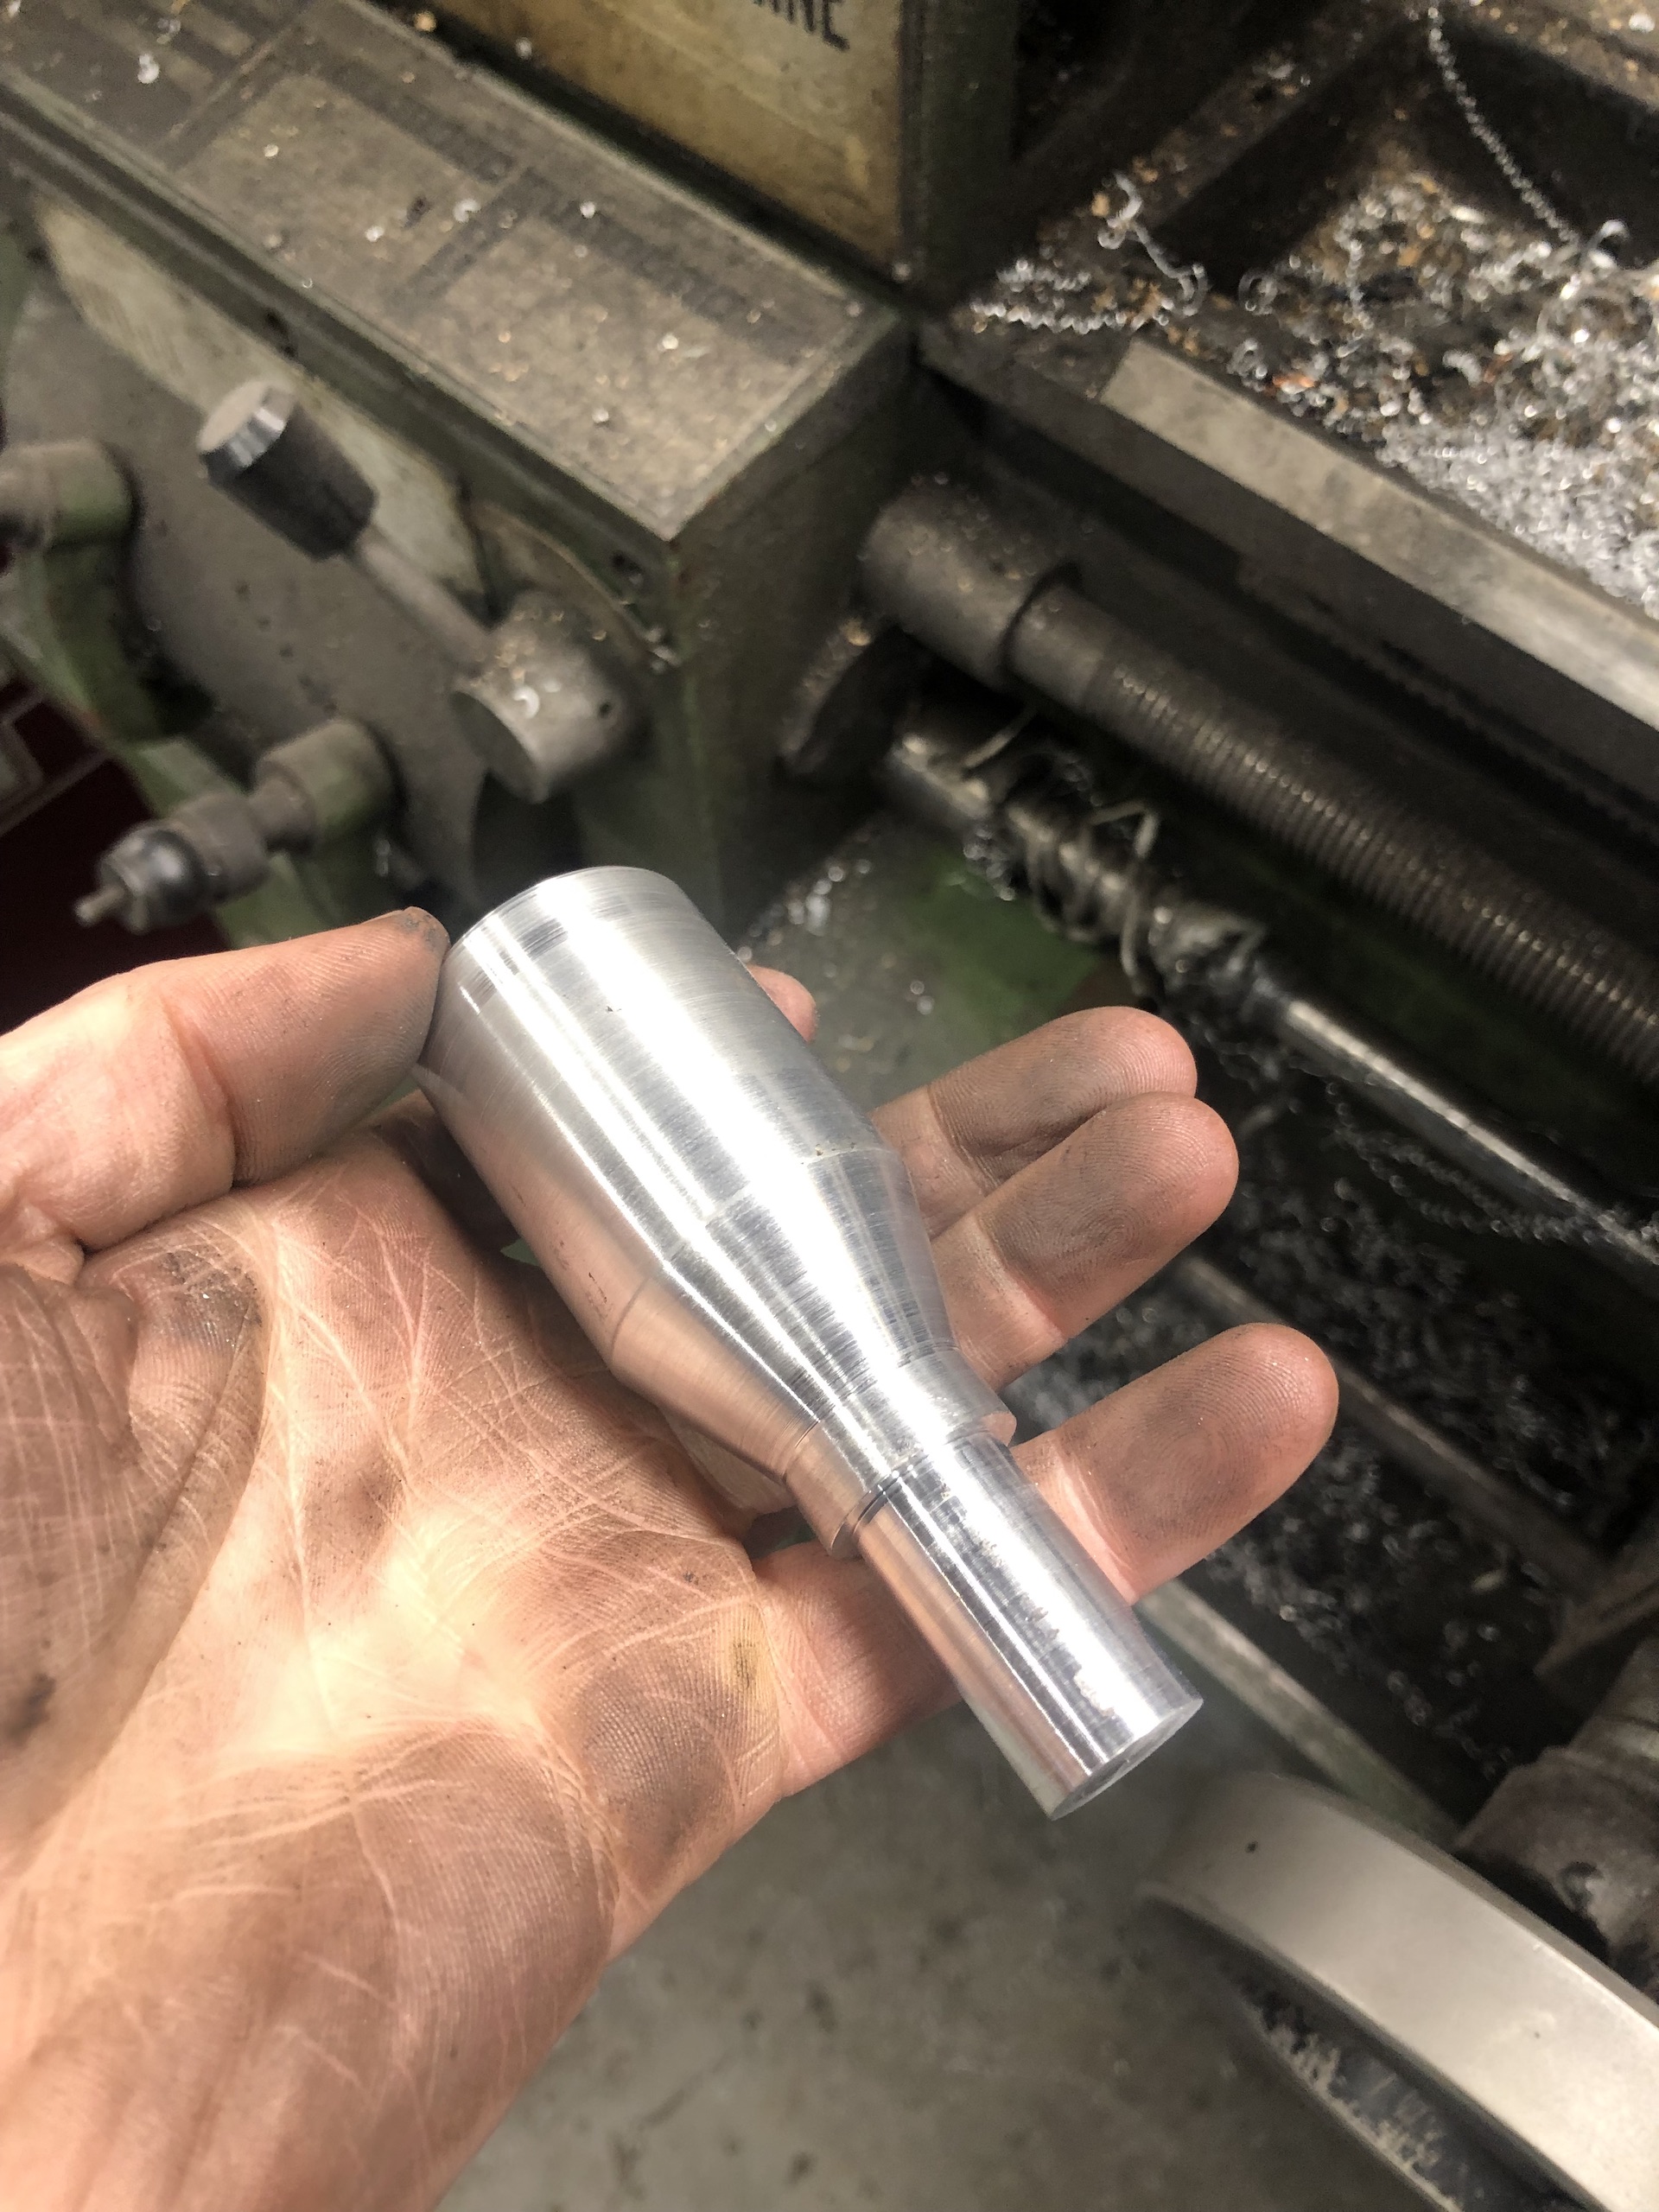
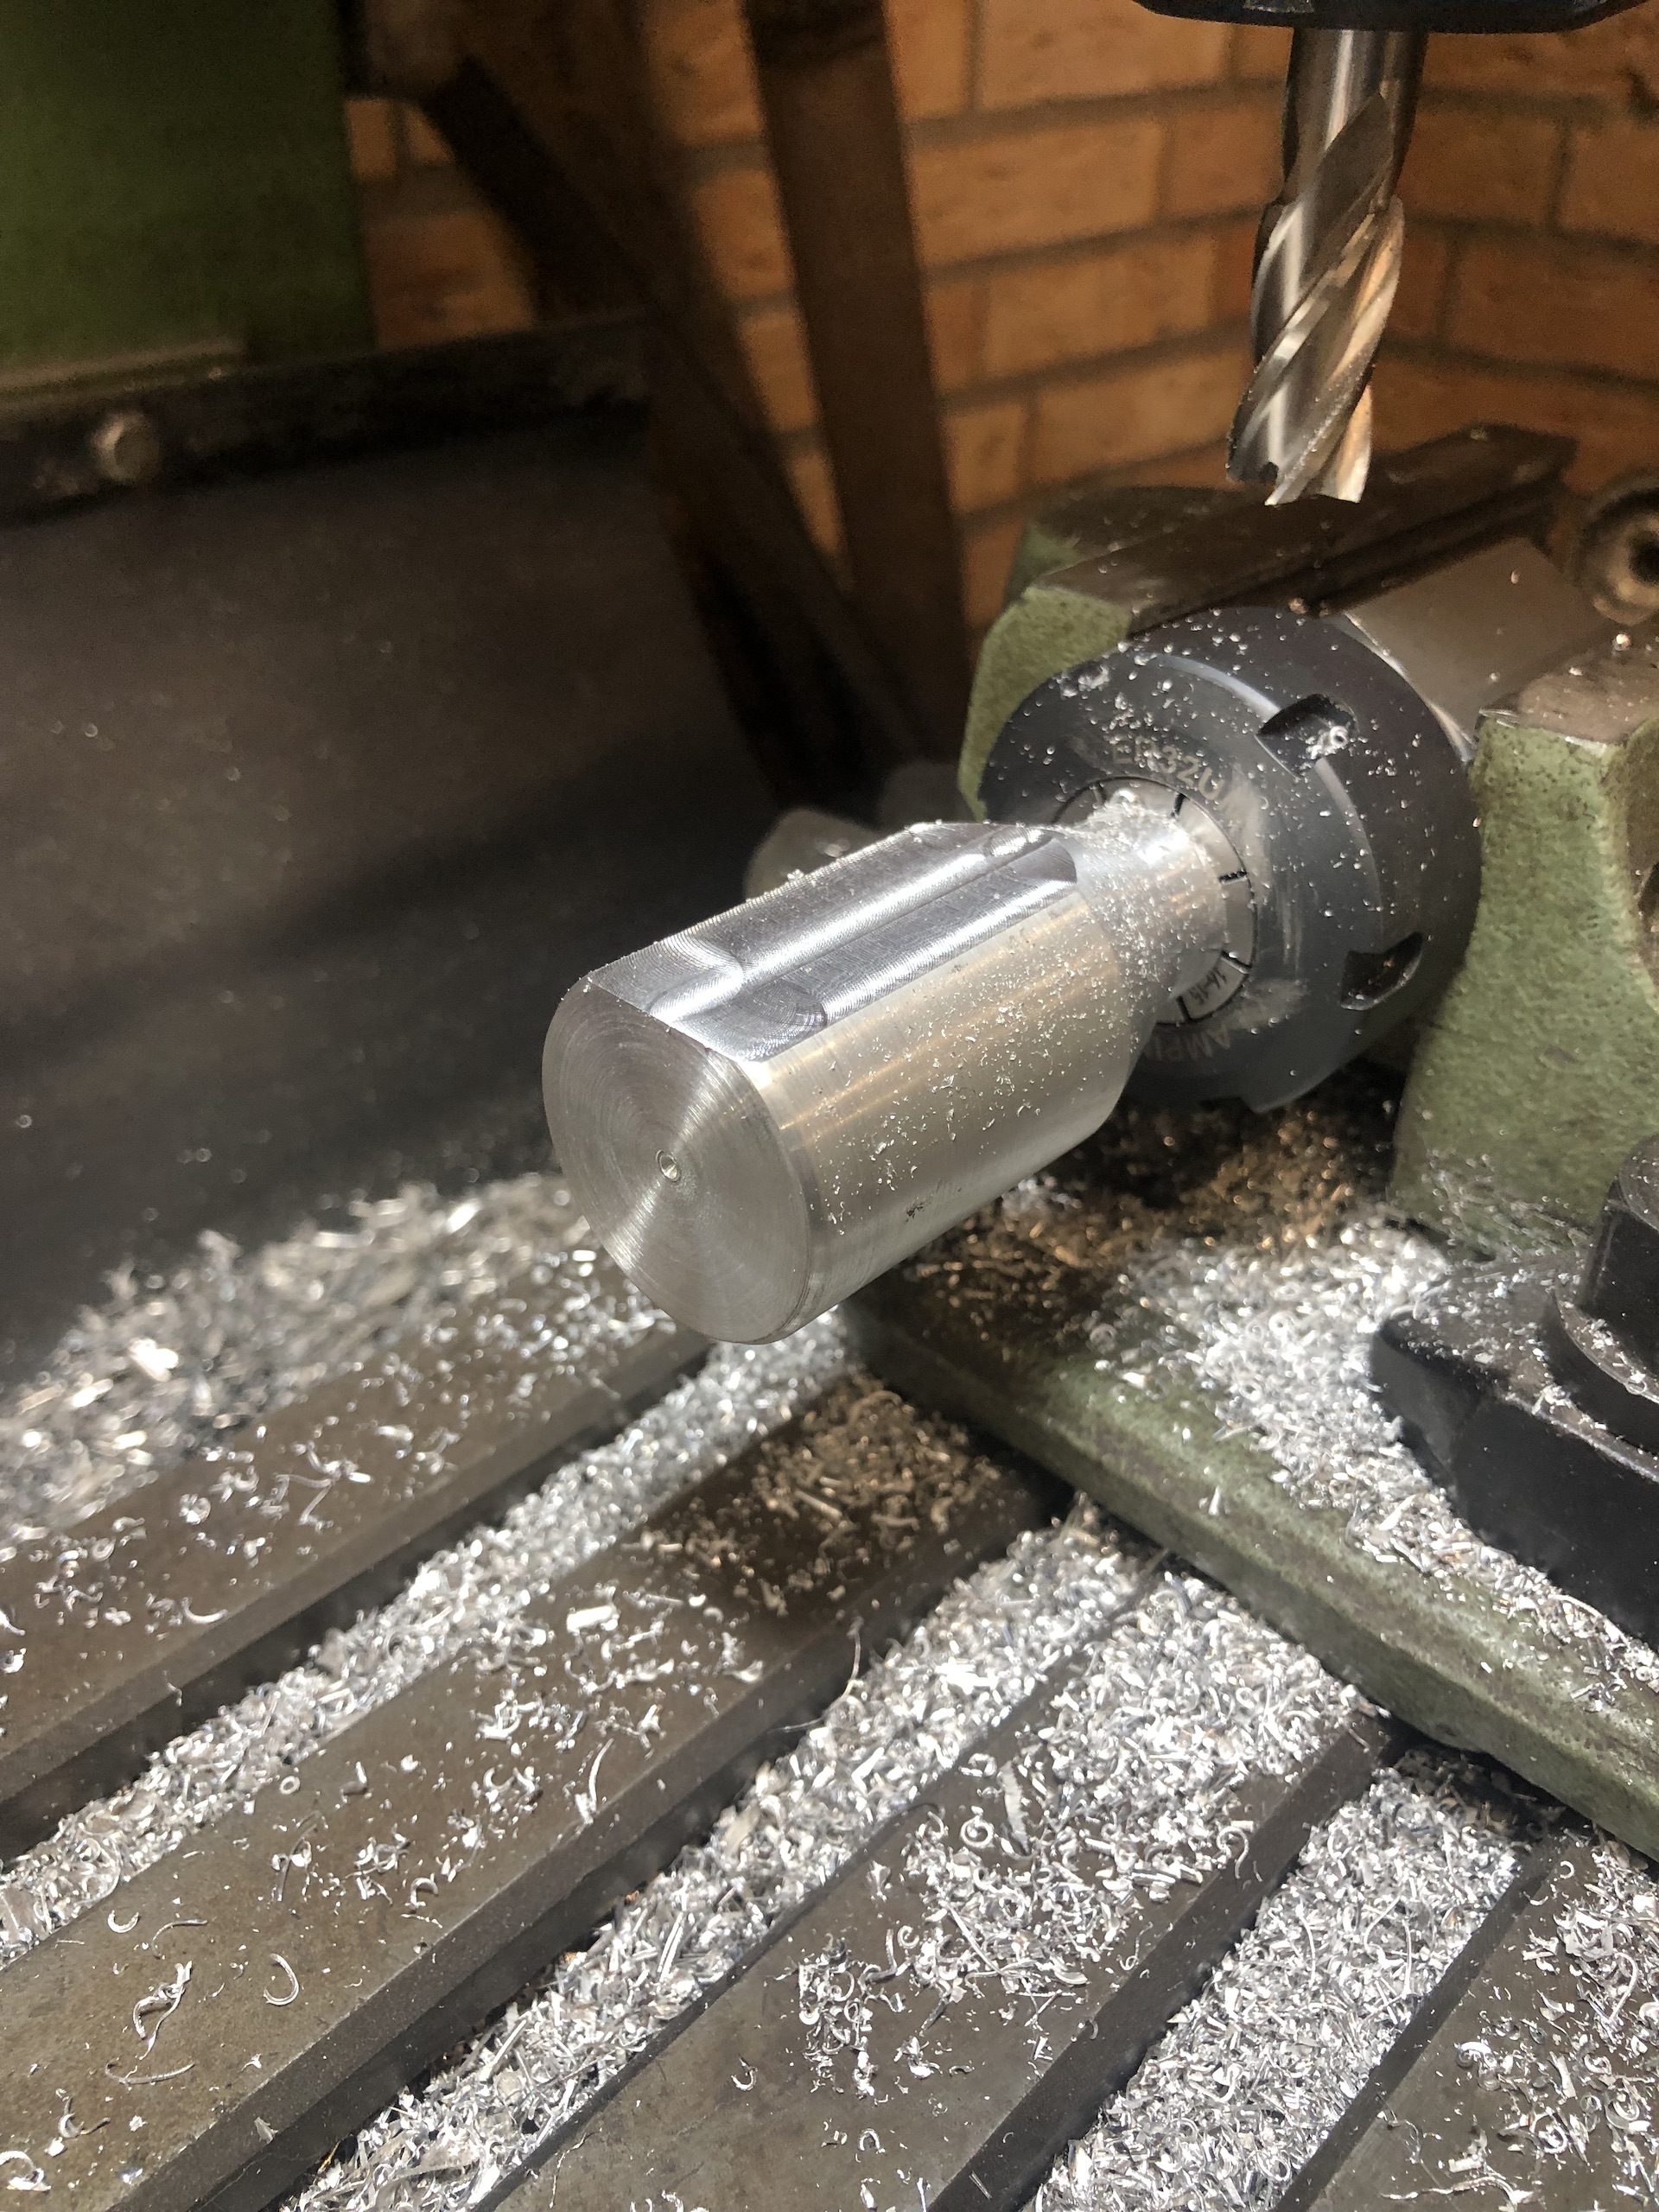
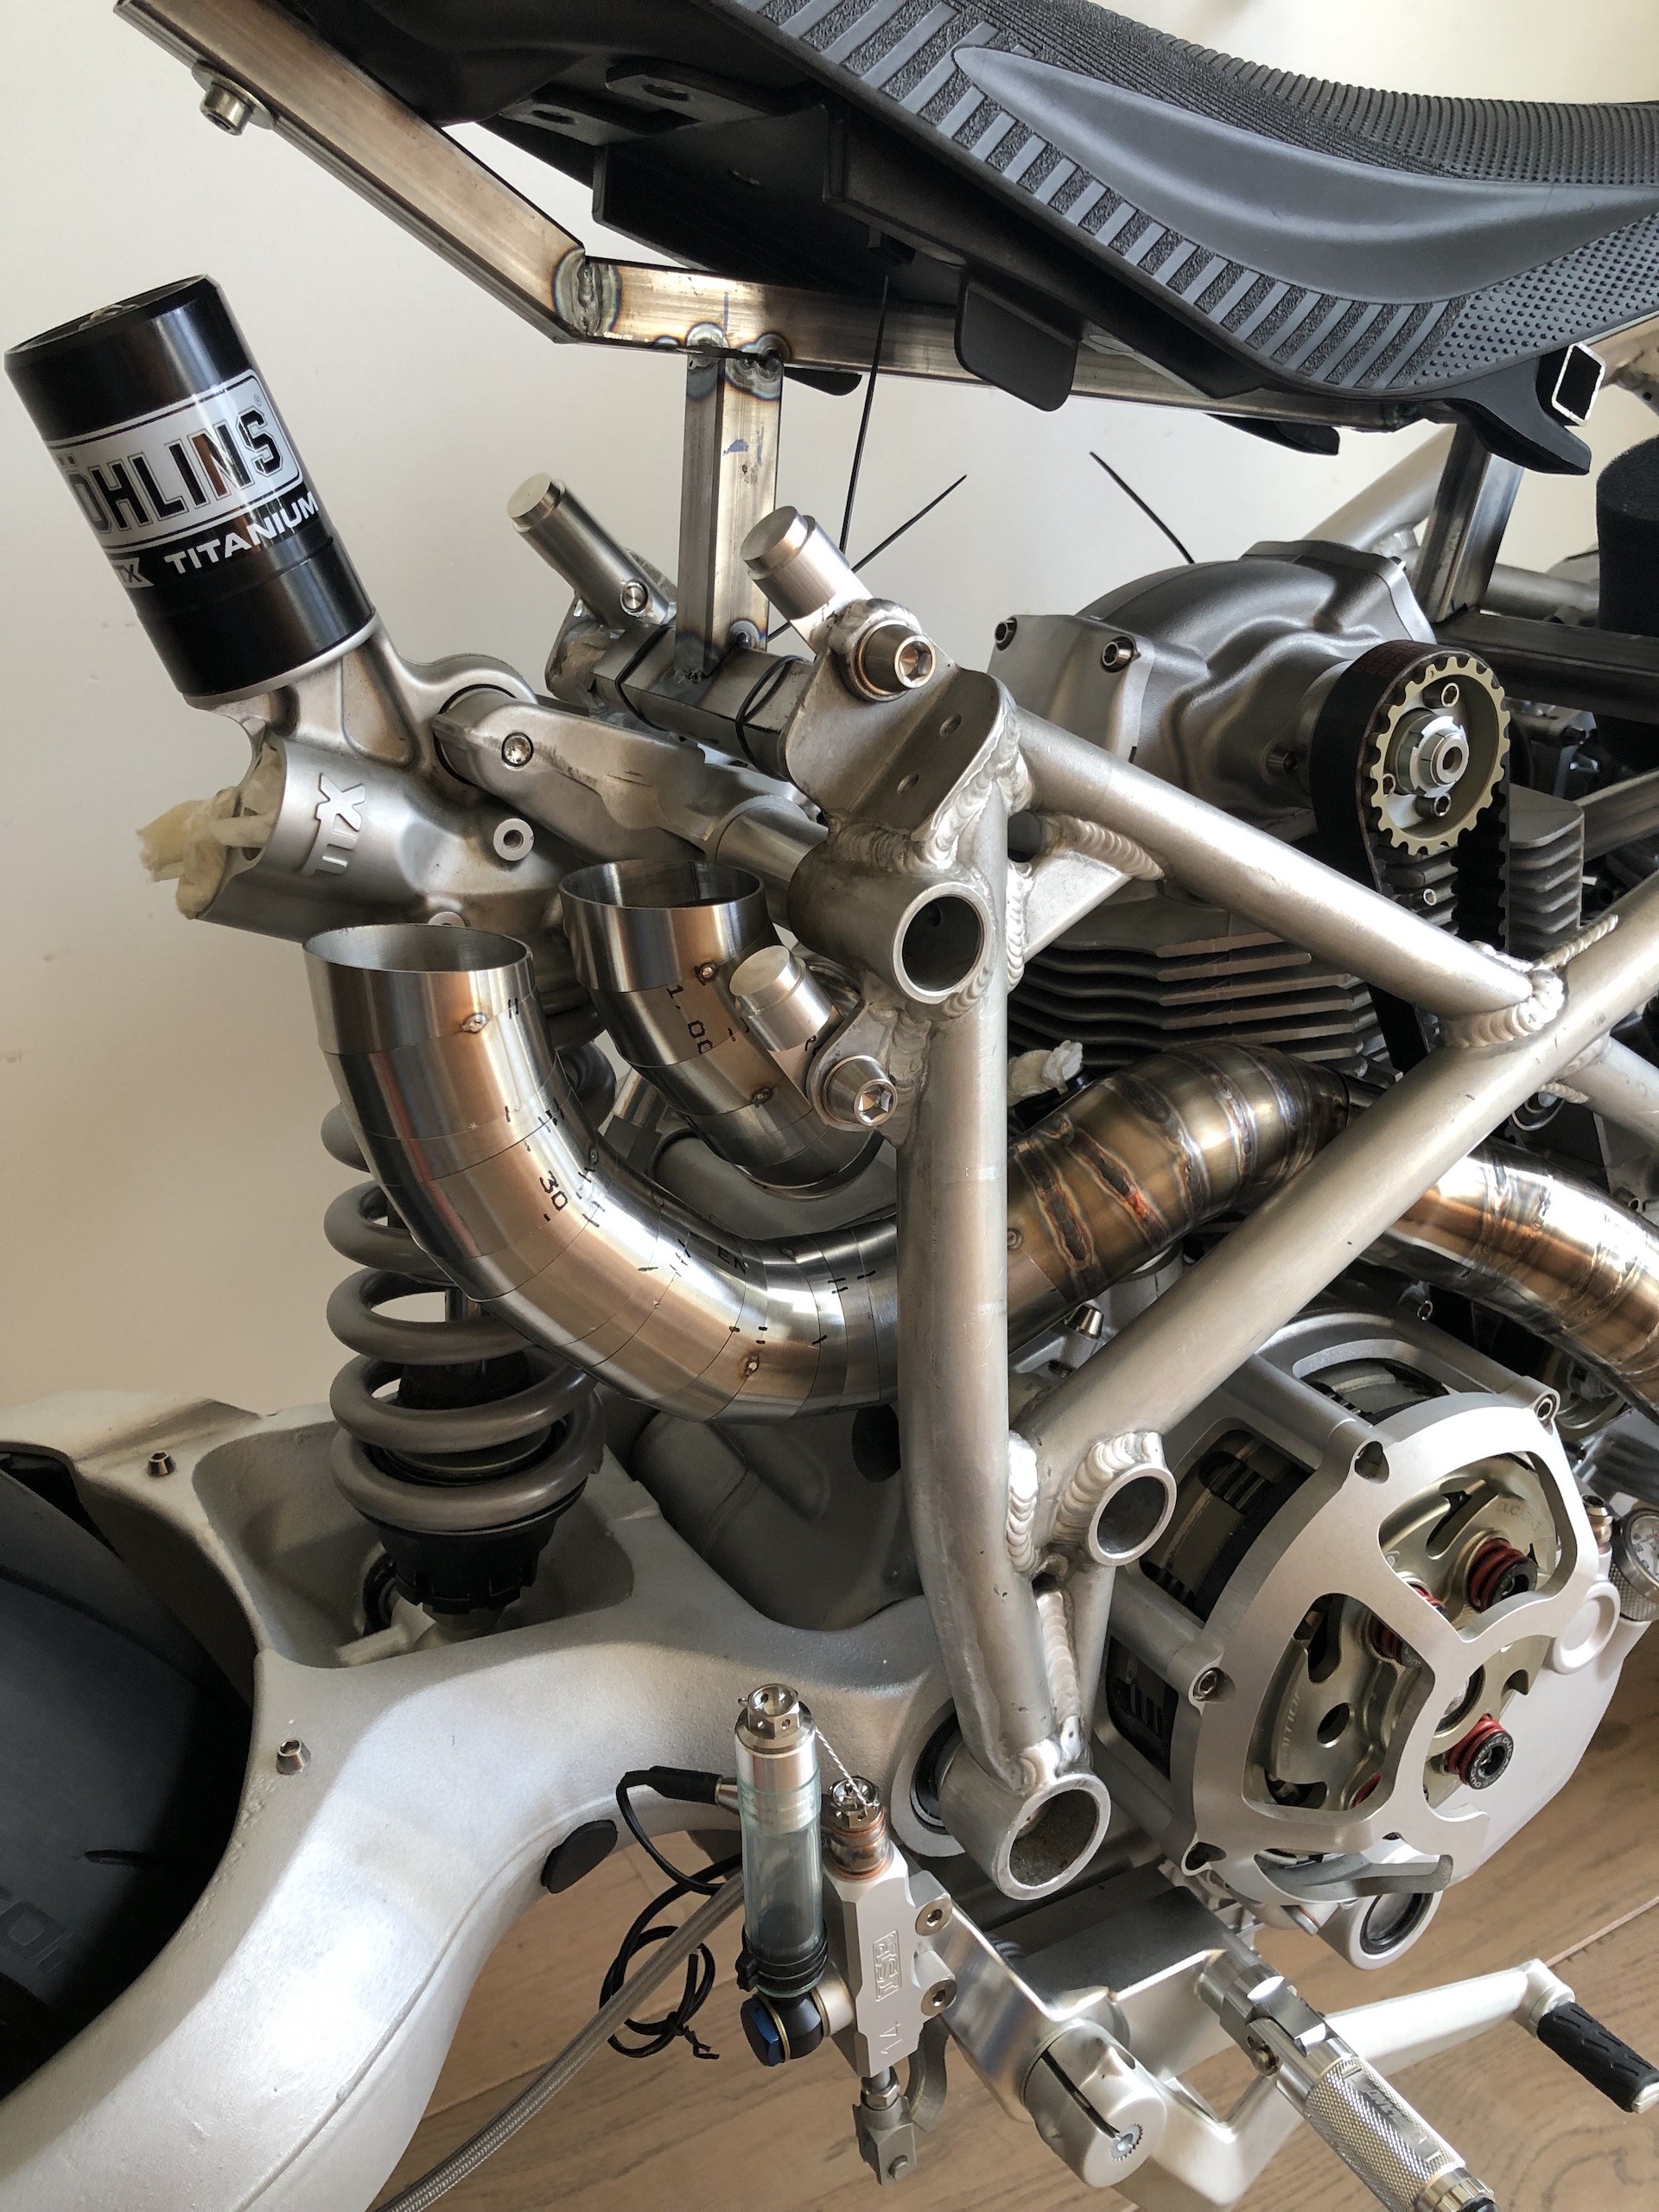
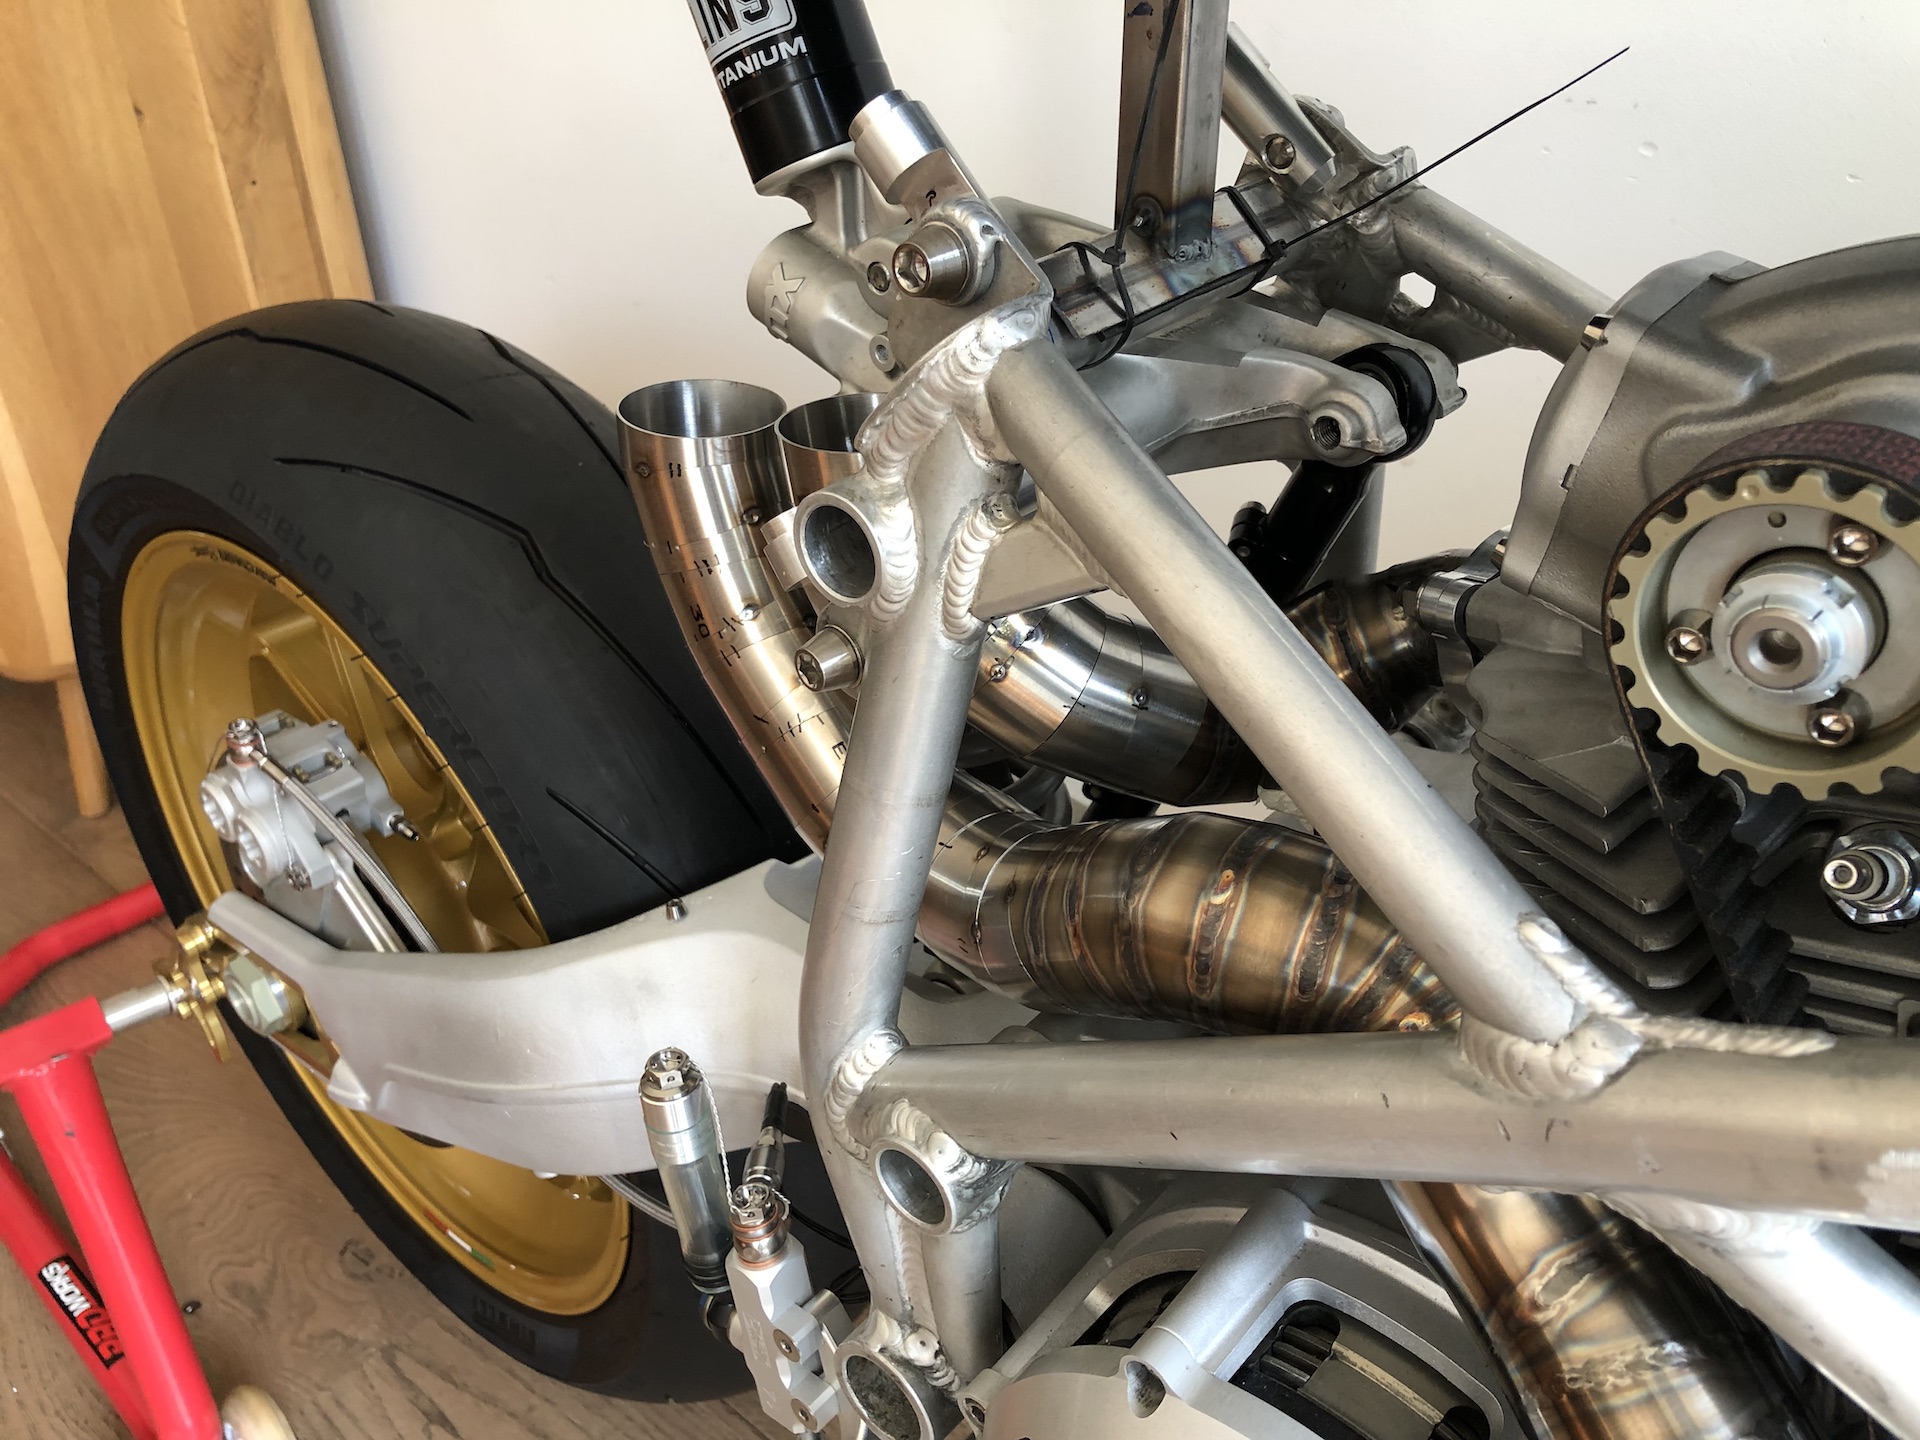
THE BIG HURDLE, CUSTOM TRIPLE TREE
Time to finally tick off that major hurdle of the todo list that delayed the project for to long… The WP triple tree just did not work because it did not have enough steering angle in combination with this frame. So I started to design my own custom triple tree. It took allot of time to design and get the technical drawings right but the quote request has been send 🙂 !
Really happy with the whole look! Matches the rest of the bike perfectly, also with the all the ISR gear. Im pretty proud of myself with this design haha. Jesus this took some hours to get right…
Had to design it with an offset of 36mm instead of 30mm to get the angle right. Designed it with a removable stem, without a press fit. Just as accurate, but won’t require a press to push the stem in with the risk of damaging it. Taking inspiration from IMA and Robby Moto Engineering doing it just like this.
The whole triple tree will be made out of 6082 aluminium, glass bead blasted and anodized clear. With off course some custom laser engraving! Finishing everything off with titanium bolts.
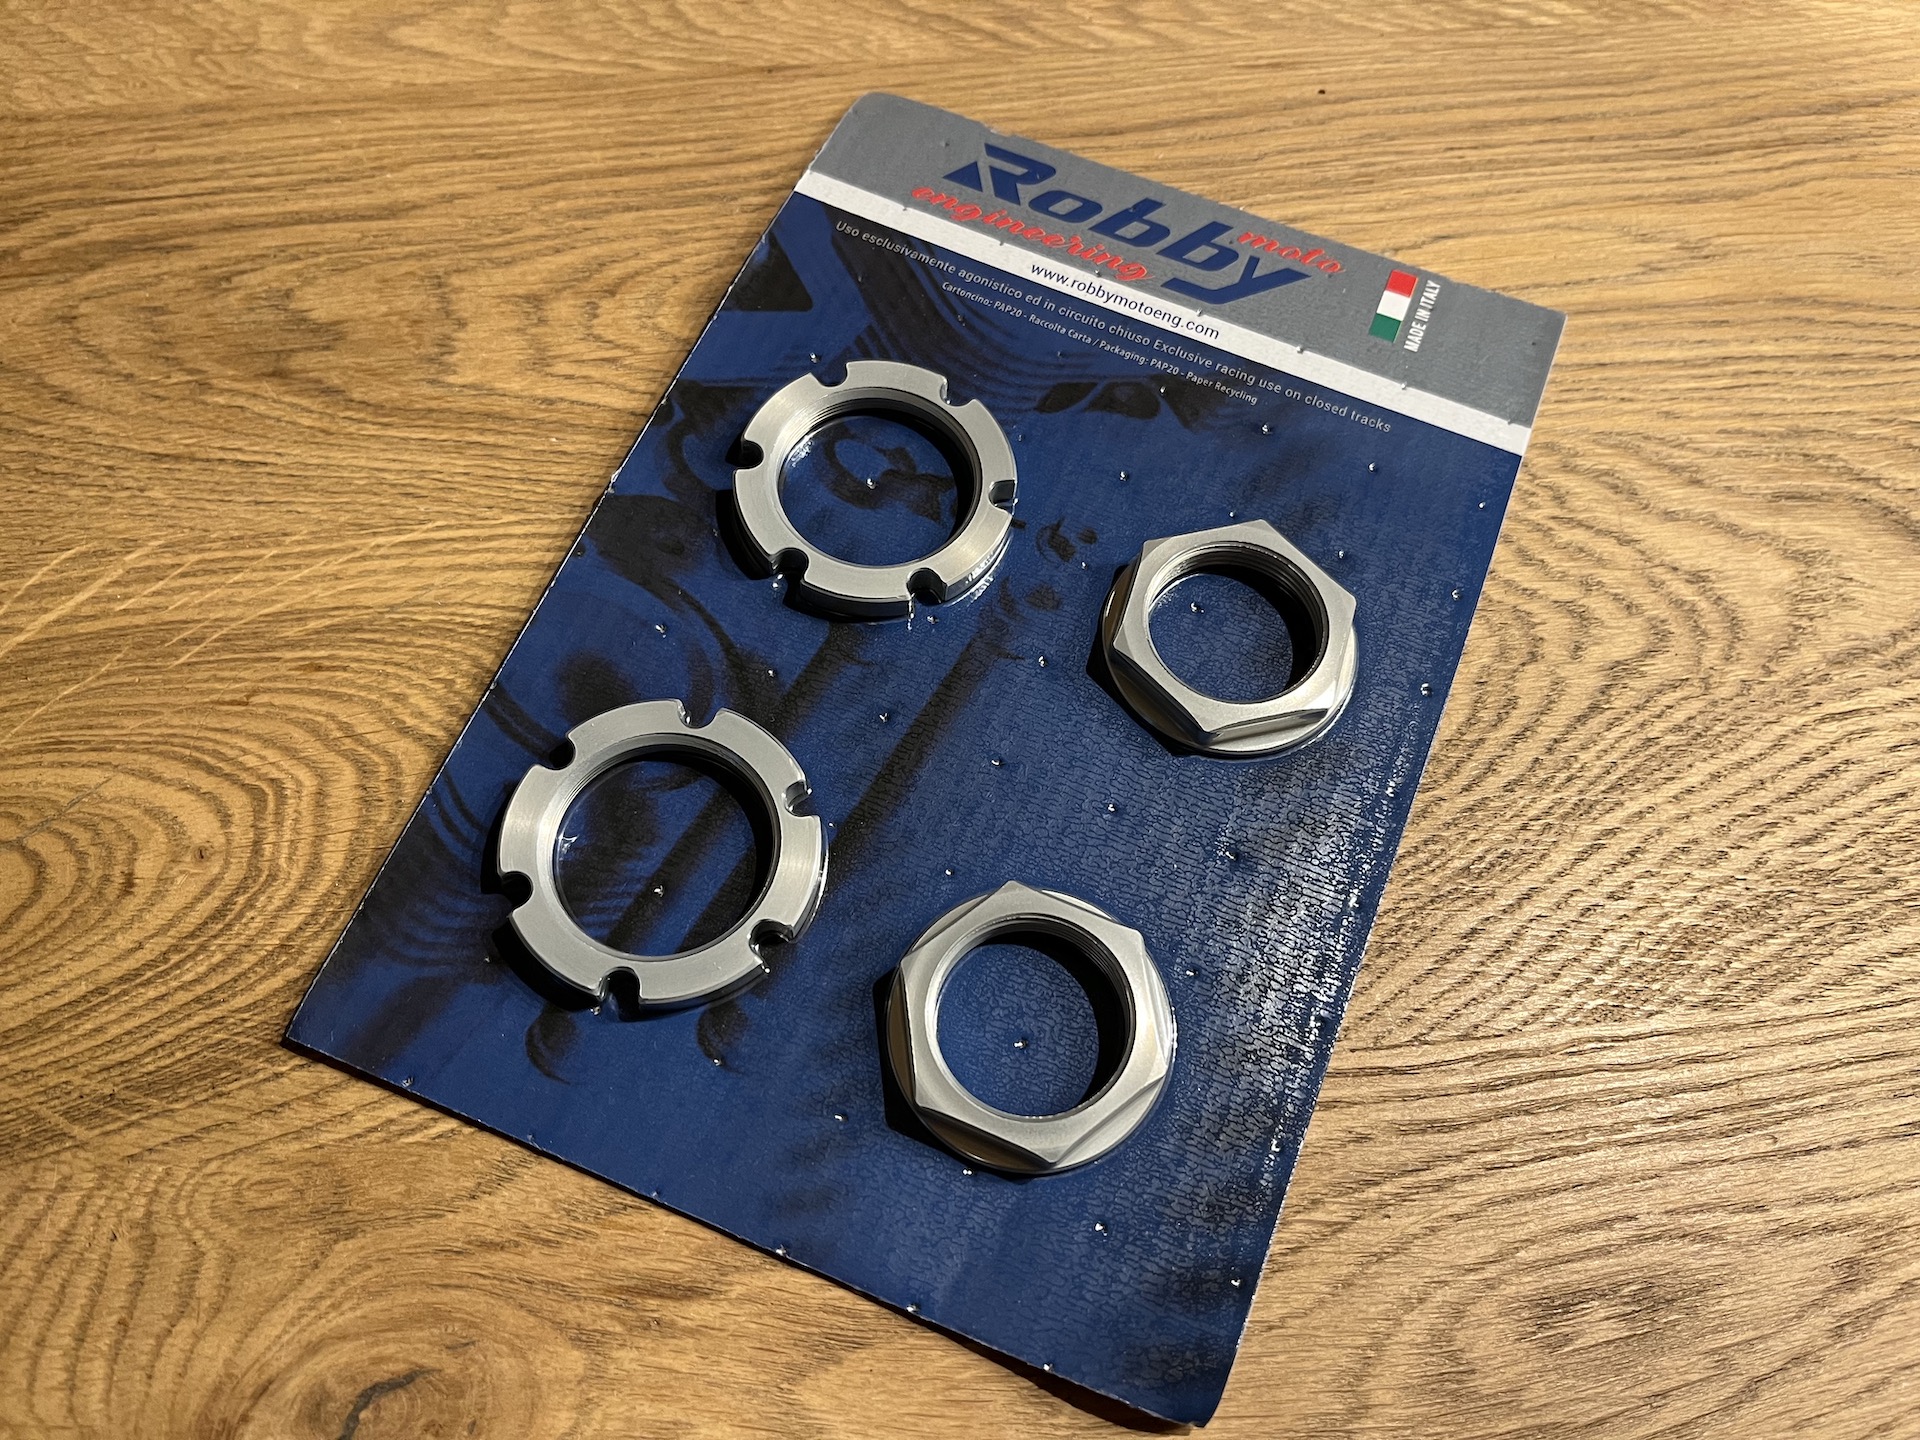
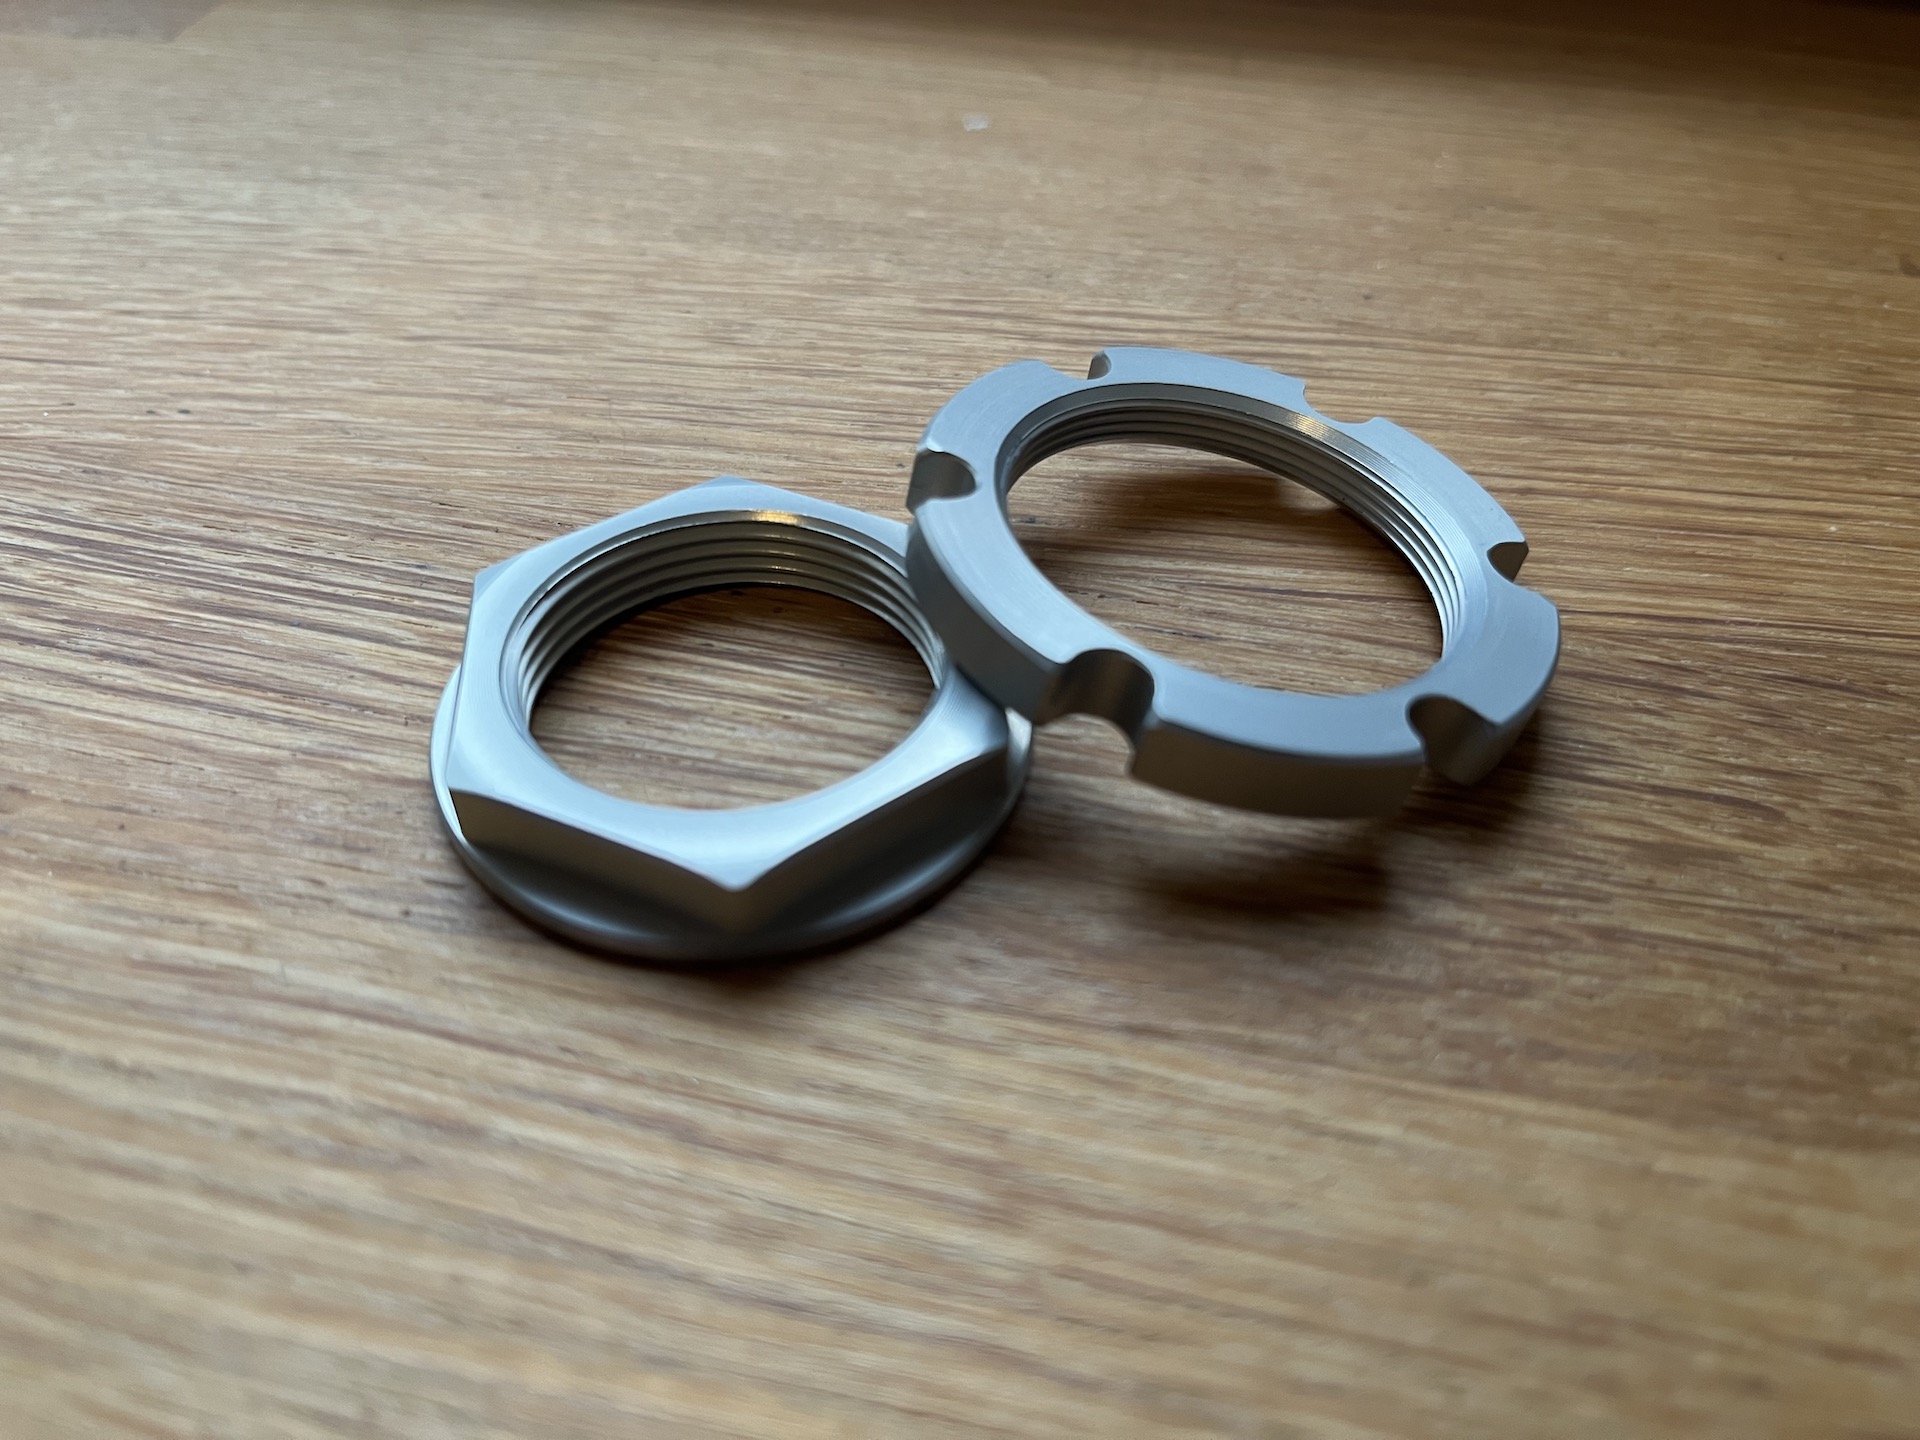
Machining the one off M35x1.0 and M30x1.5 nuts will be a costly procedure. So I just ordered the ones that Robby Moto Engineering uses. The clear aluminium anodized version. Way cheaper so I designed the stem around these nuts.
Thanks Michel, Roel and Alexandre for reviewing my triple tree designs and sharing their feedback/knowledge <3 !
I also designed some other small parts. A fuel pump base plate that can be welded into the aluminium tank with a very small footprint, since I almost have no space for the pump. A signature plate for when the project is done. E mark plate for the exhaust to make it look like somewhat legal…. haha.
Im not a professional CAD/technical drawing designer. So the drawings are not perfect! It helped me out allot to see some examples, so maybe these can come to use for somebody else <3


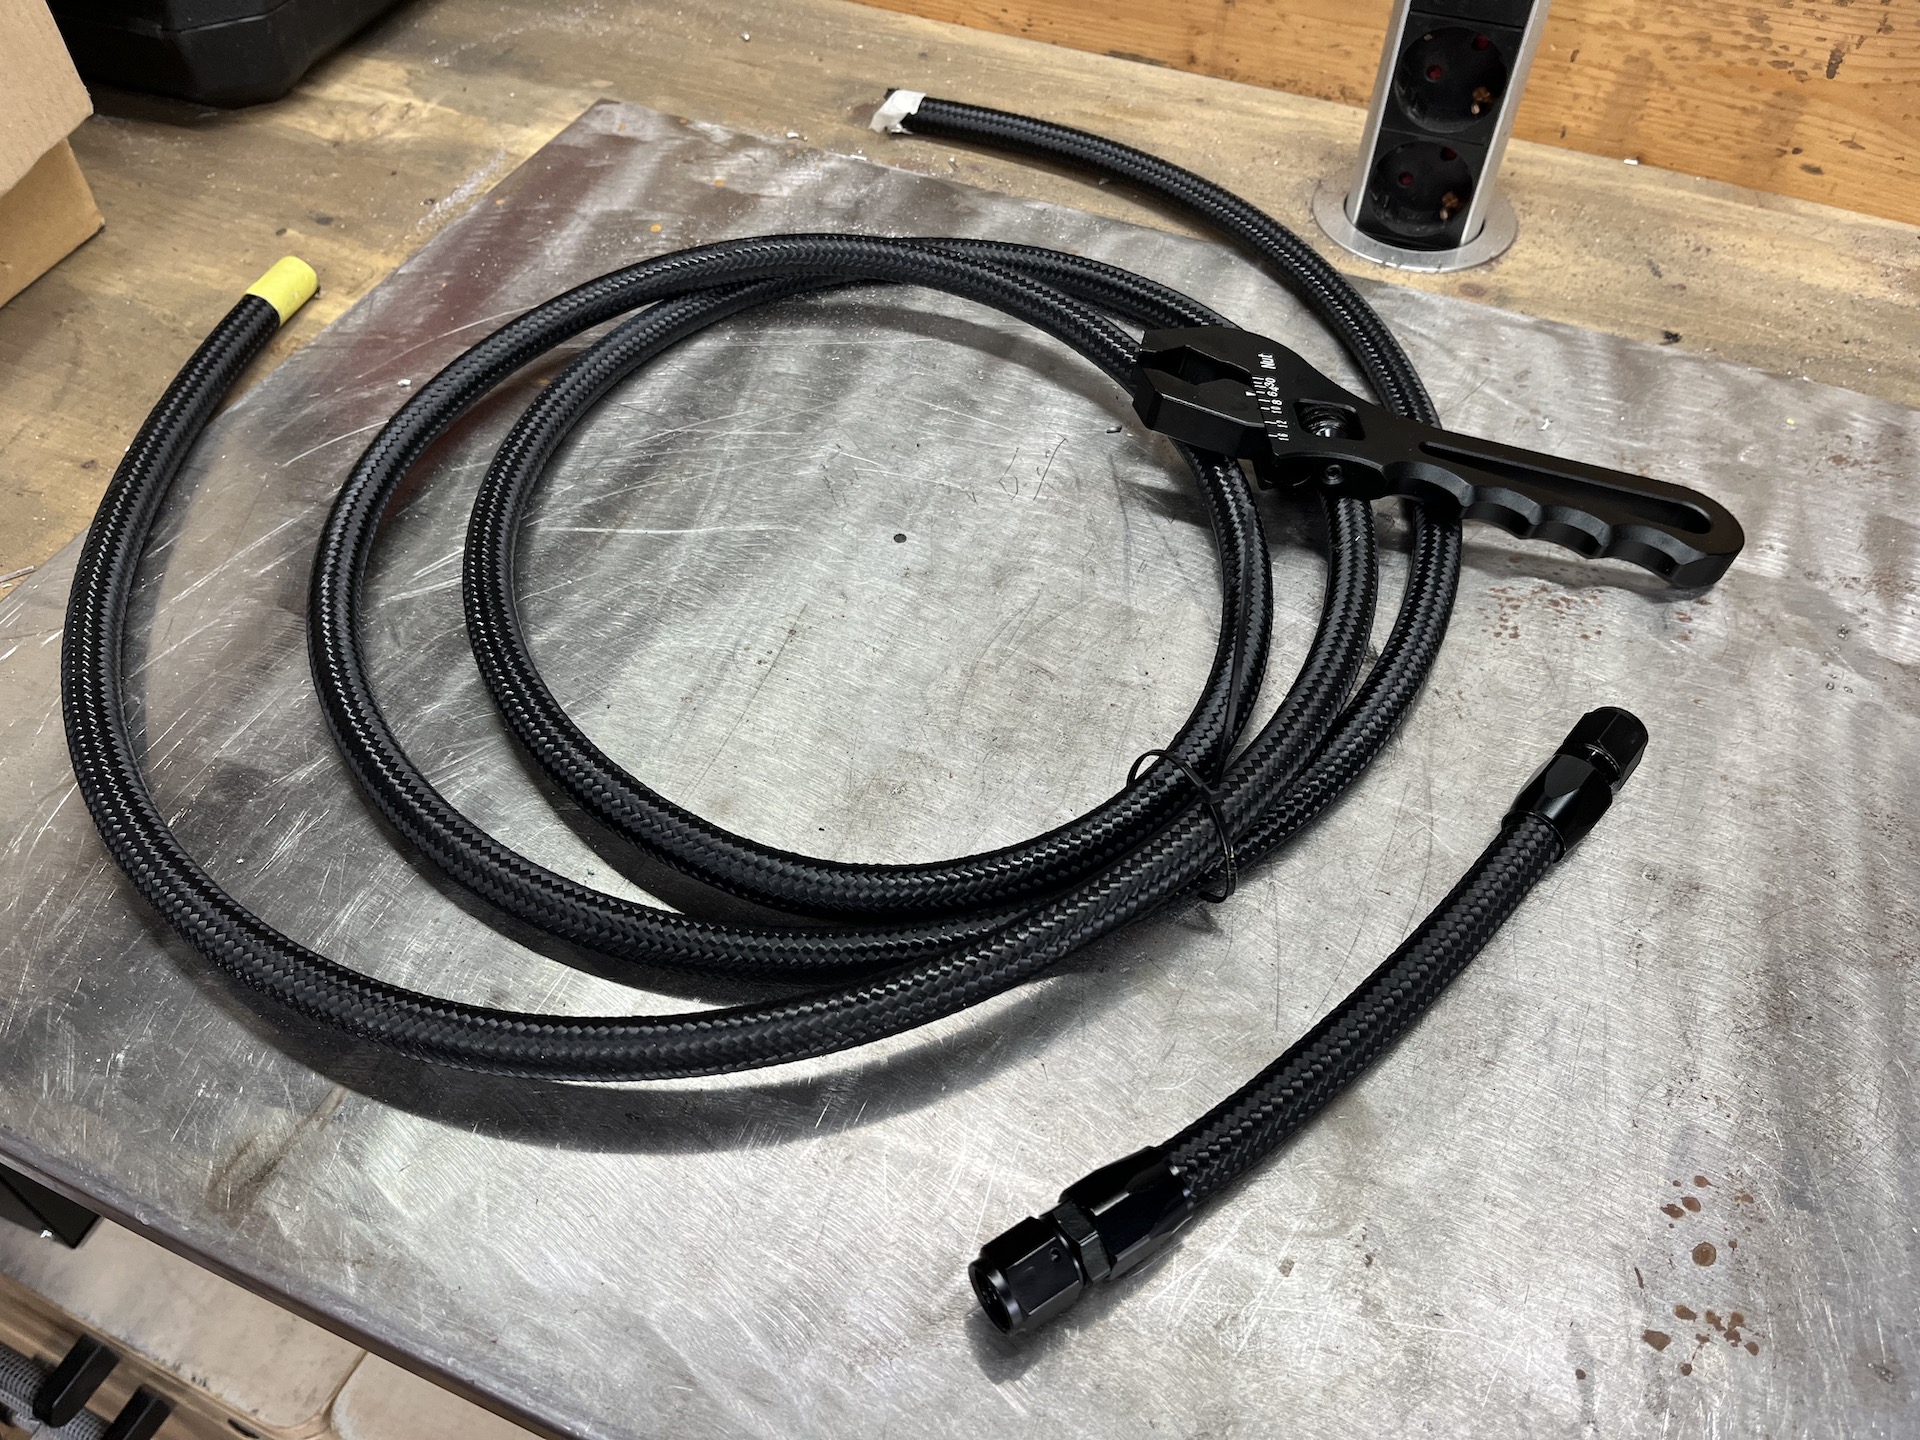
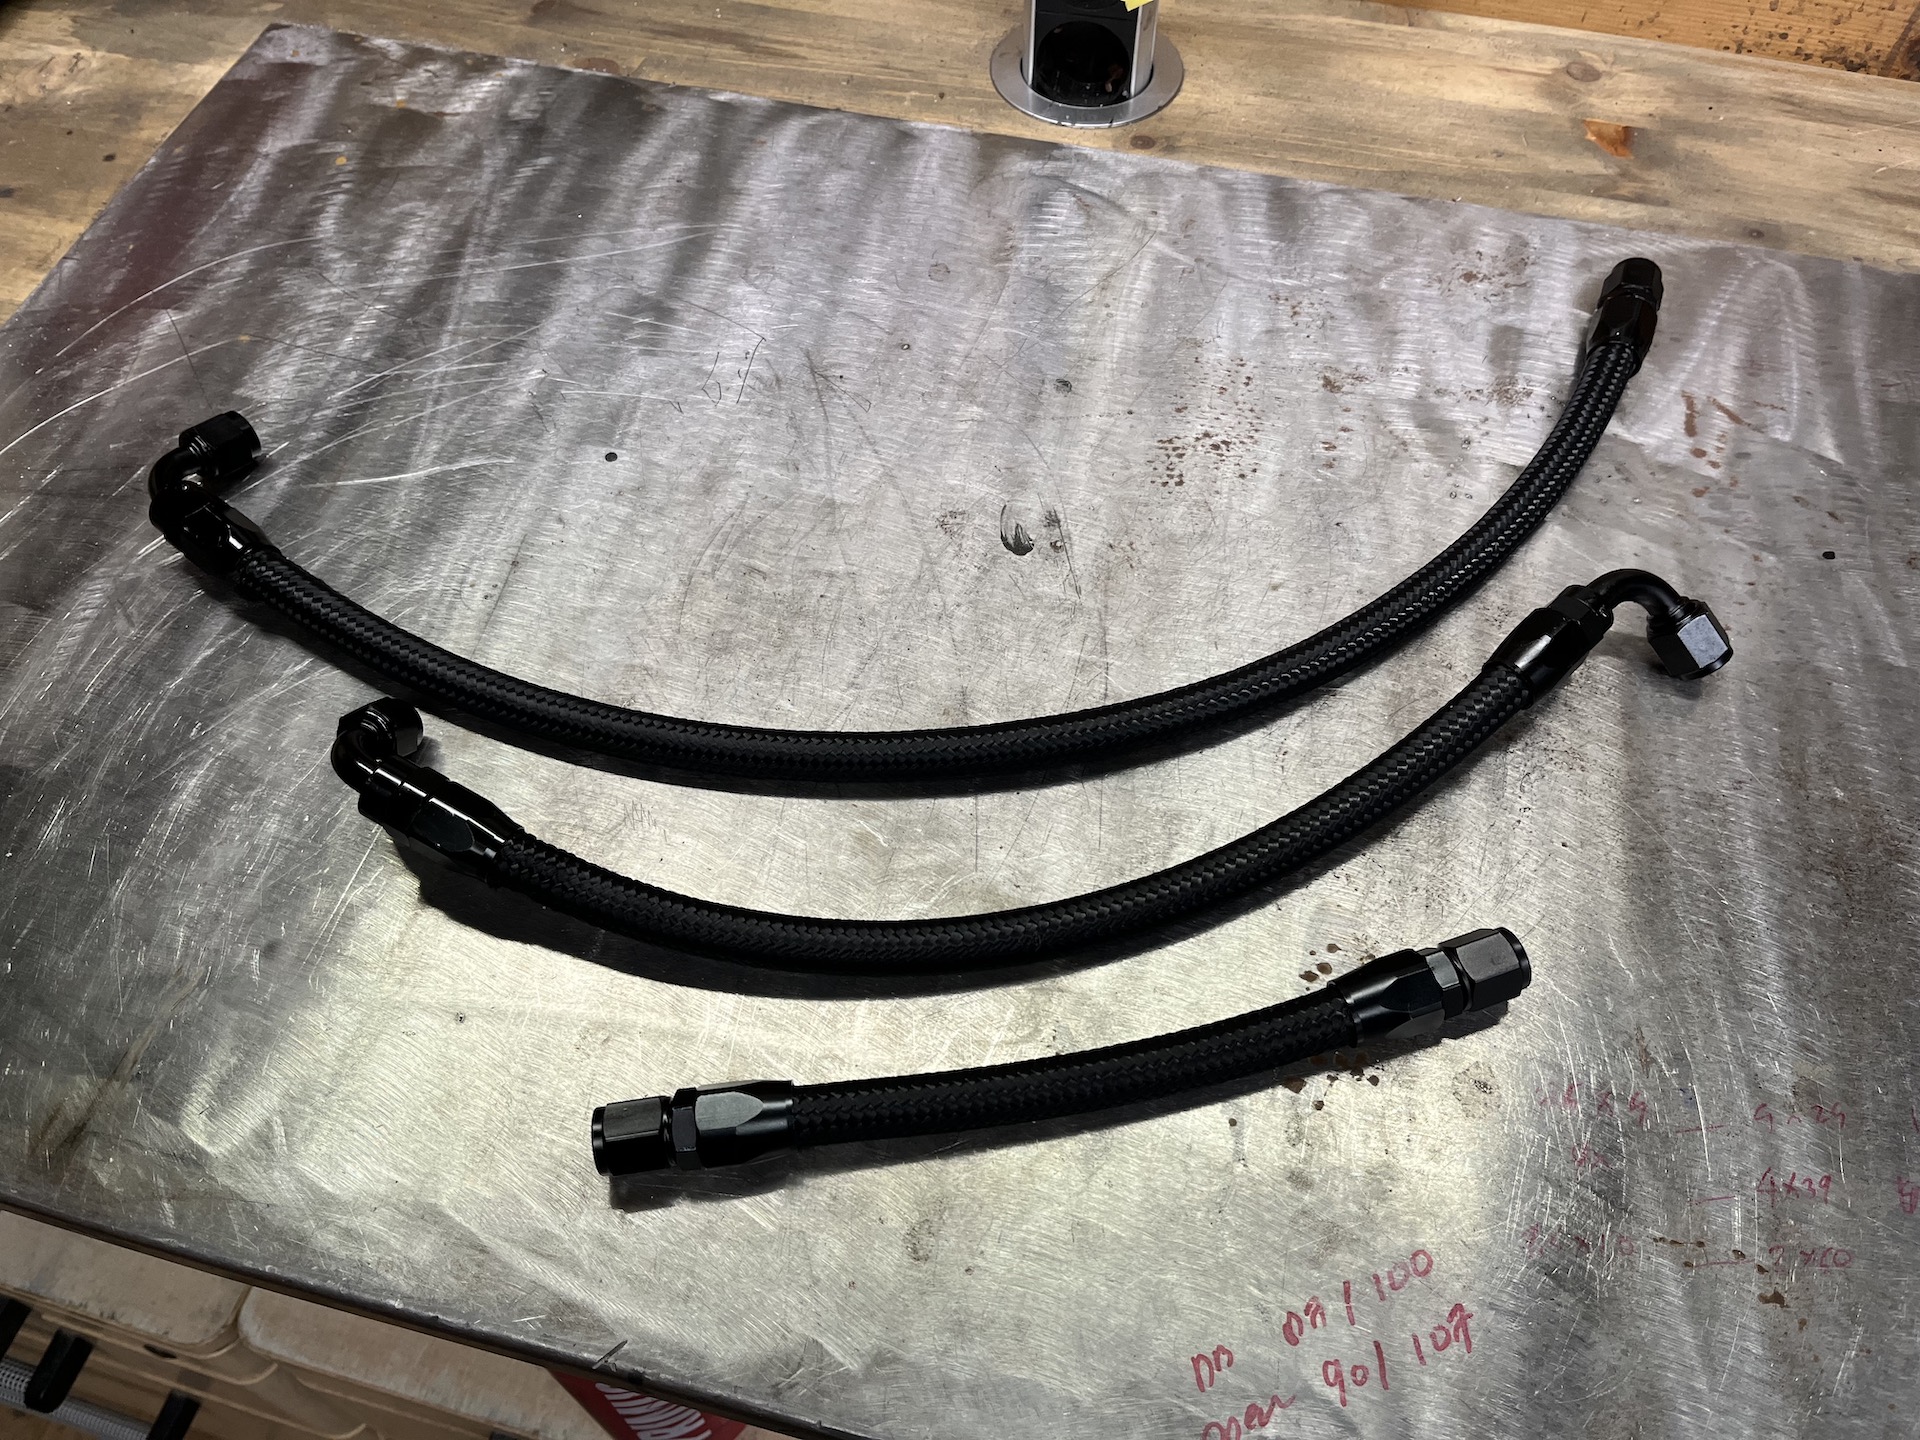
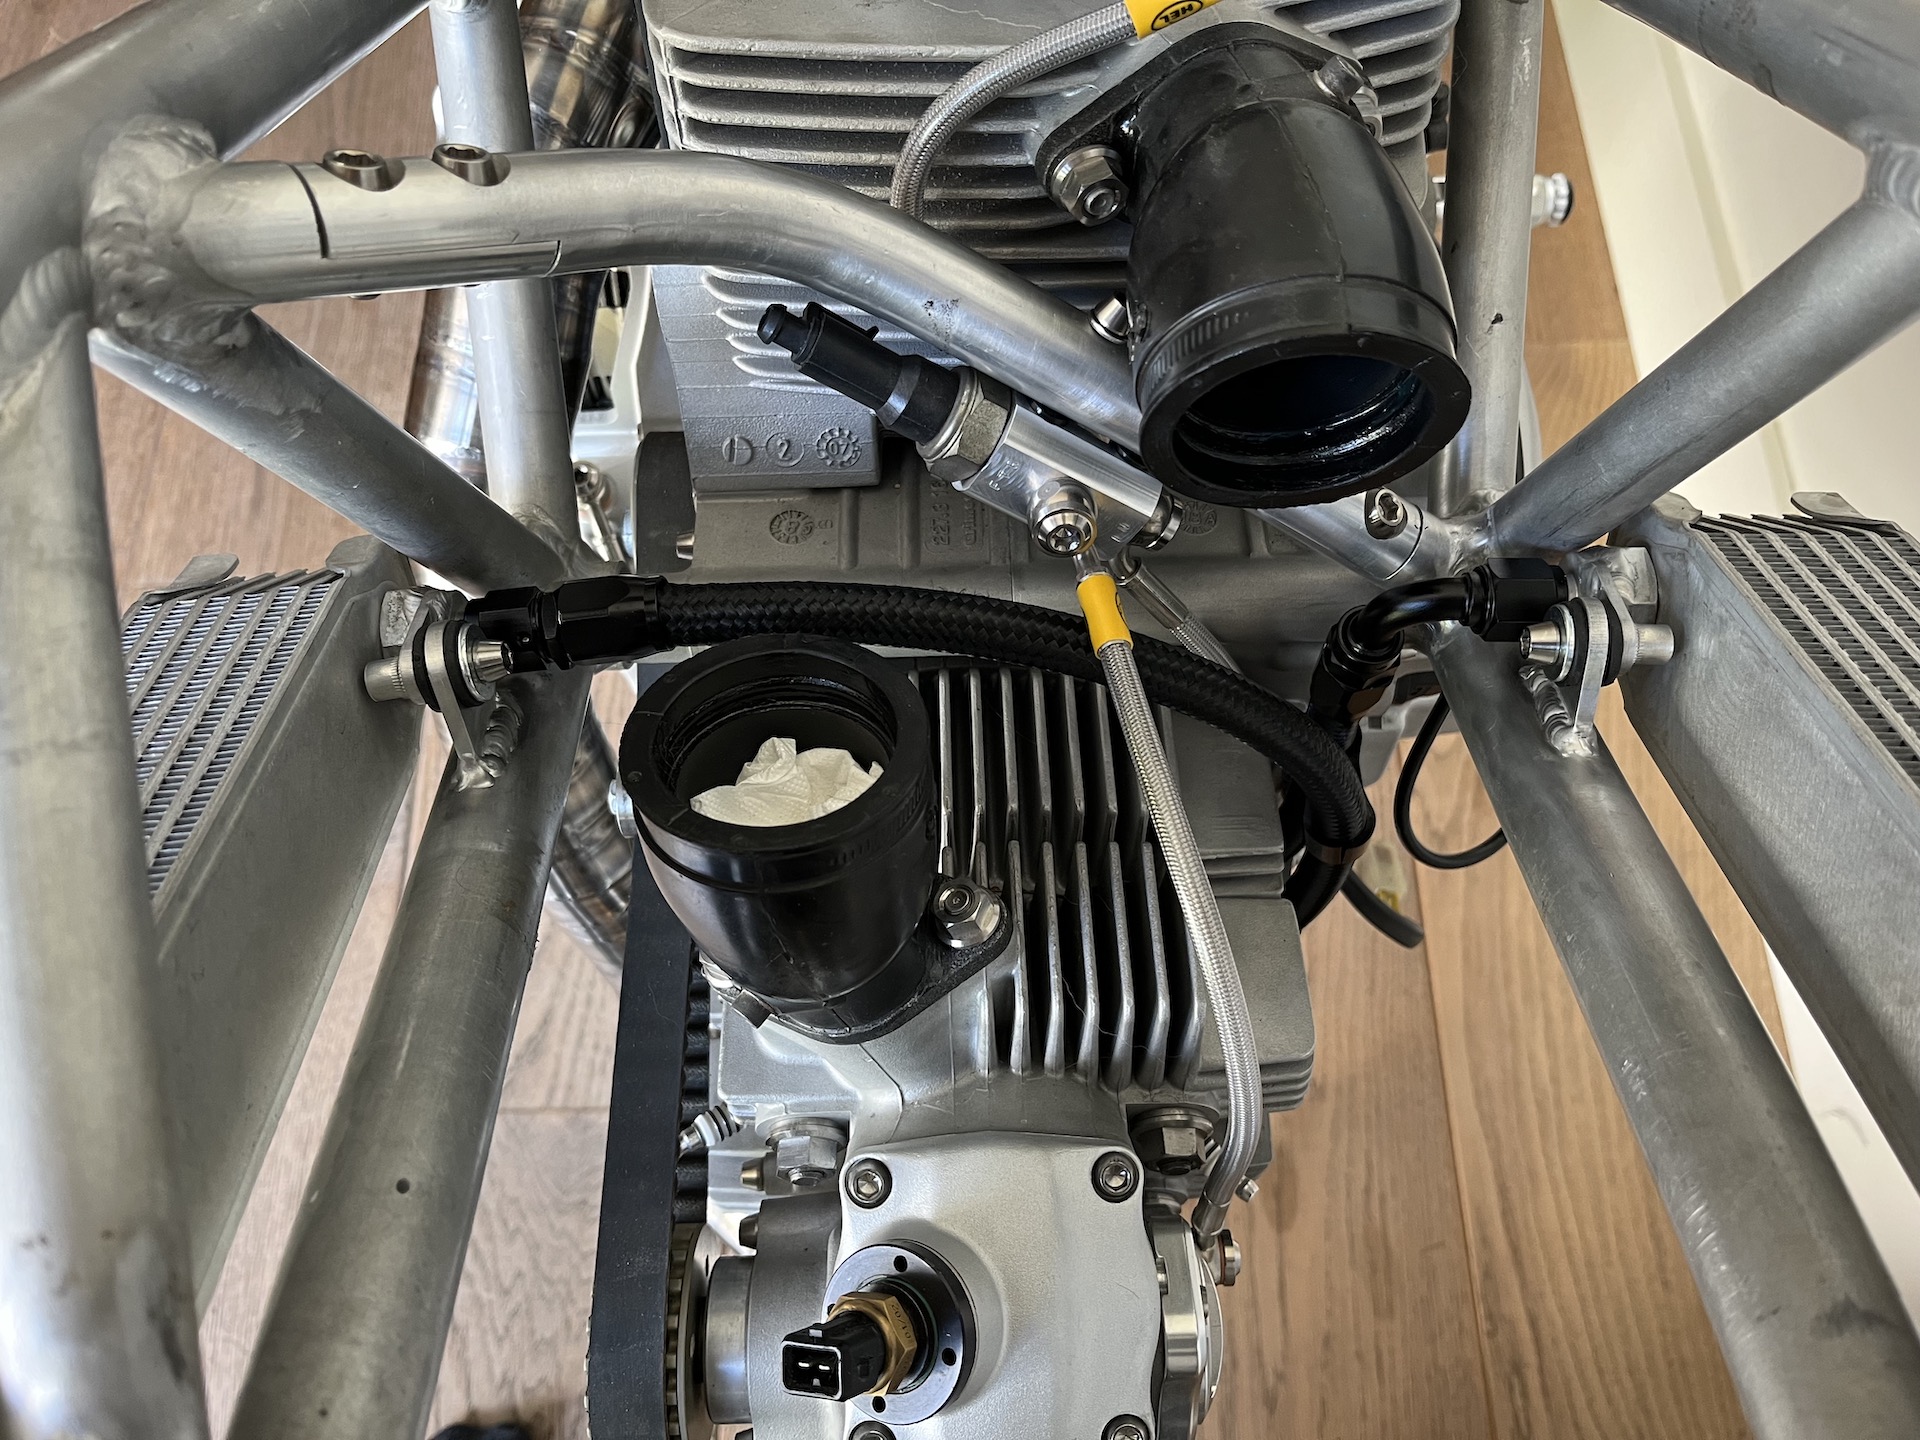
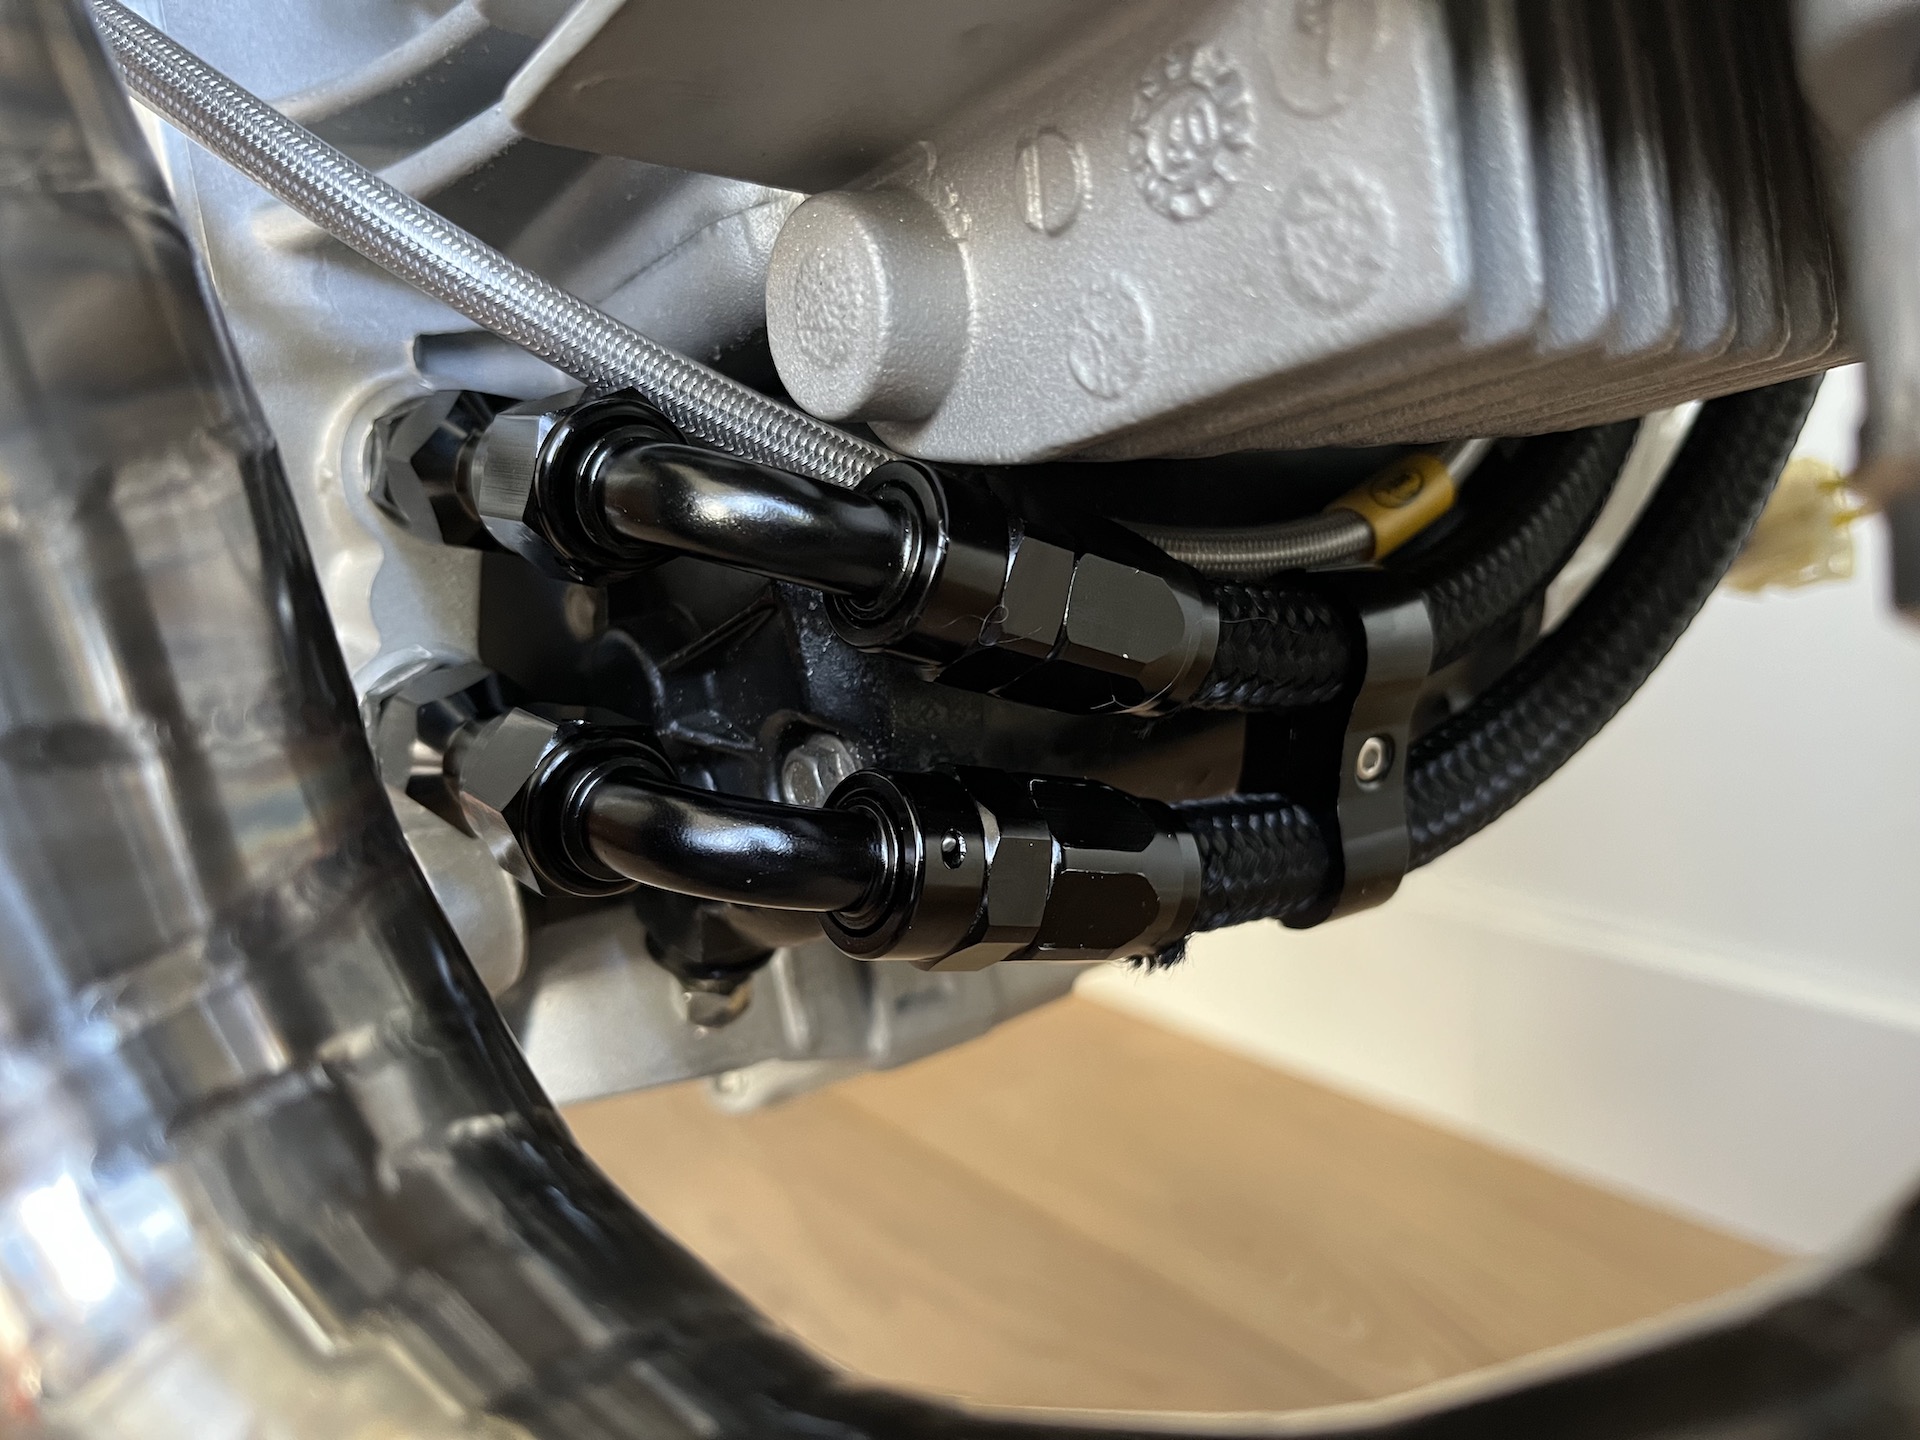
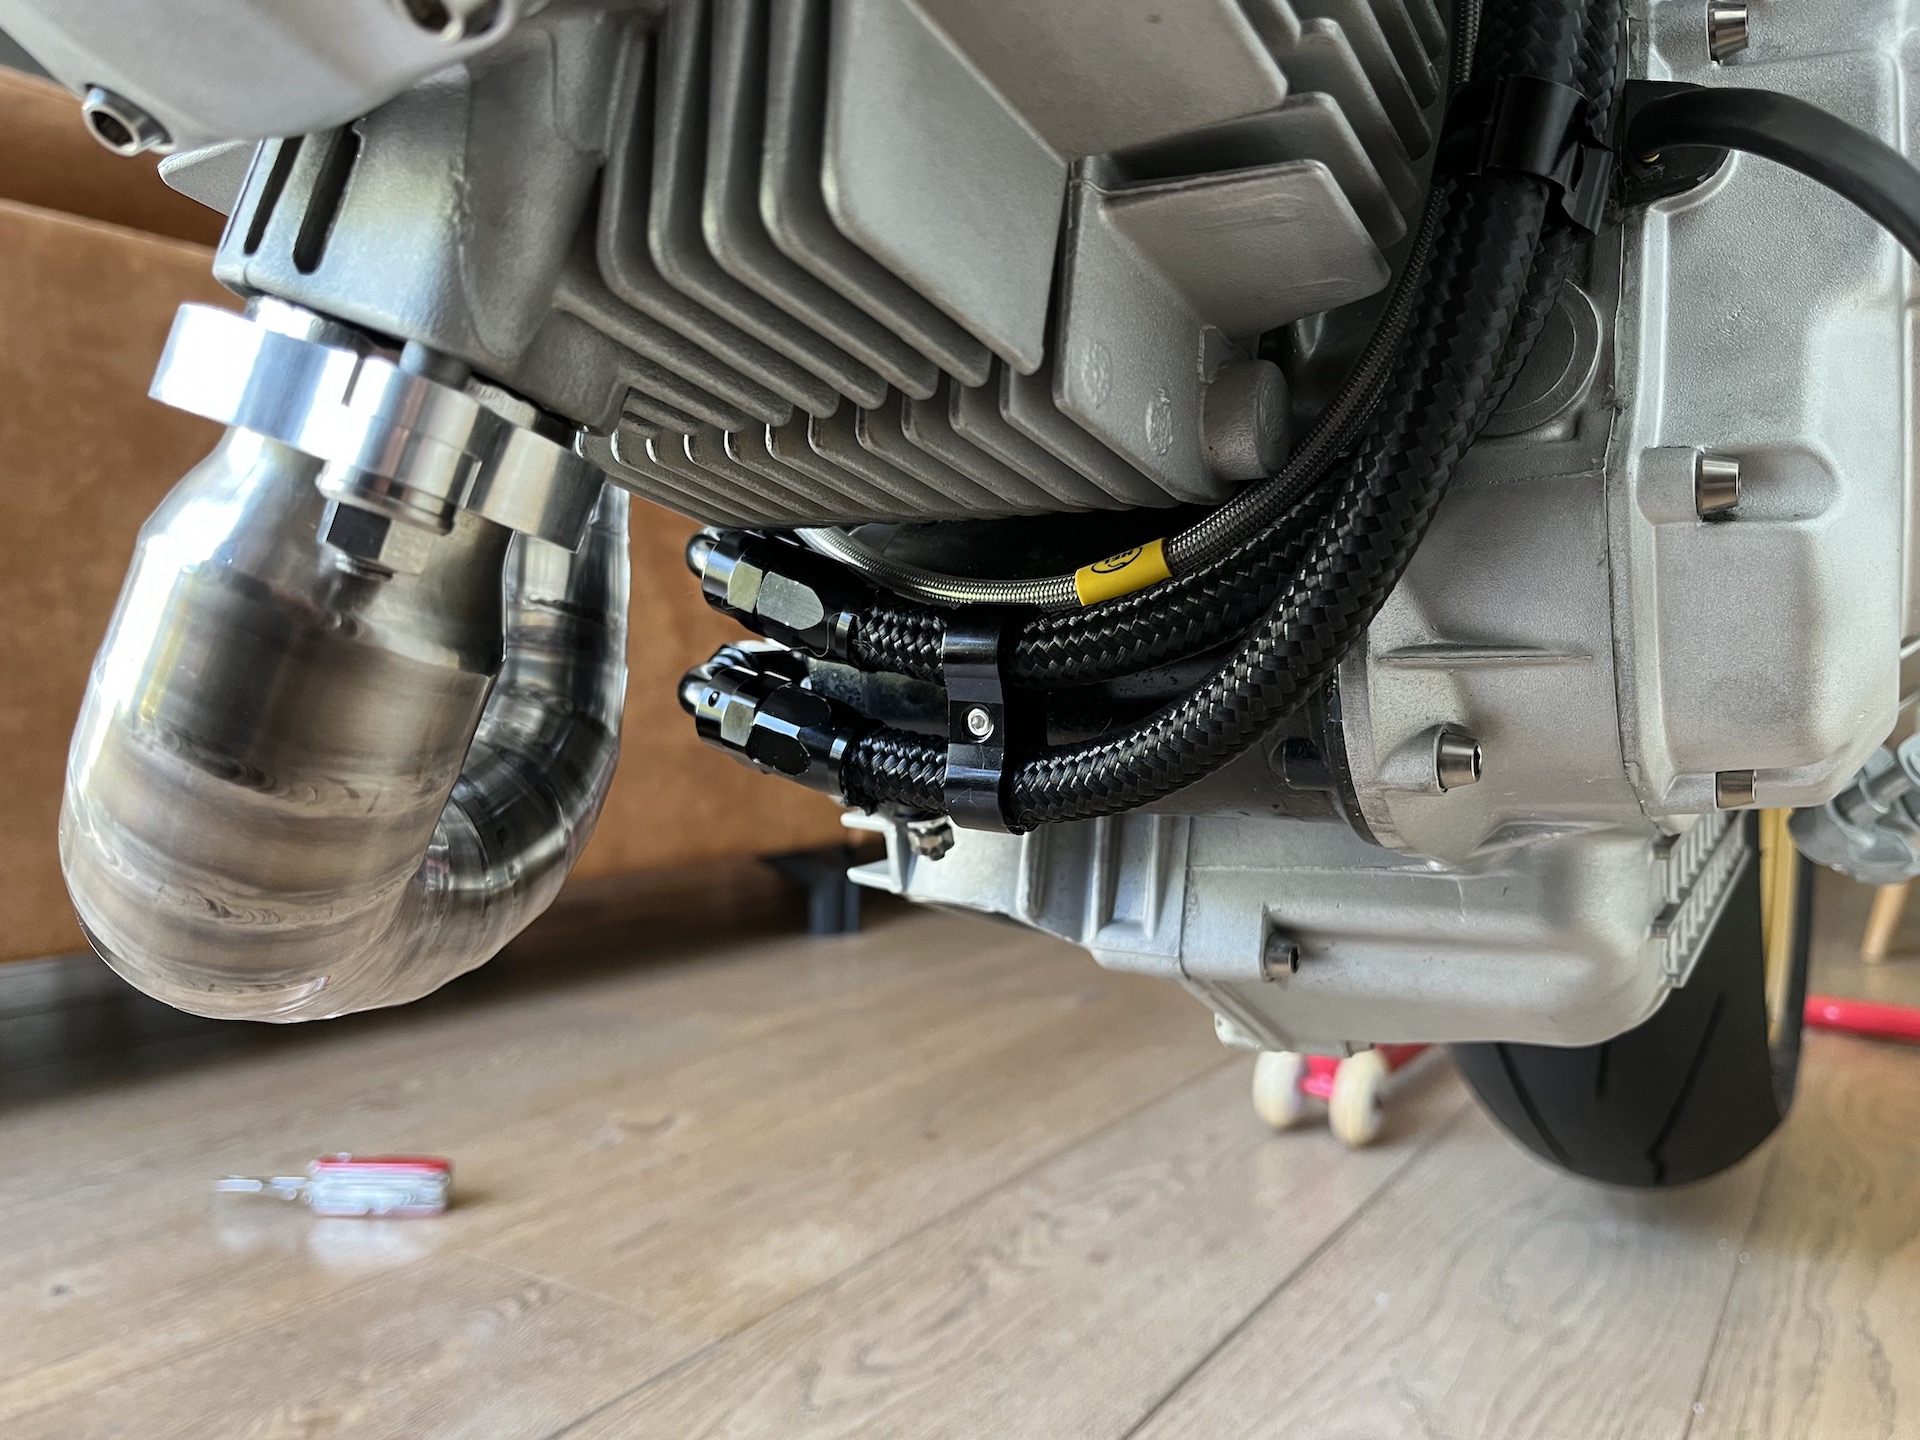
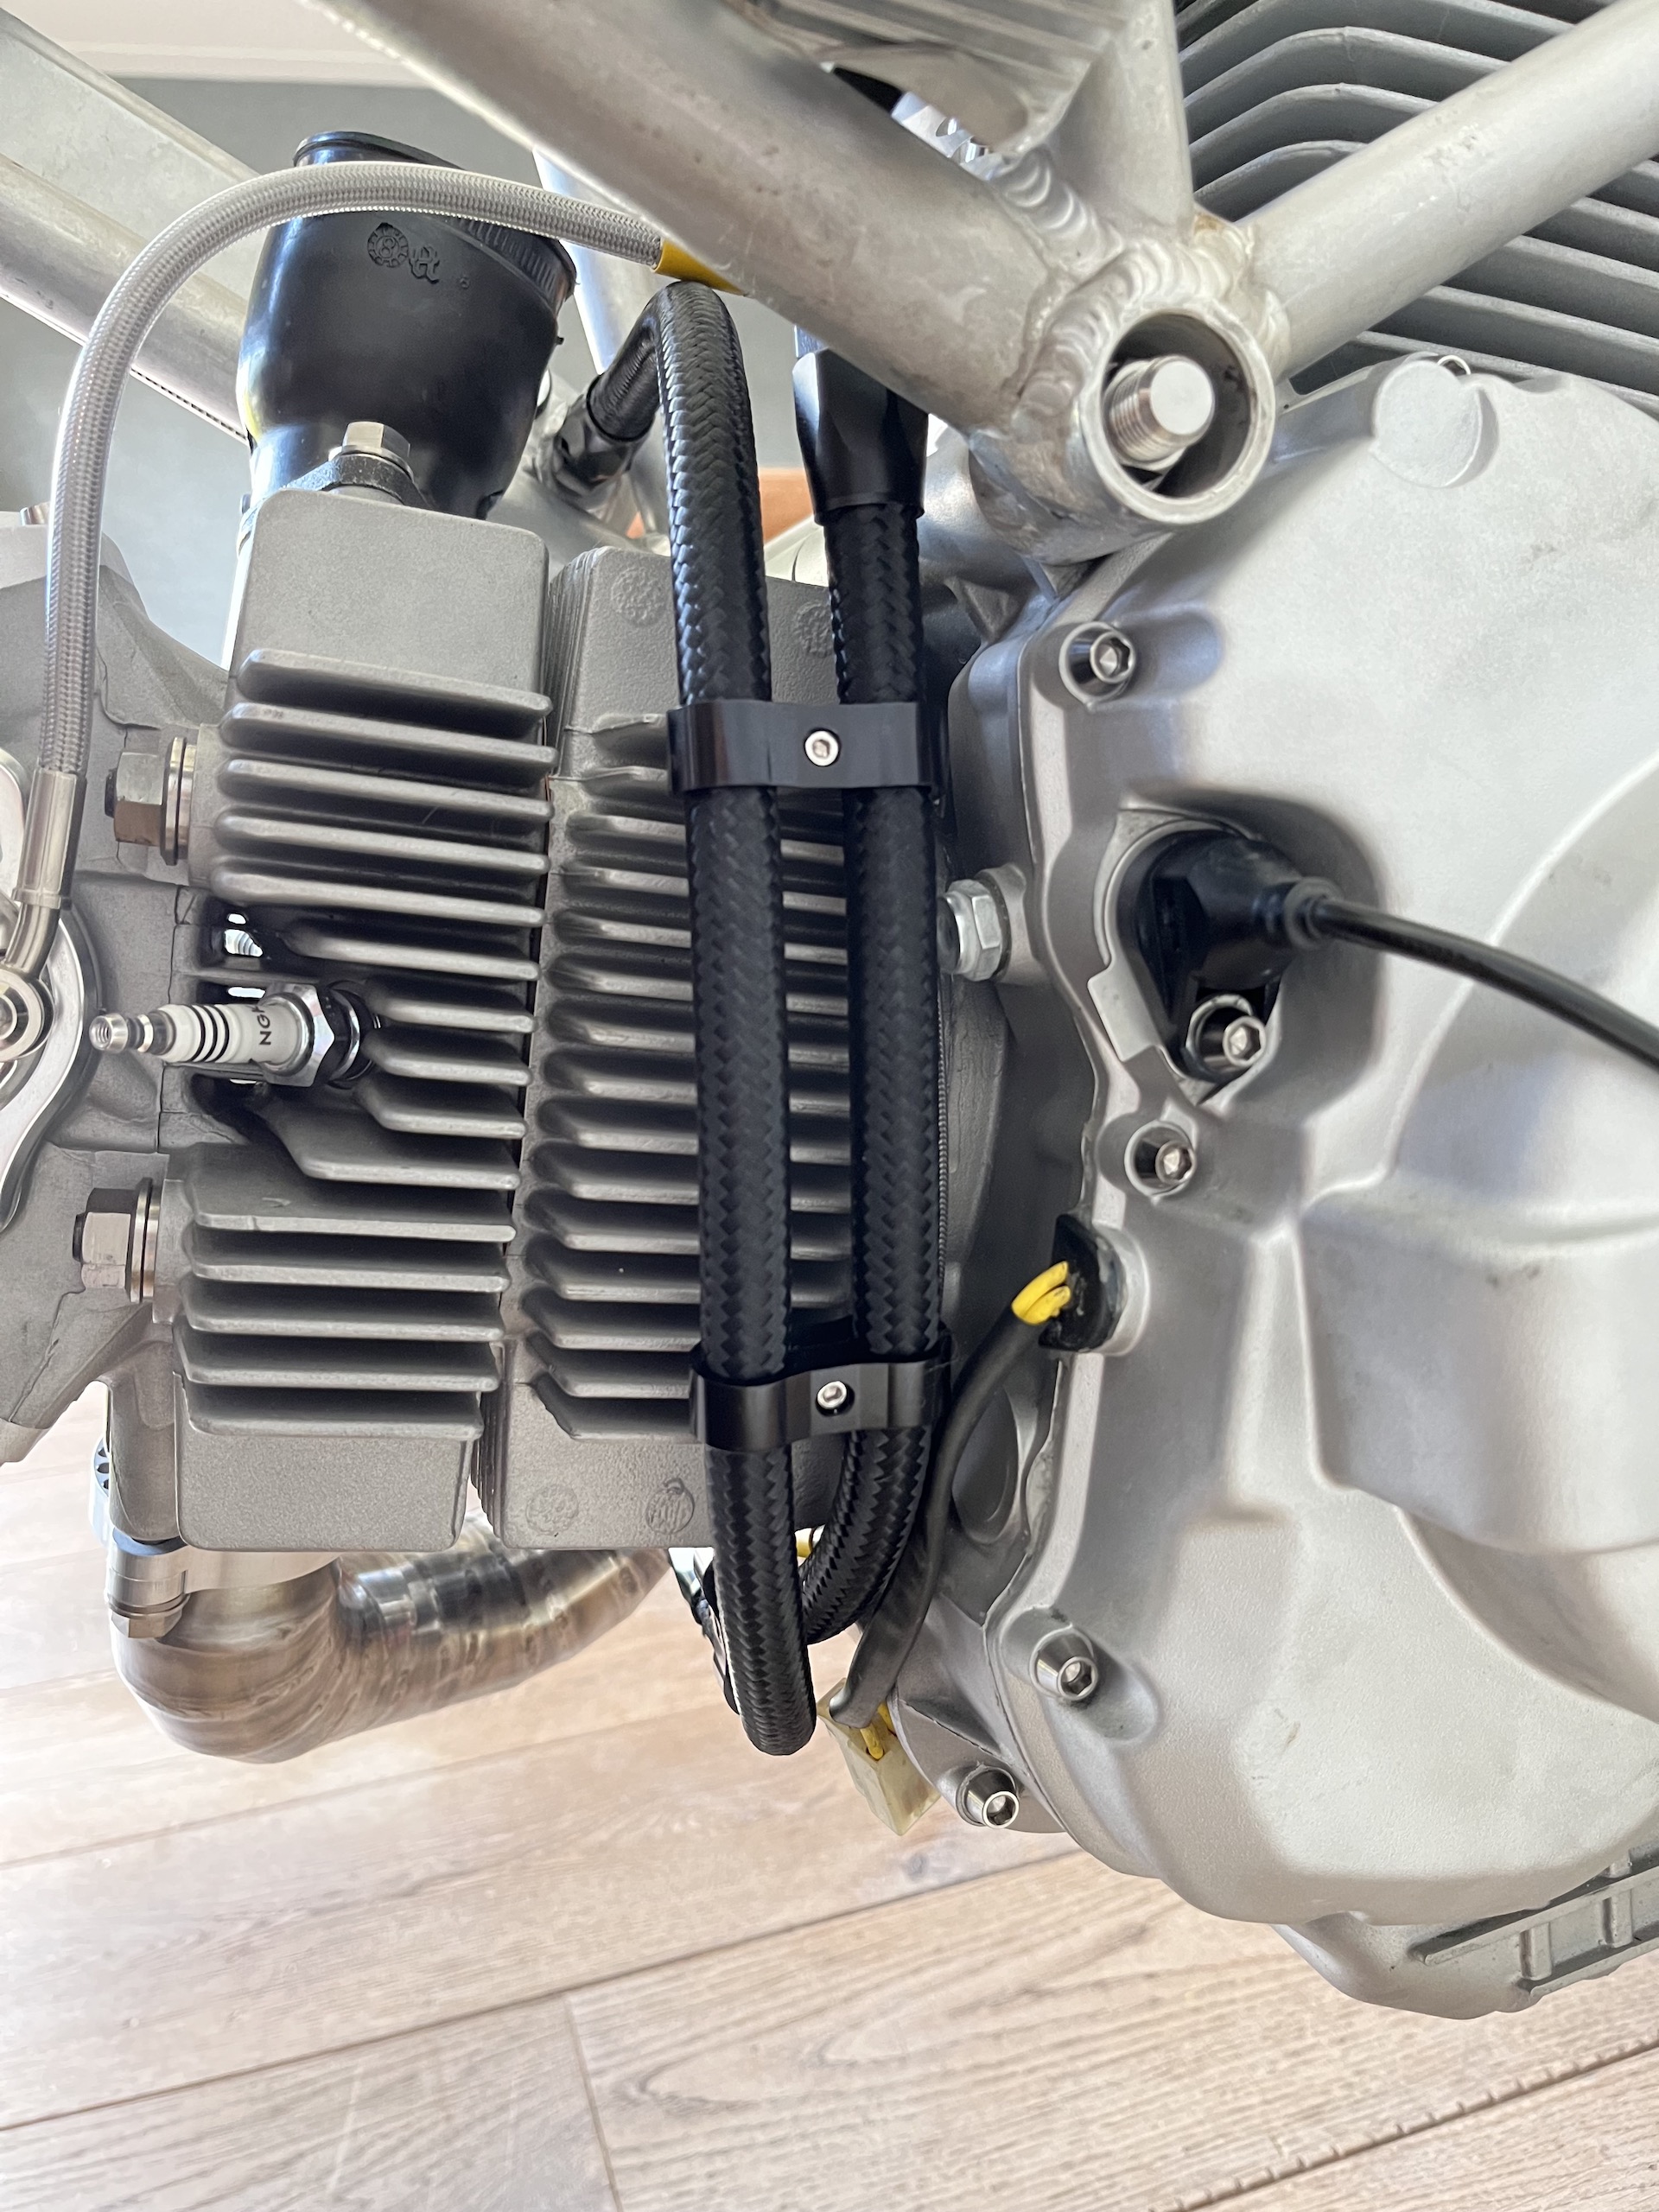
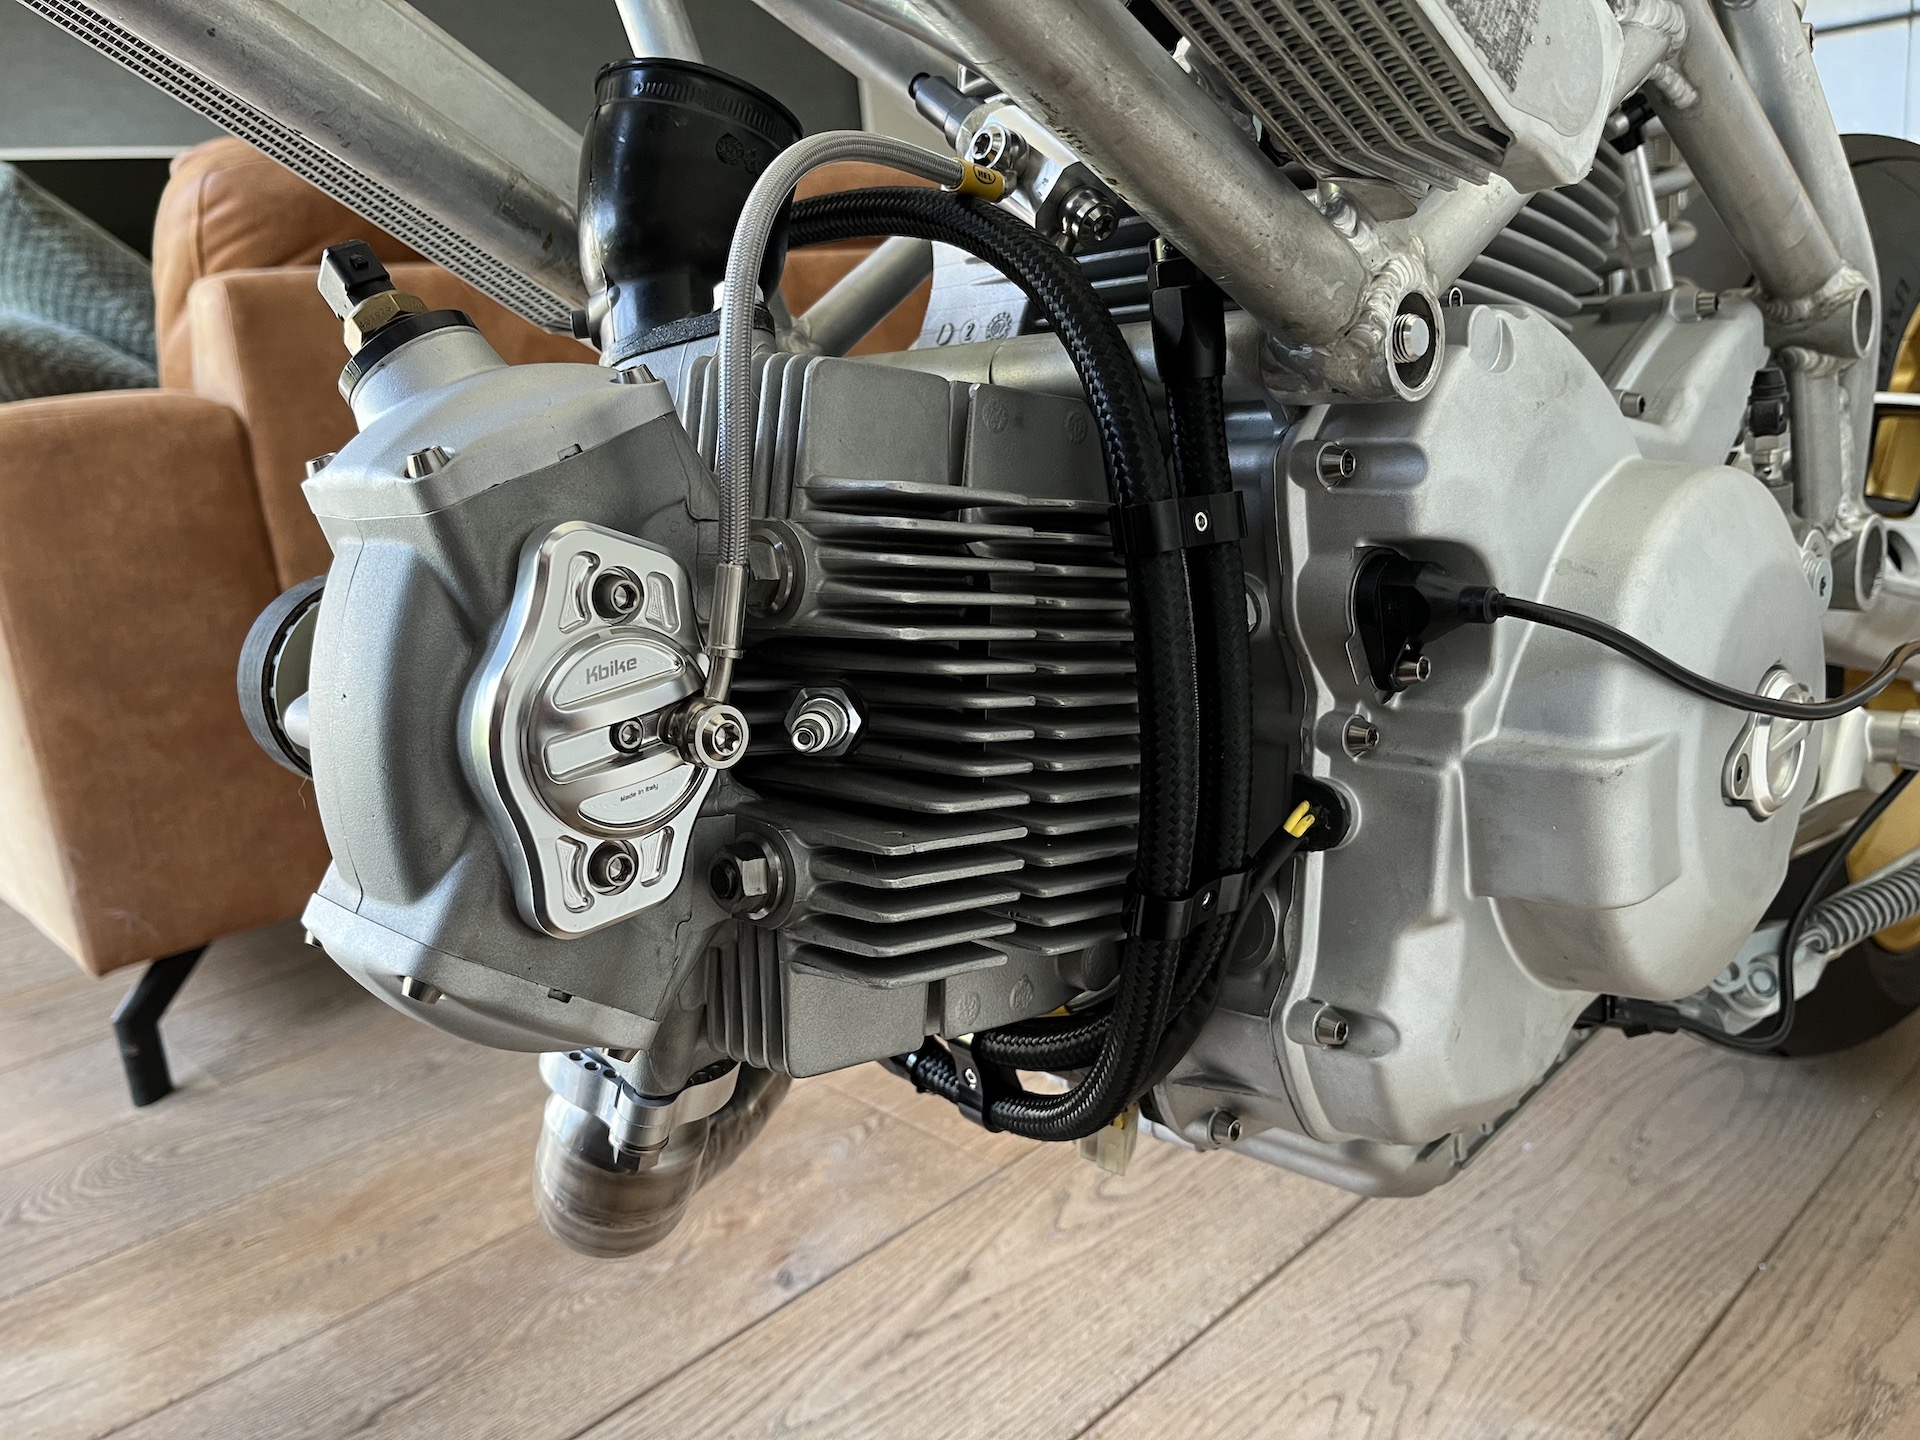
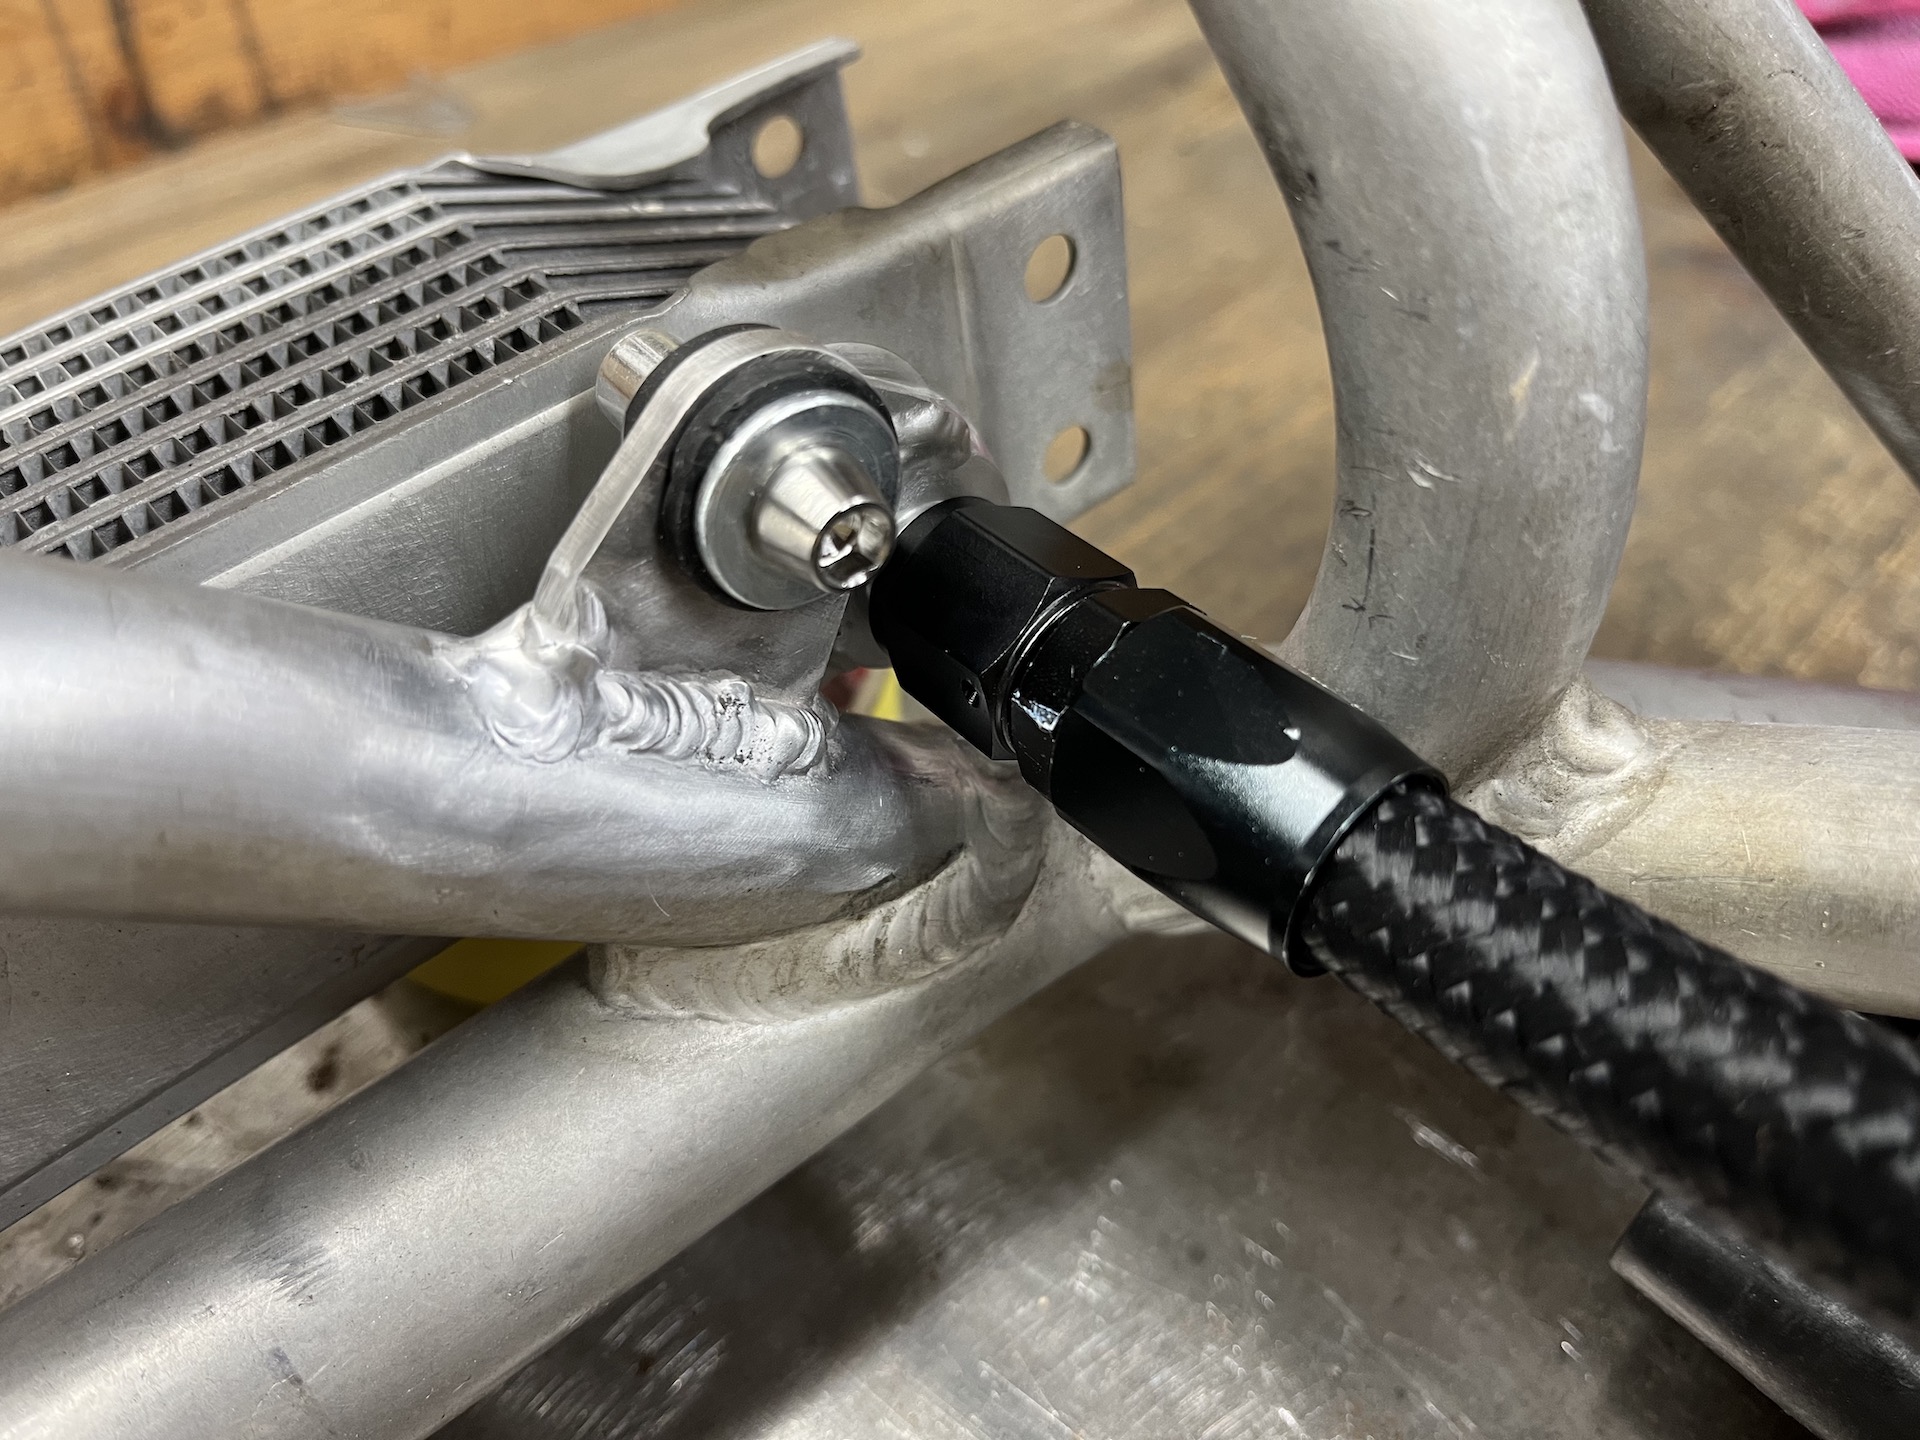
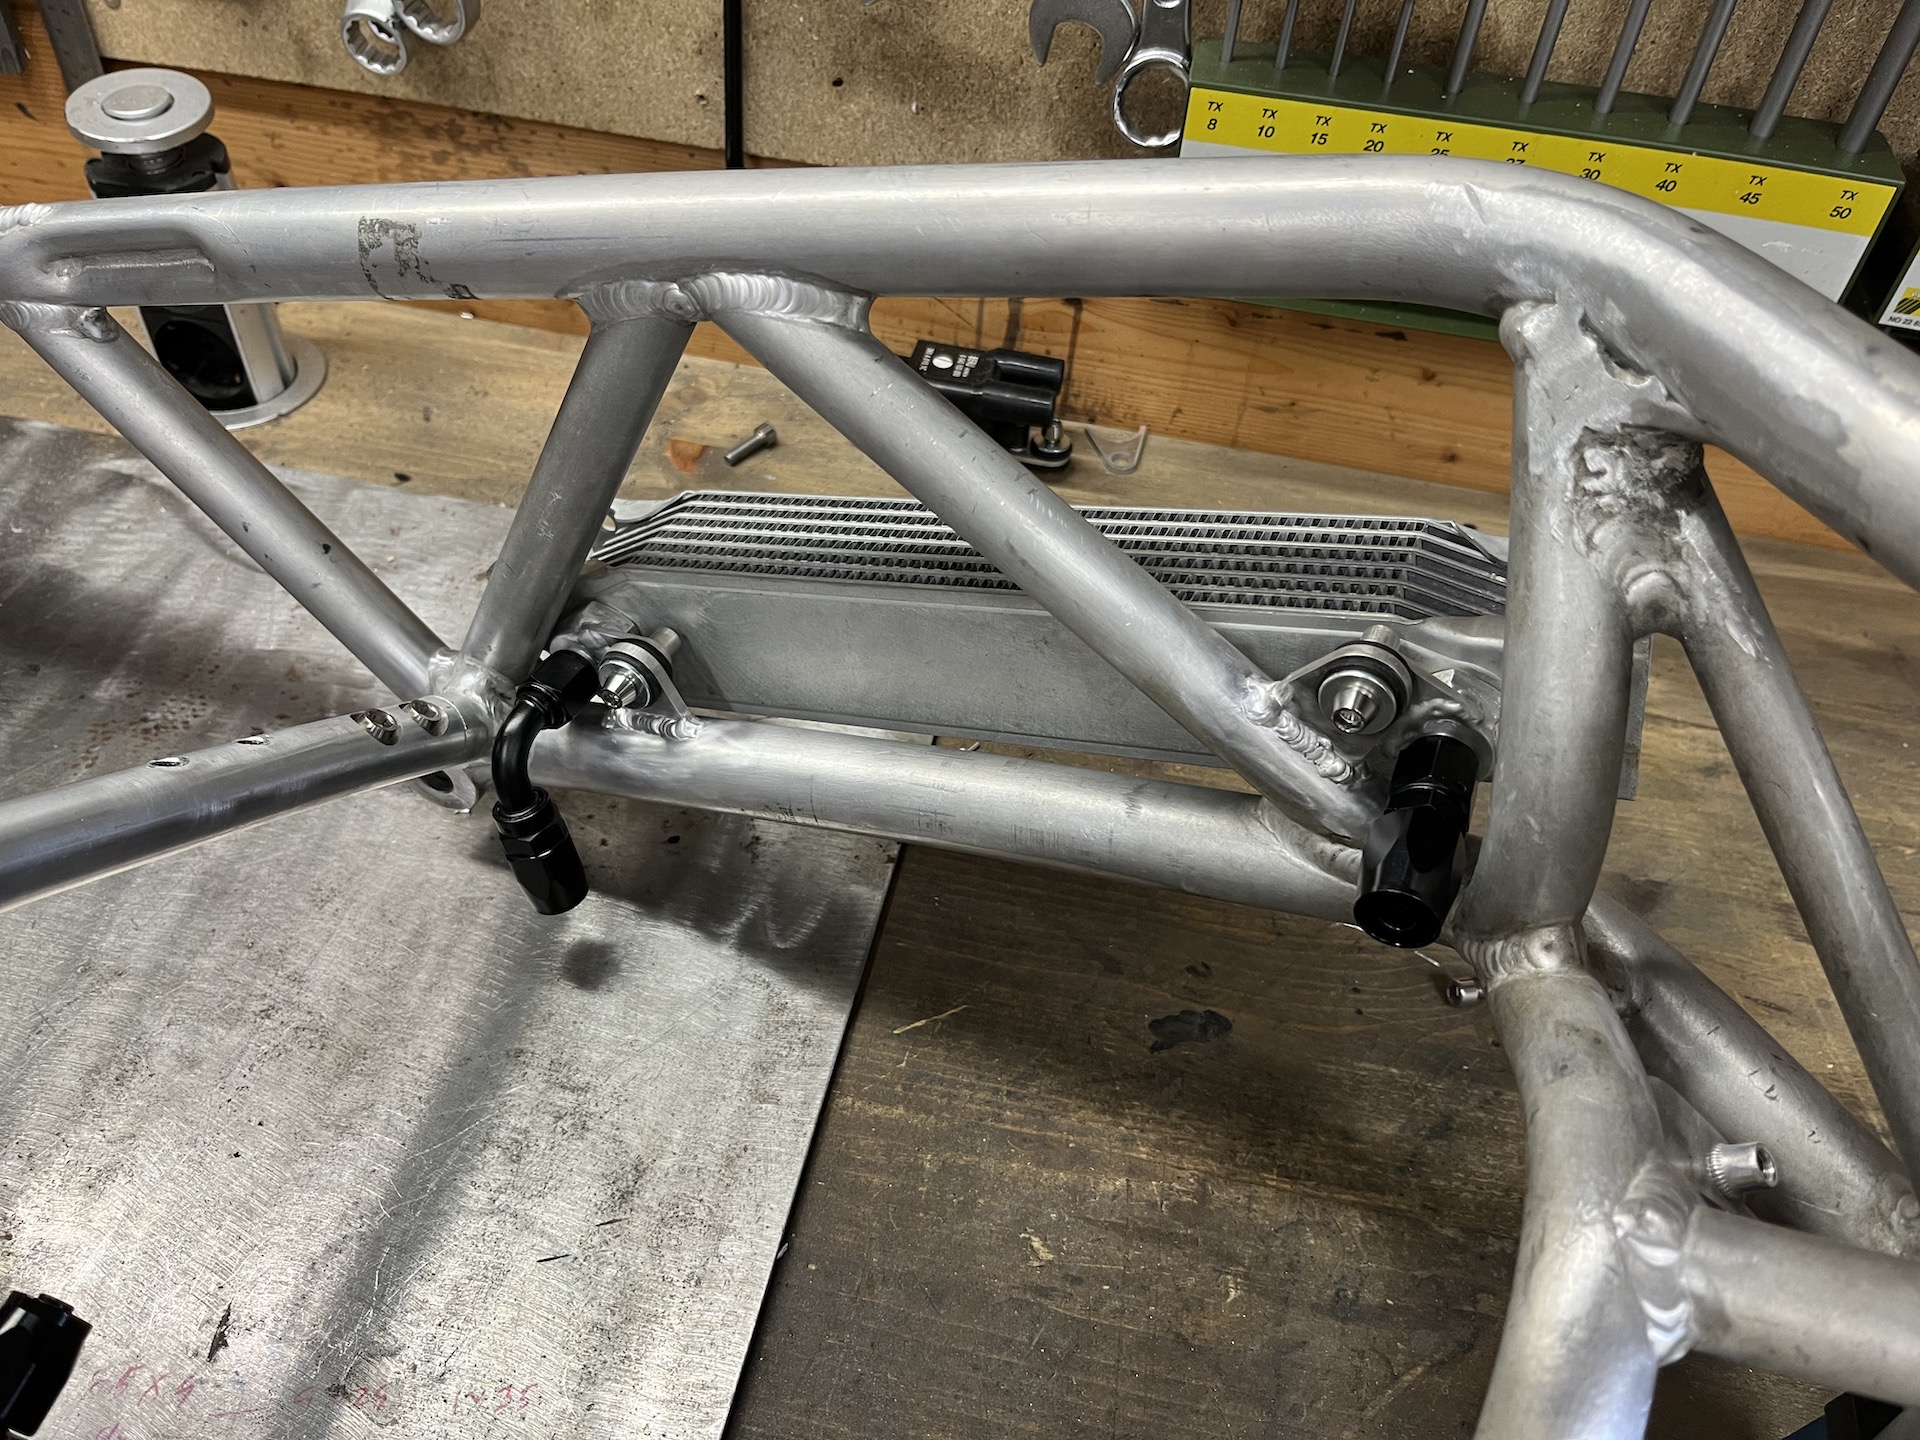
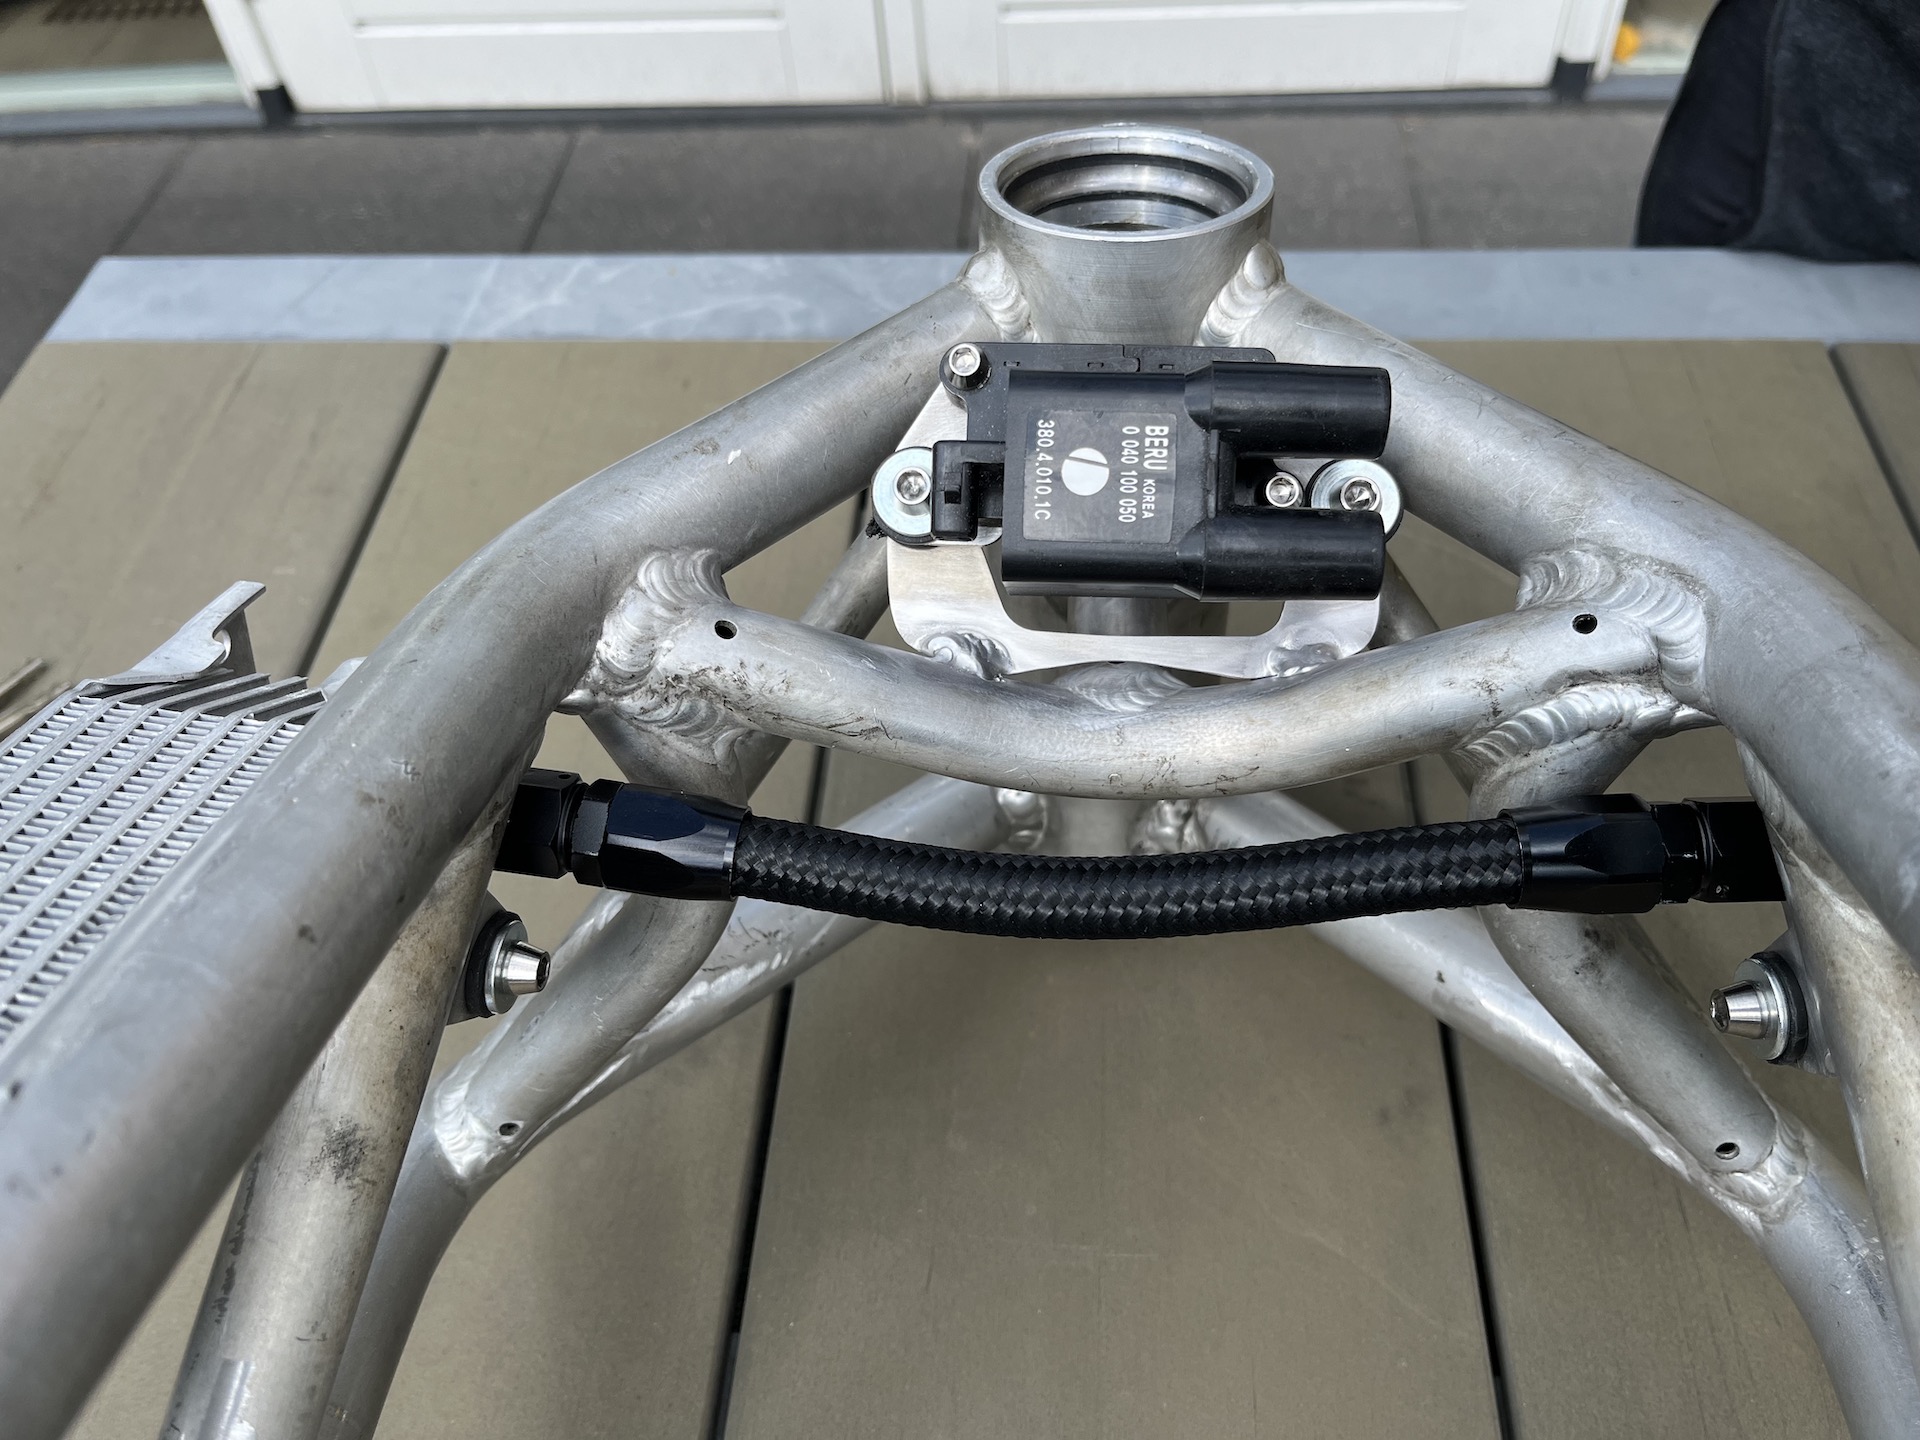
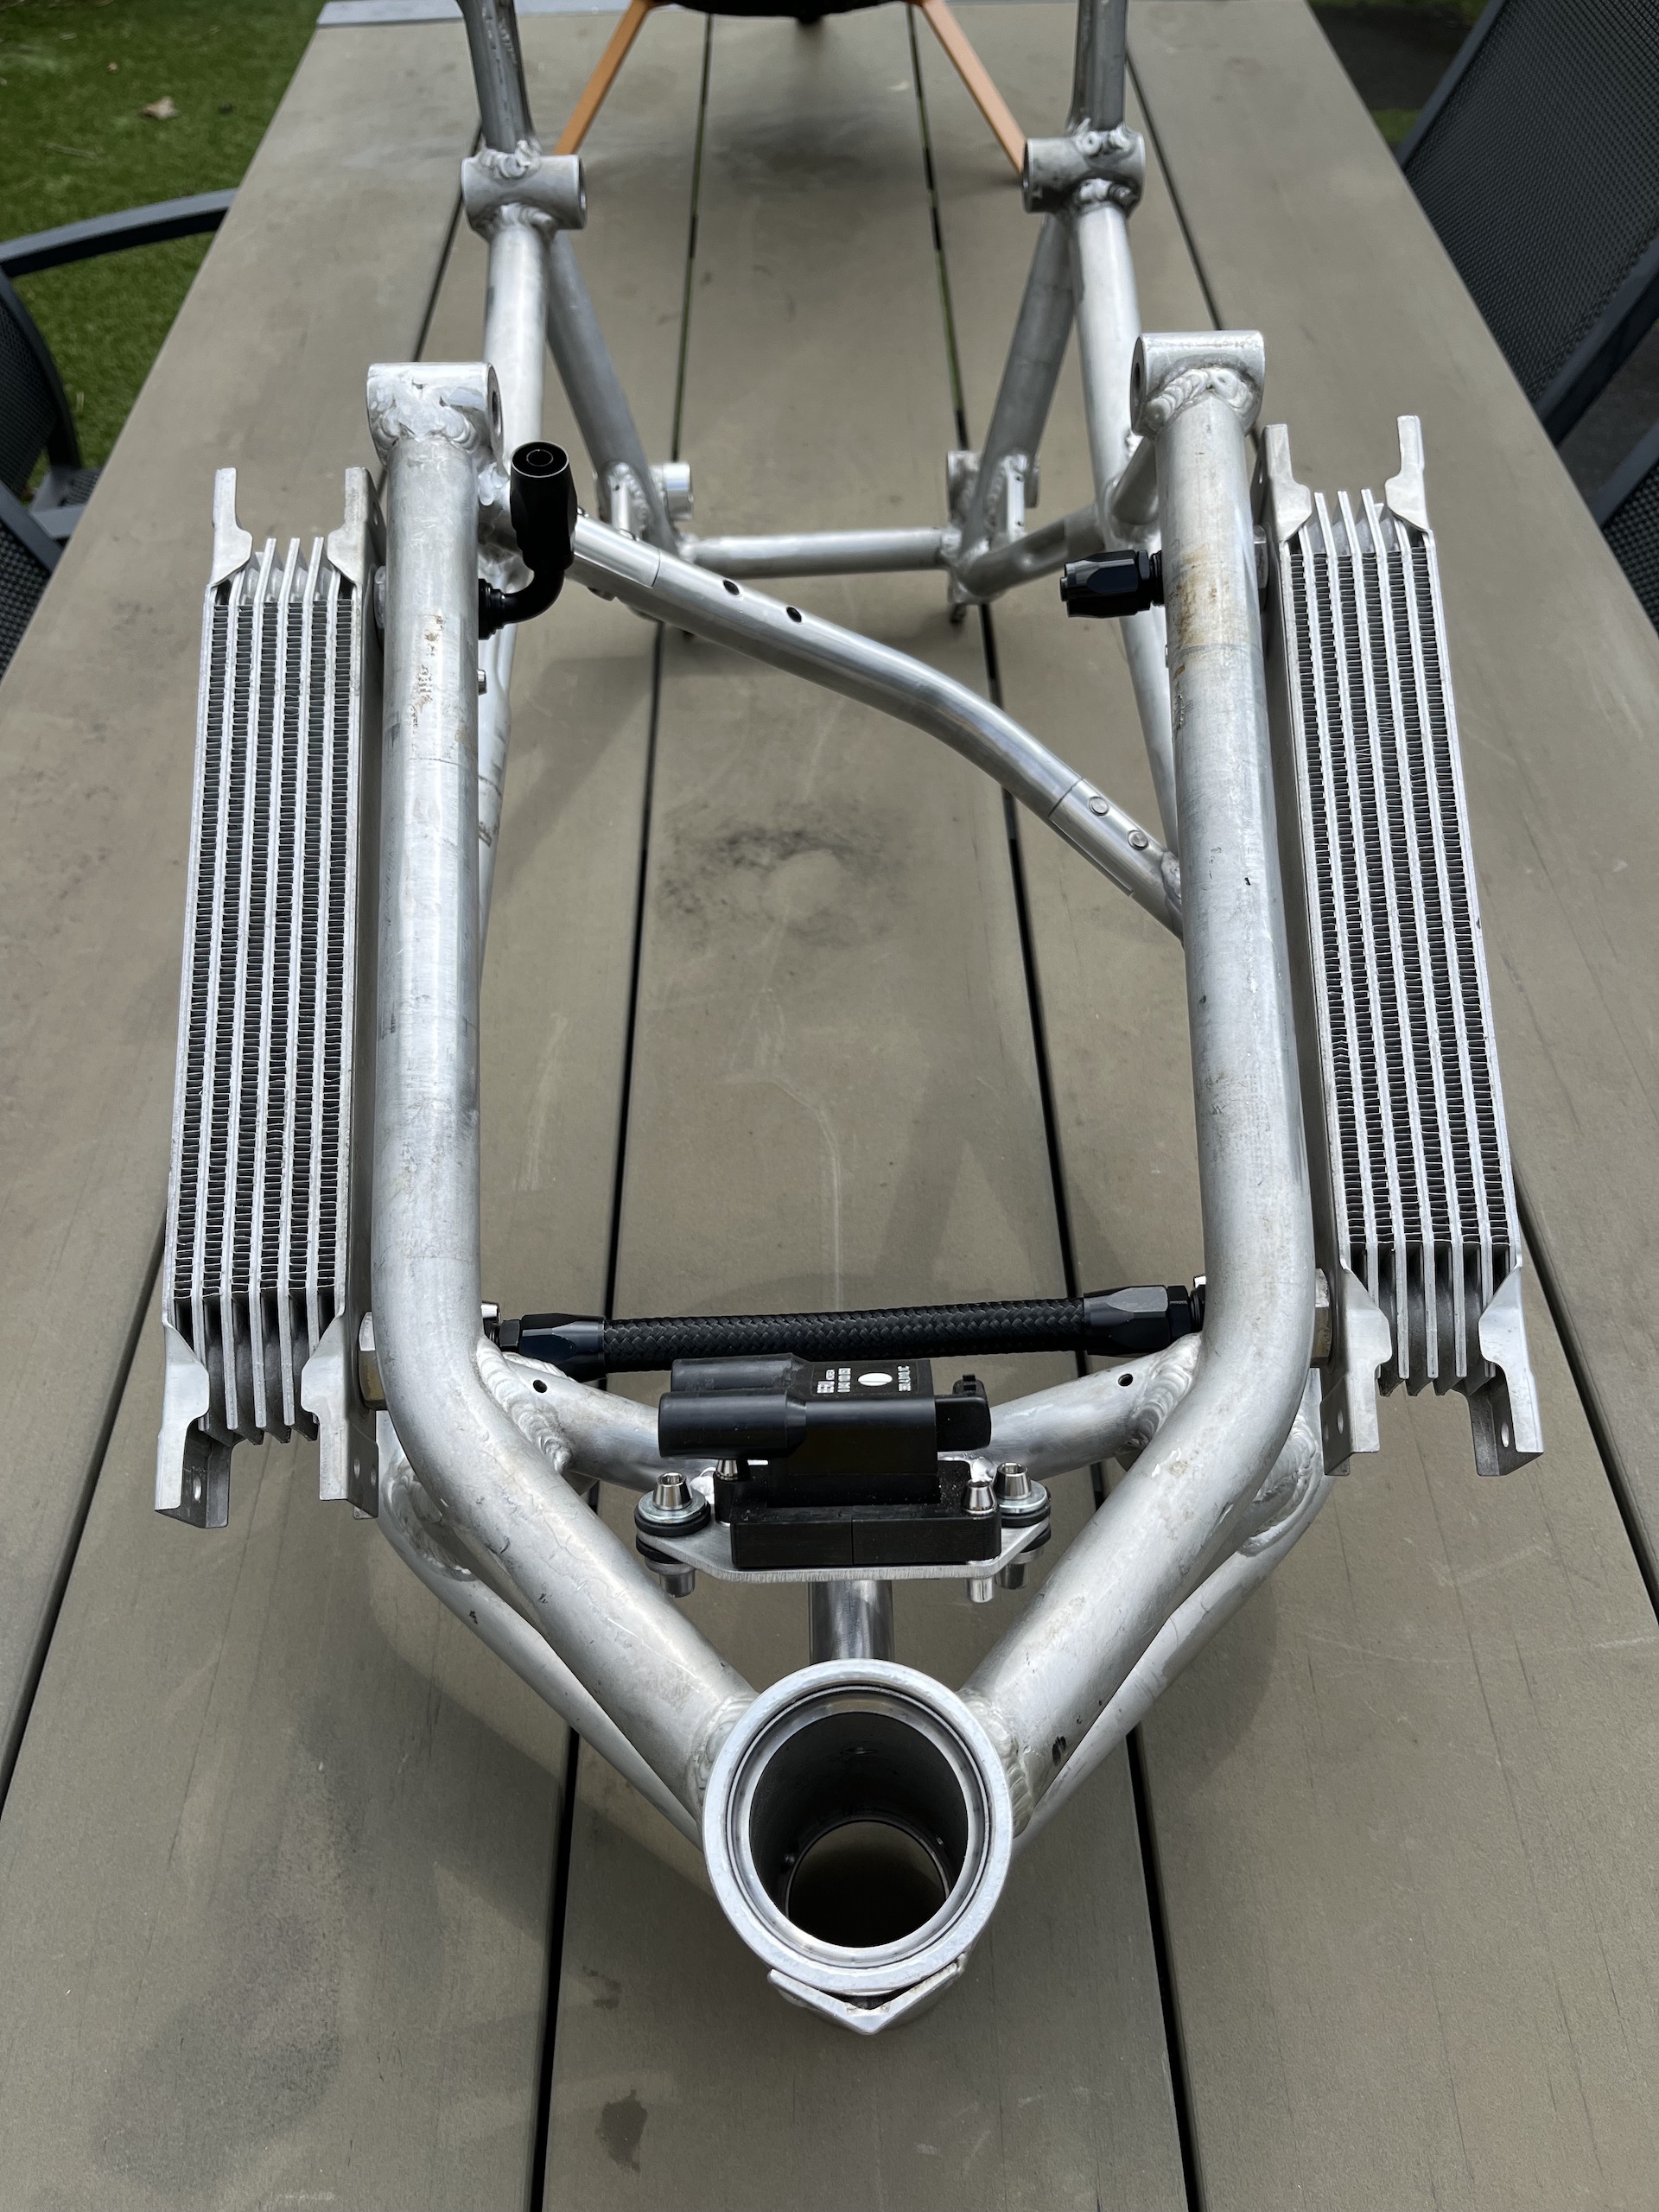
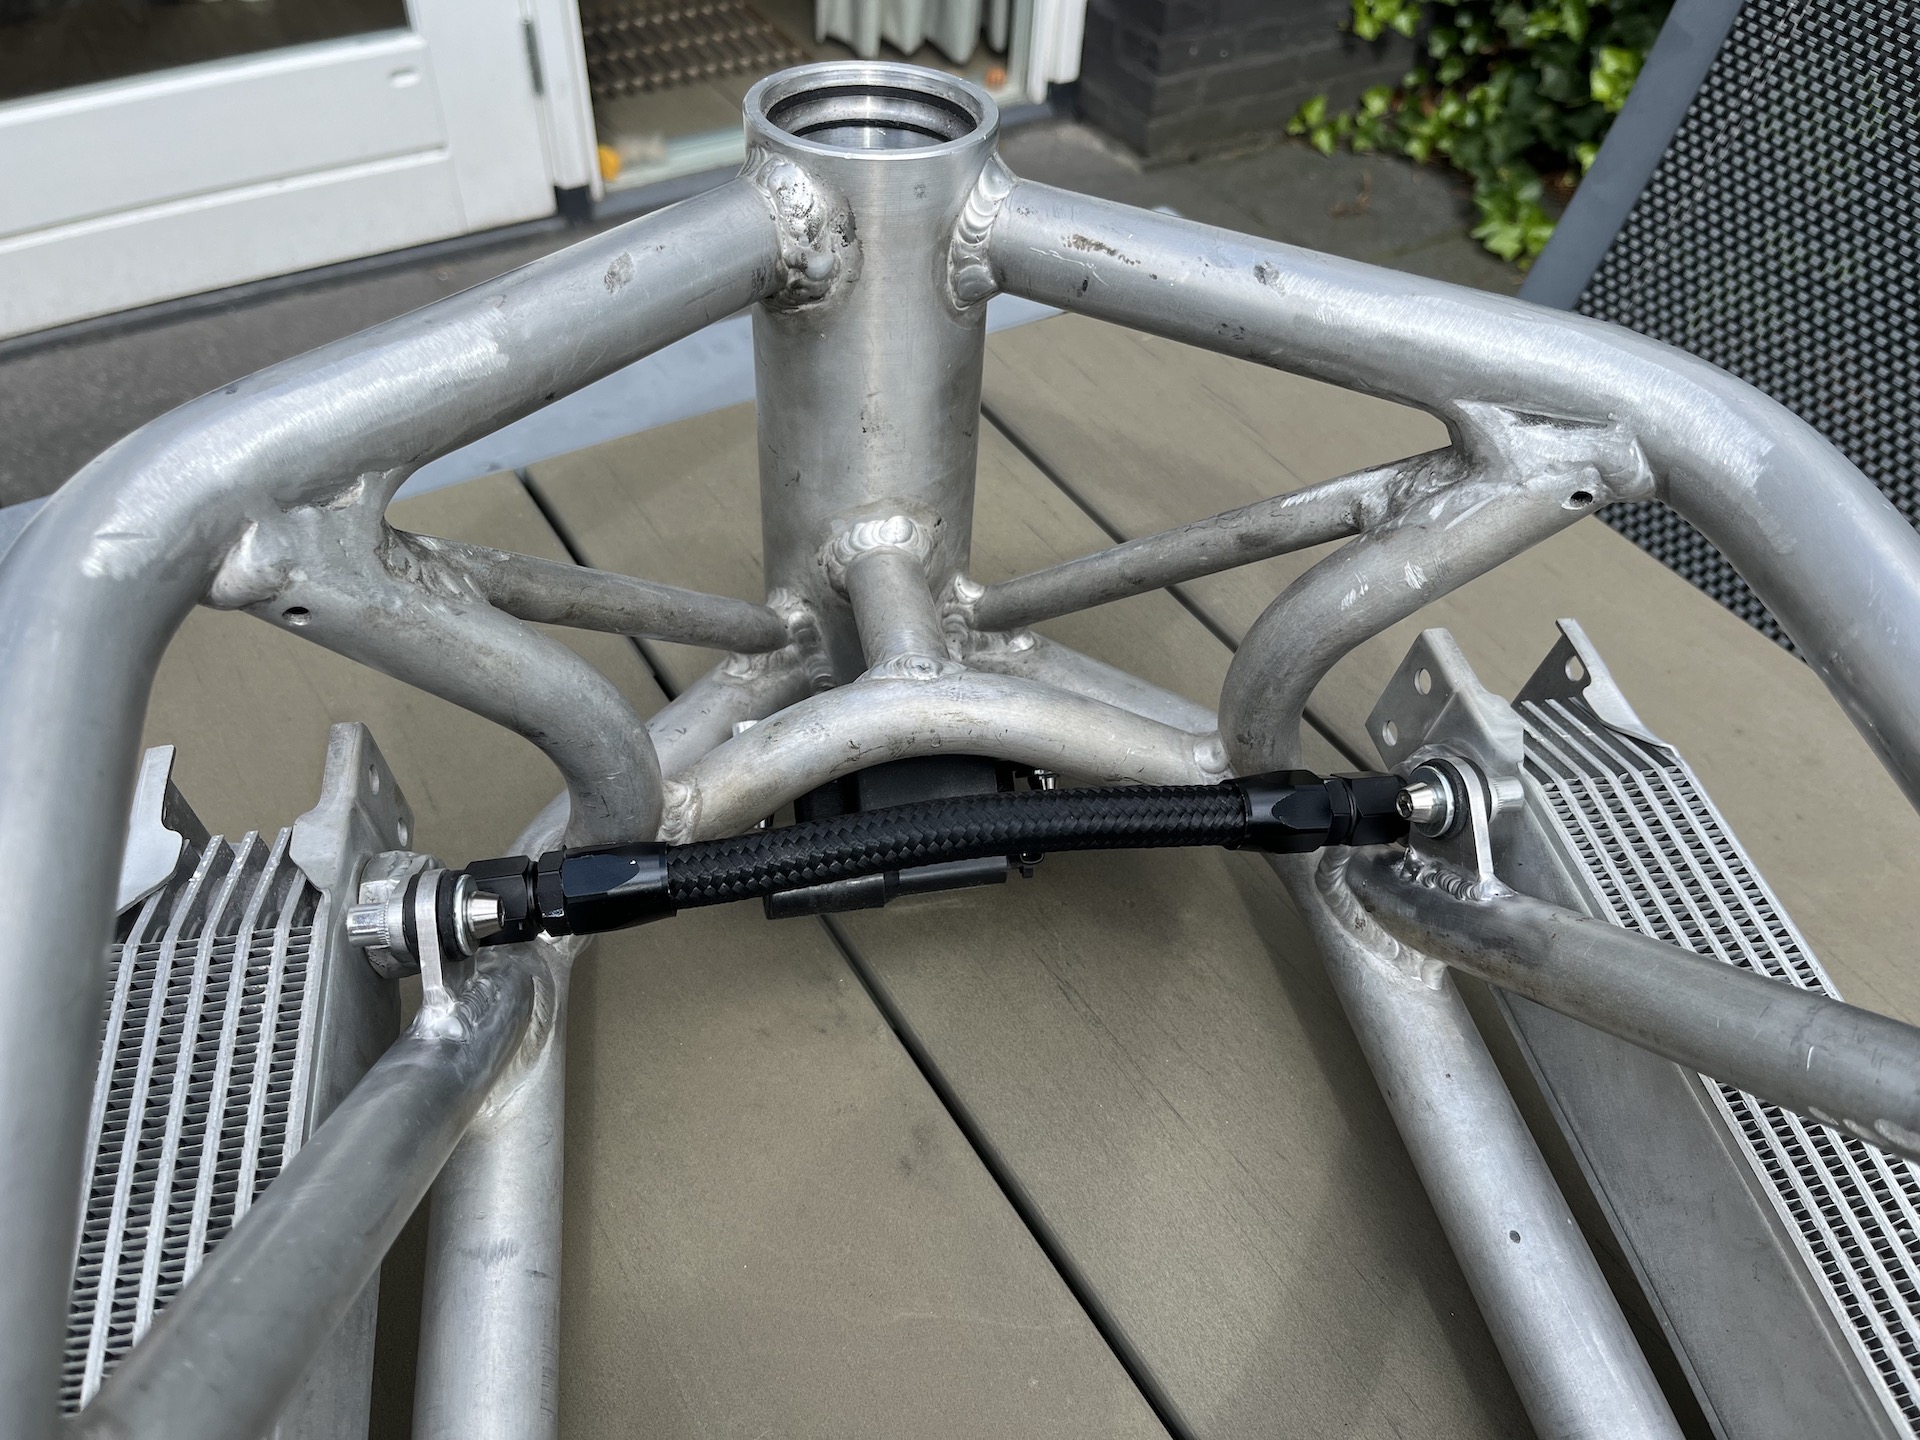
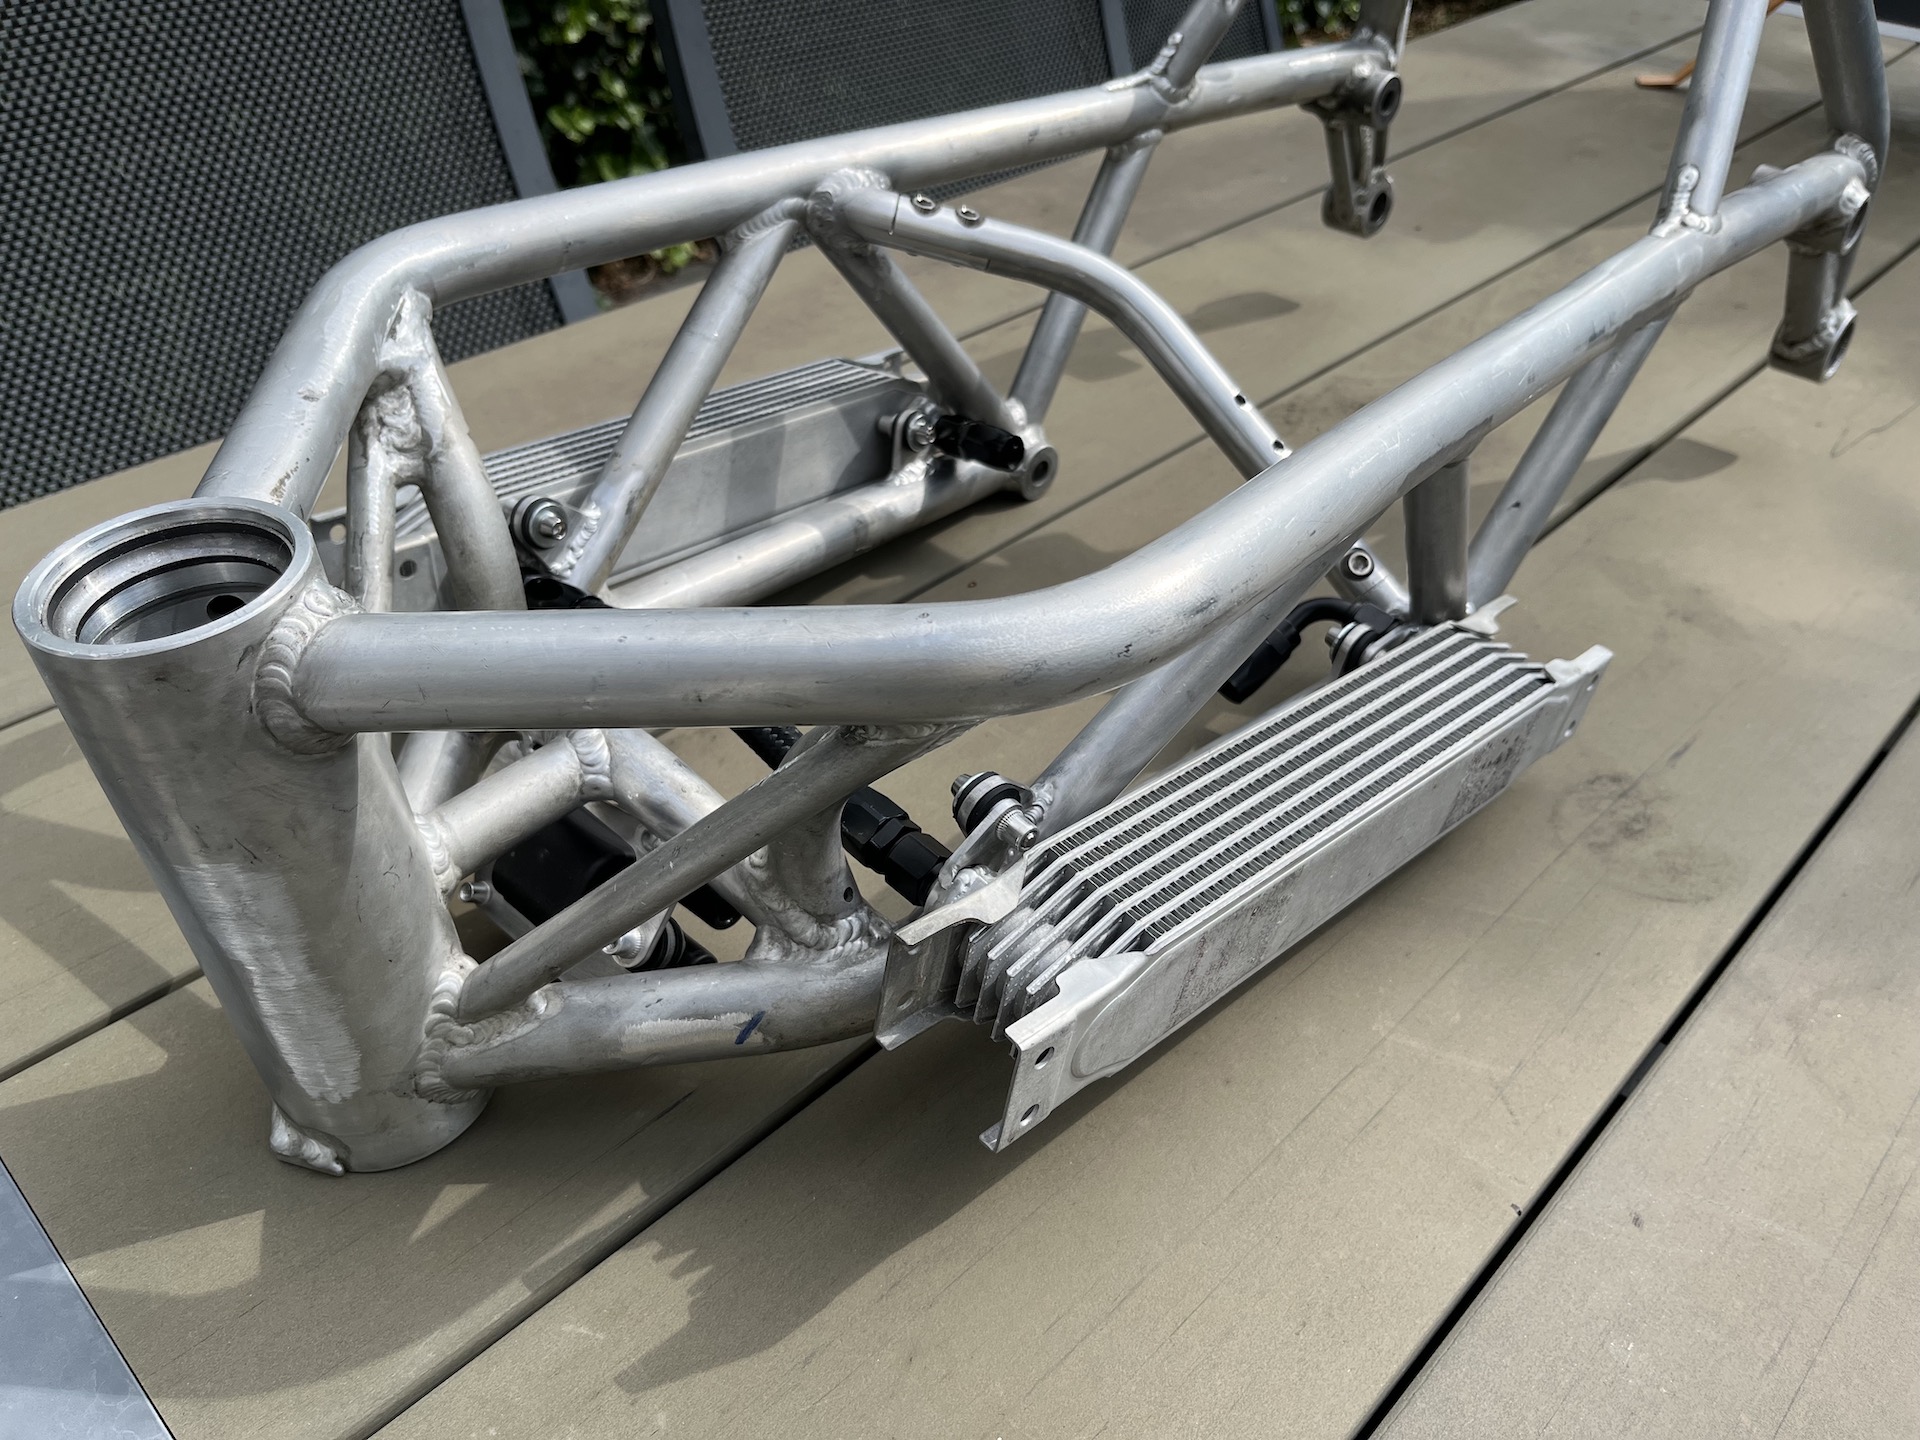
CUSTOM BRAIDED AN6 OIL LINES
First time making custom oil lines using nylon braided/steel lined AN6 hose. Way easier than I thought it would be. Looks amazing, and way more flexible than expected. Linking the left and right oil coolers together. The whole inner frame is going to be tightly packed. Nice!
Finished off with aluminium hose separators to make sure the hose routing looks as clean as possible.
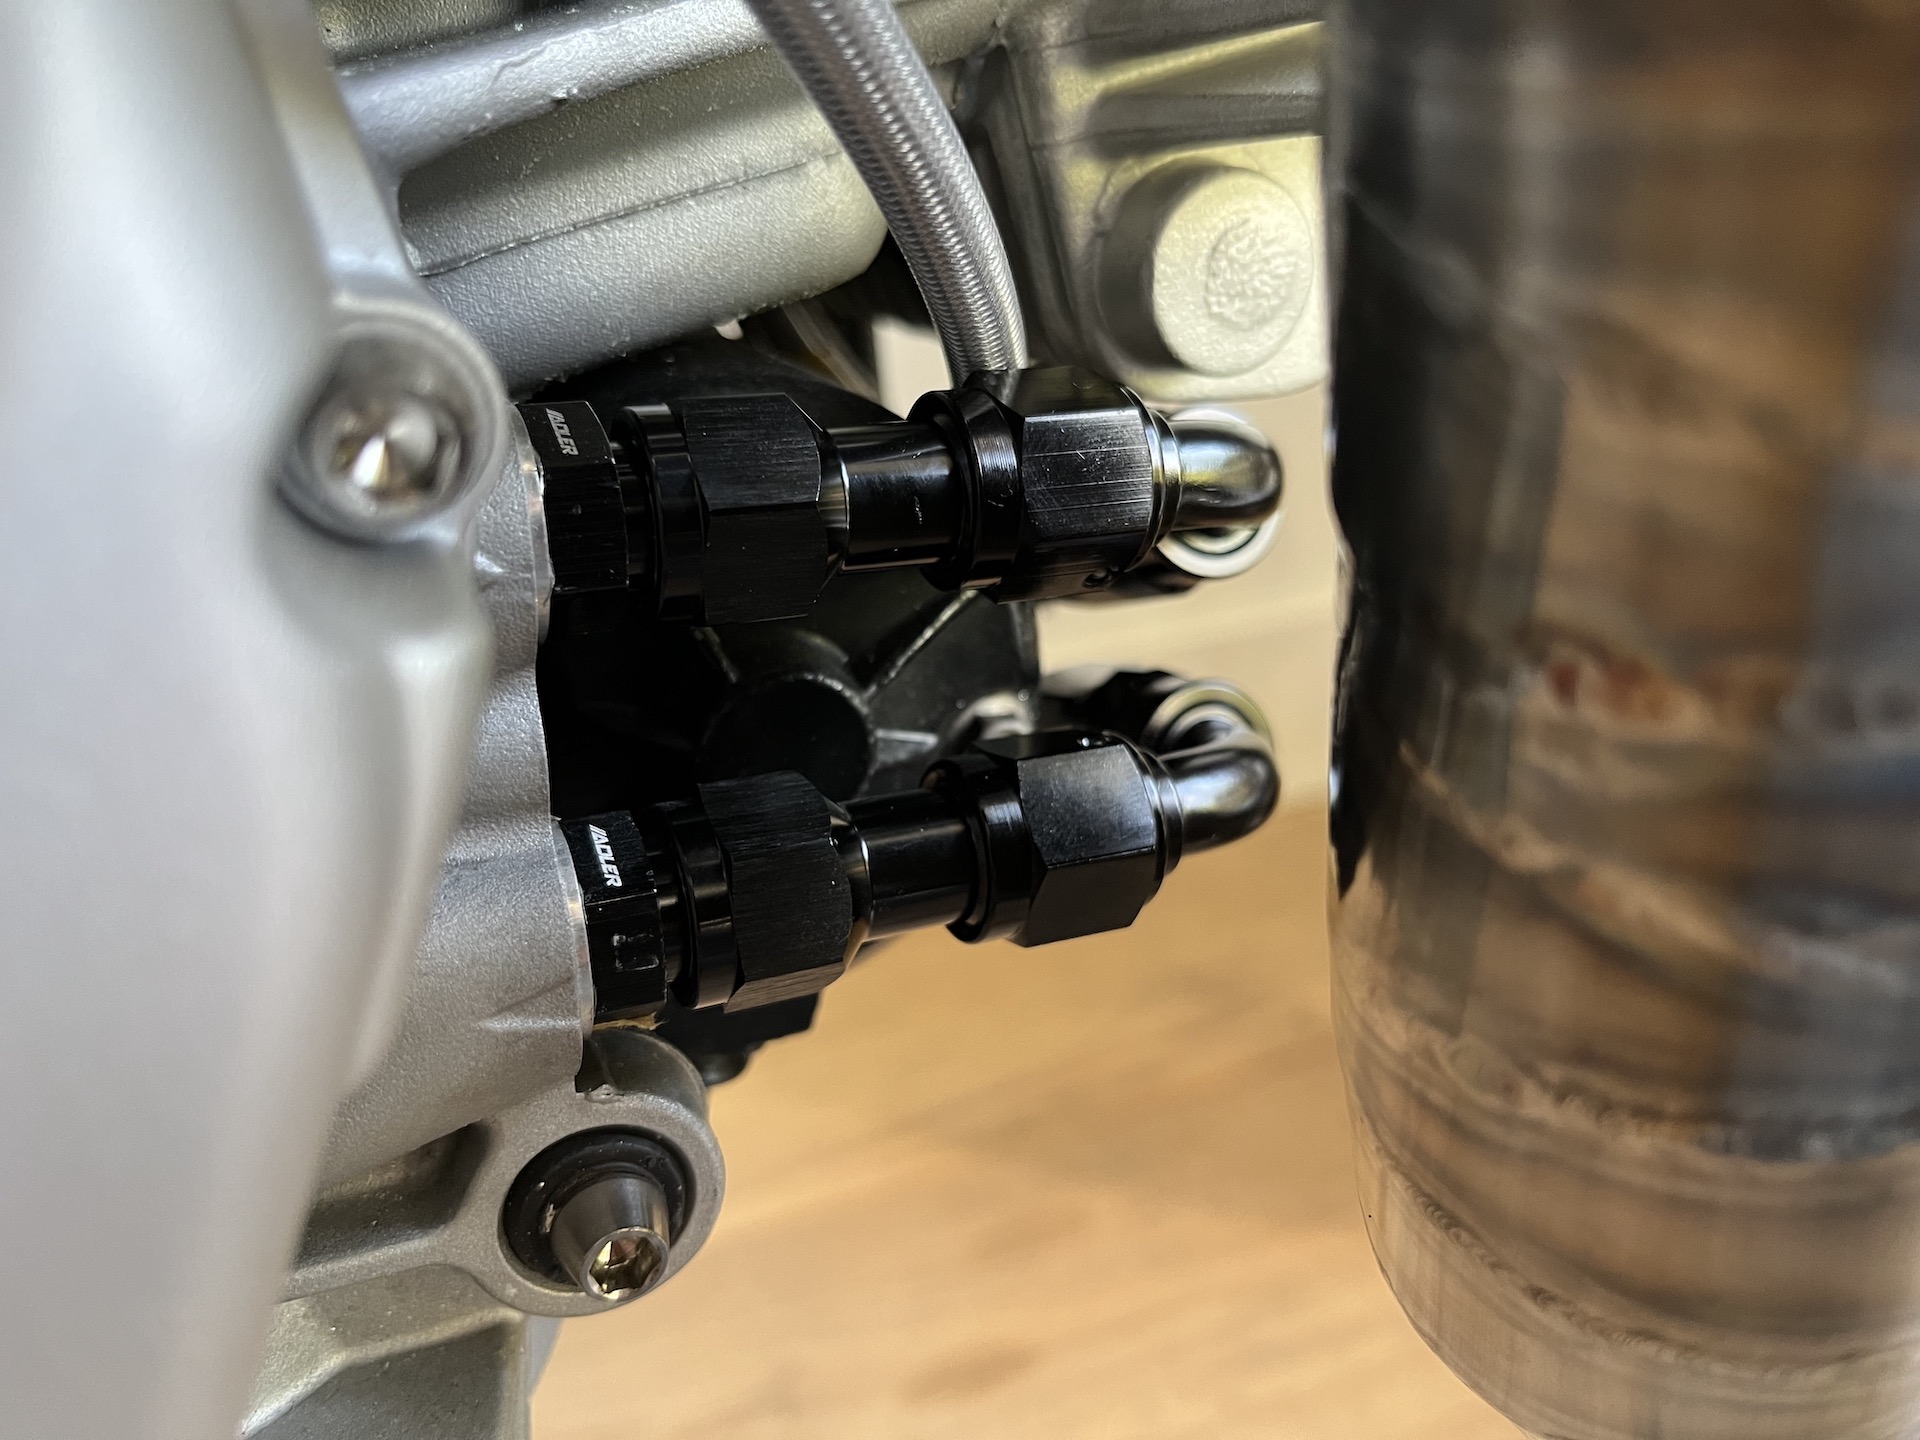
Needed some AN6 extenders for the oil ports on the engine block, otherwise the 90 degree fittings would not fit.
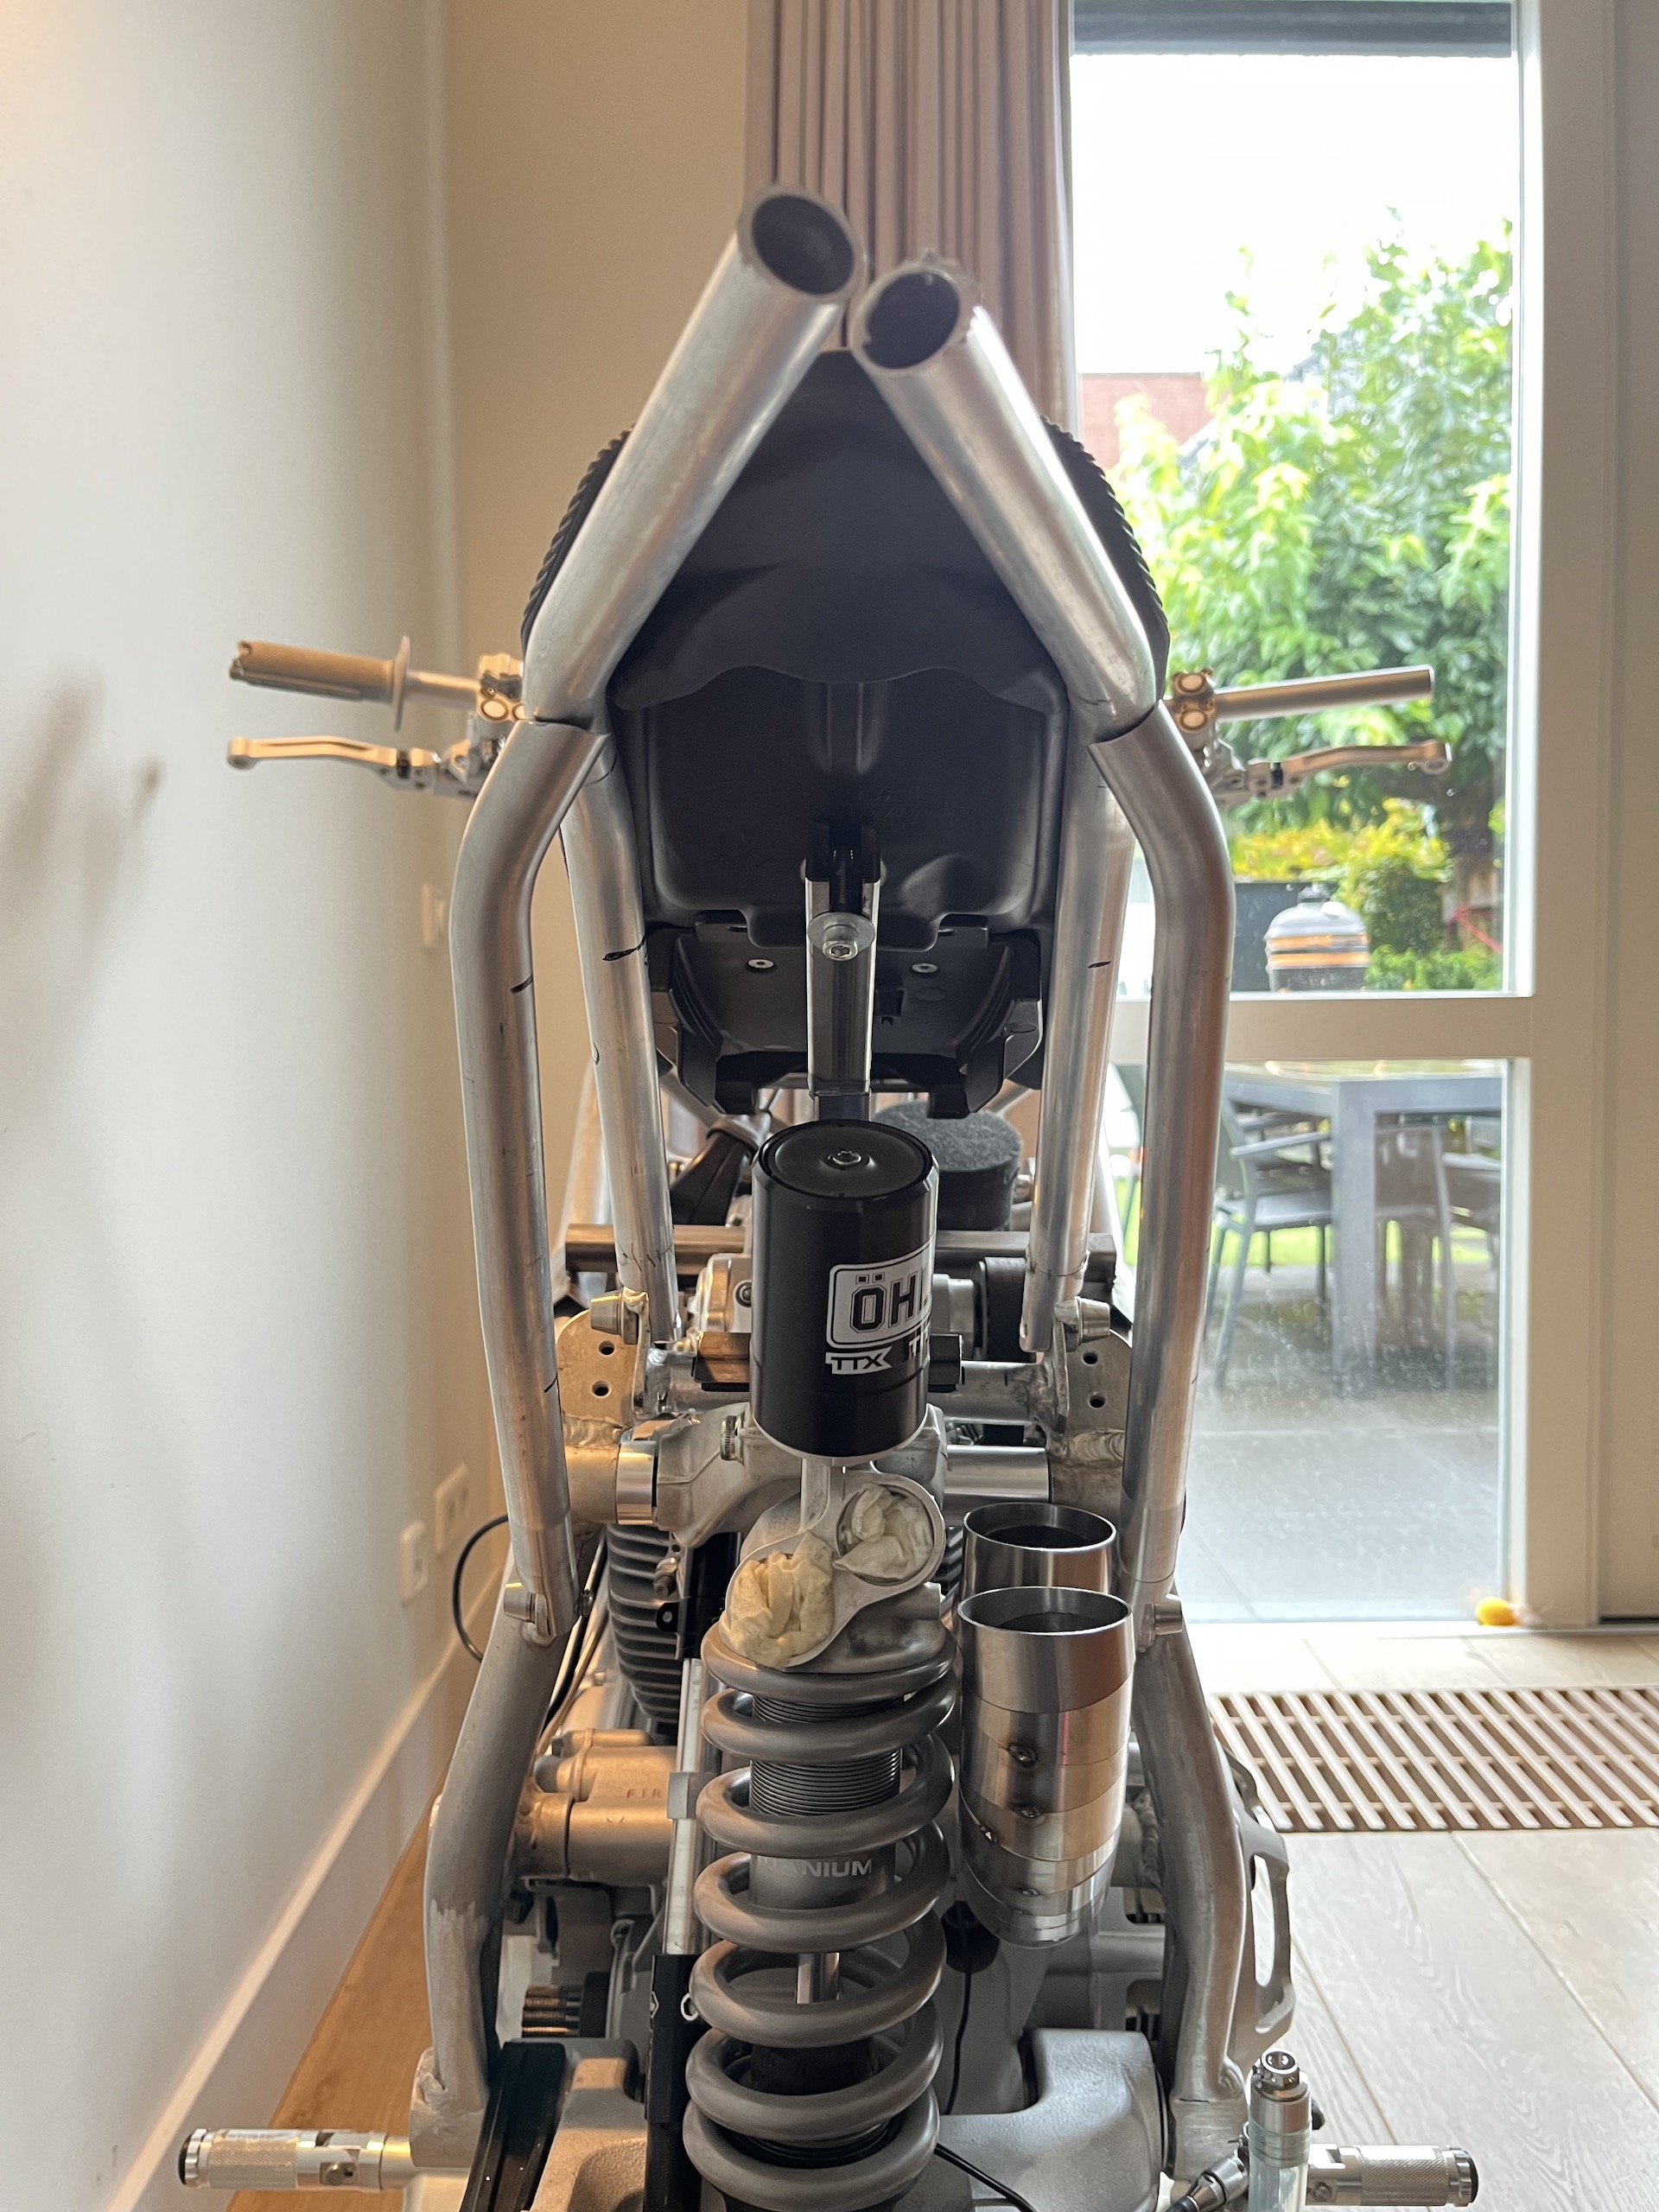
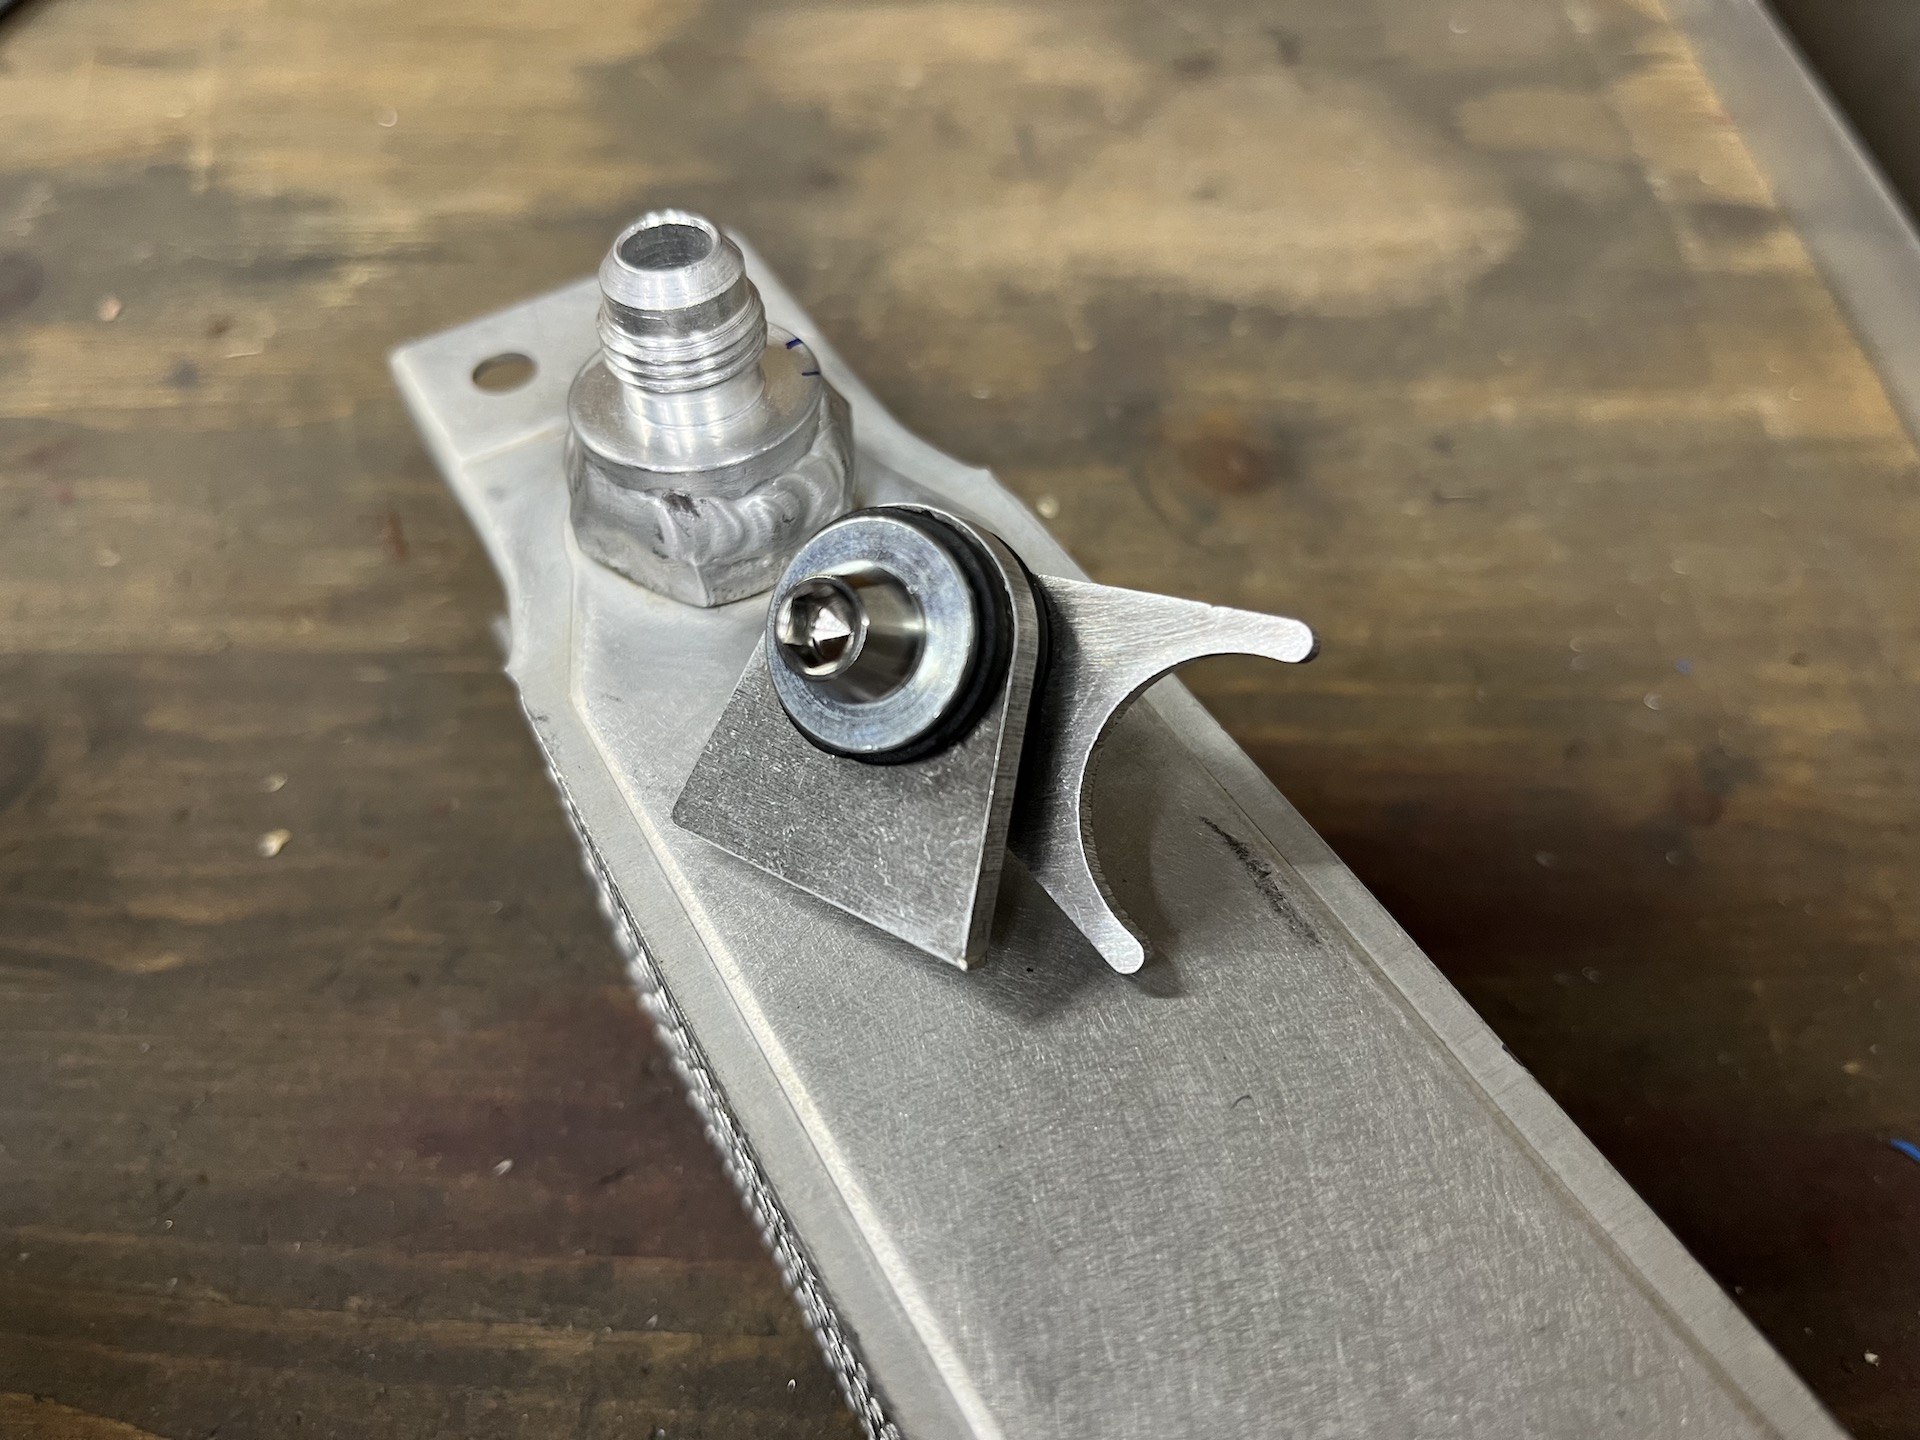
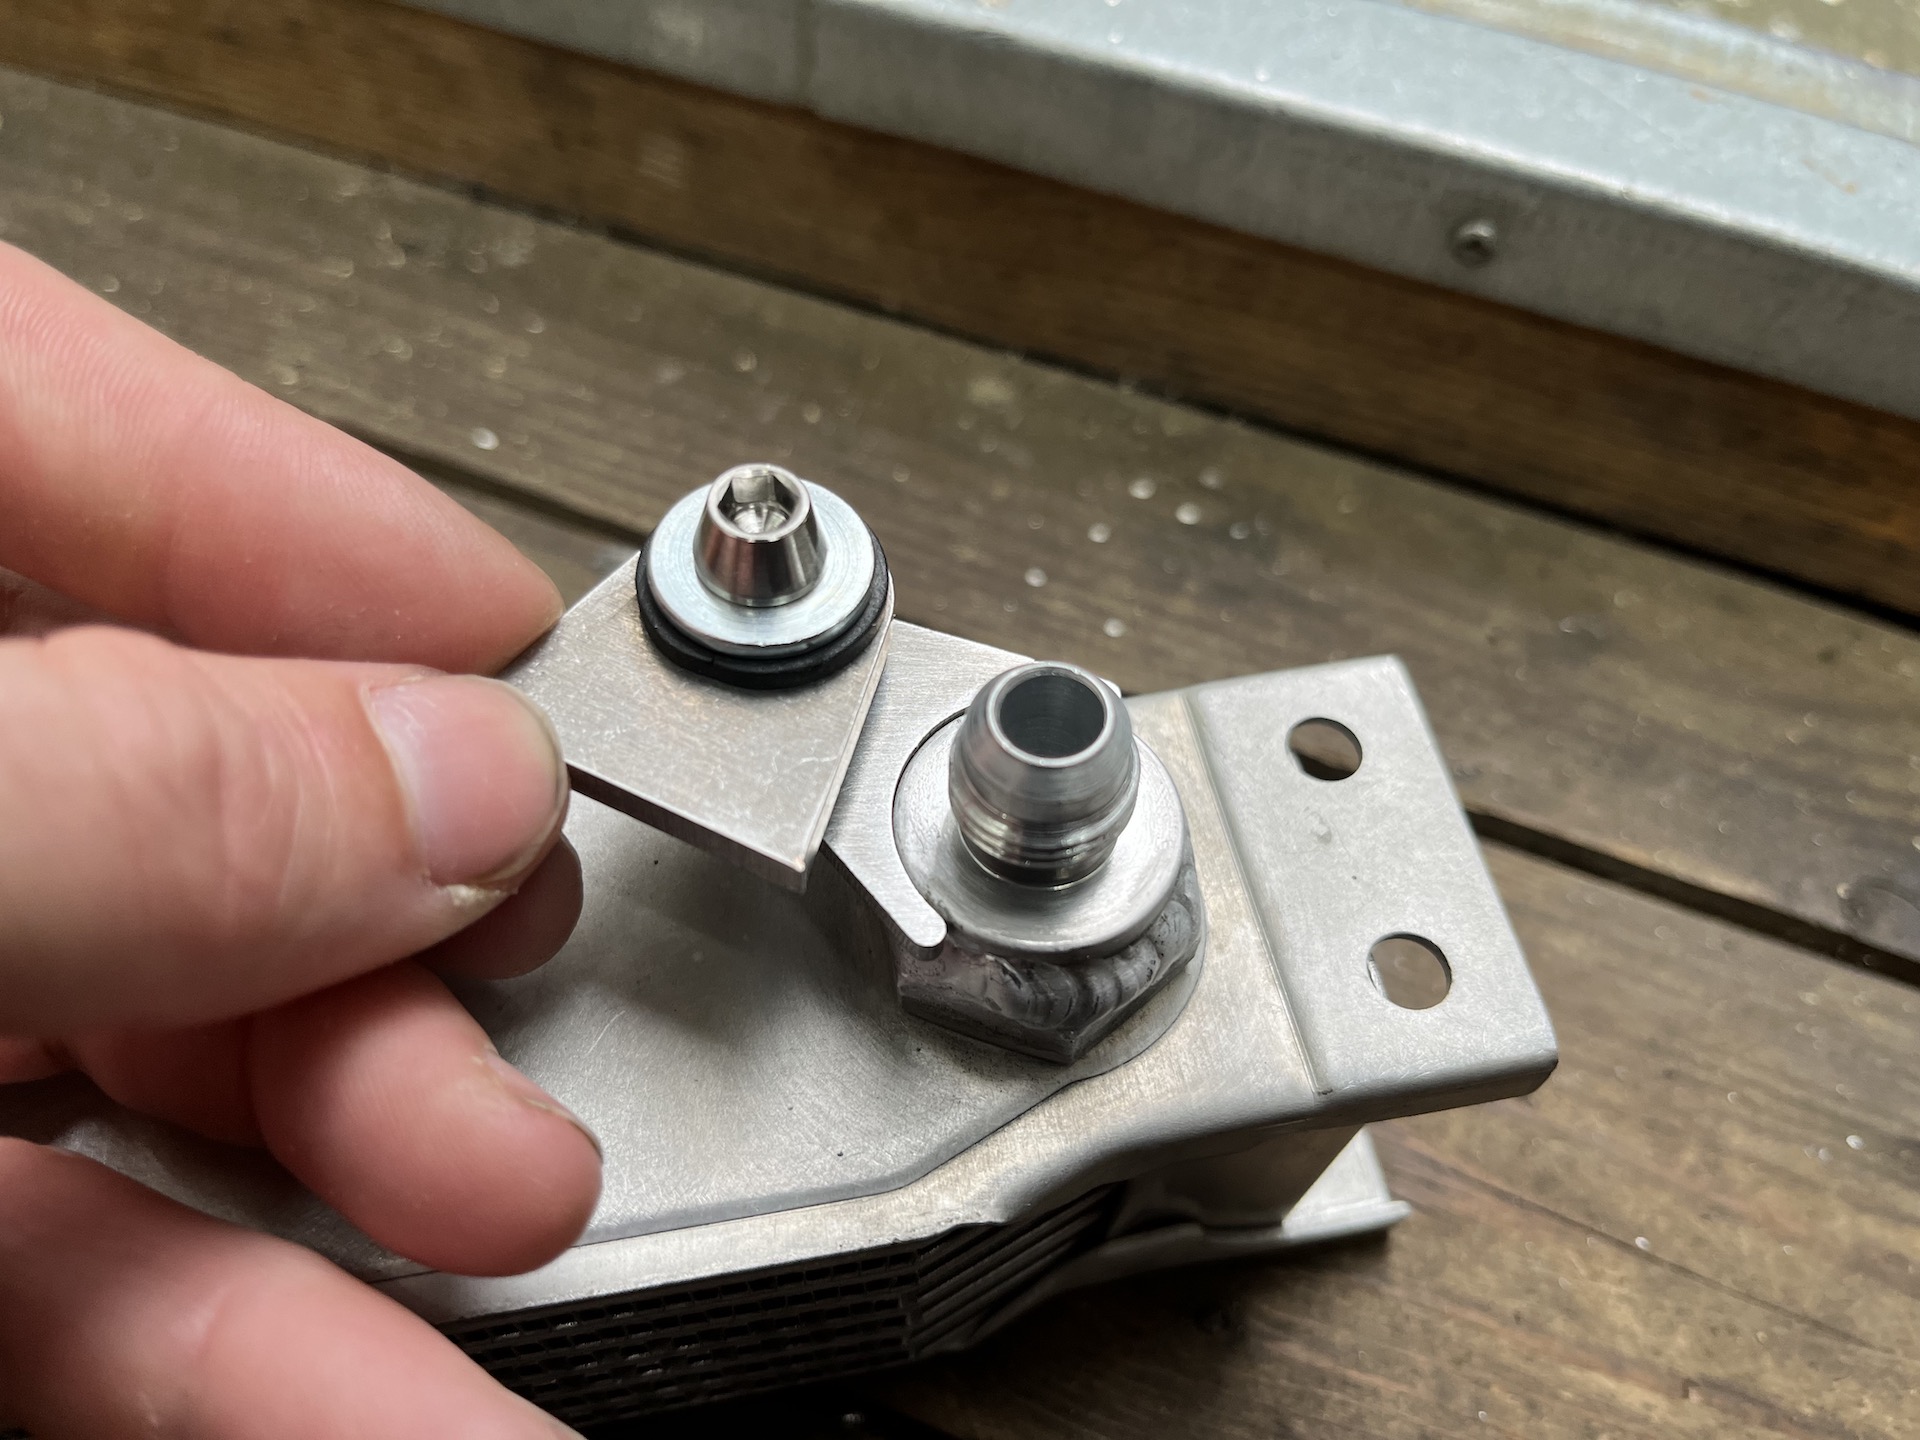
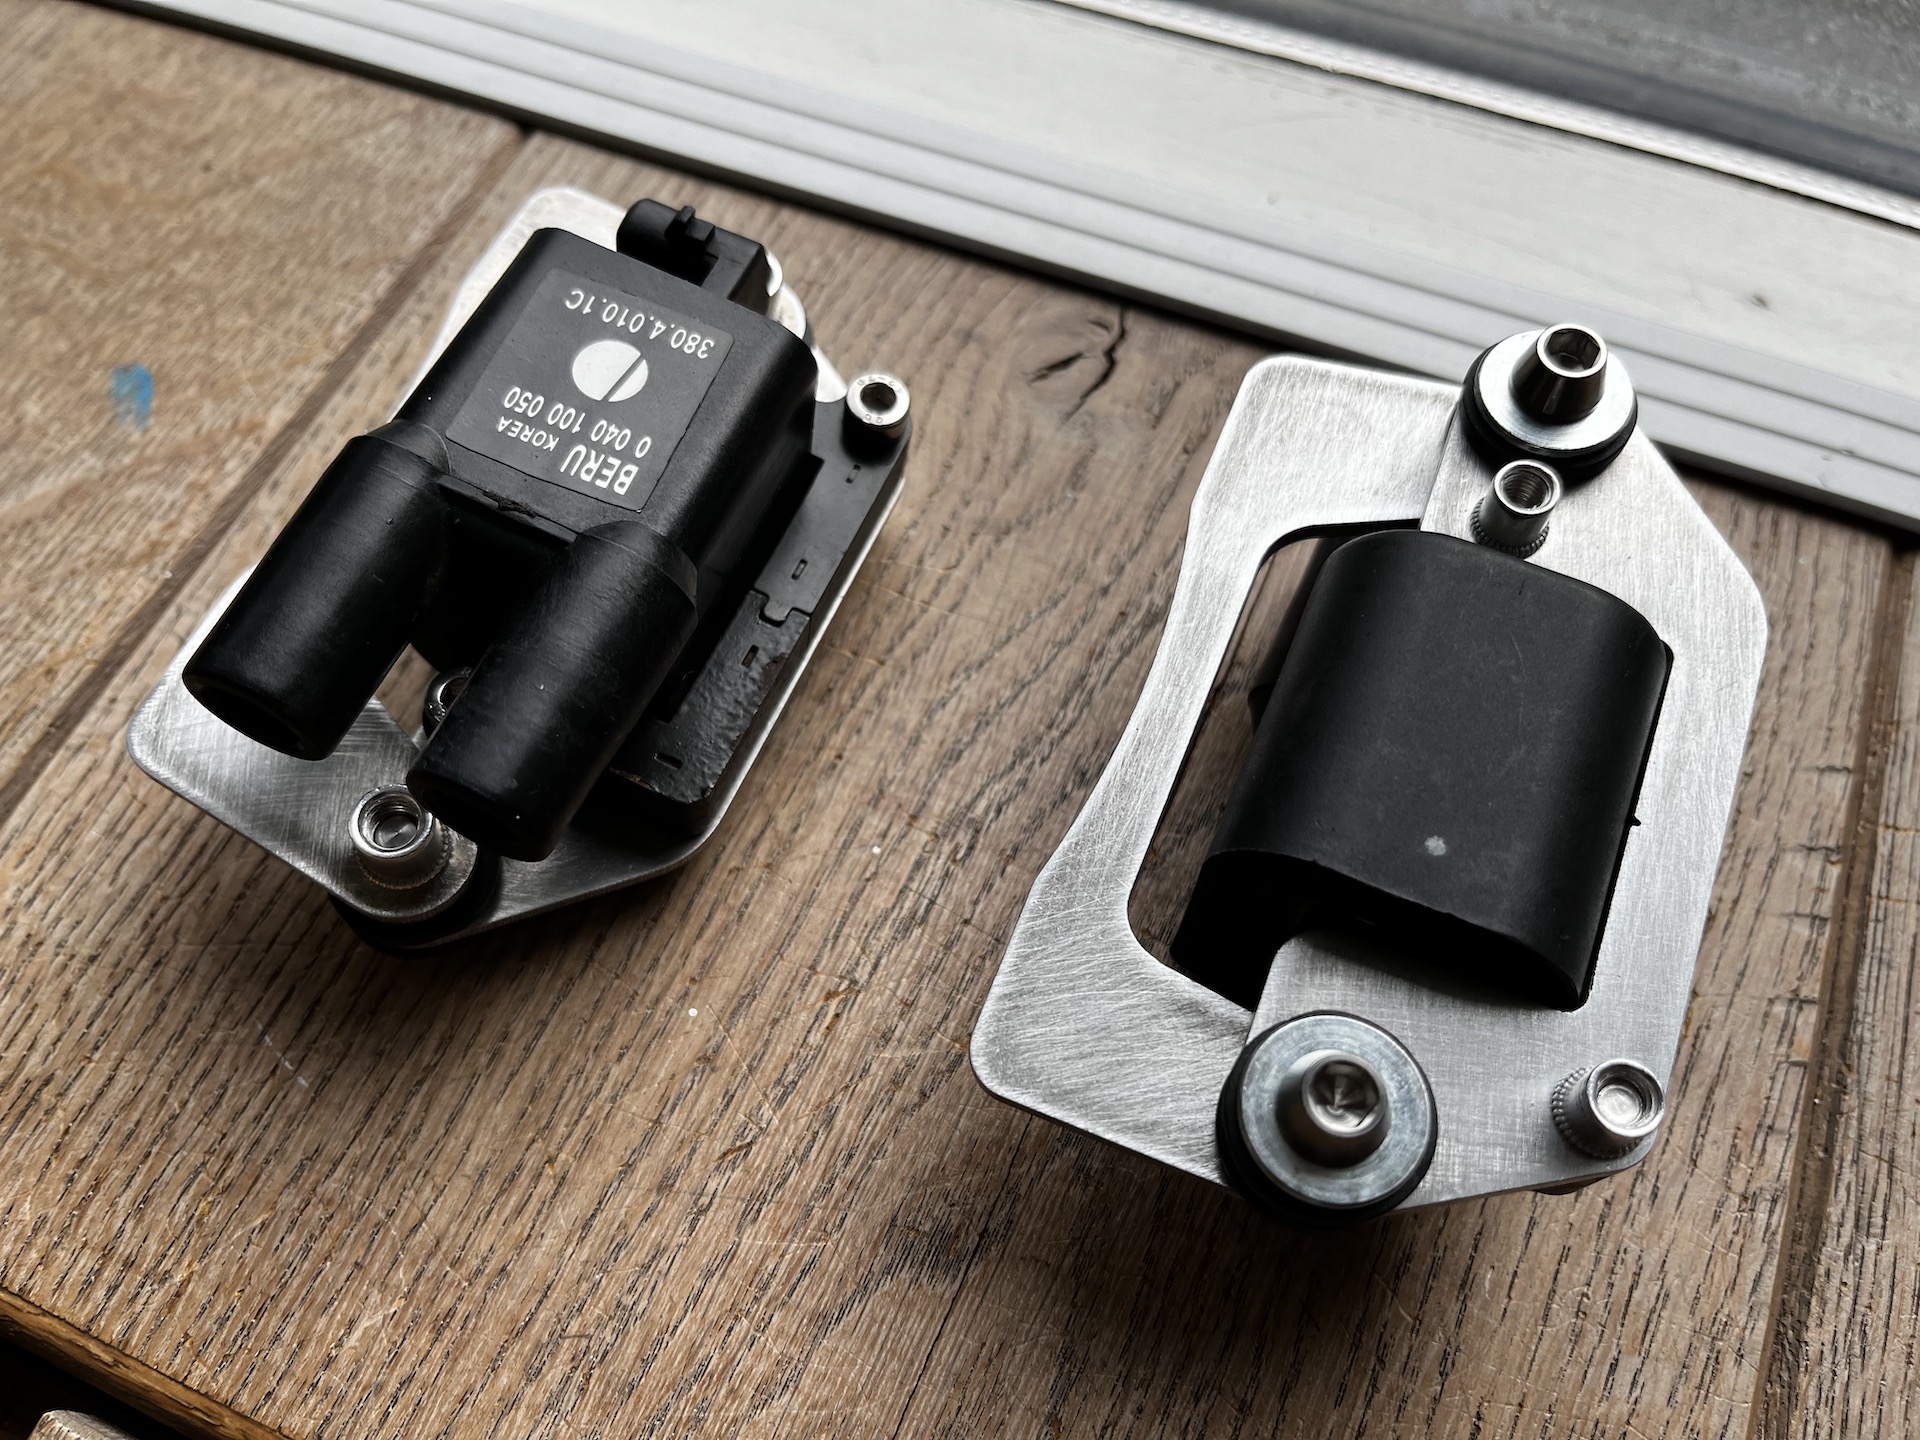
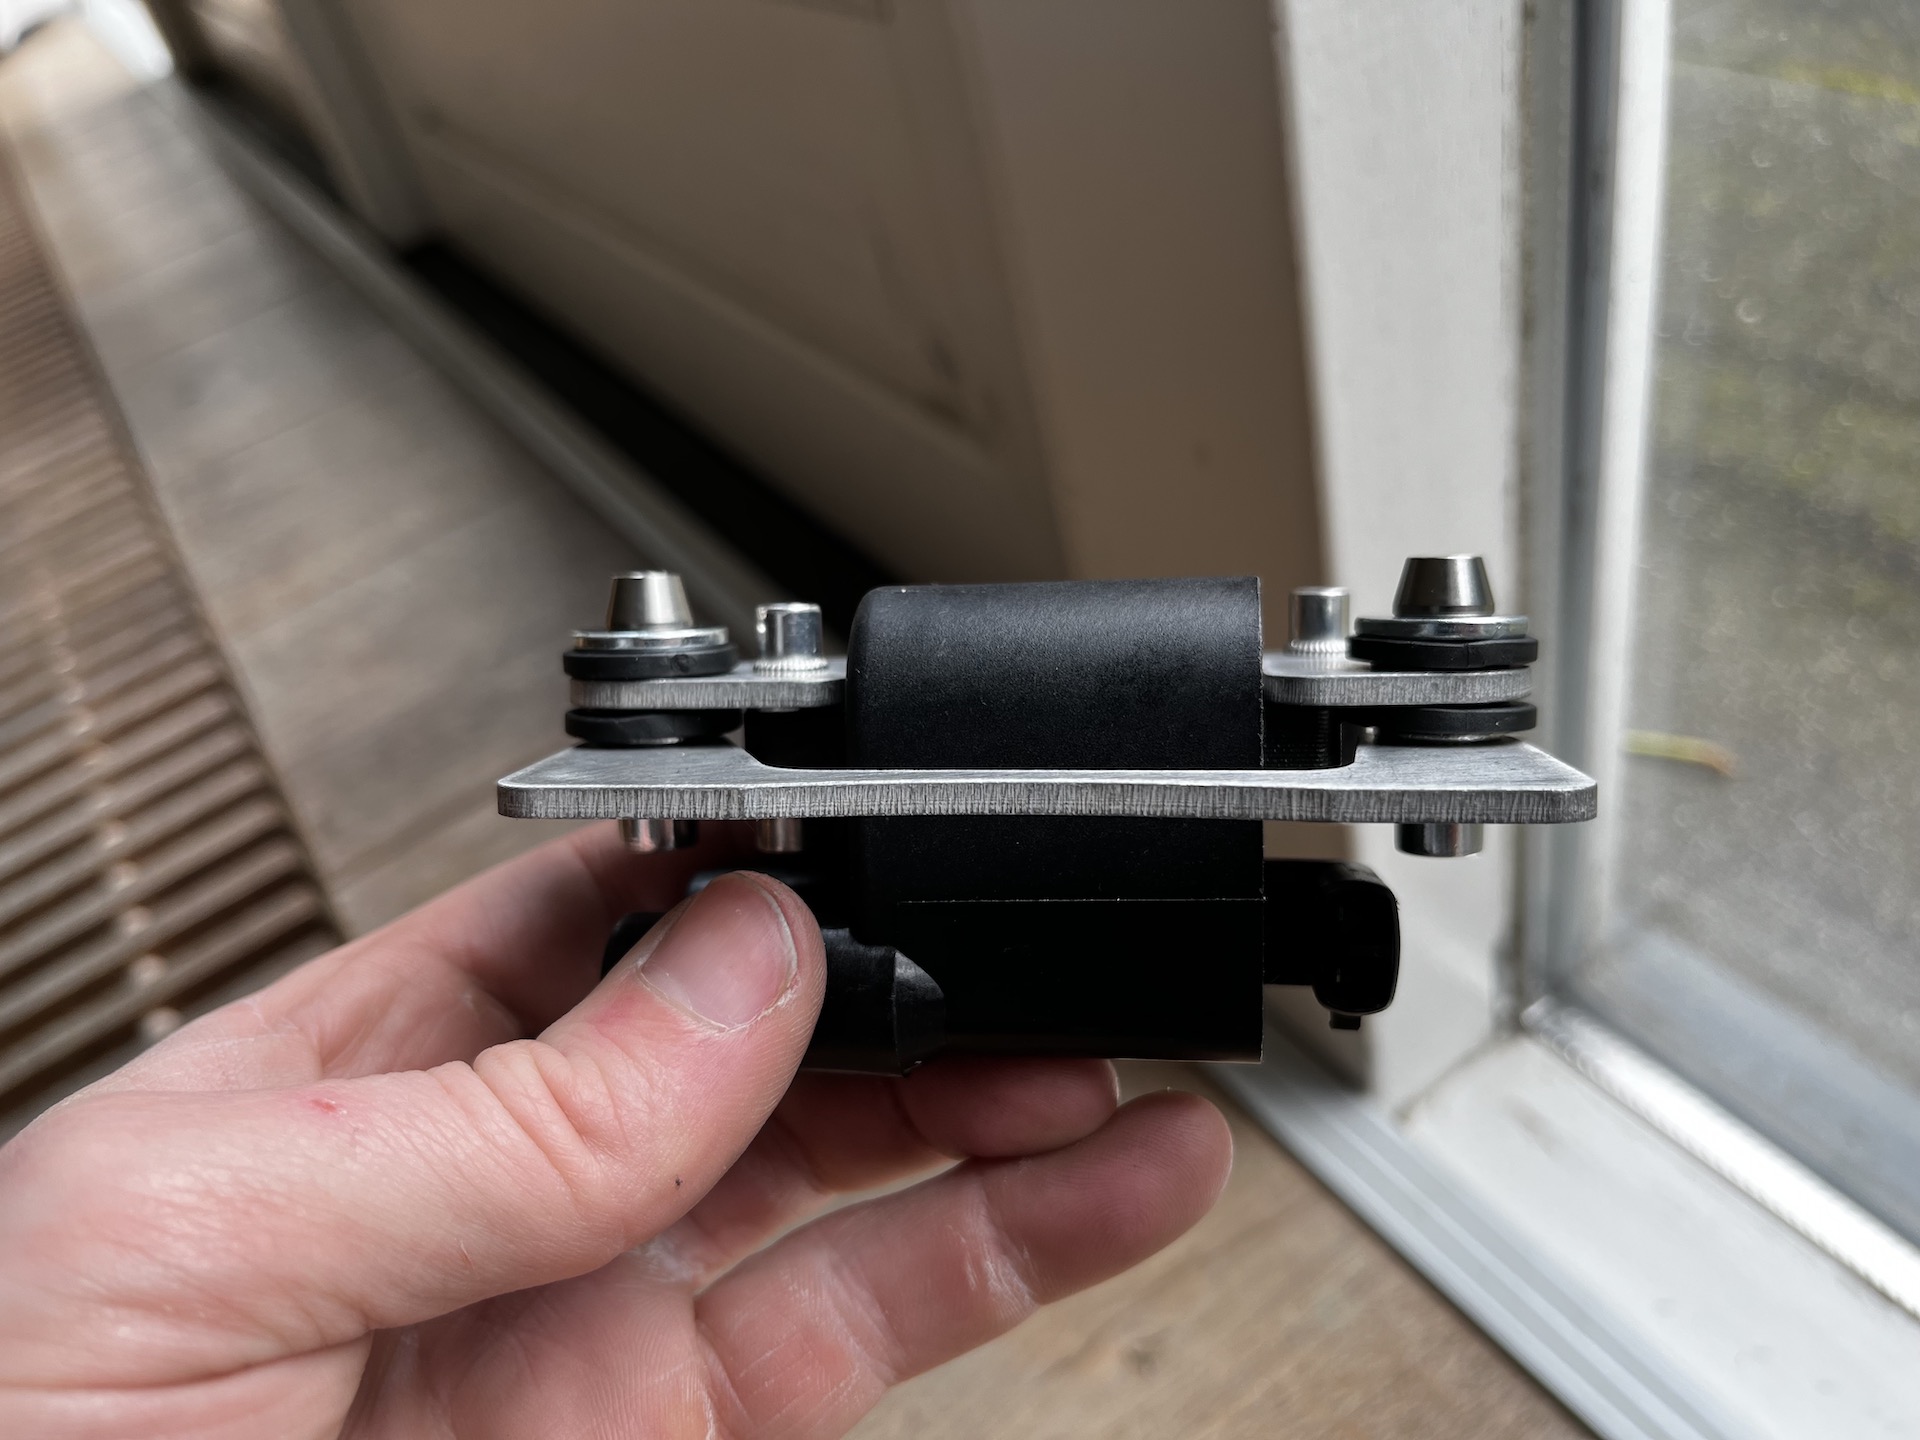
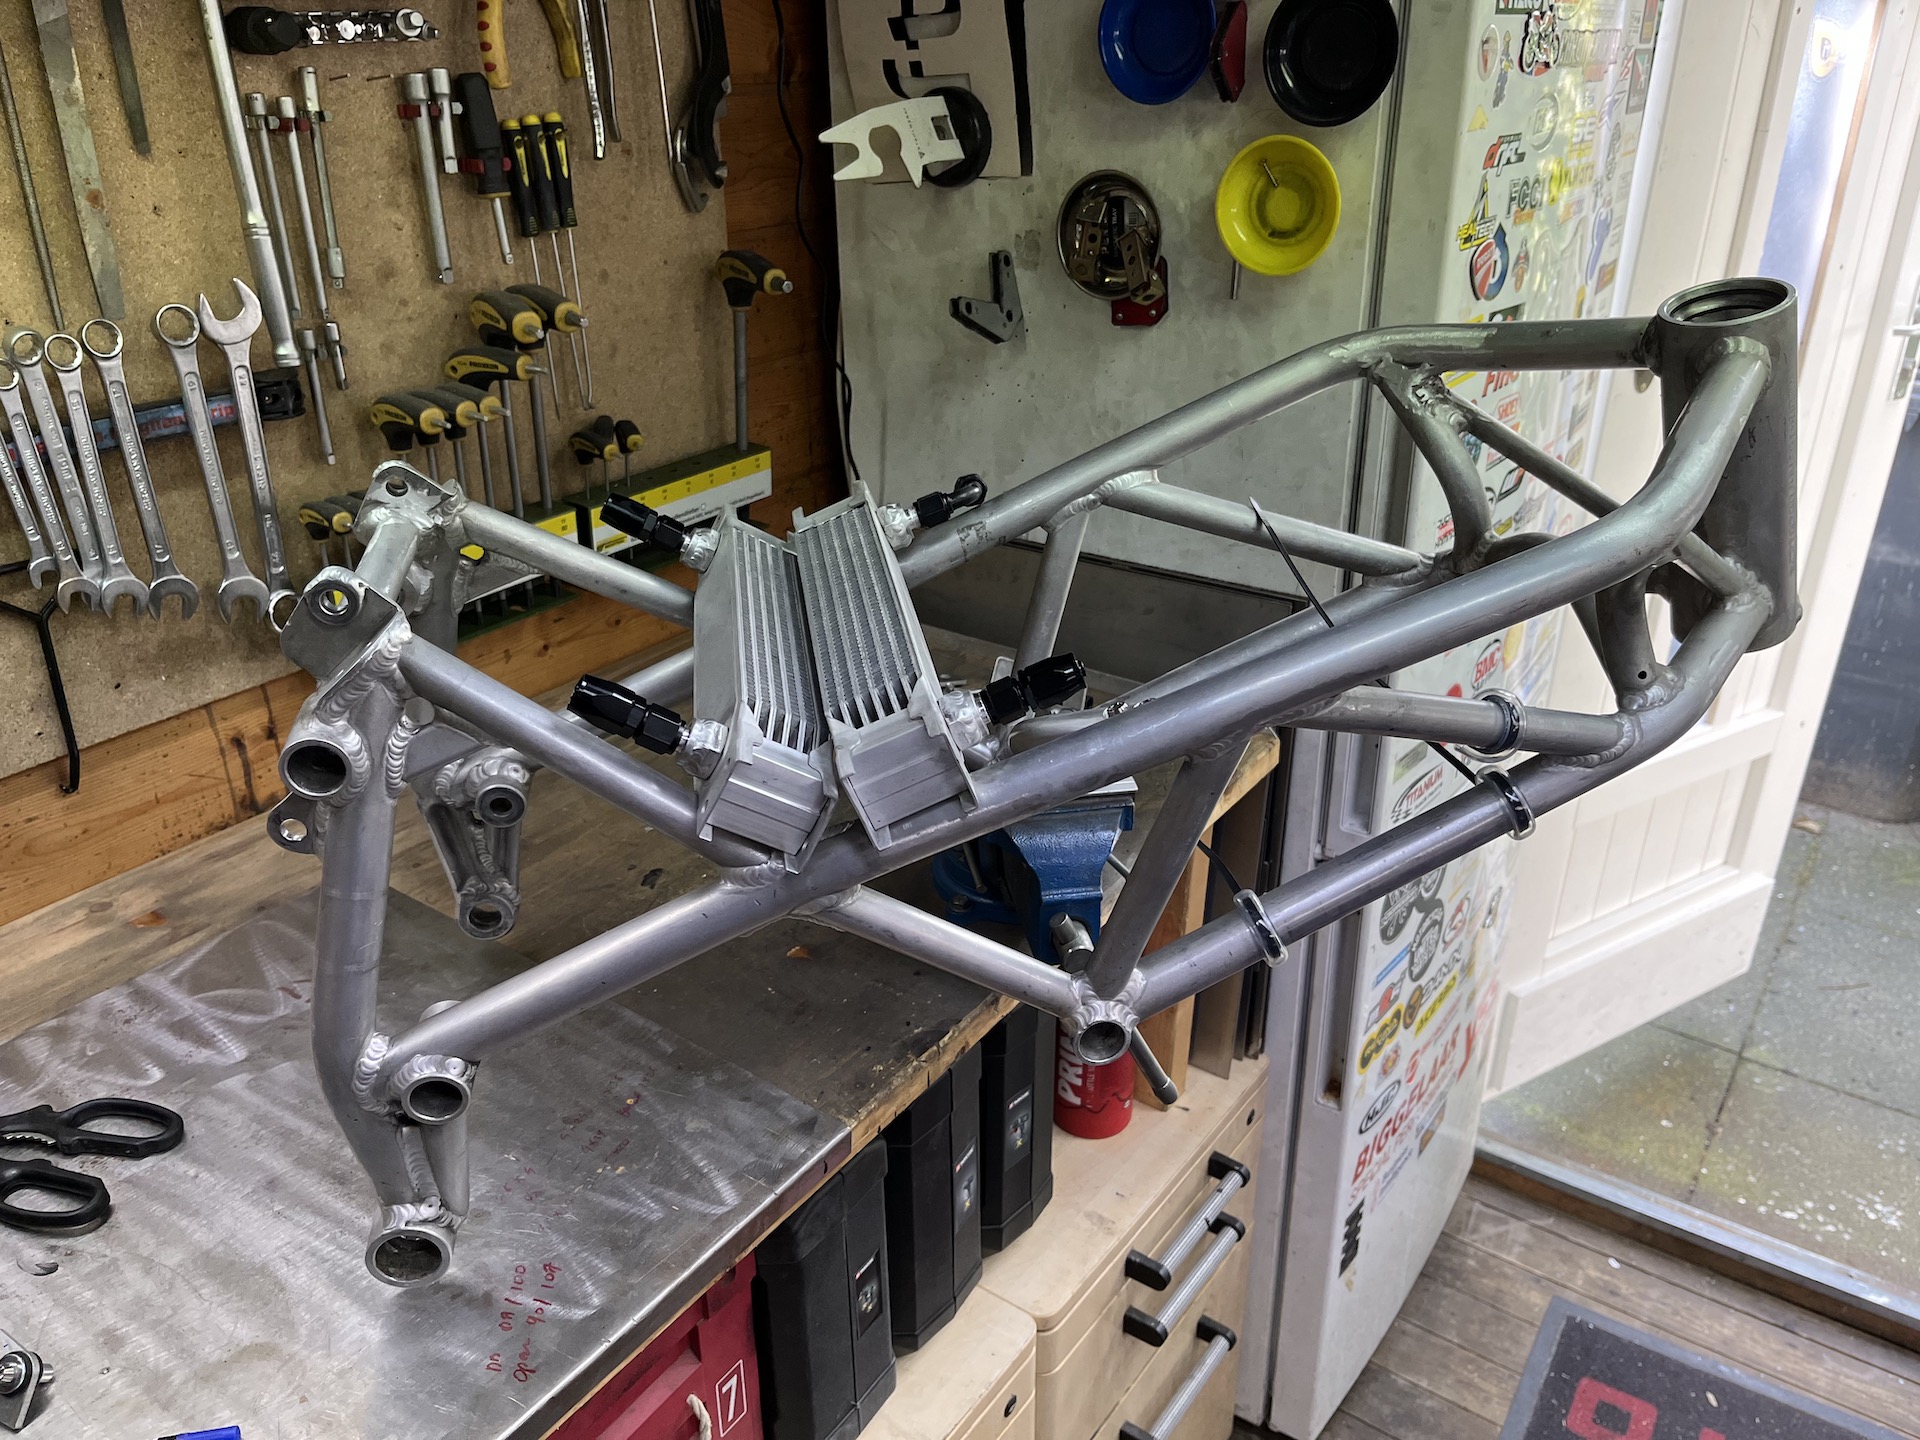
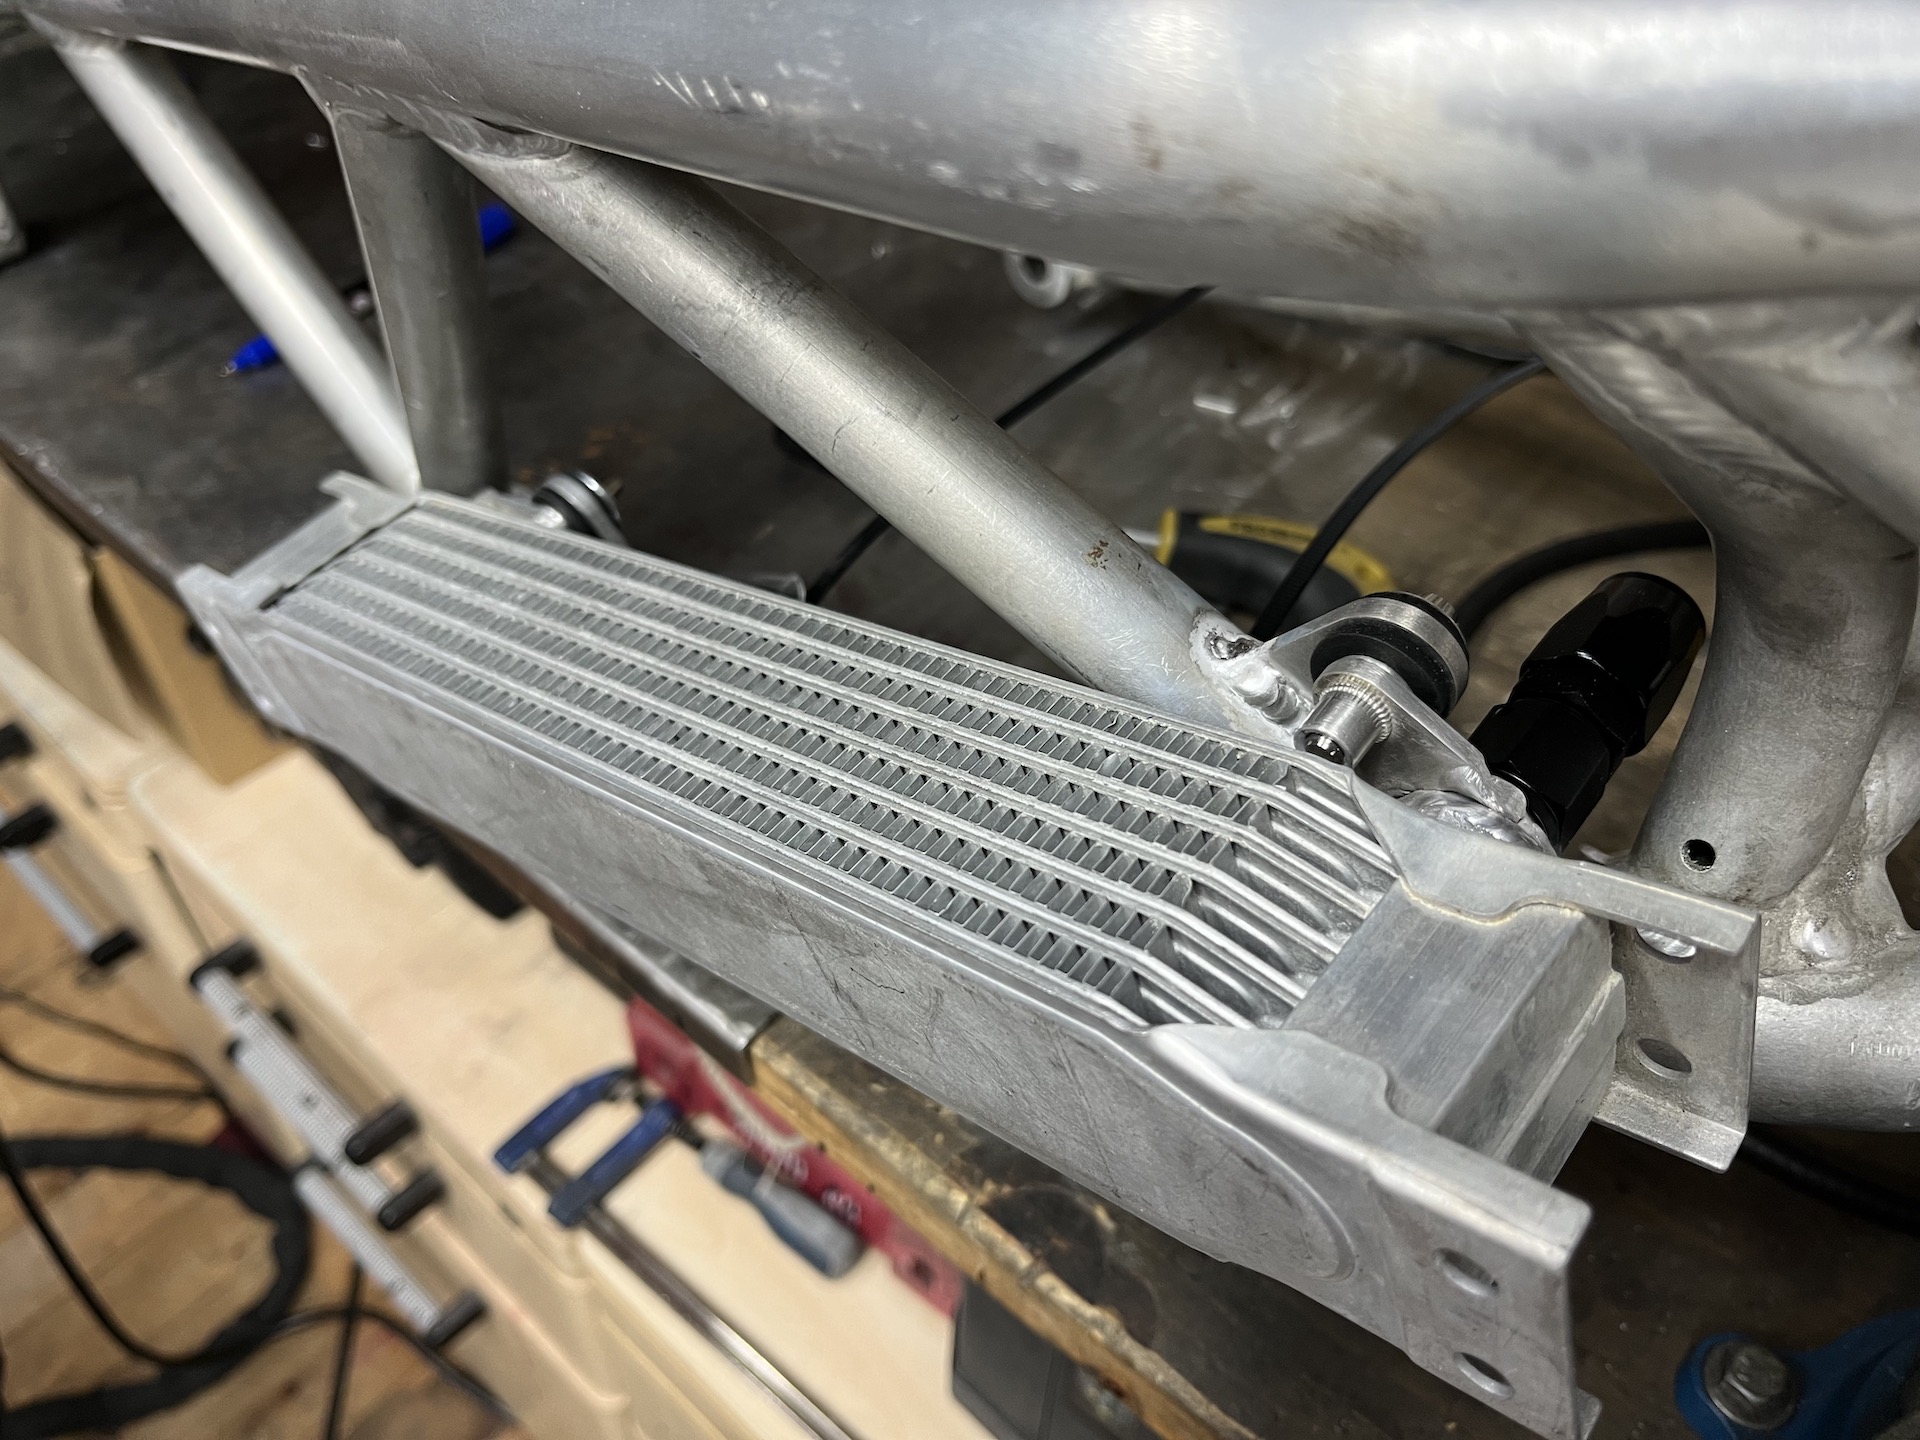
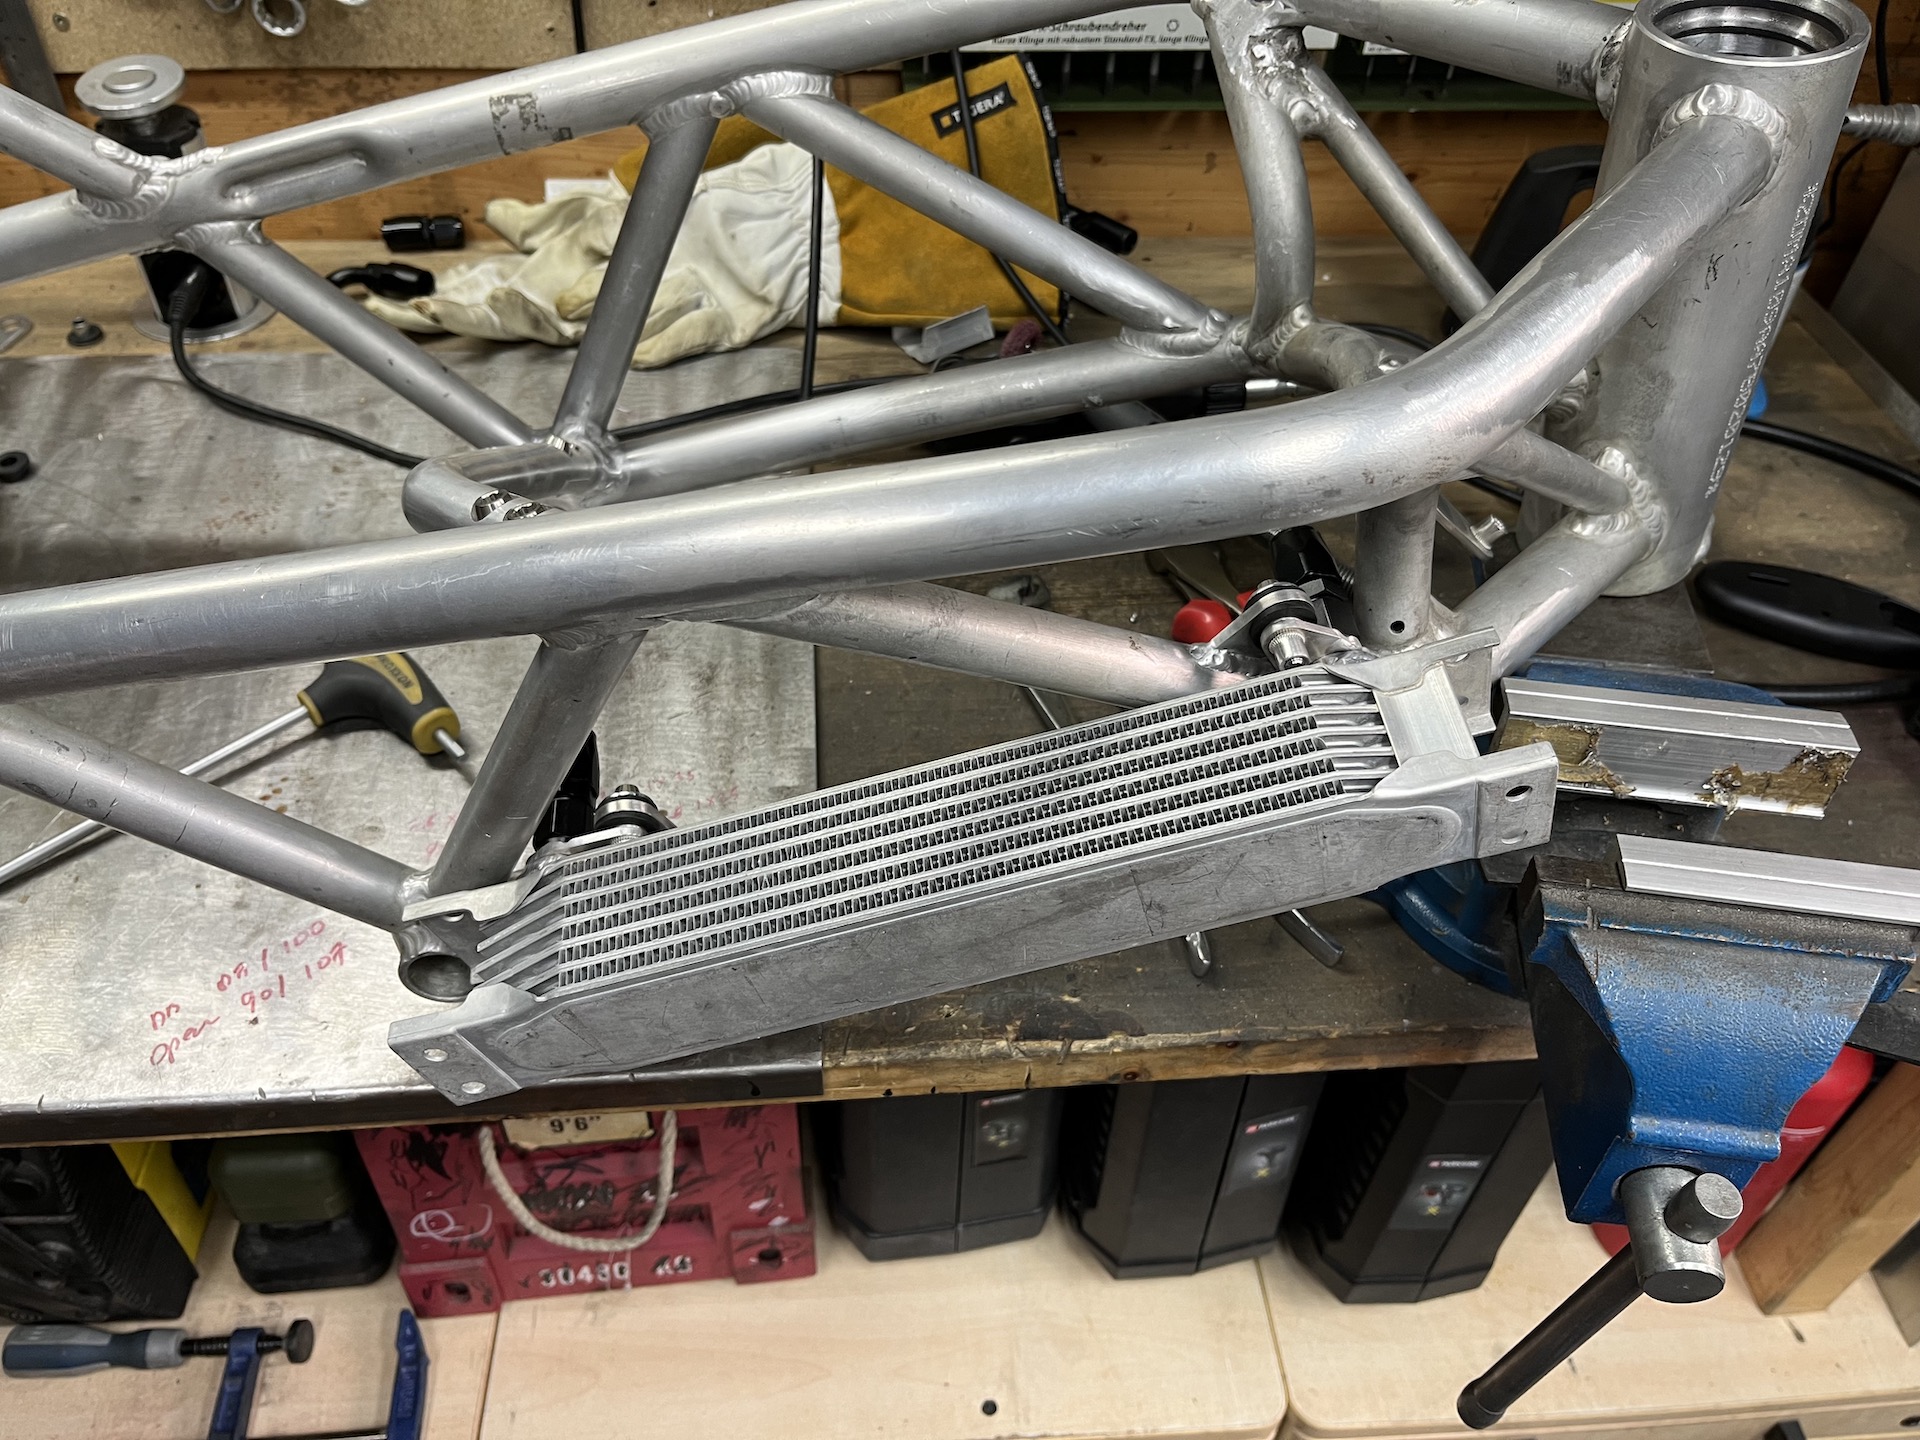
MOUNTING THE OIL COOLERS & IGN. COILS
Time to get those skinny oil coolers/radiators mounted to the frame. Also the first front ignition coil is going to be mounted to the frame.
I had custom aluminium brackets lasercut, saving me allot of time and the quality is way higher then cutting them myself. Going to be a very clean mounting solution with rubber vibration dampers and rivet nuts.
Welds on the radiators didnt come out as nice as I wanted because of some contamination. Also was abit rusty on welding aluminium so it took some to get back into it haha.

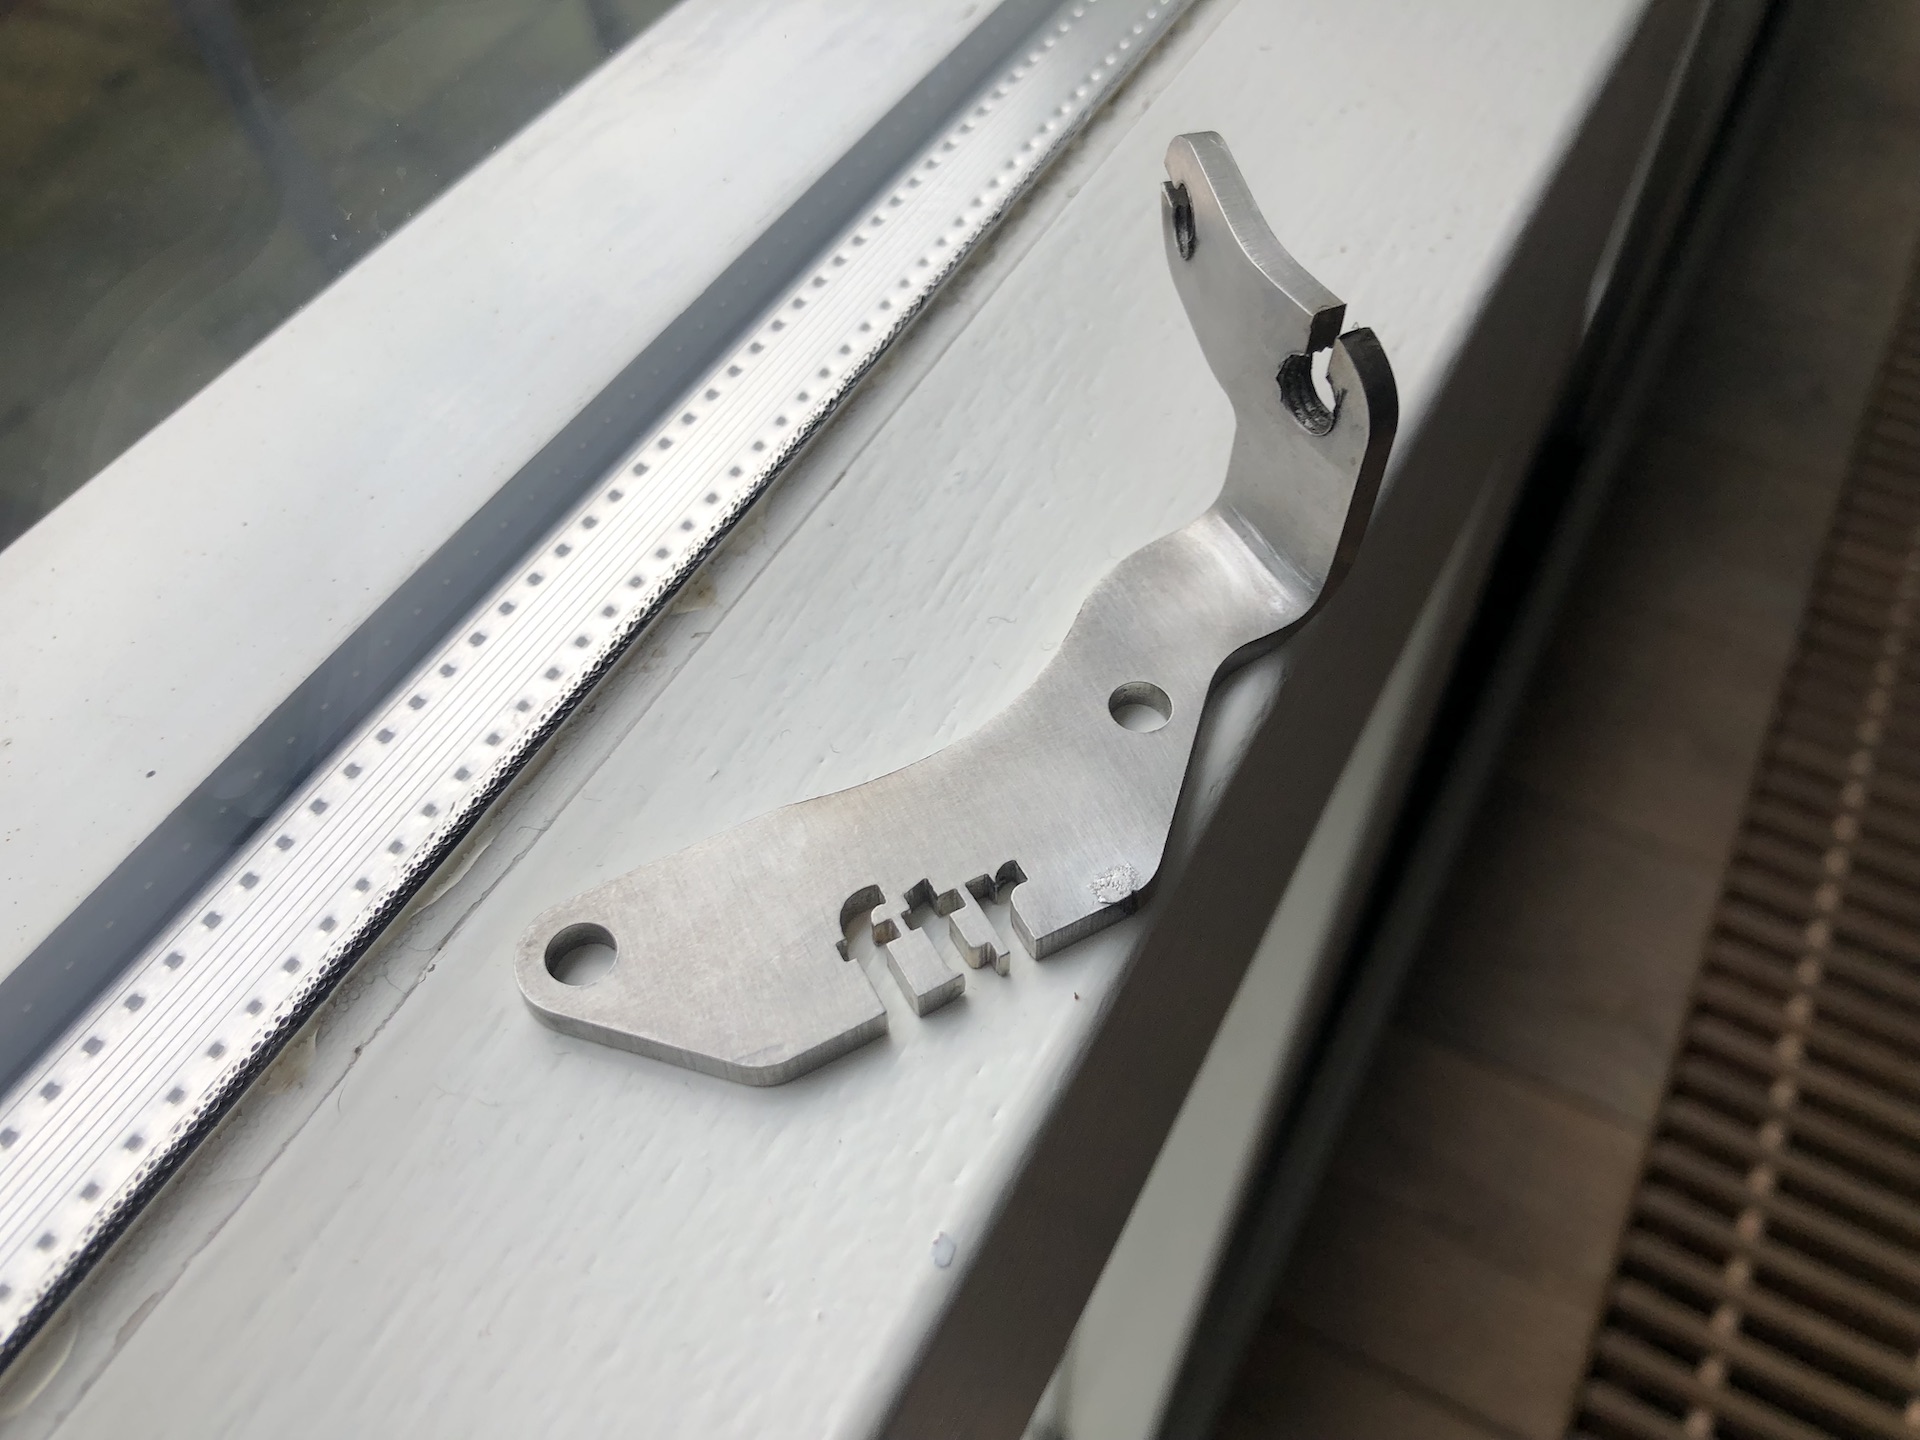
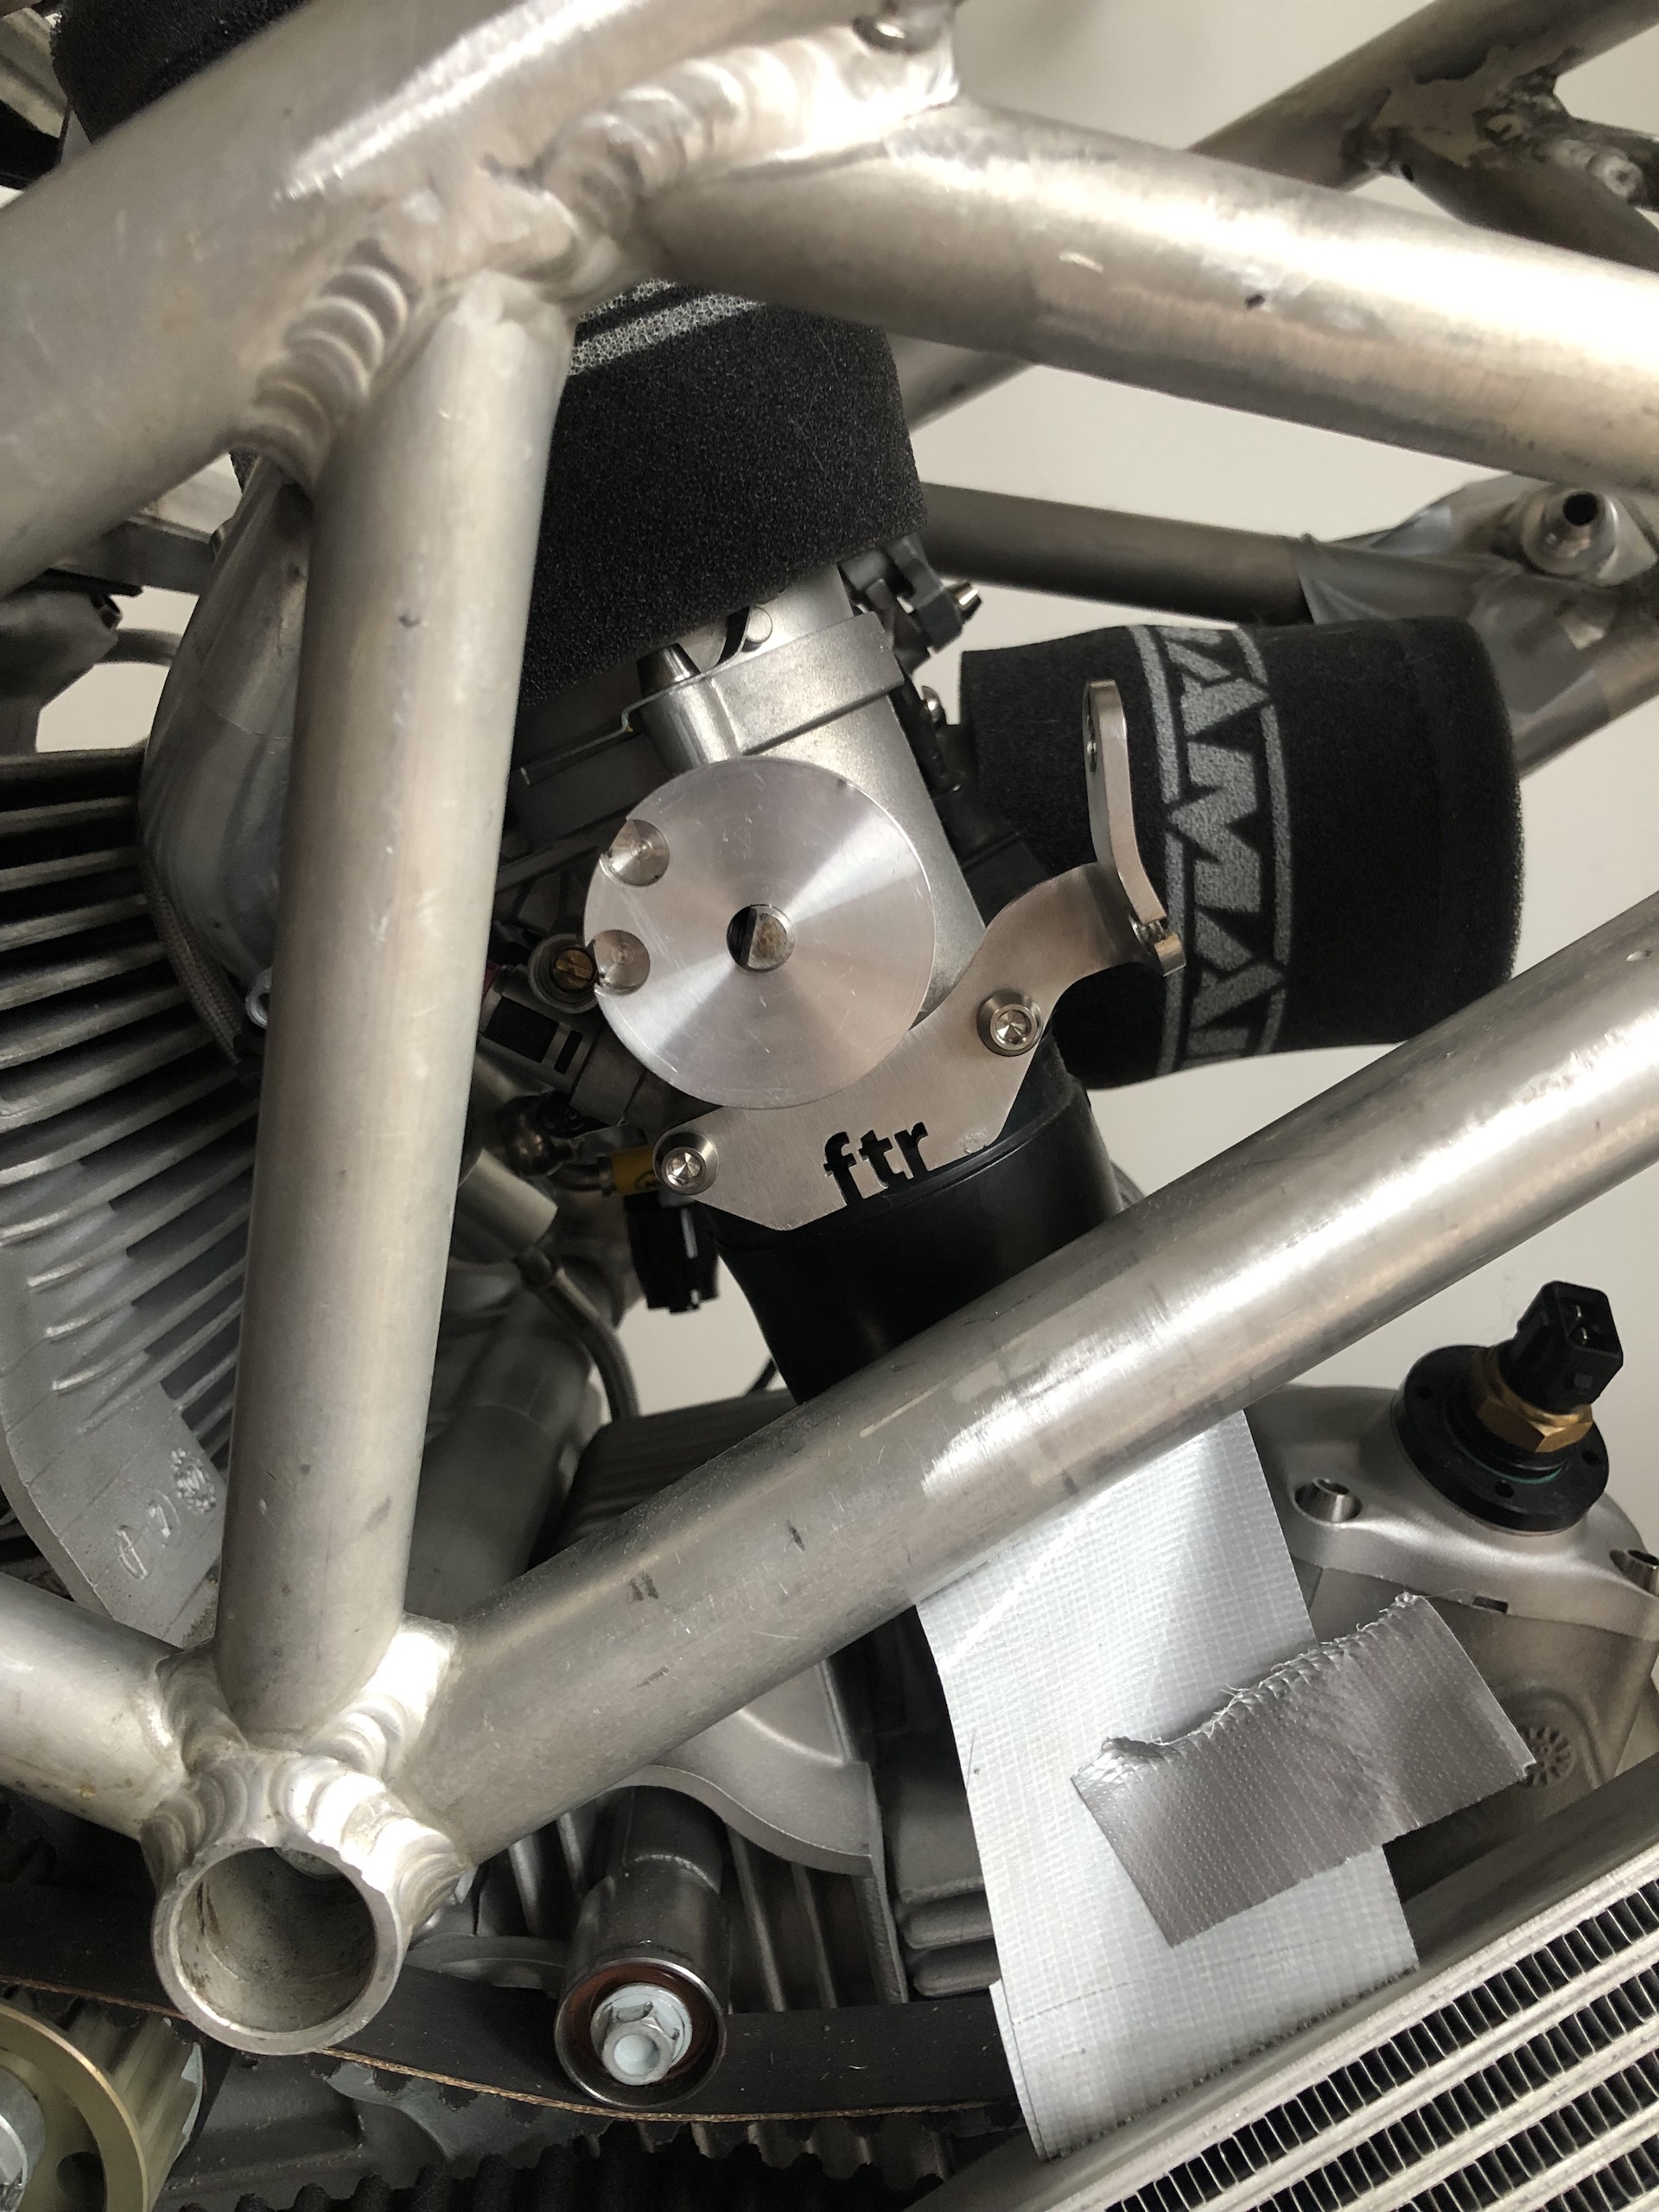
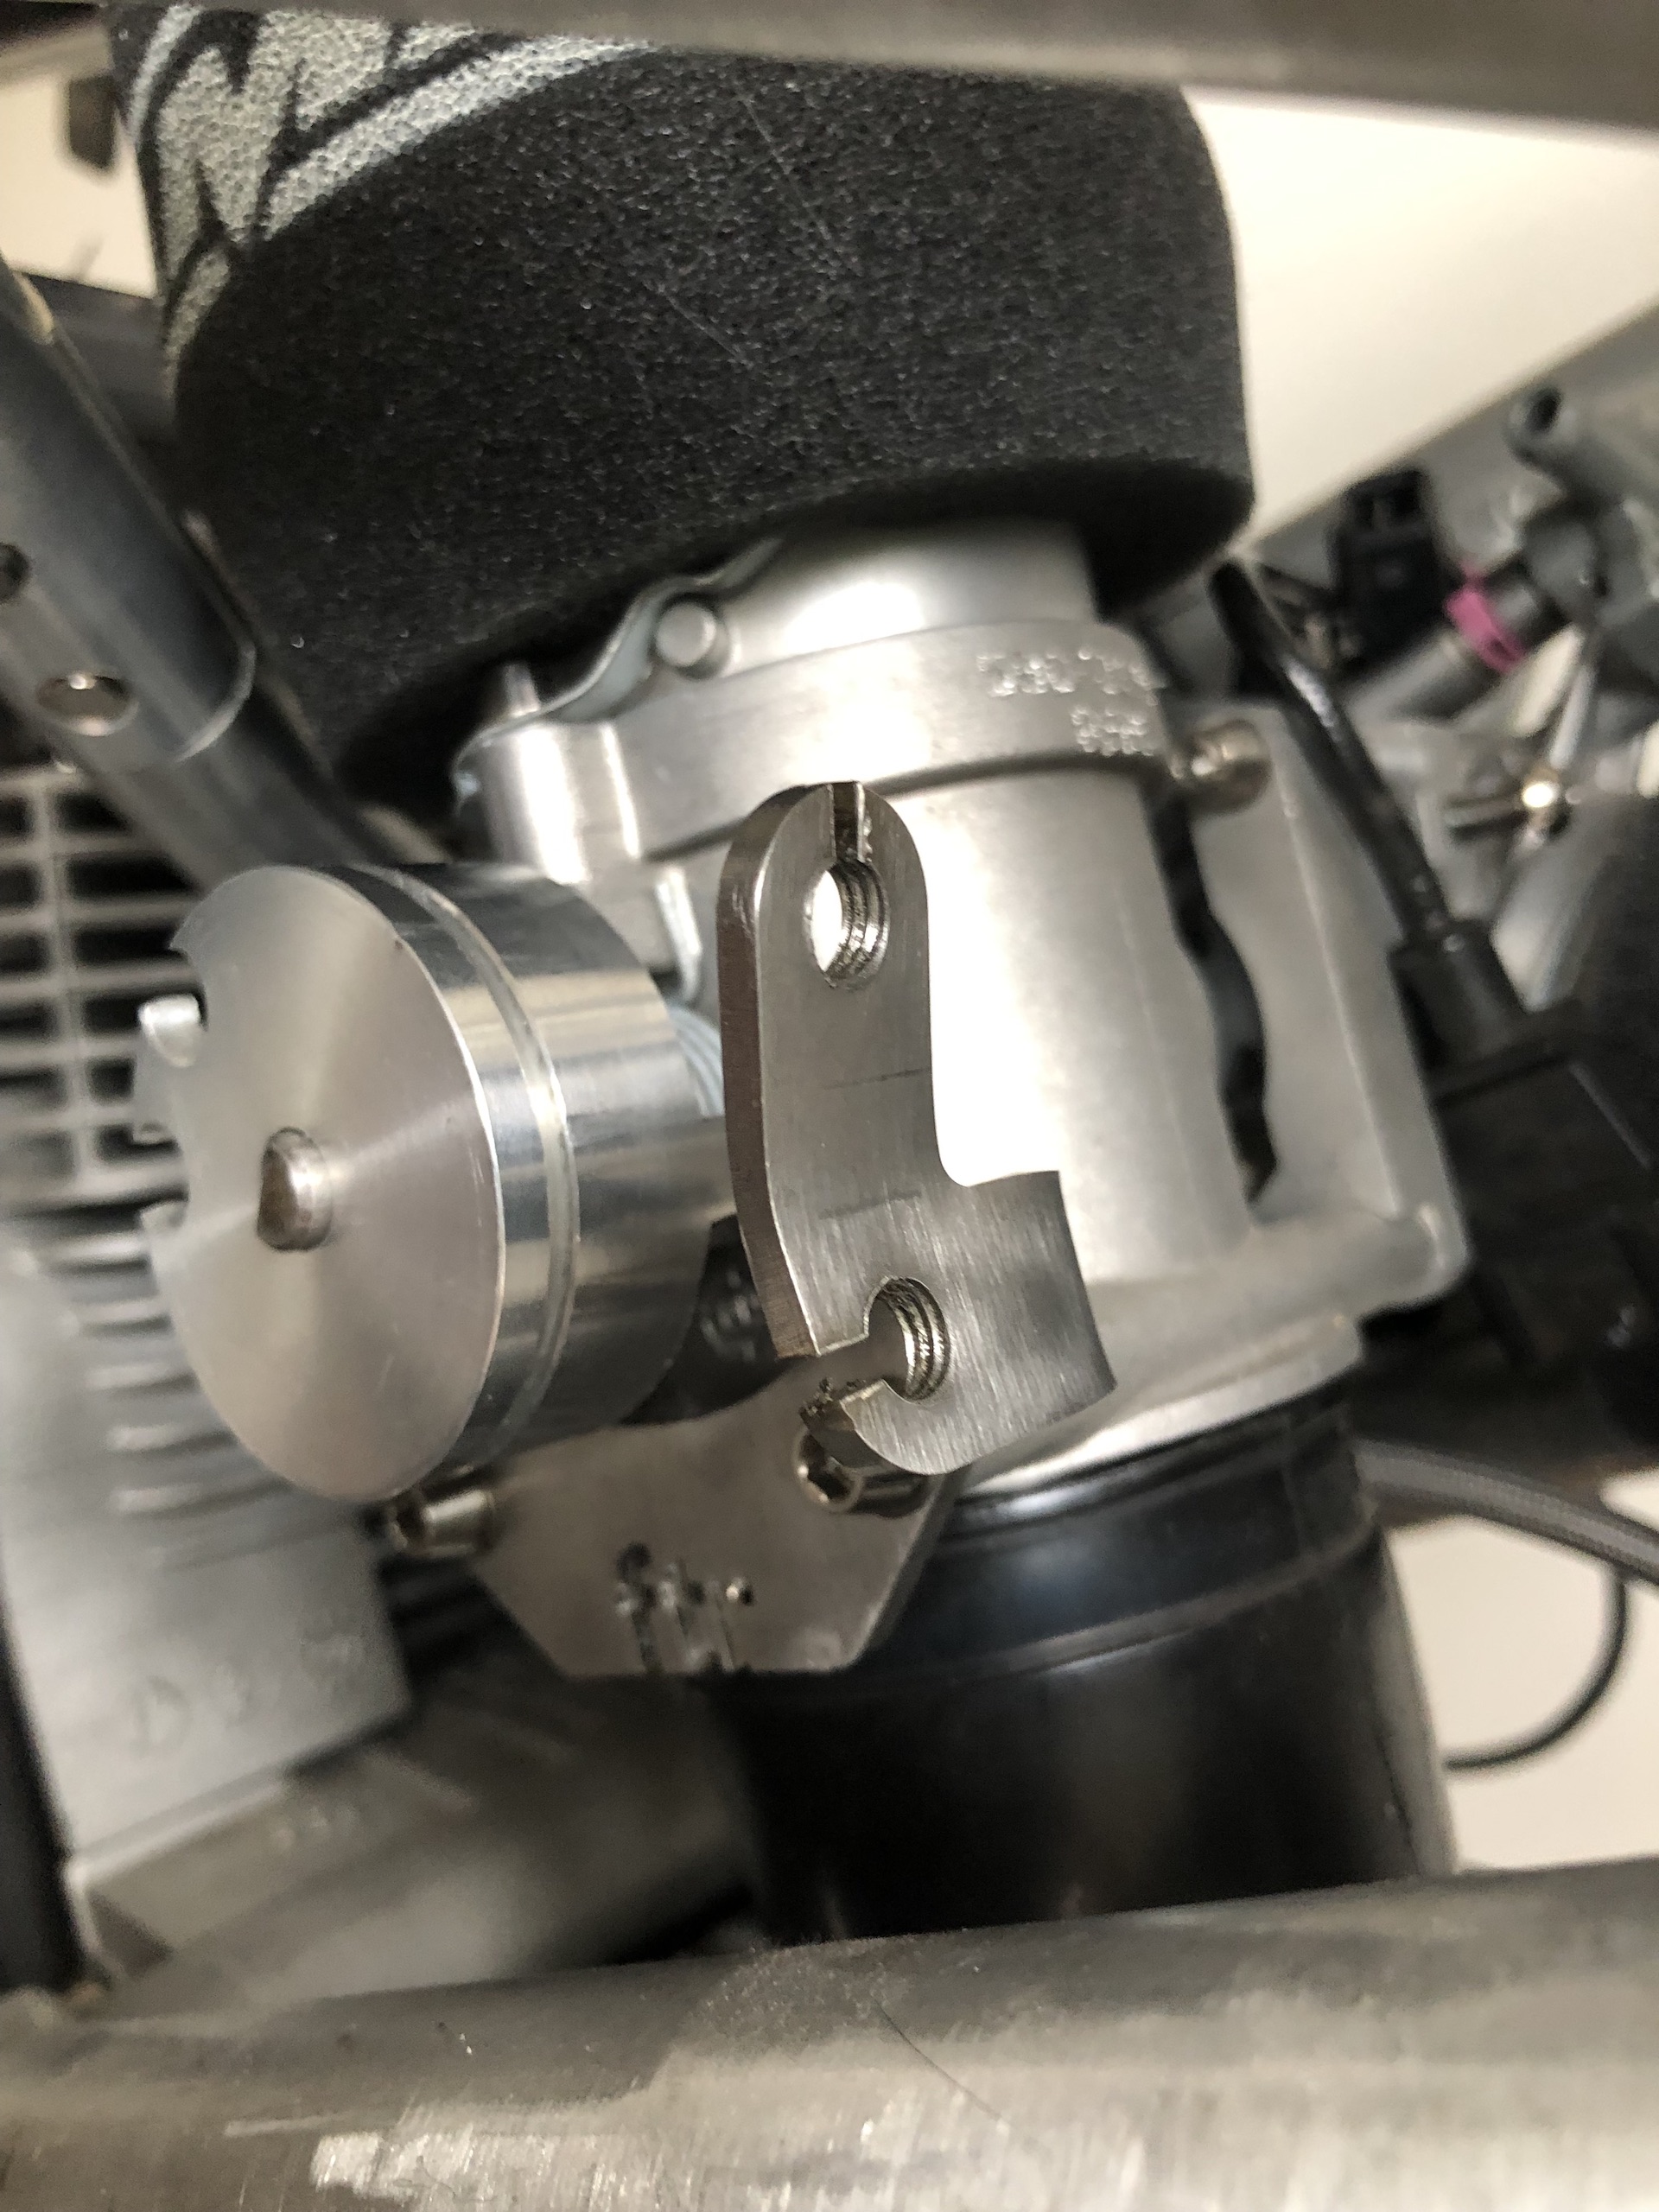
CUSTOM THROTTLE CABLE BRACKET
Because of the custom S4RS 50mm throttle body conversion I needed a new bracket for the throttle cables to mount to. Custom ftr bracket lasercut out of stainless. Looks super clean together with the custom aluminium rotary swivel on the throttle body!
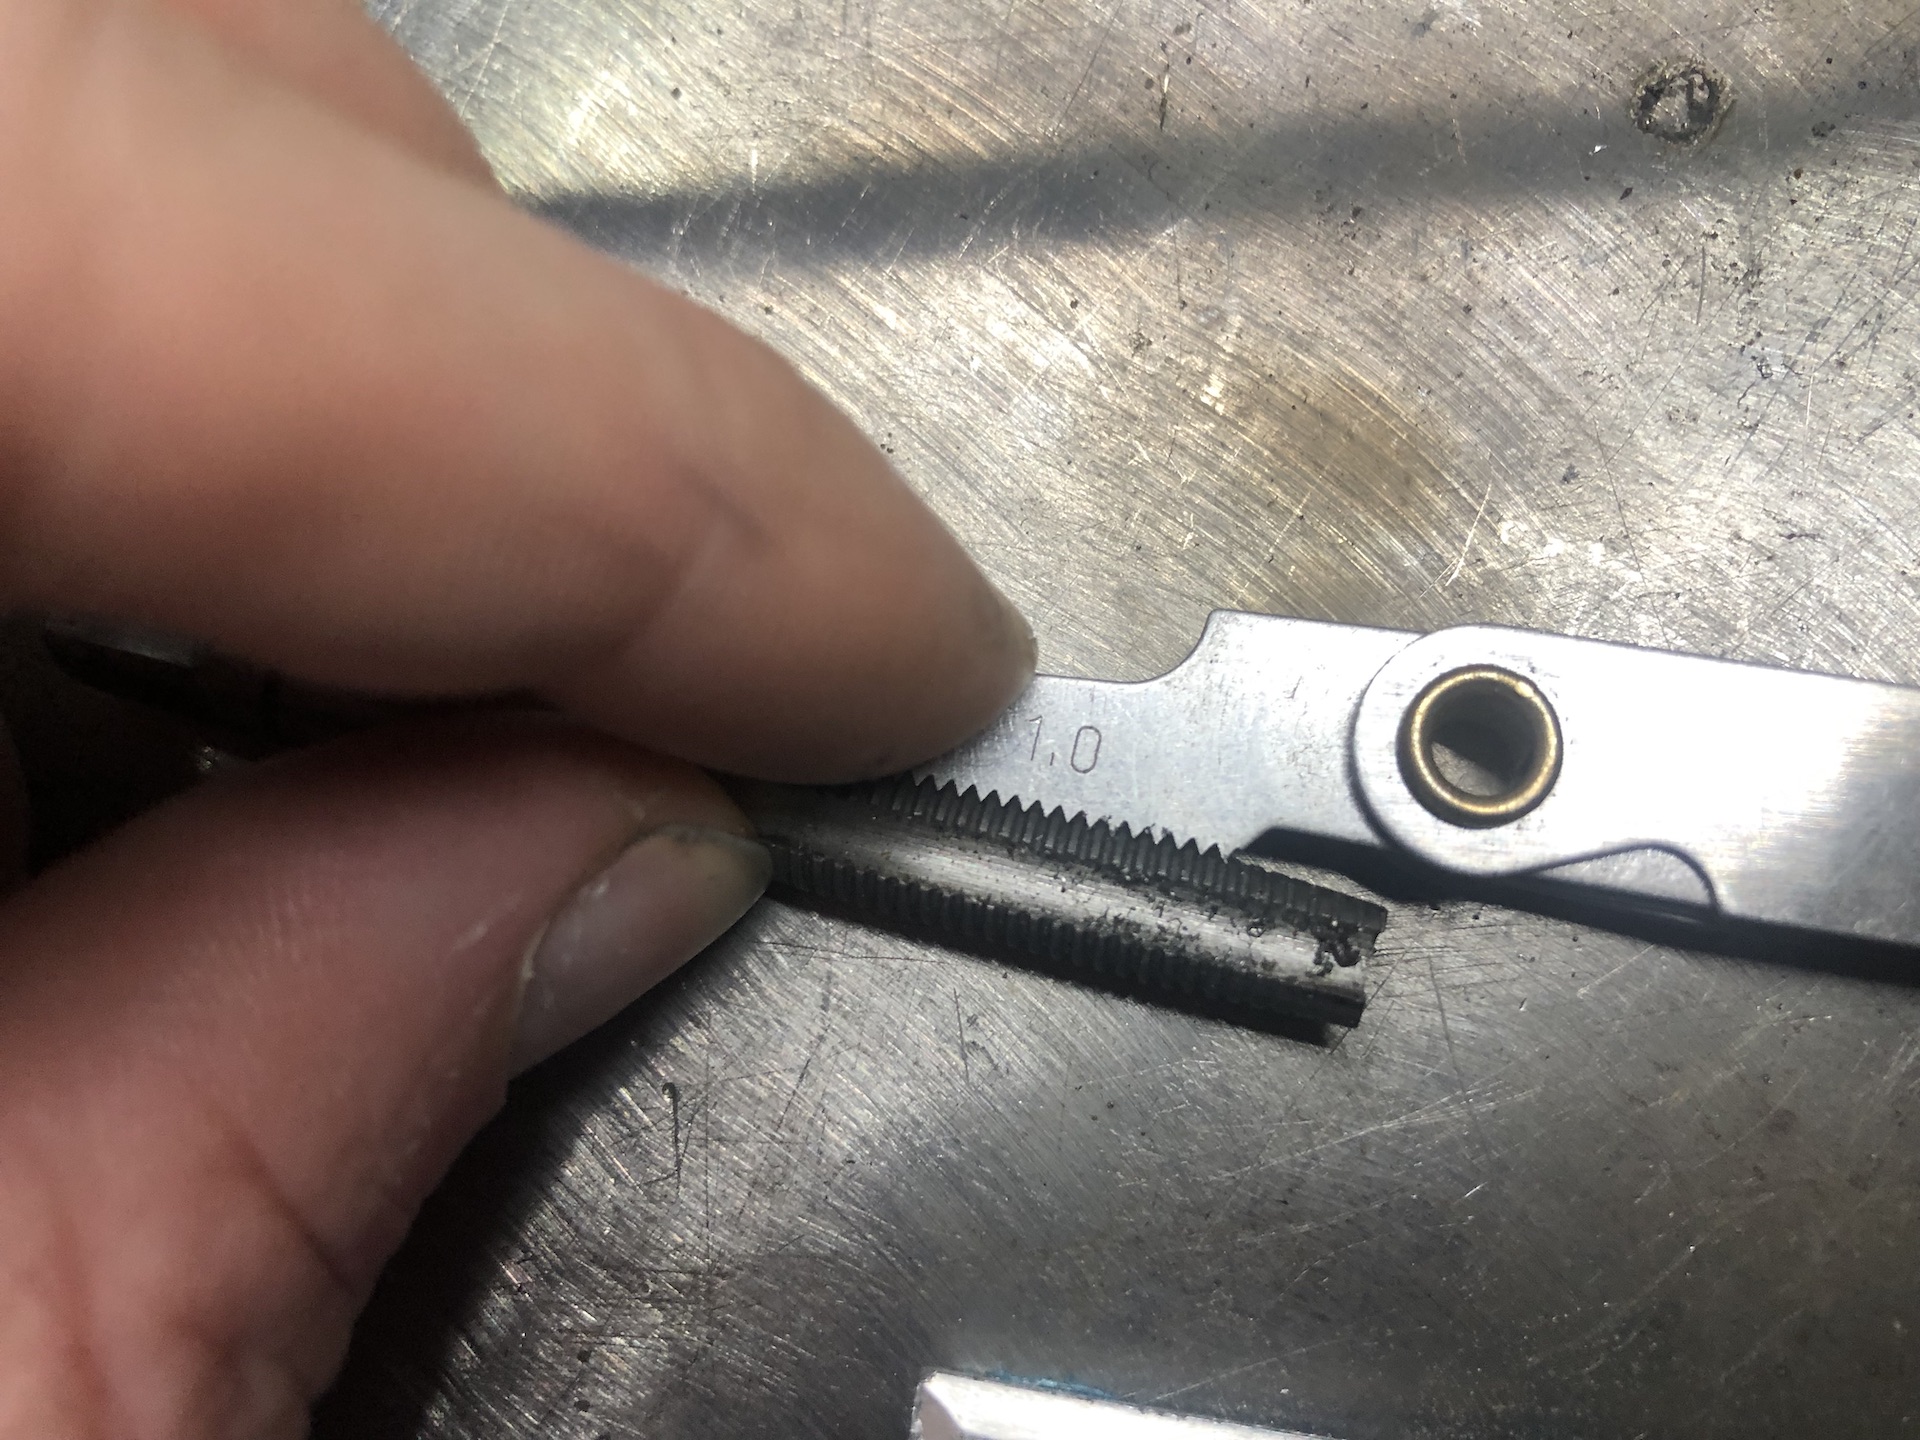
Had some trouble getting the bracket tapped with the correct thread. Turns out I was an idiot not using a final stage tap… If anybody needs this info, the thread is M7x1.0.
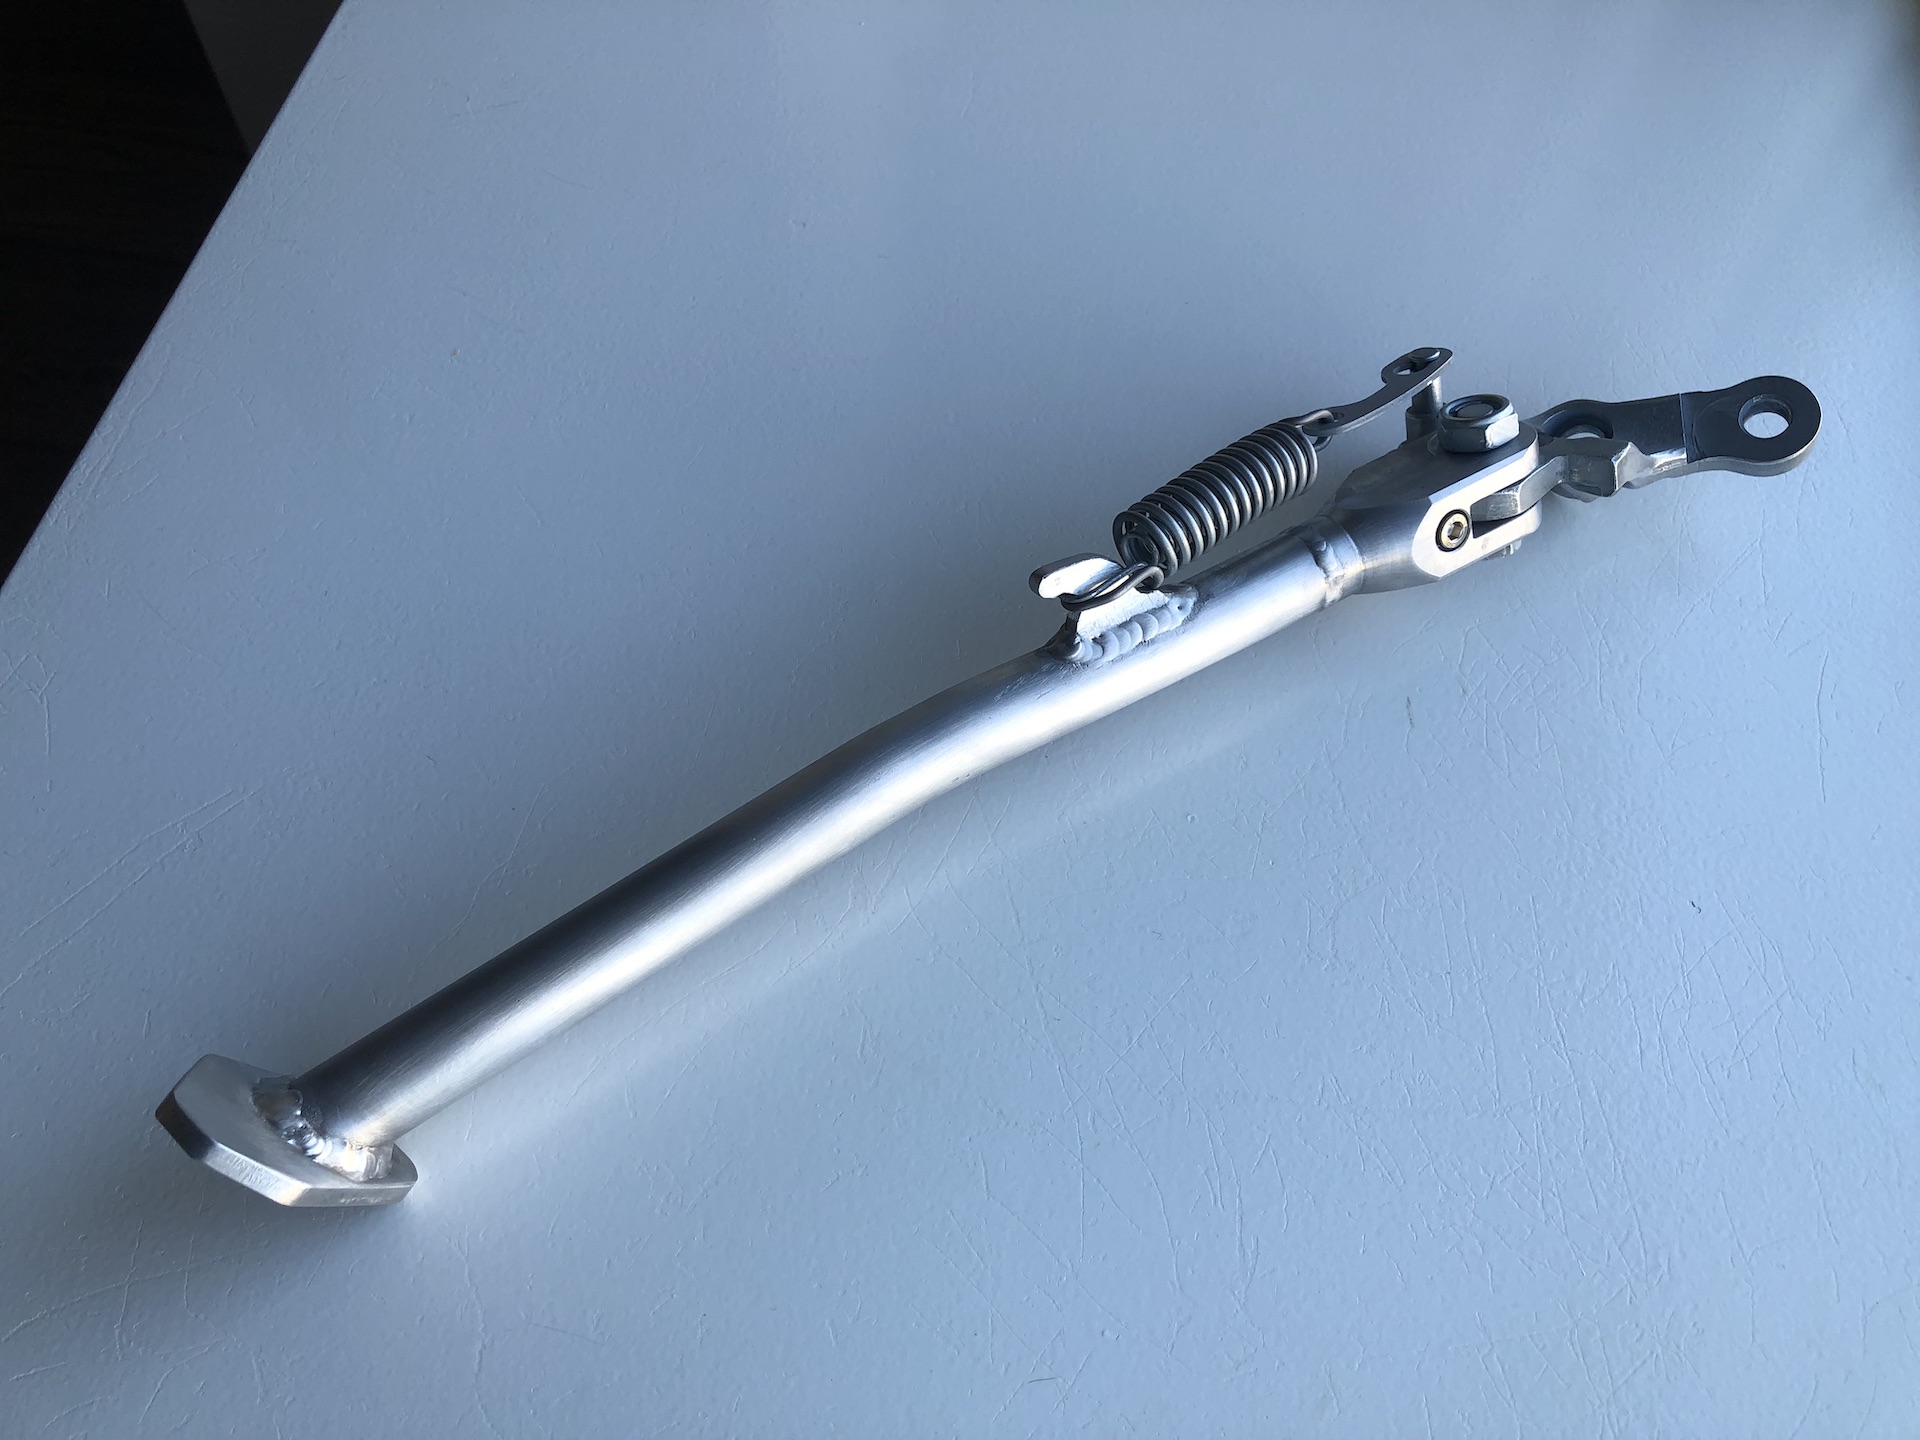
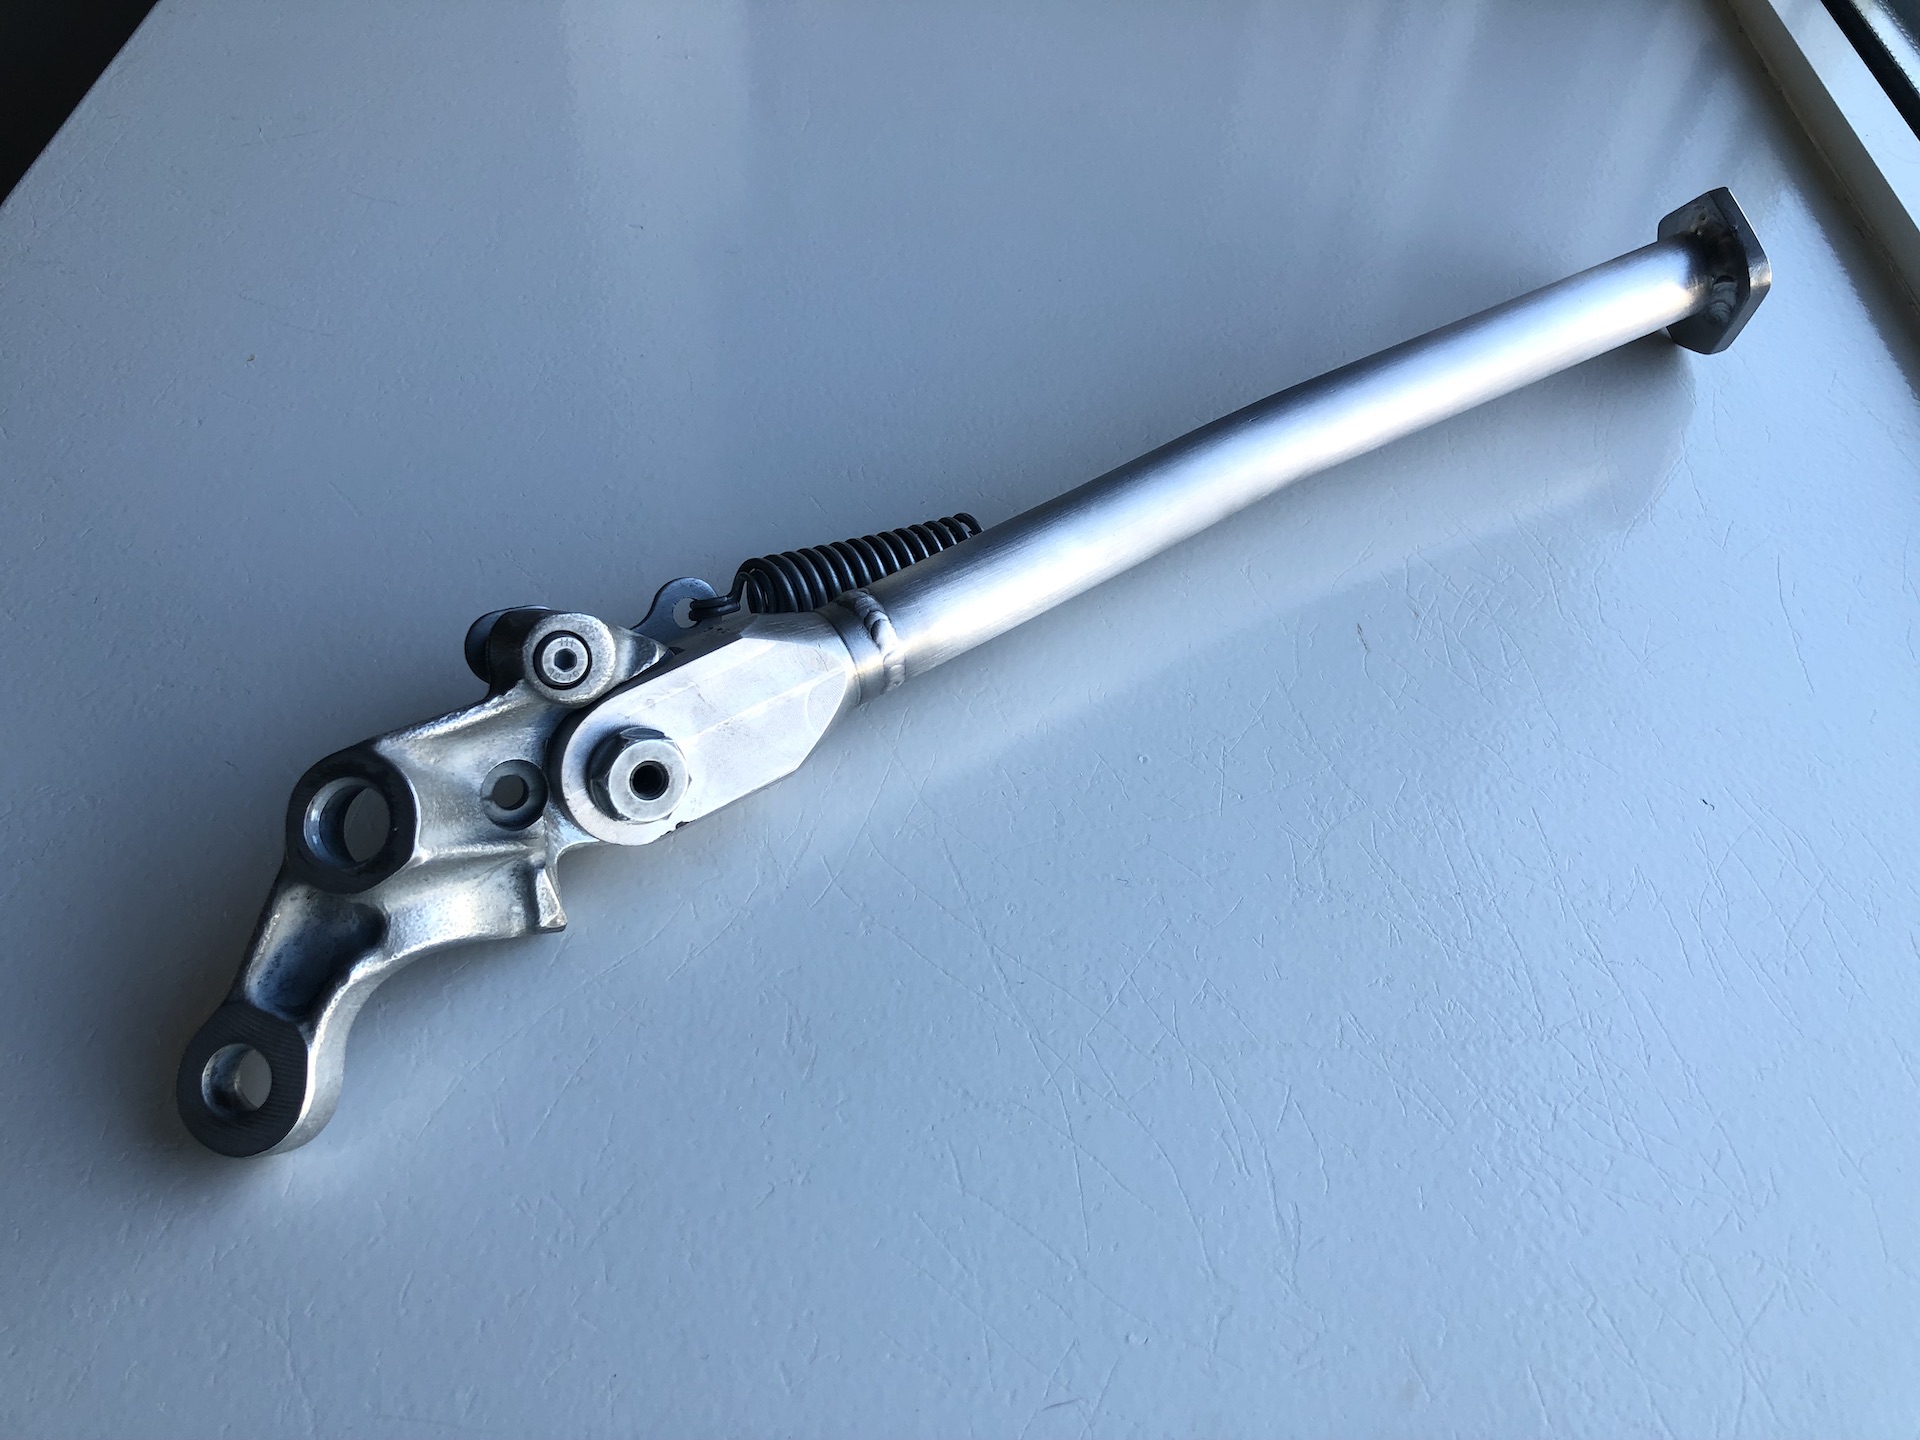
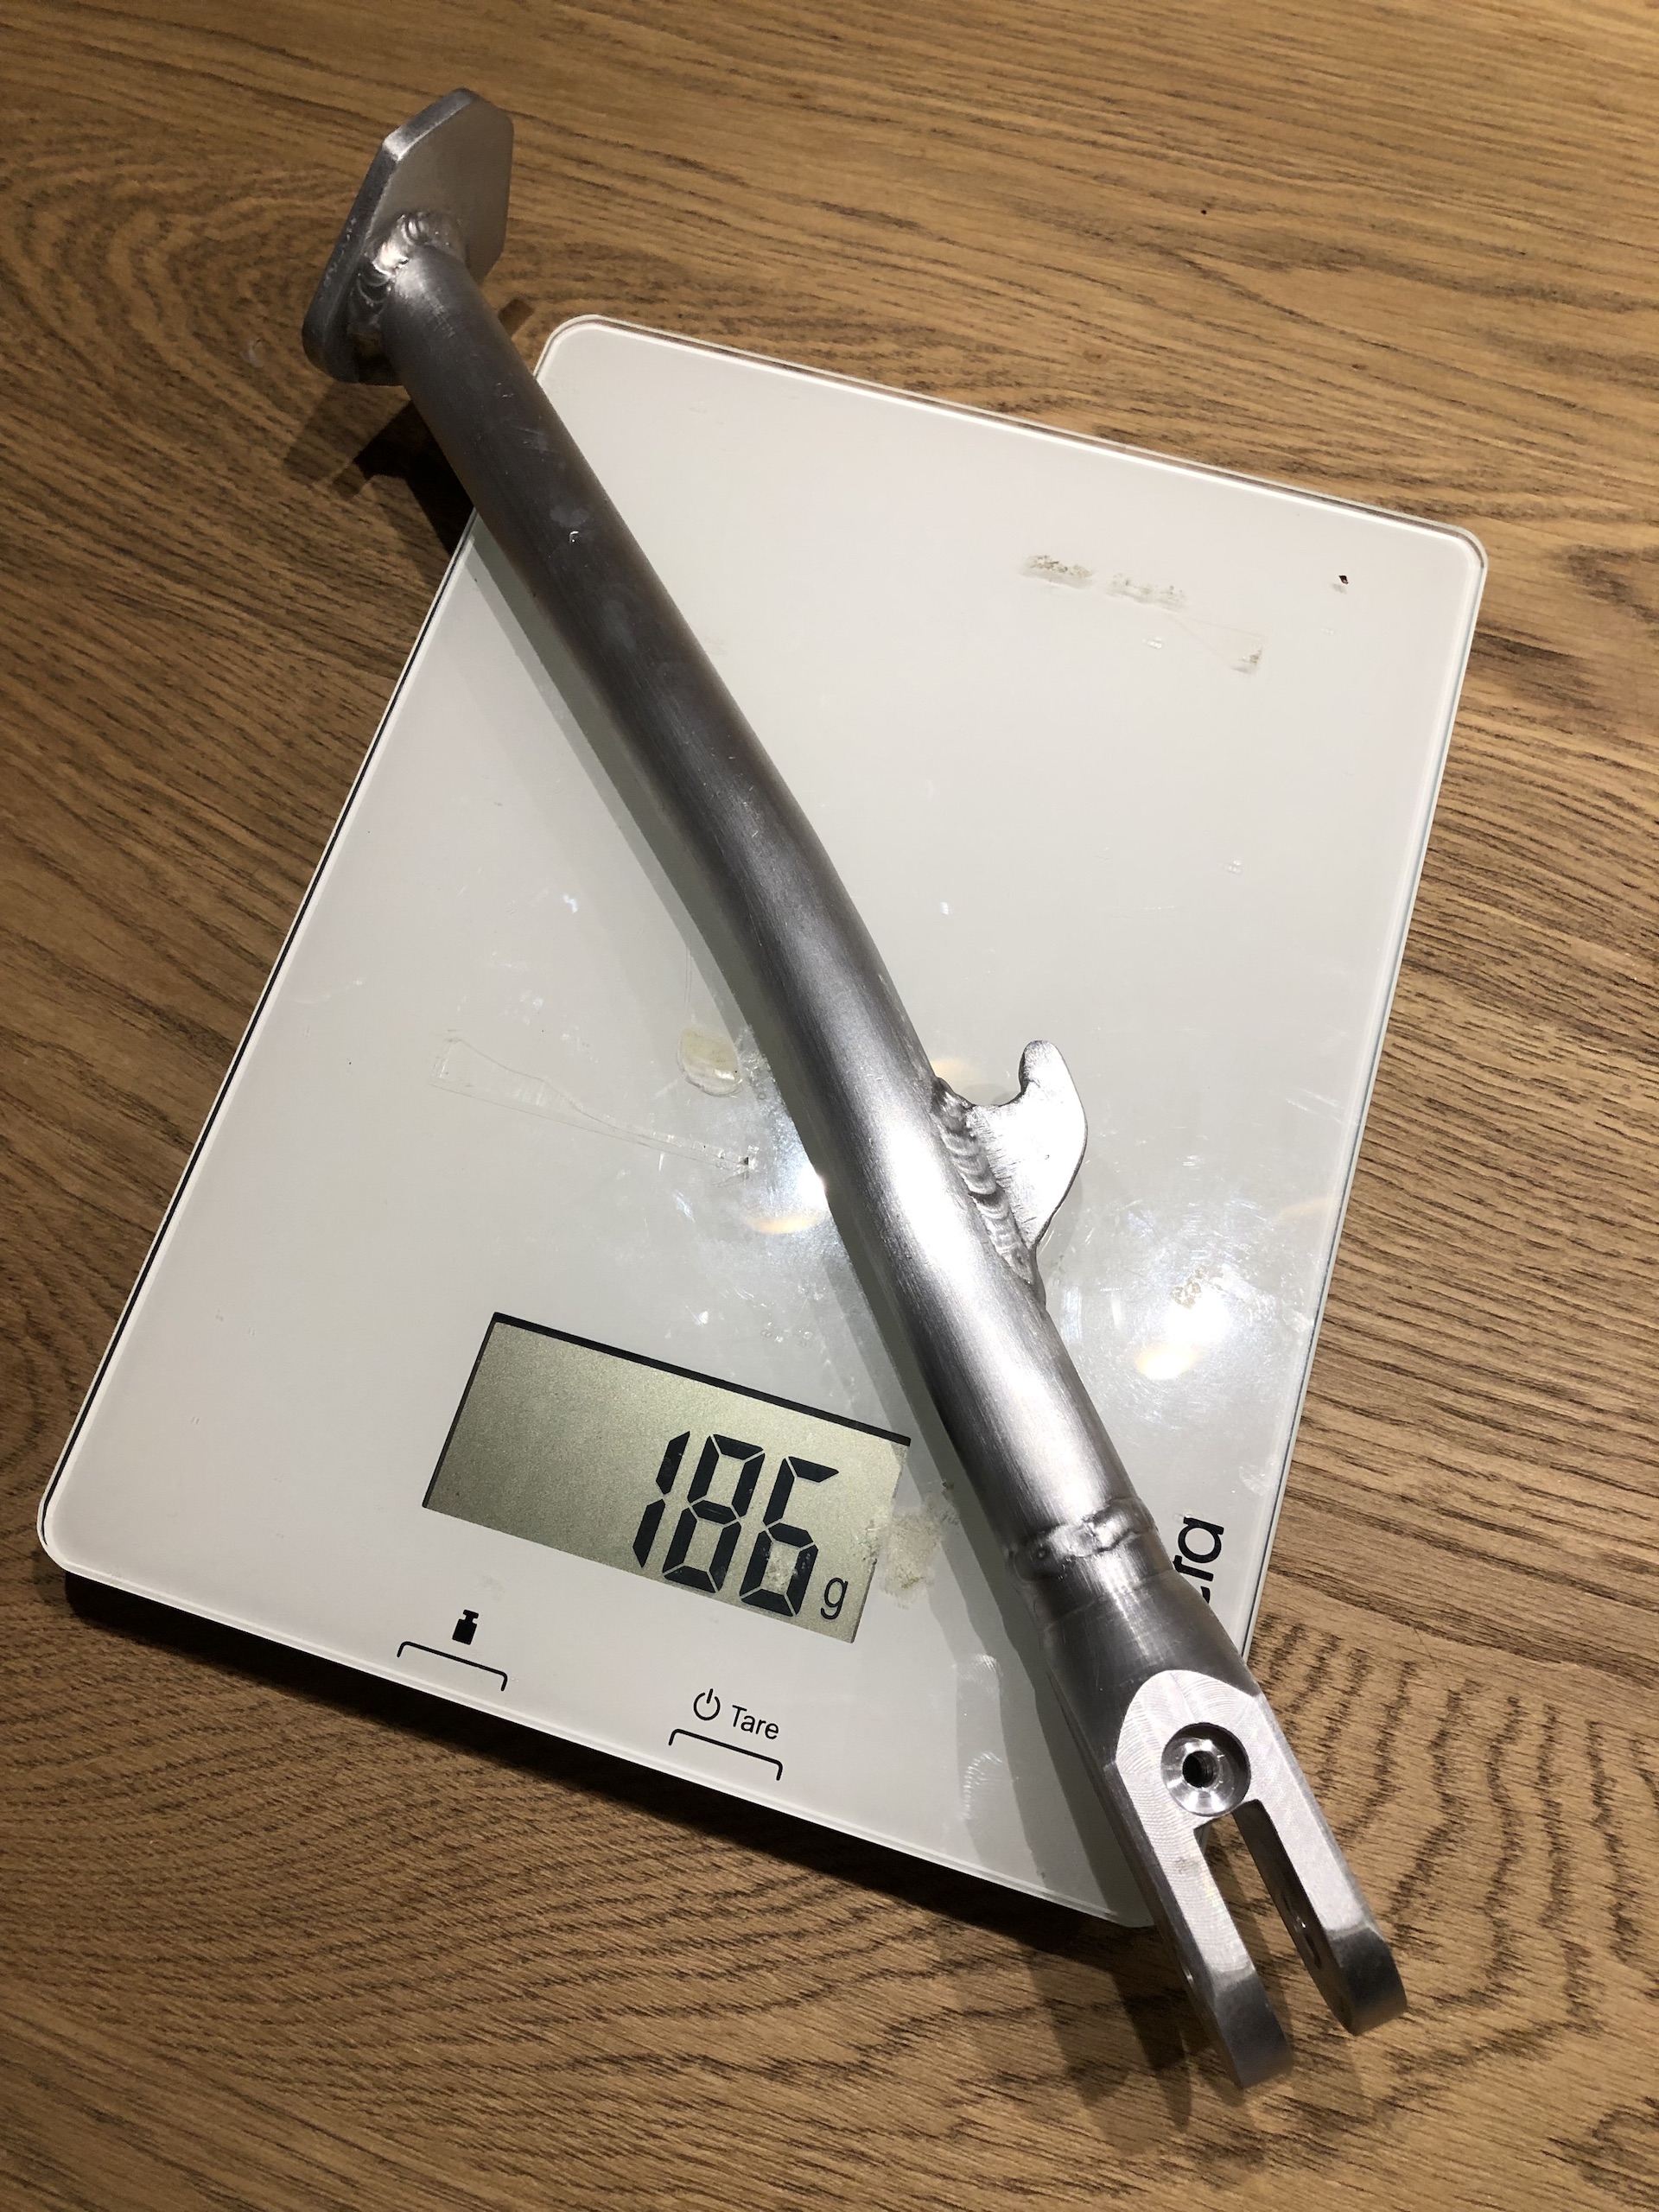
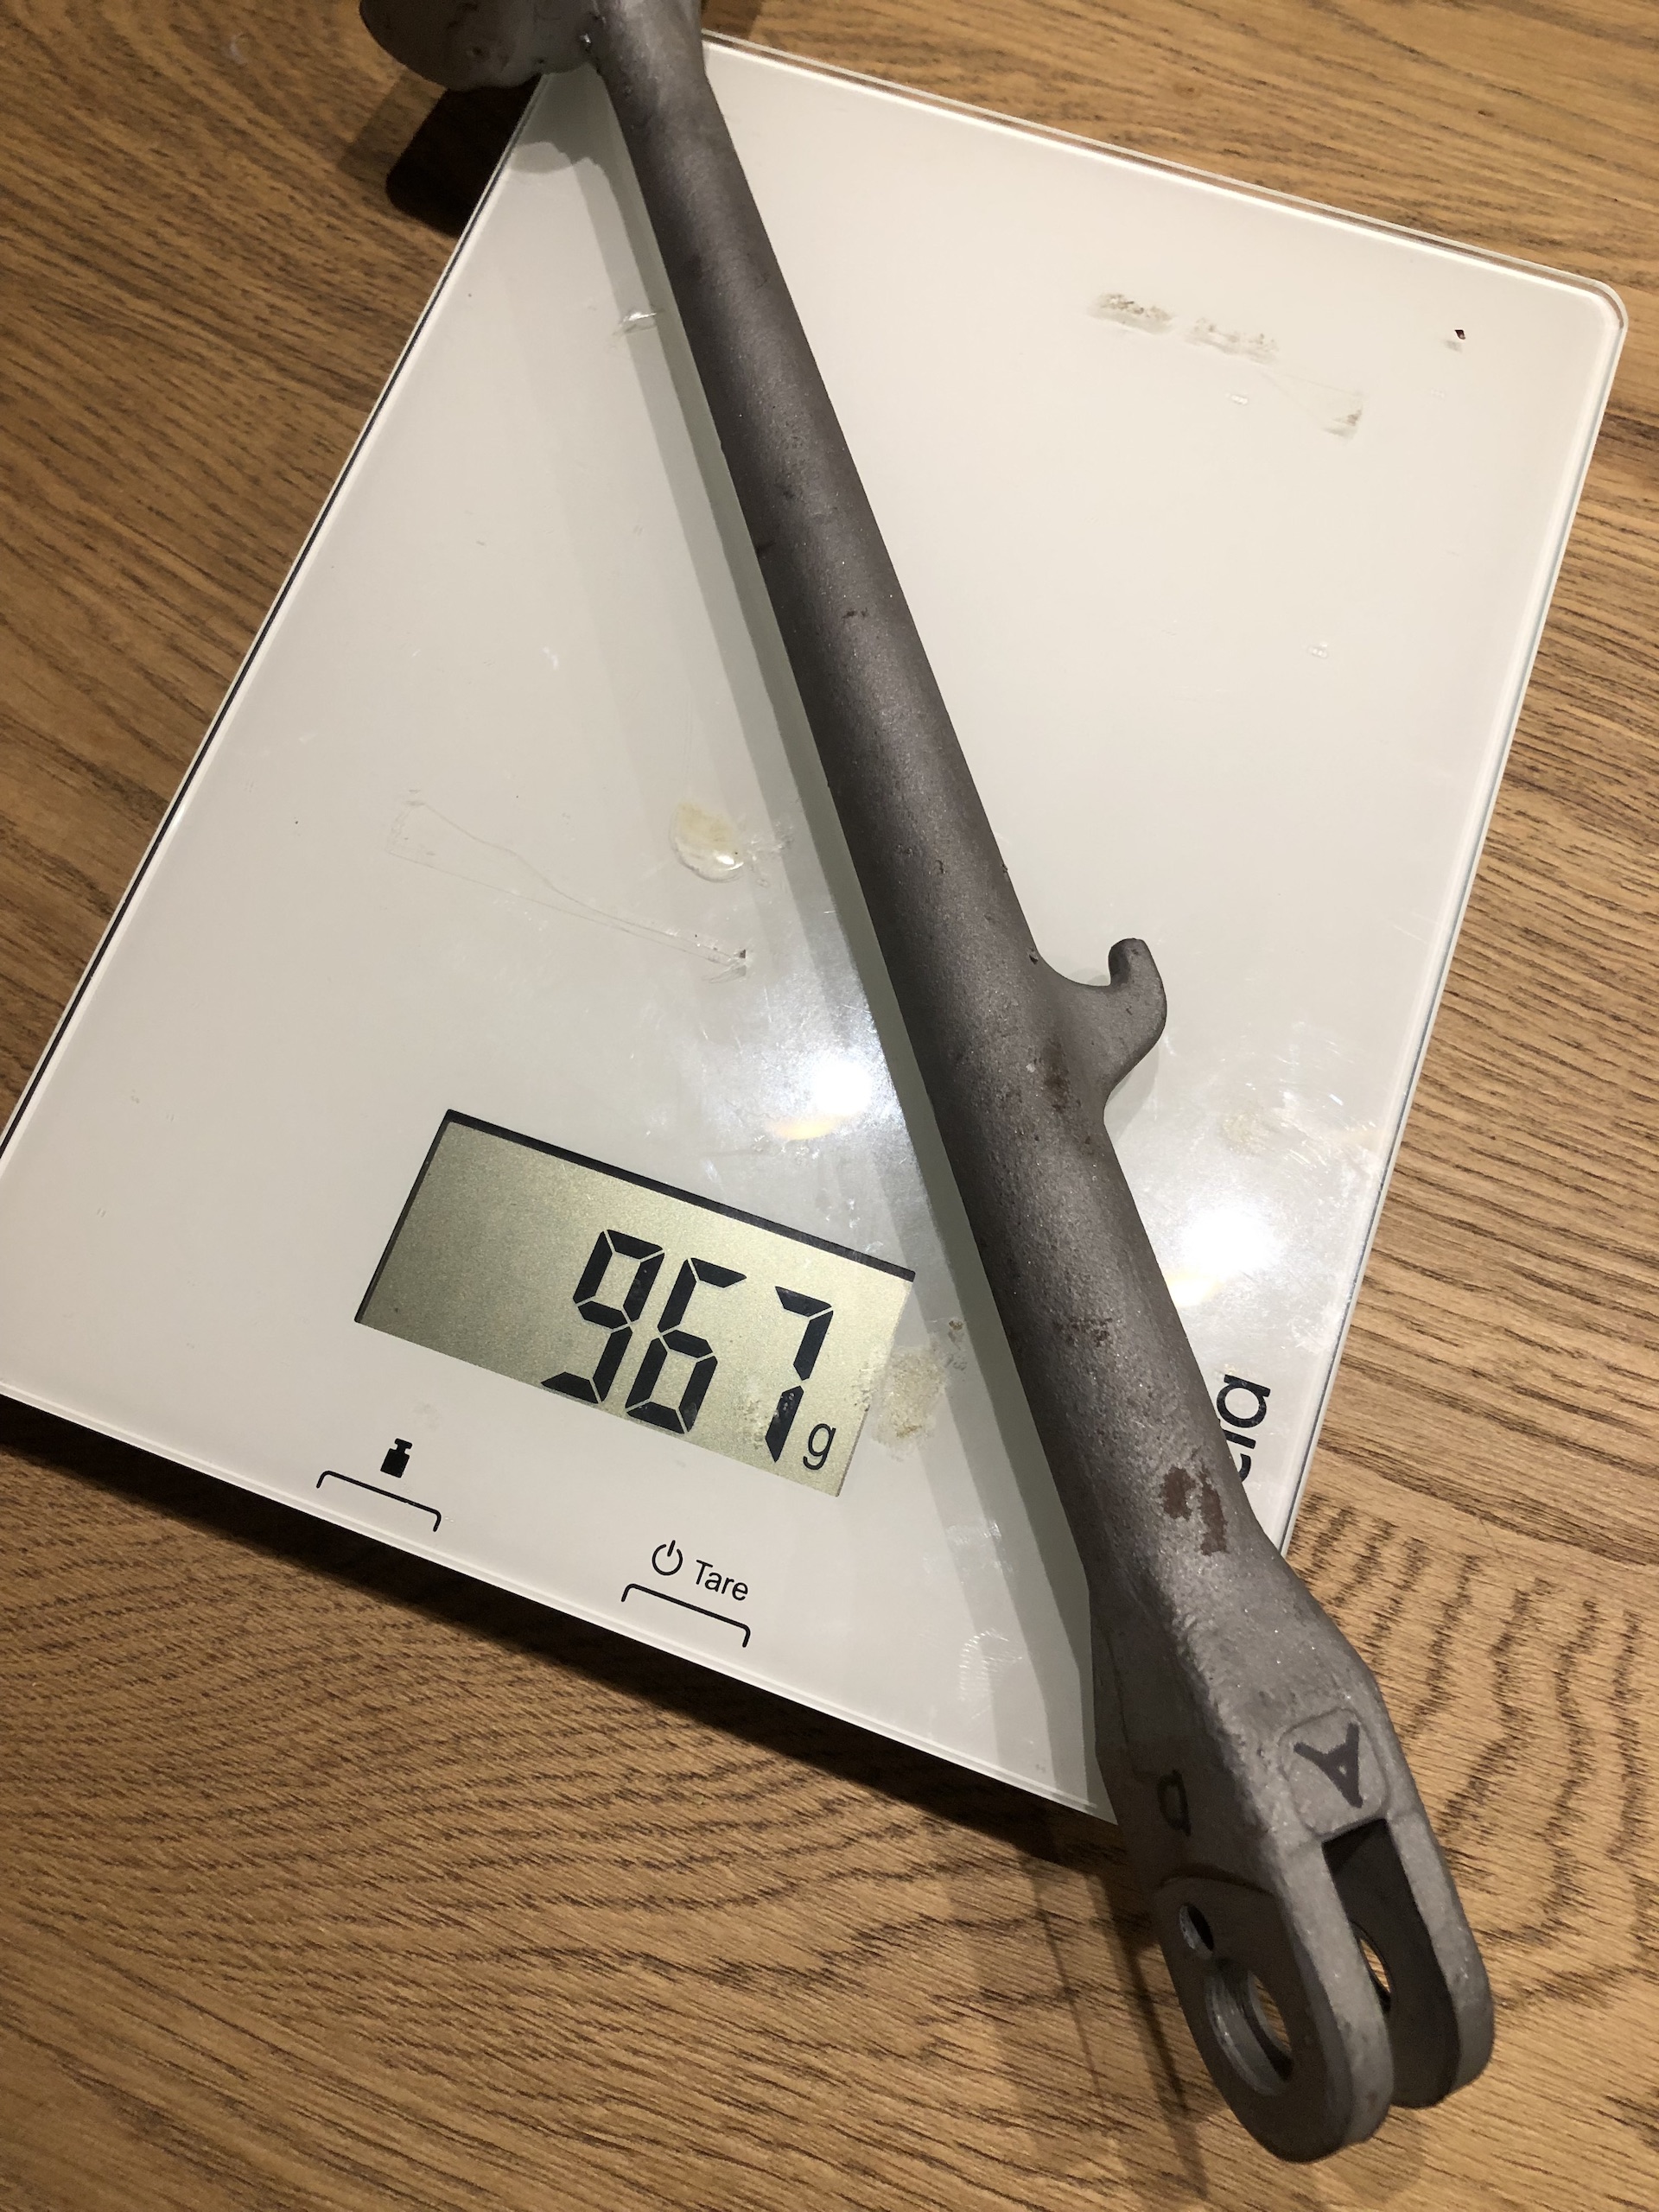
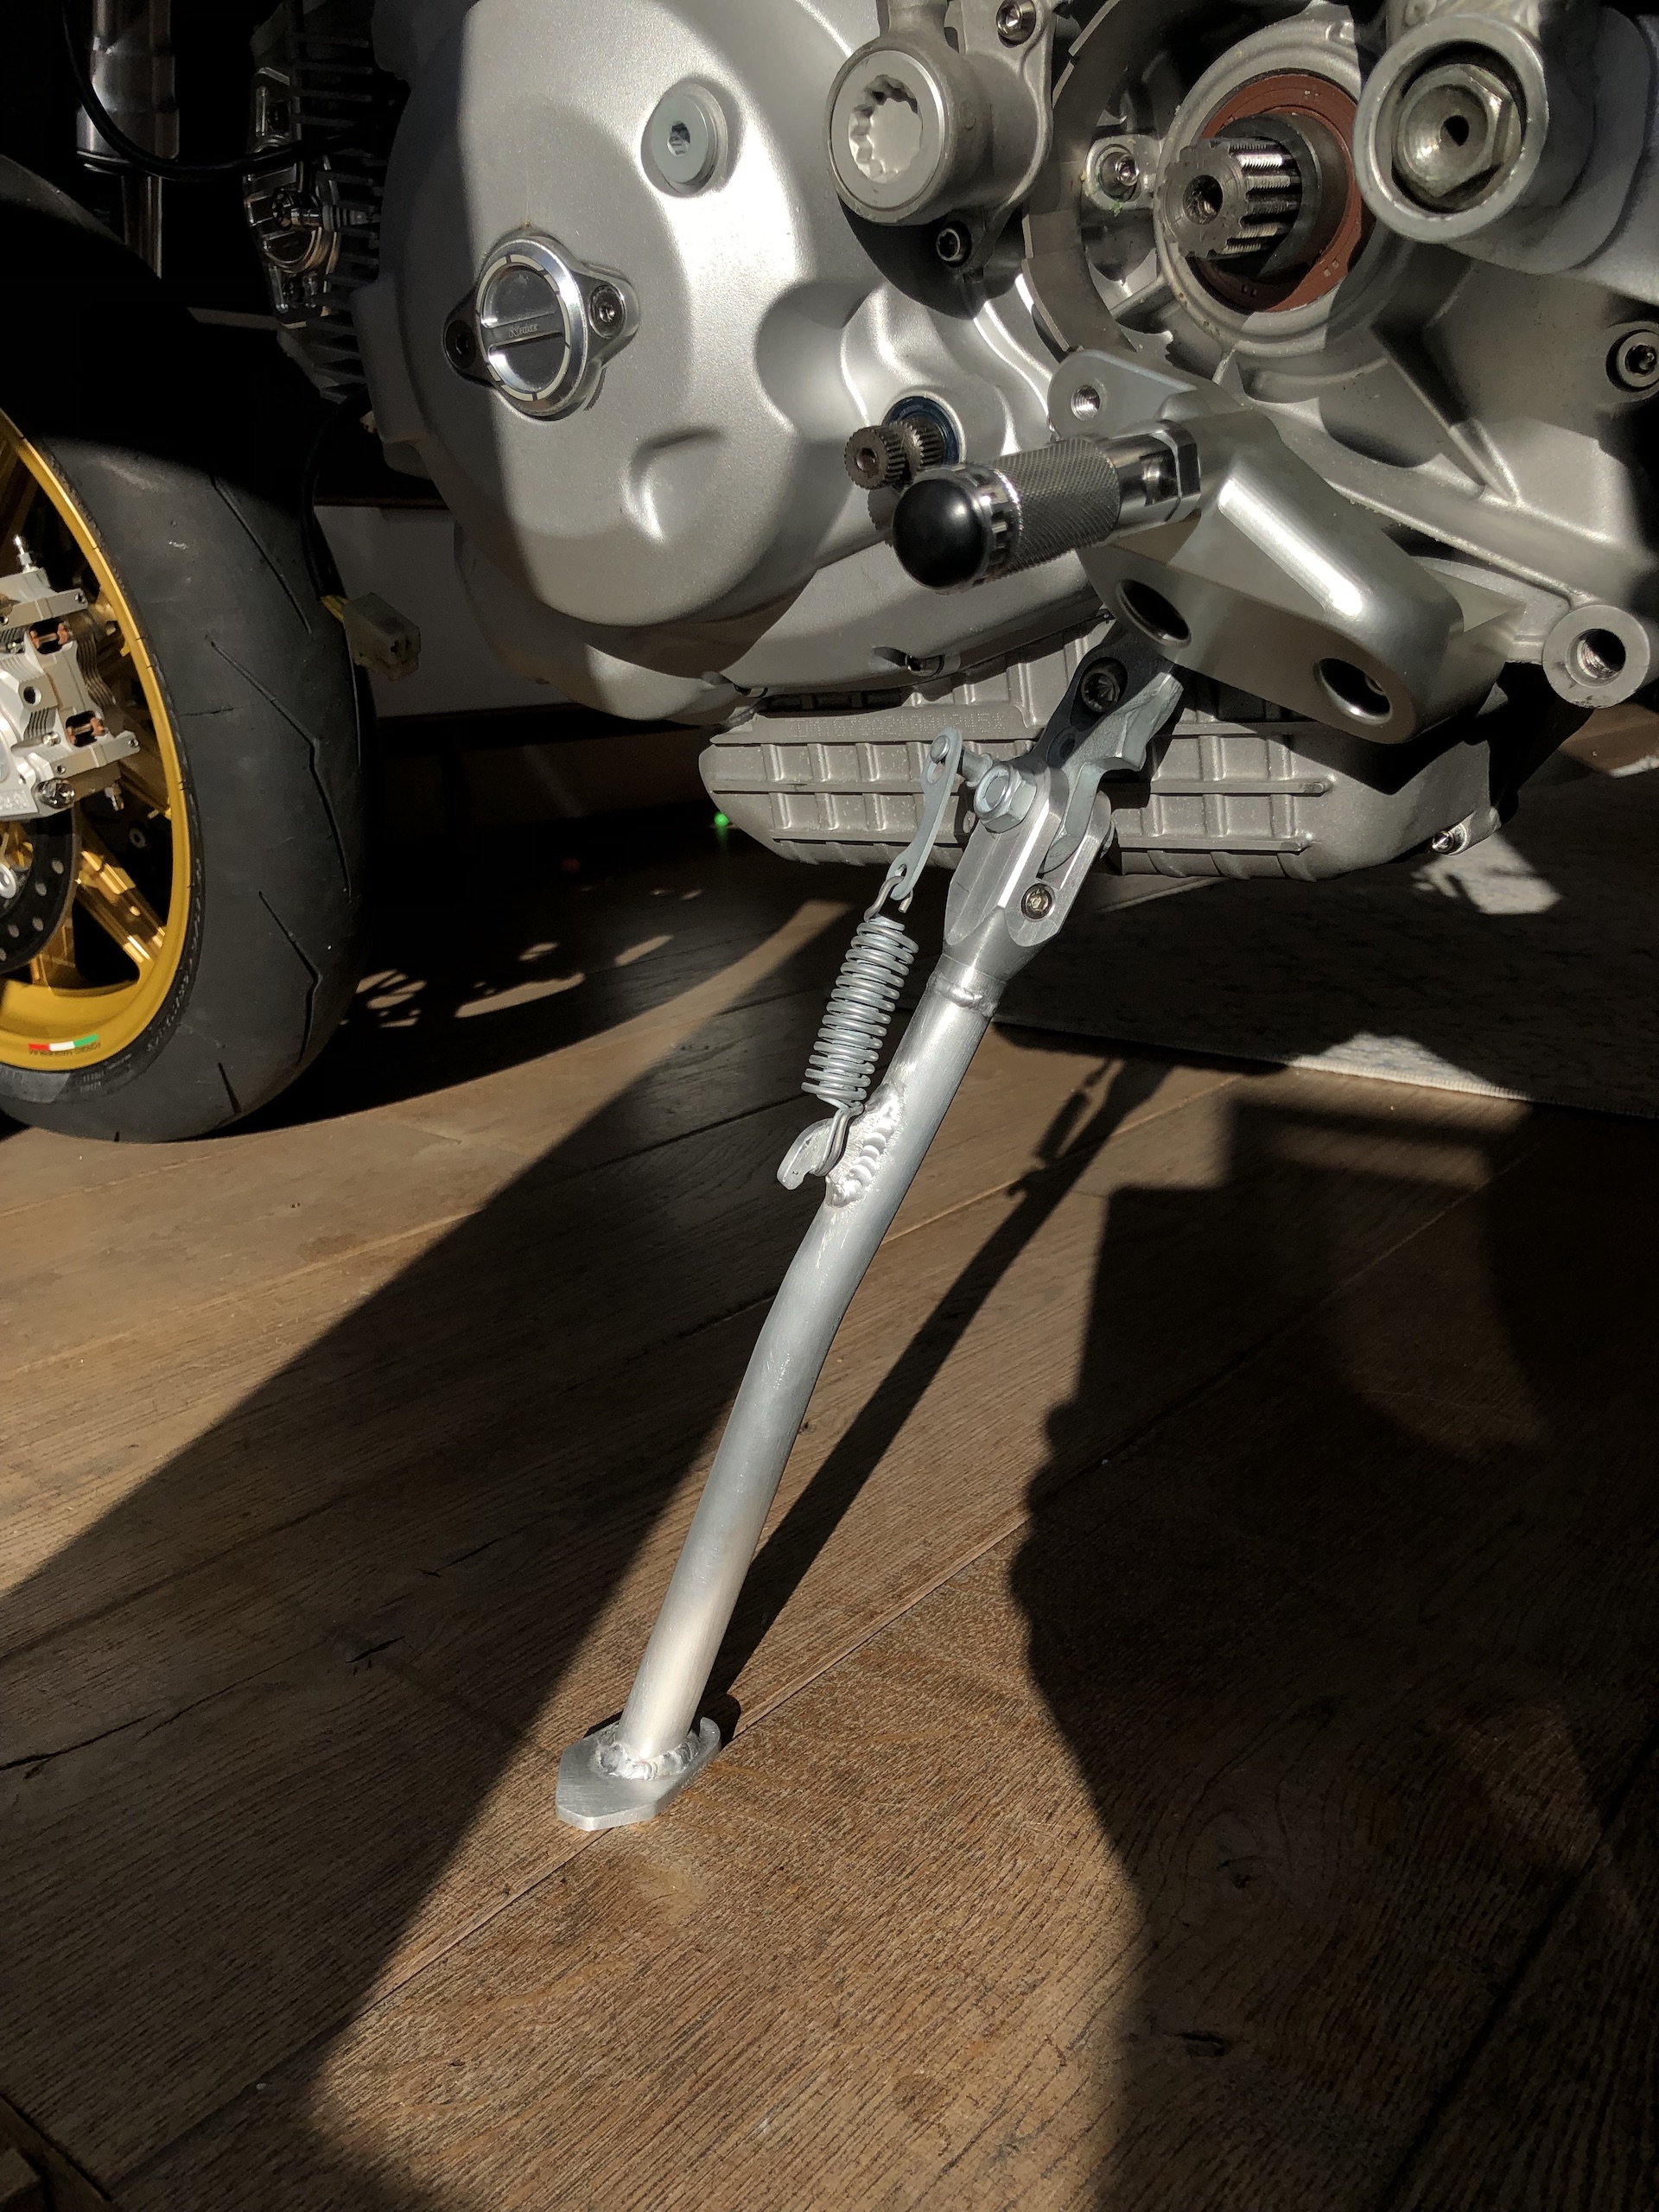
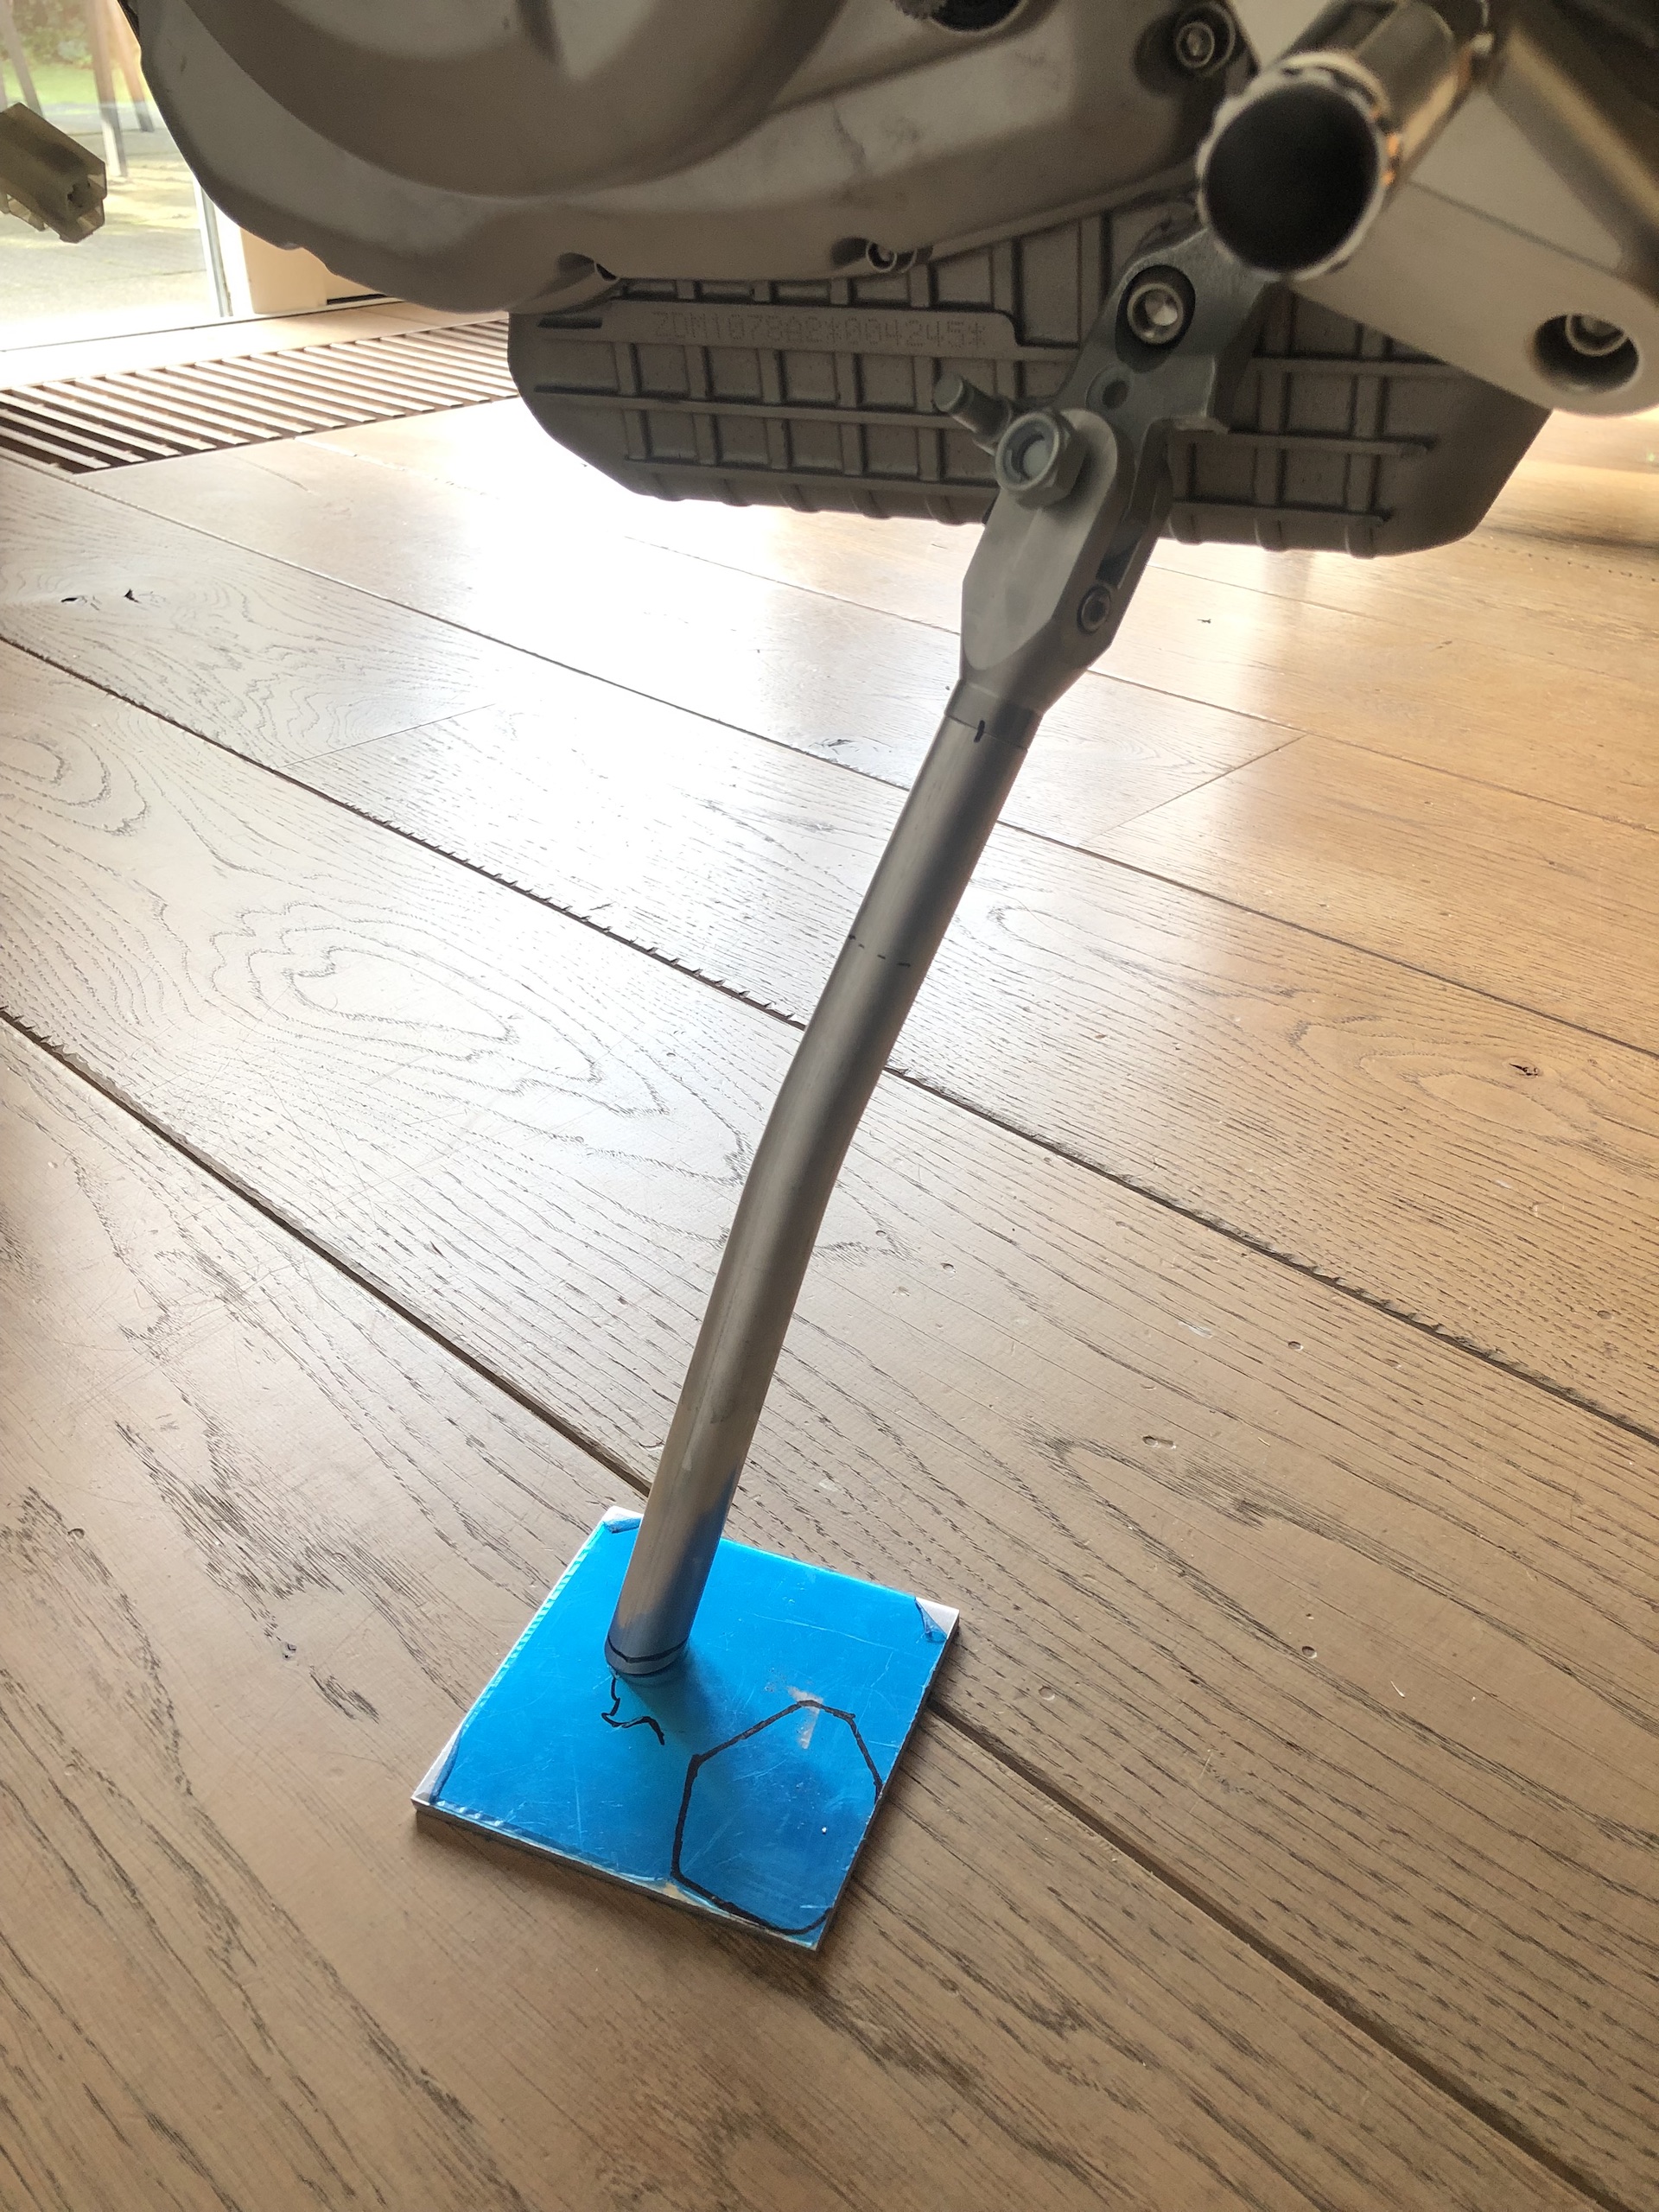
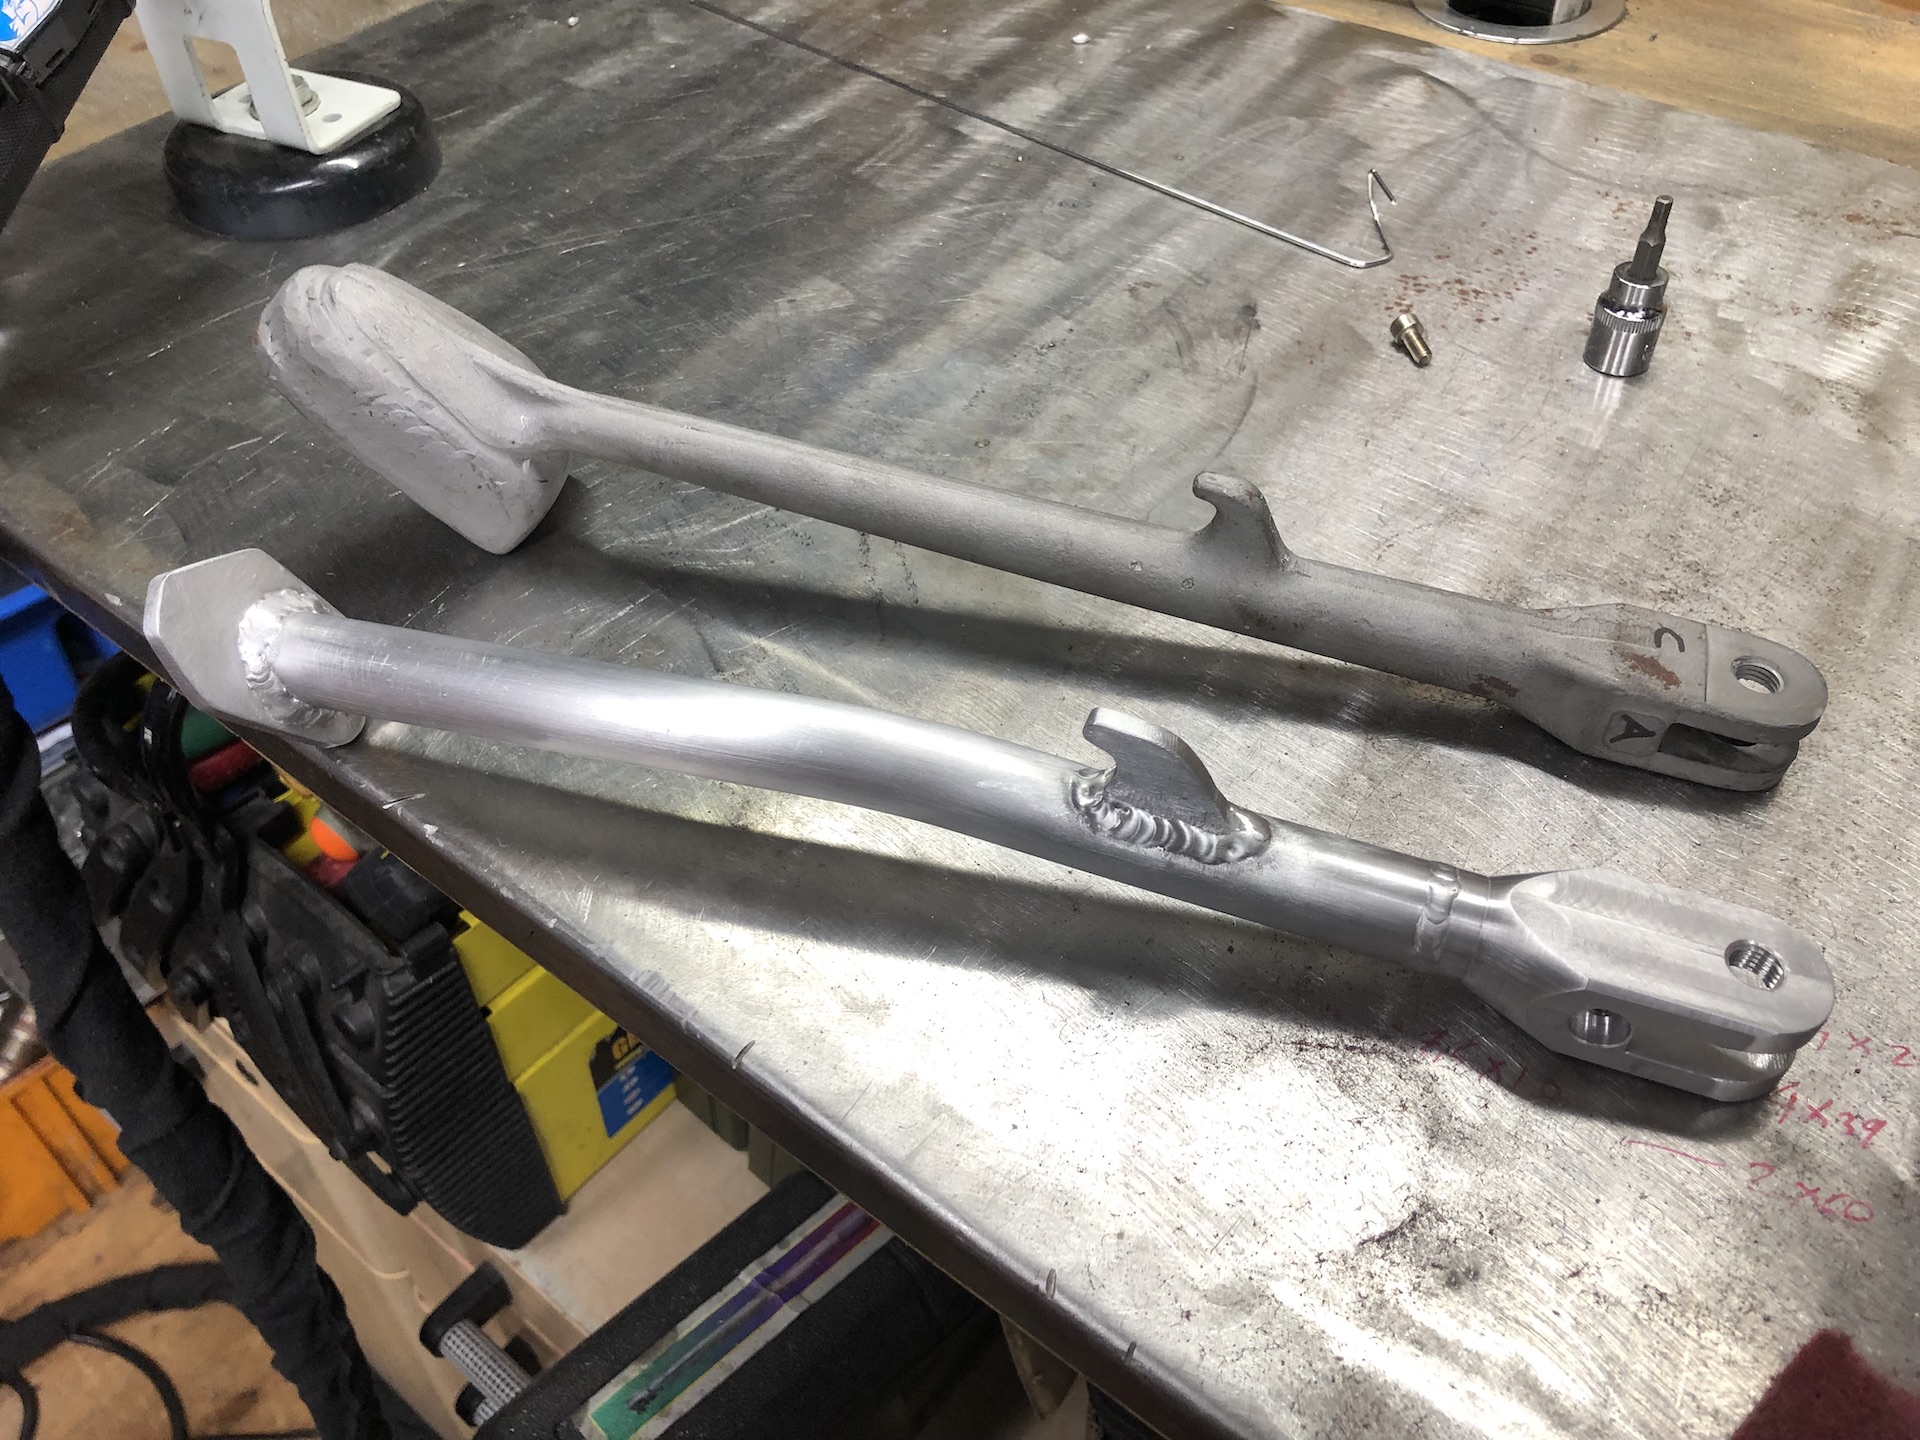
CUSTOM ALUMINIUM SIDE STAND
A whole diary of pictures while building this amazing aluminium side stand!
The original was just way to heavy and overkill. + this was a cheap way of saving weight (-780 gram)!
All made on the manual lathe and mill out of 6082 T6 aluminium. Looks amazing!


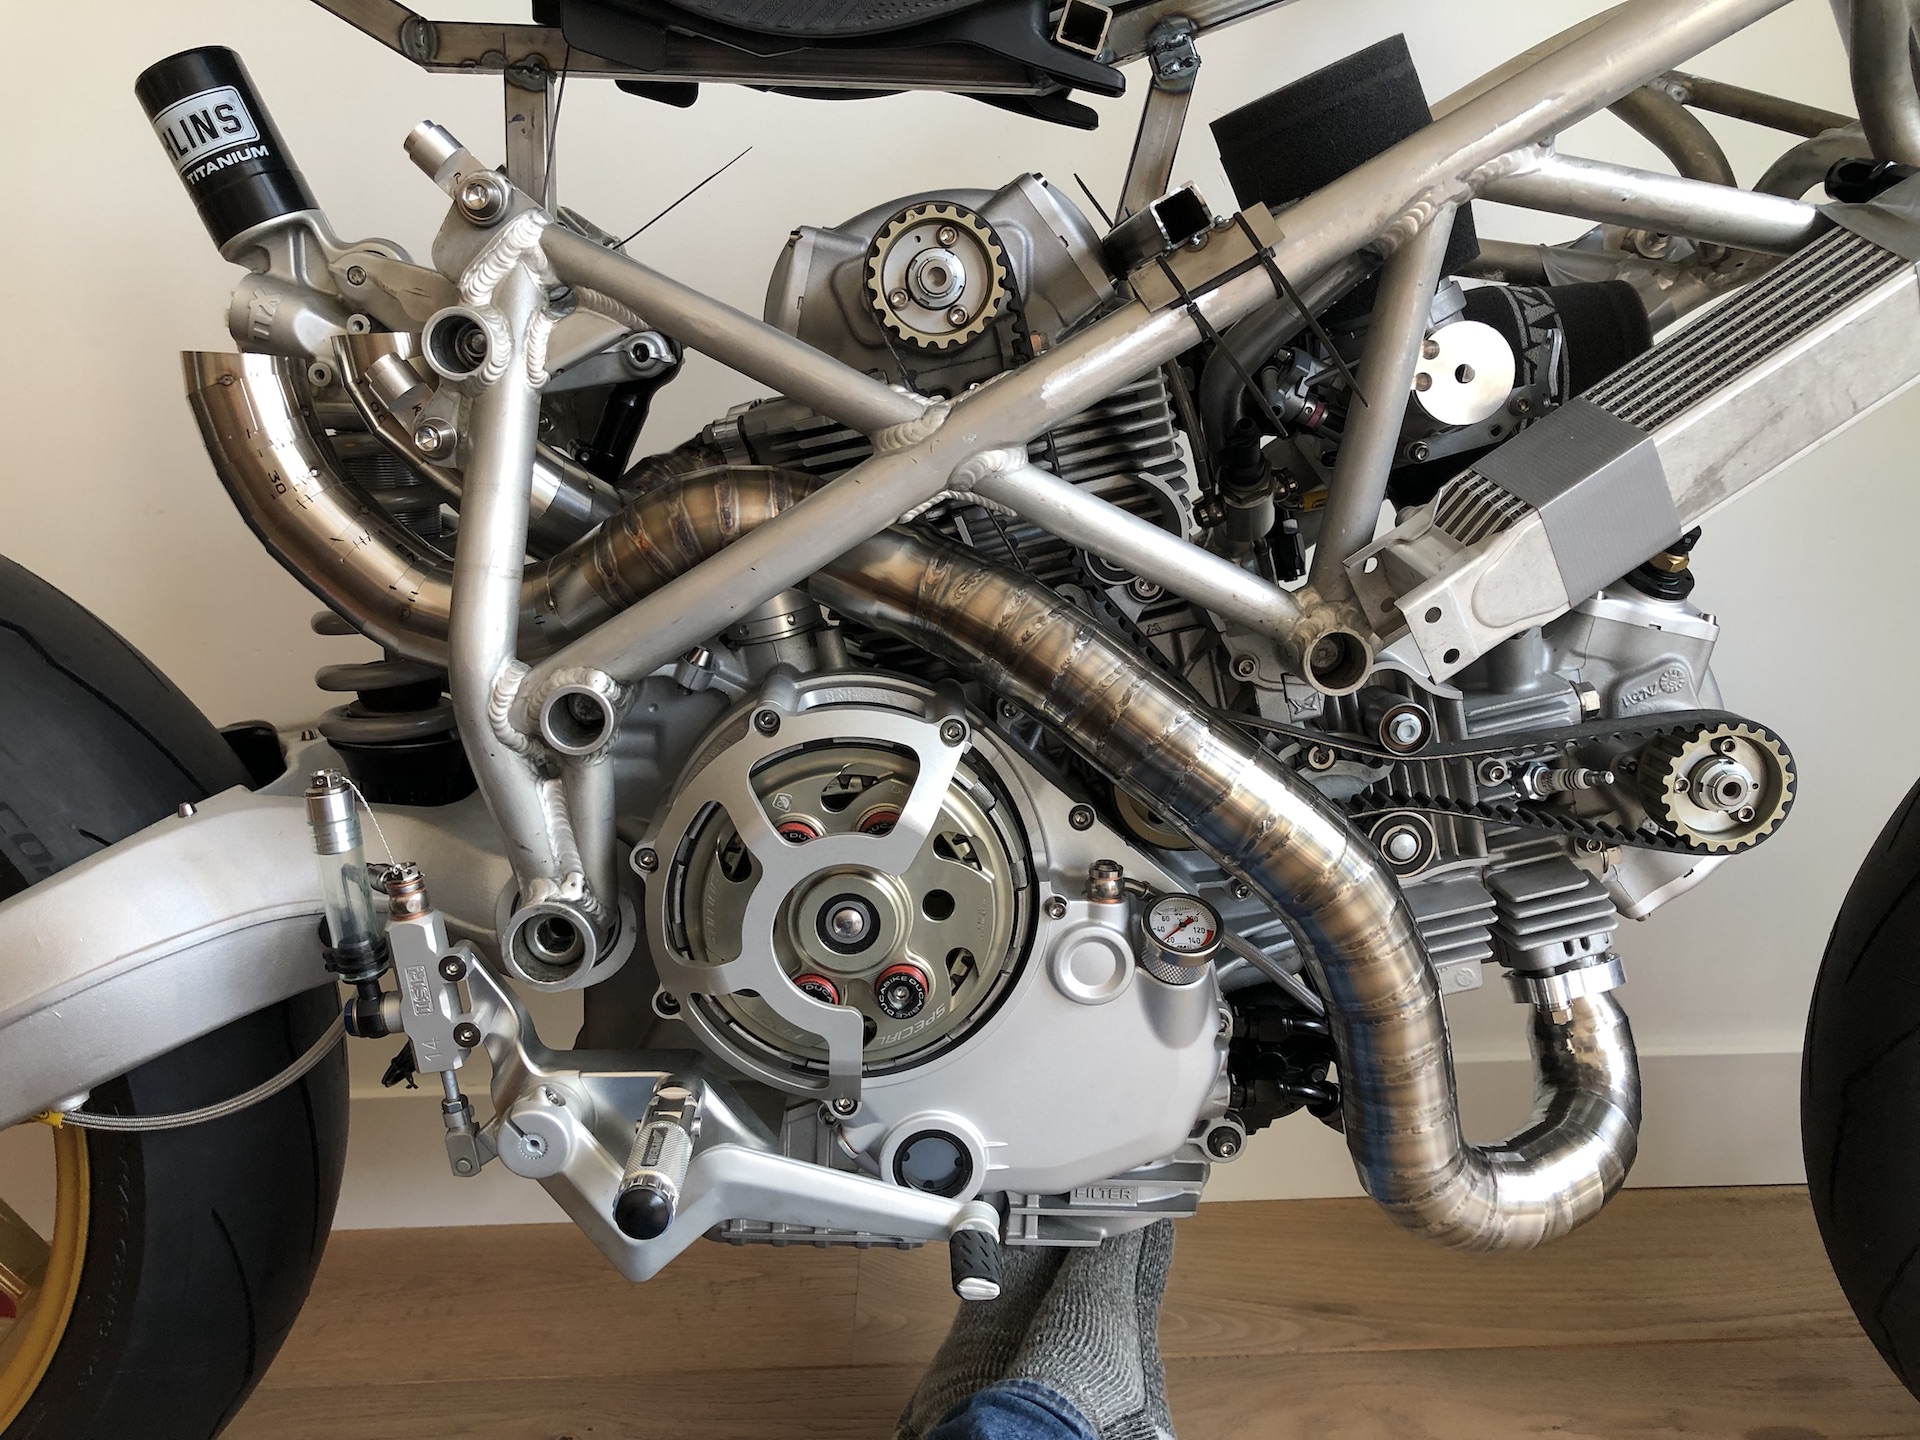
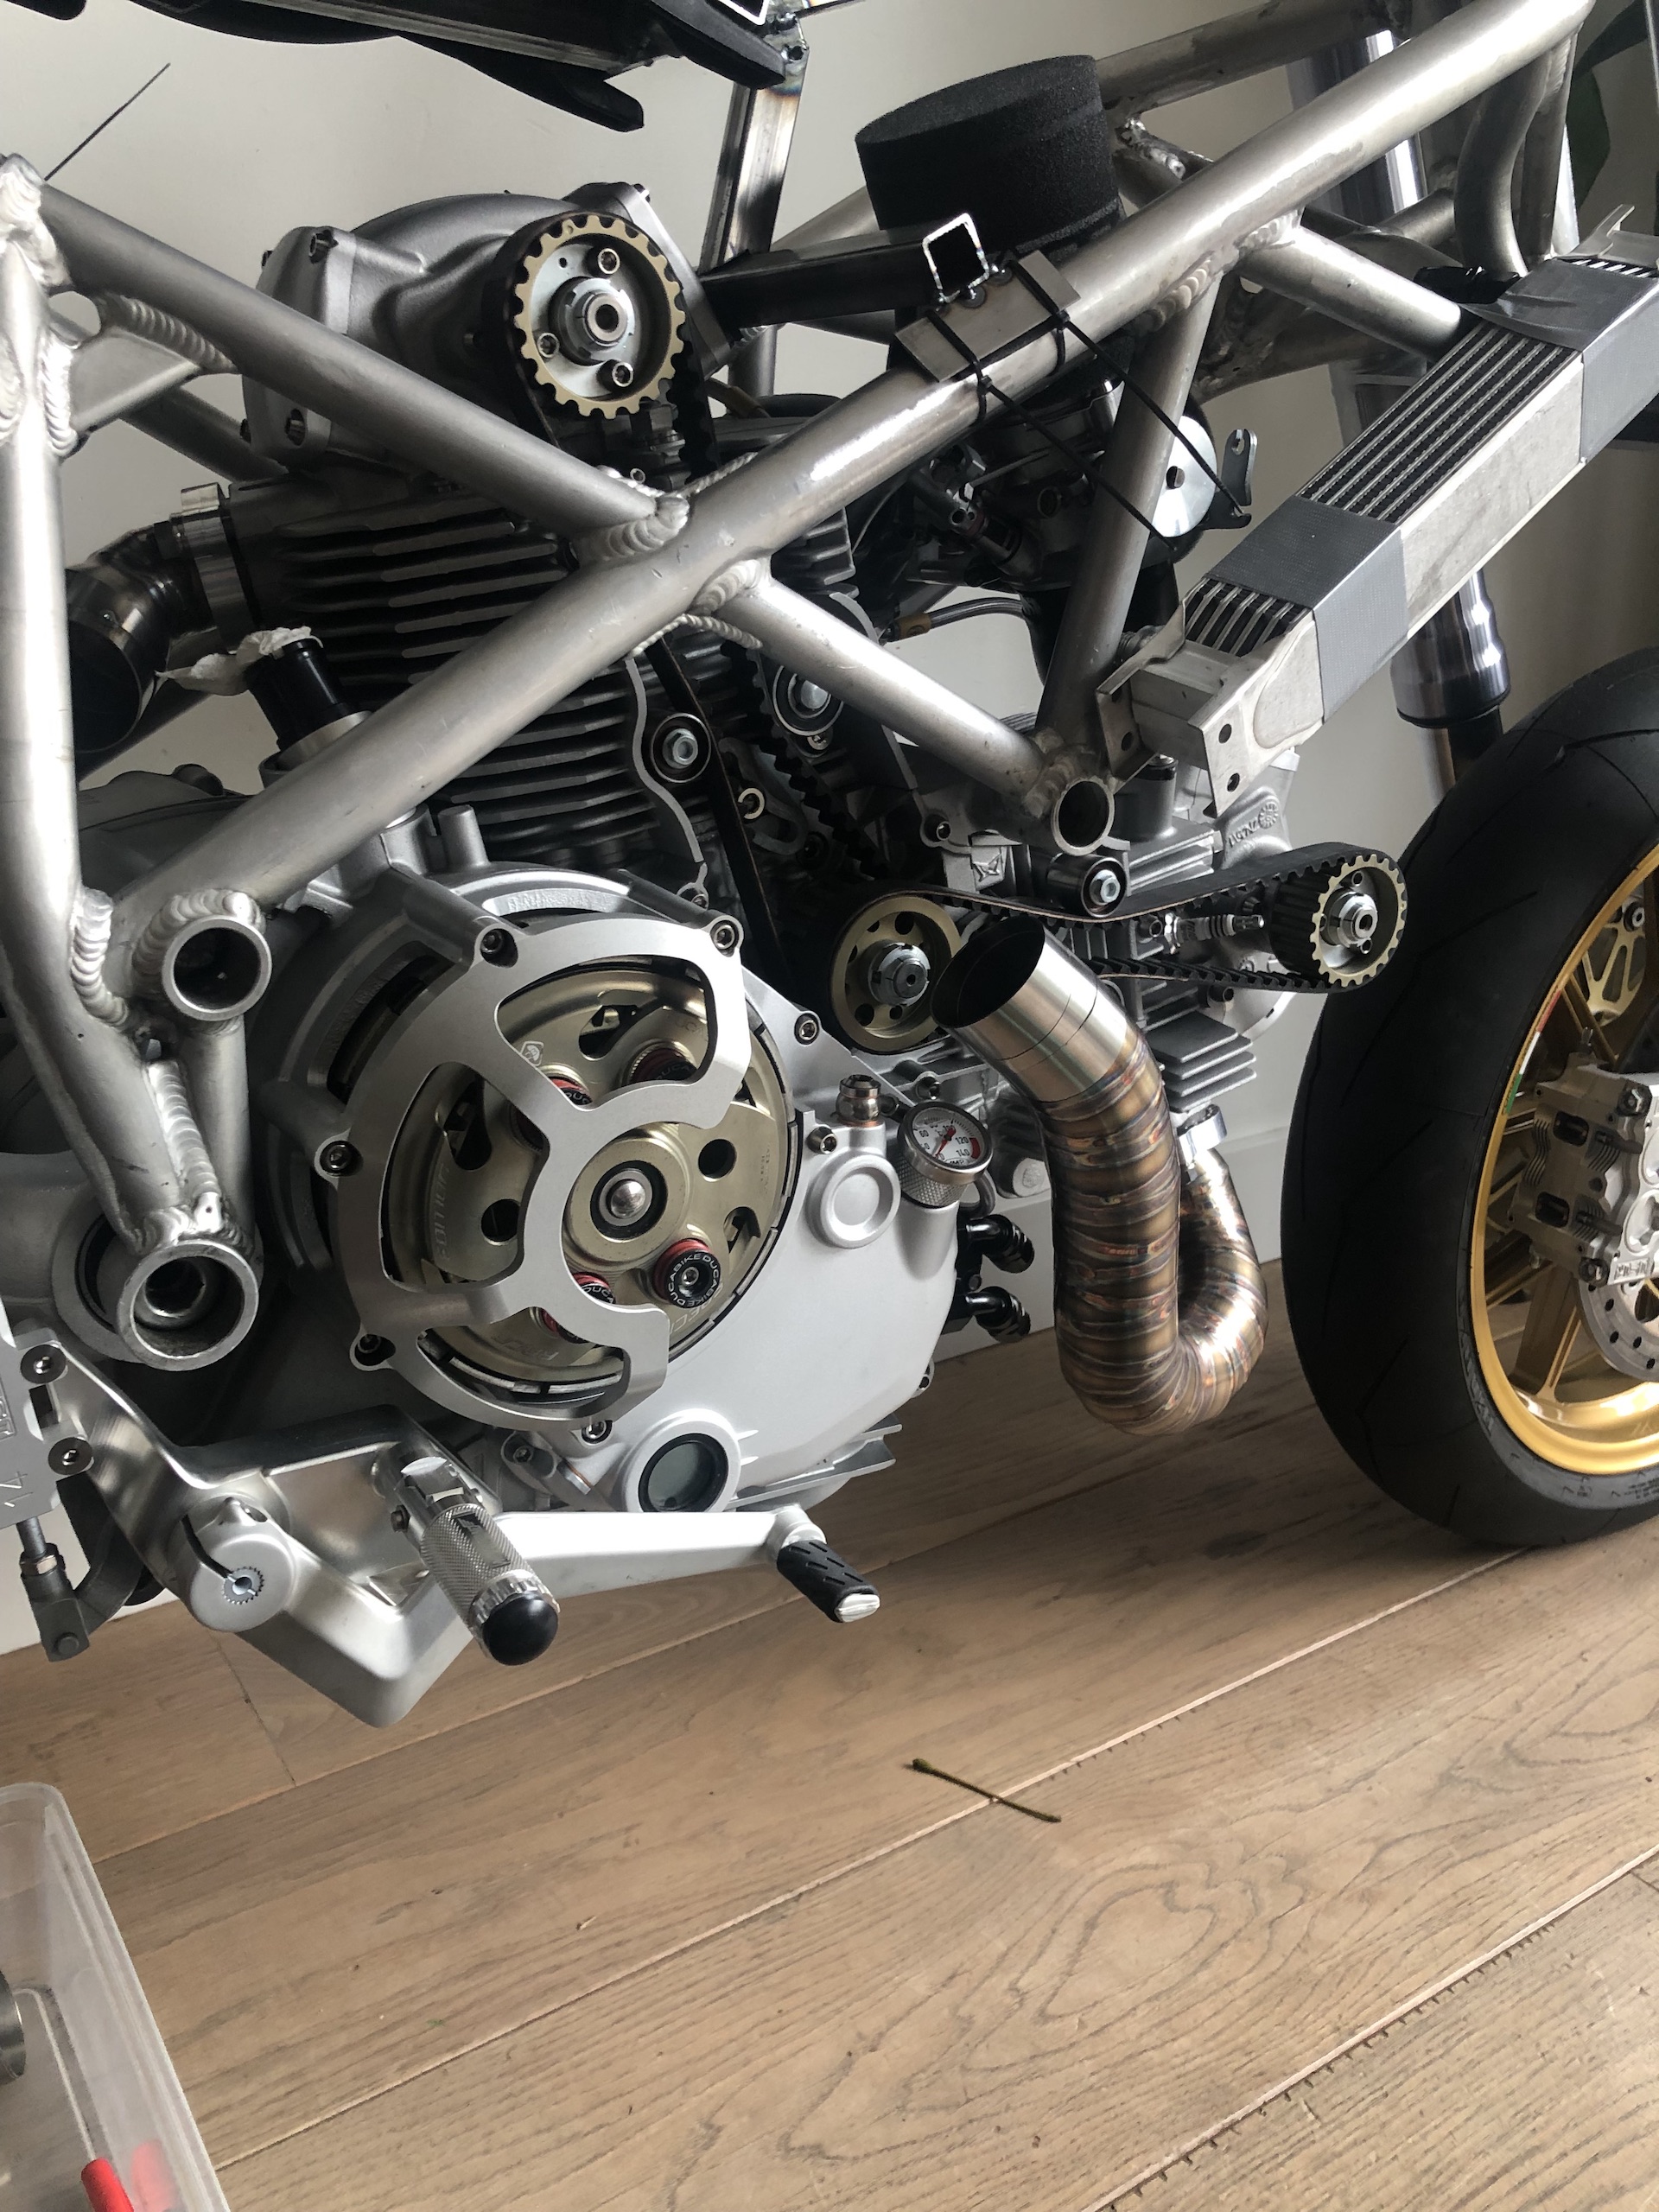
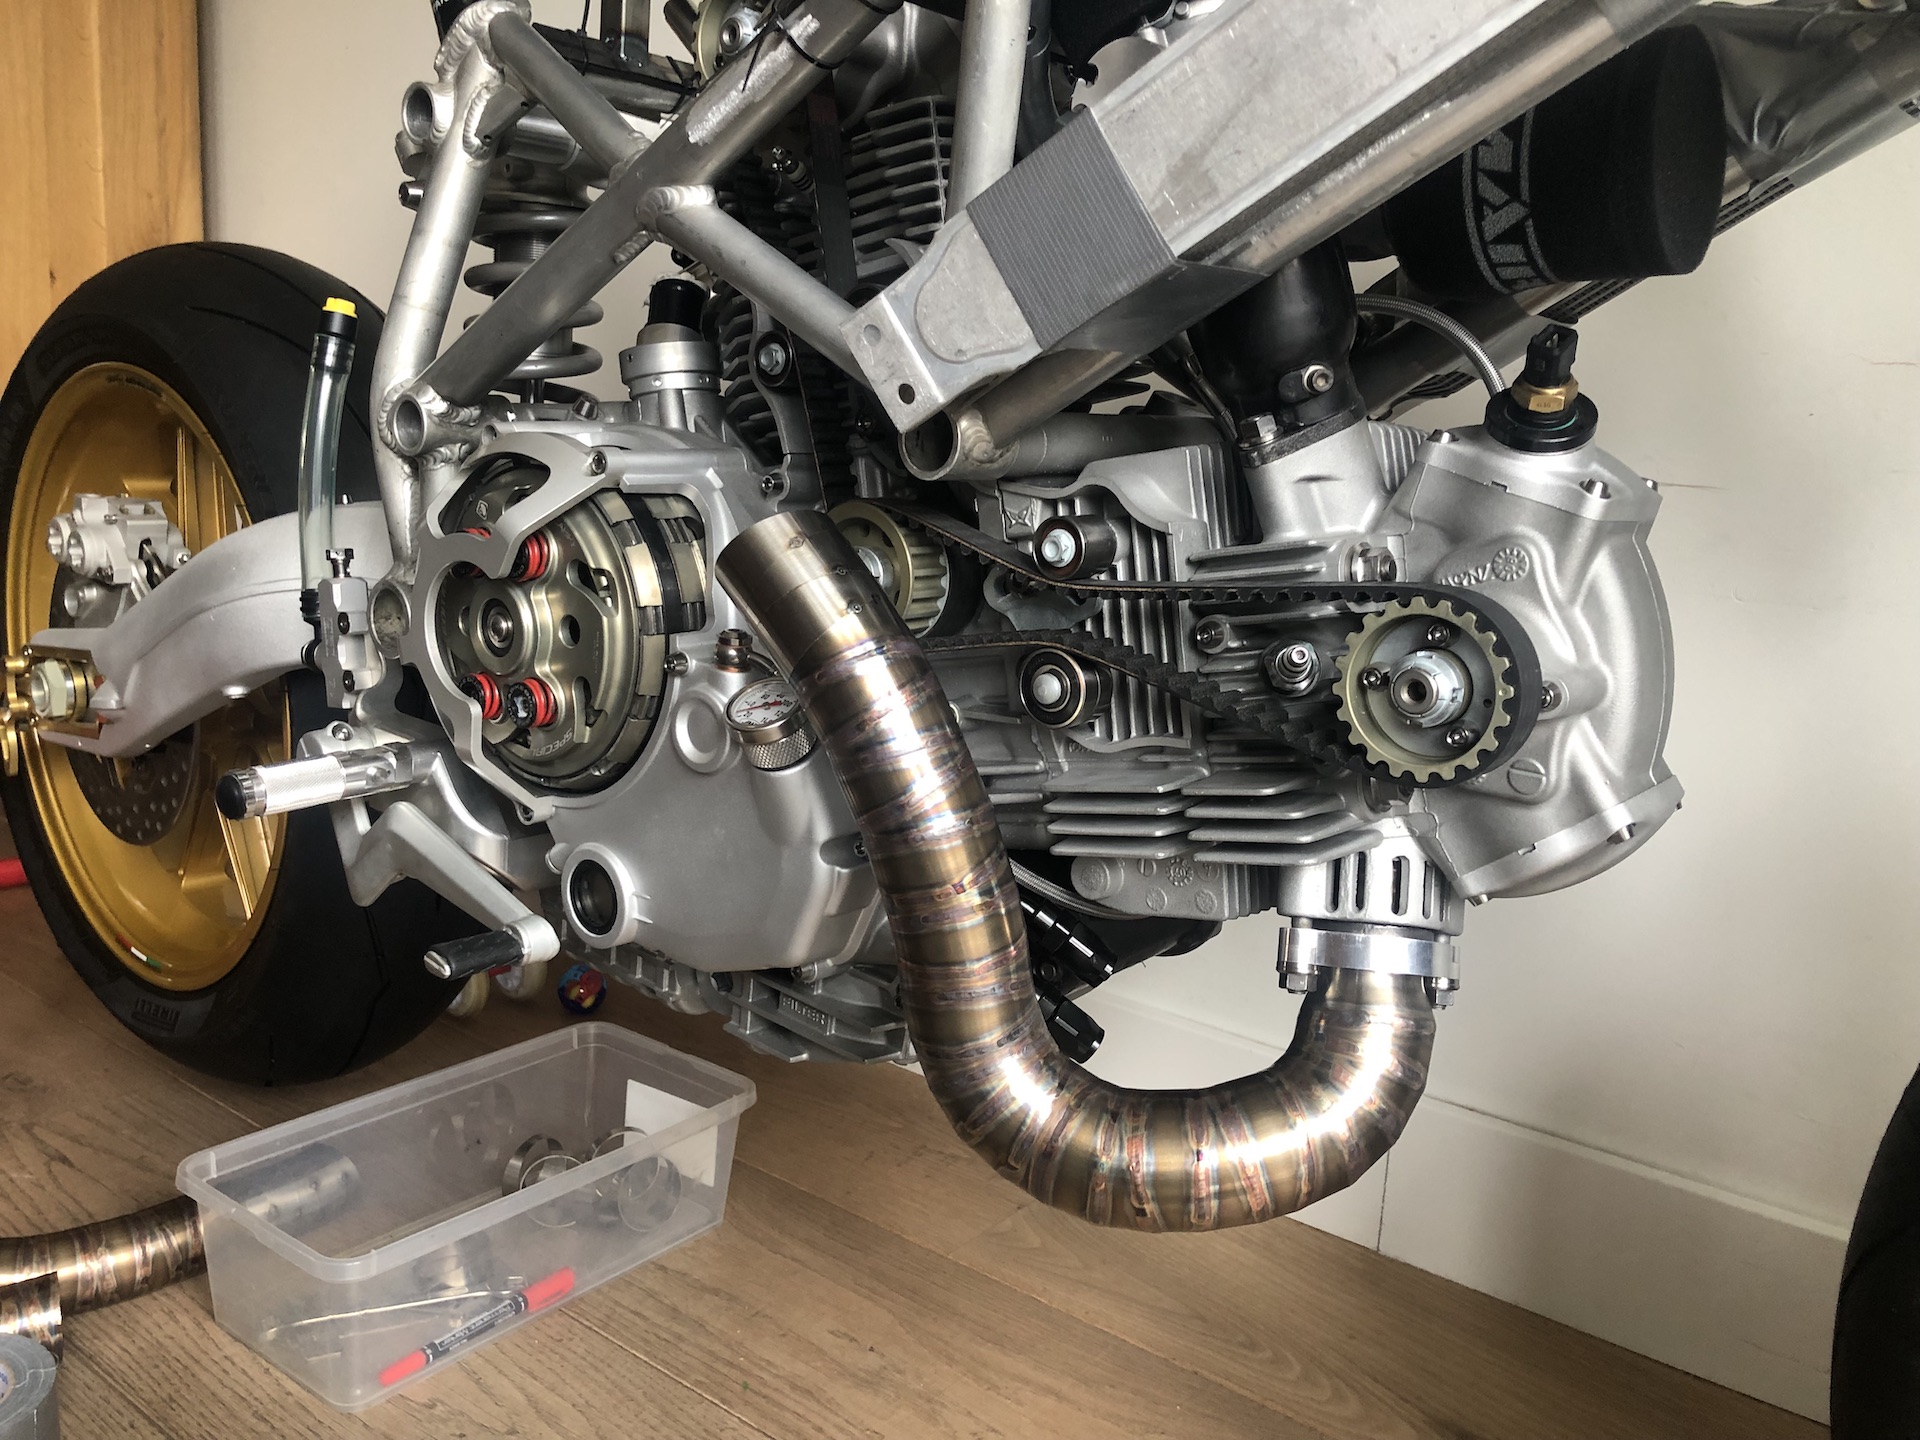
EXHAUST PART 3.
As seen in a previous post I didnt like the look of the first atempt at building the exhaust. I made another attempt but didnt finish it yet. Now i have! Atleast till the start of the subframe. Looks way better!
1 thing I am somewhat worried about is heat. The exhaust runs close to everything, so probably will have to fabricate some custom carbon fiber heat-guards that are lined with heat reflective tape. Will see when the bike is running :).
One of the first next steps is to finish the aluminium subframe.
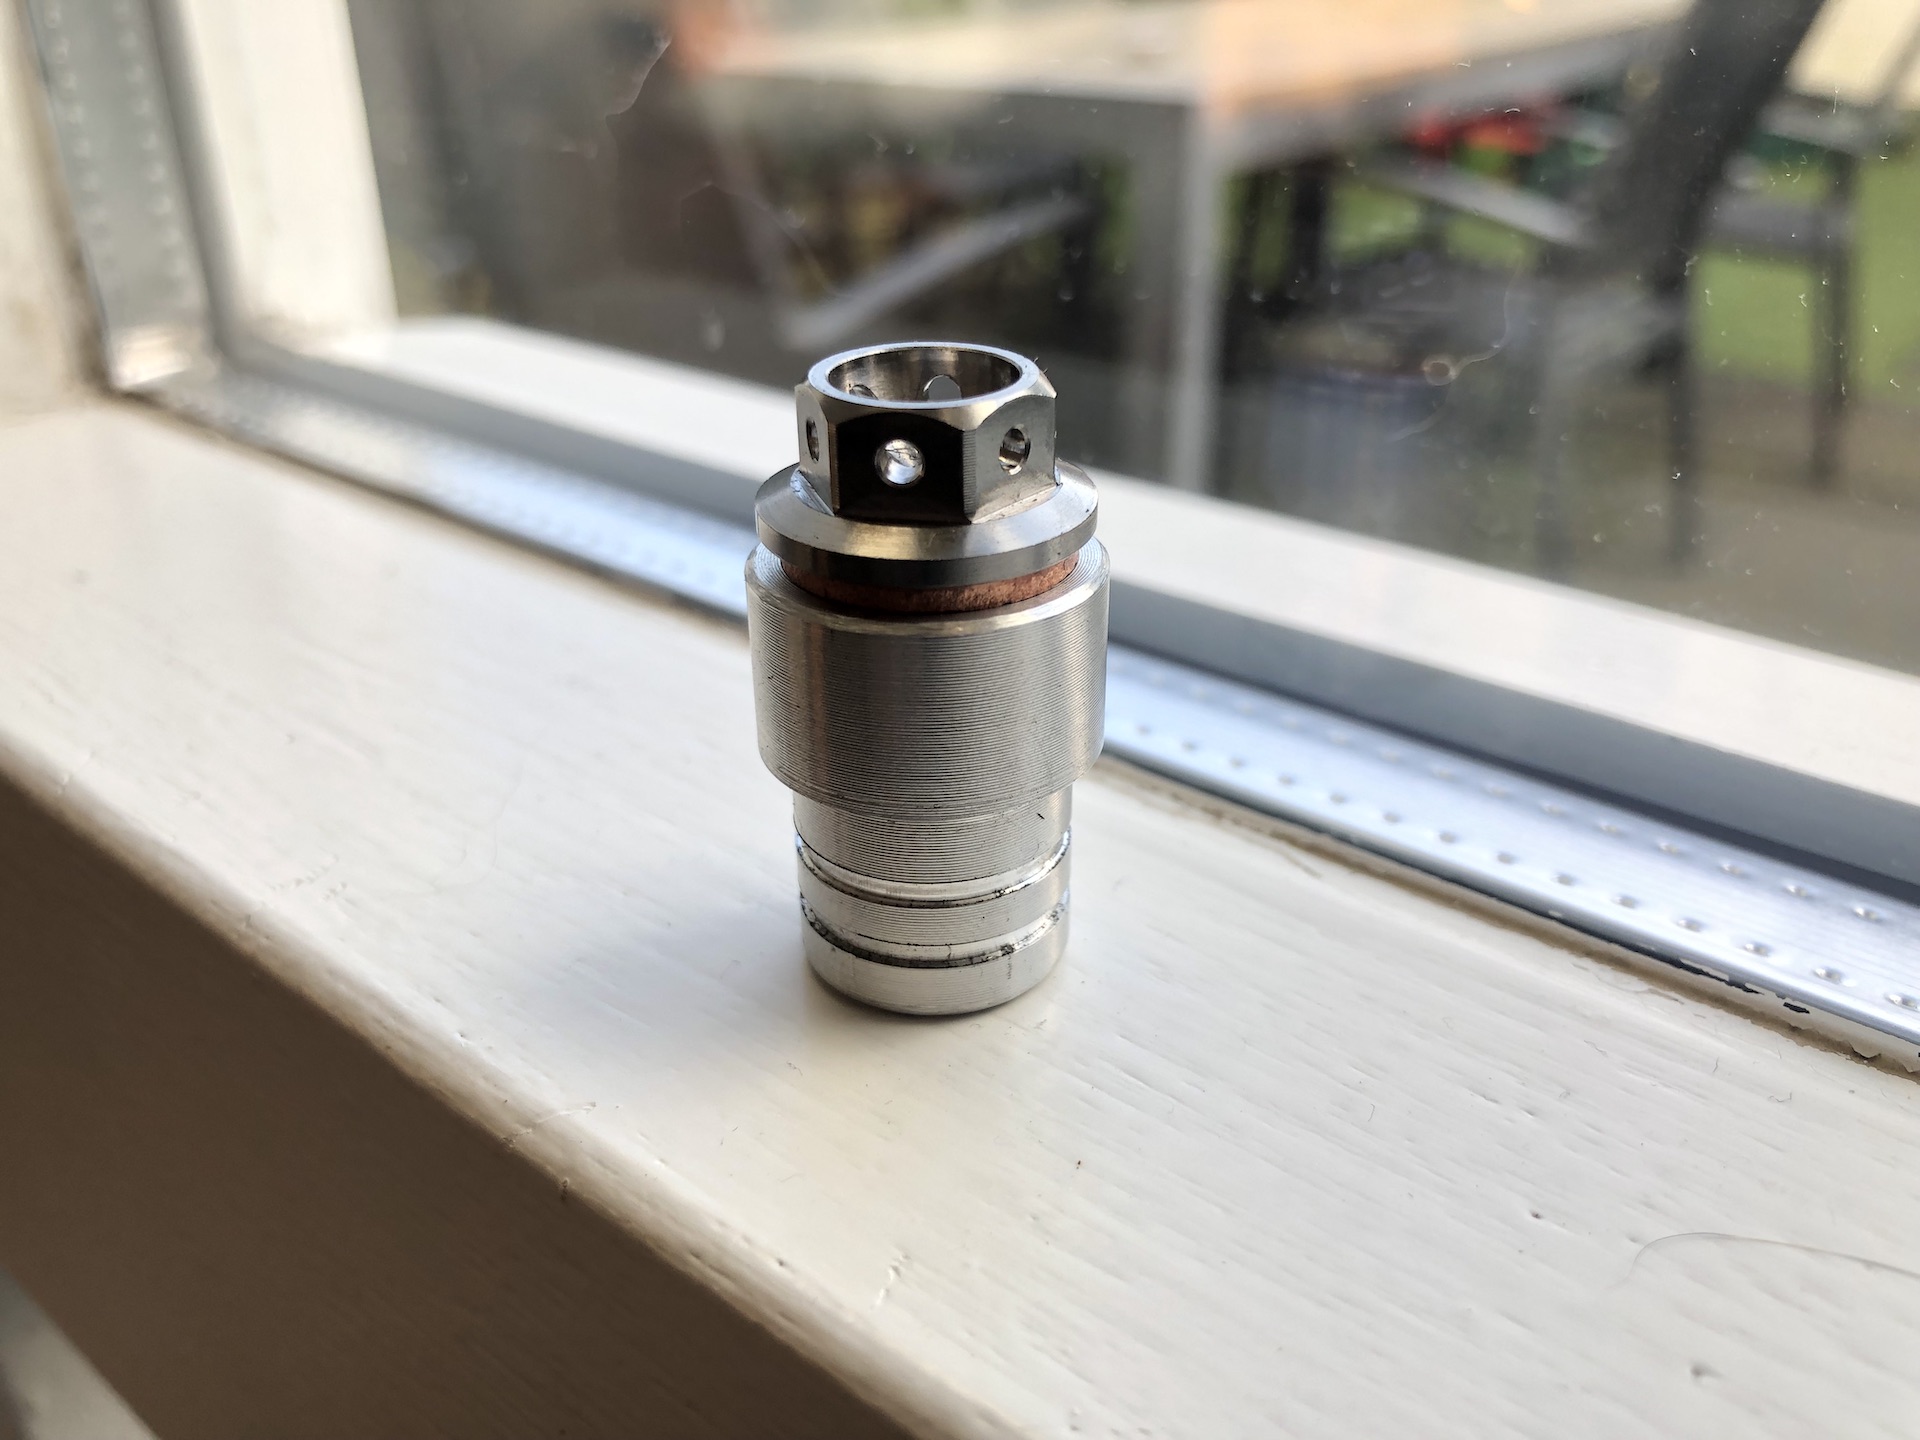
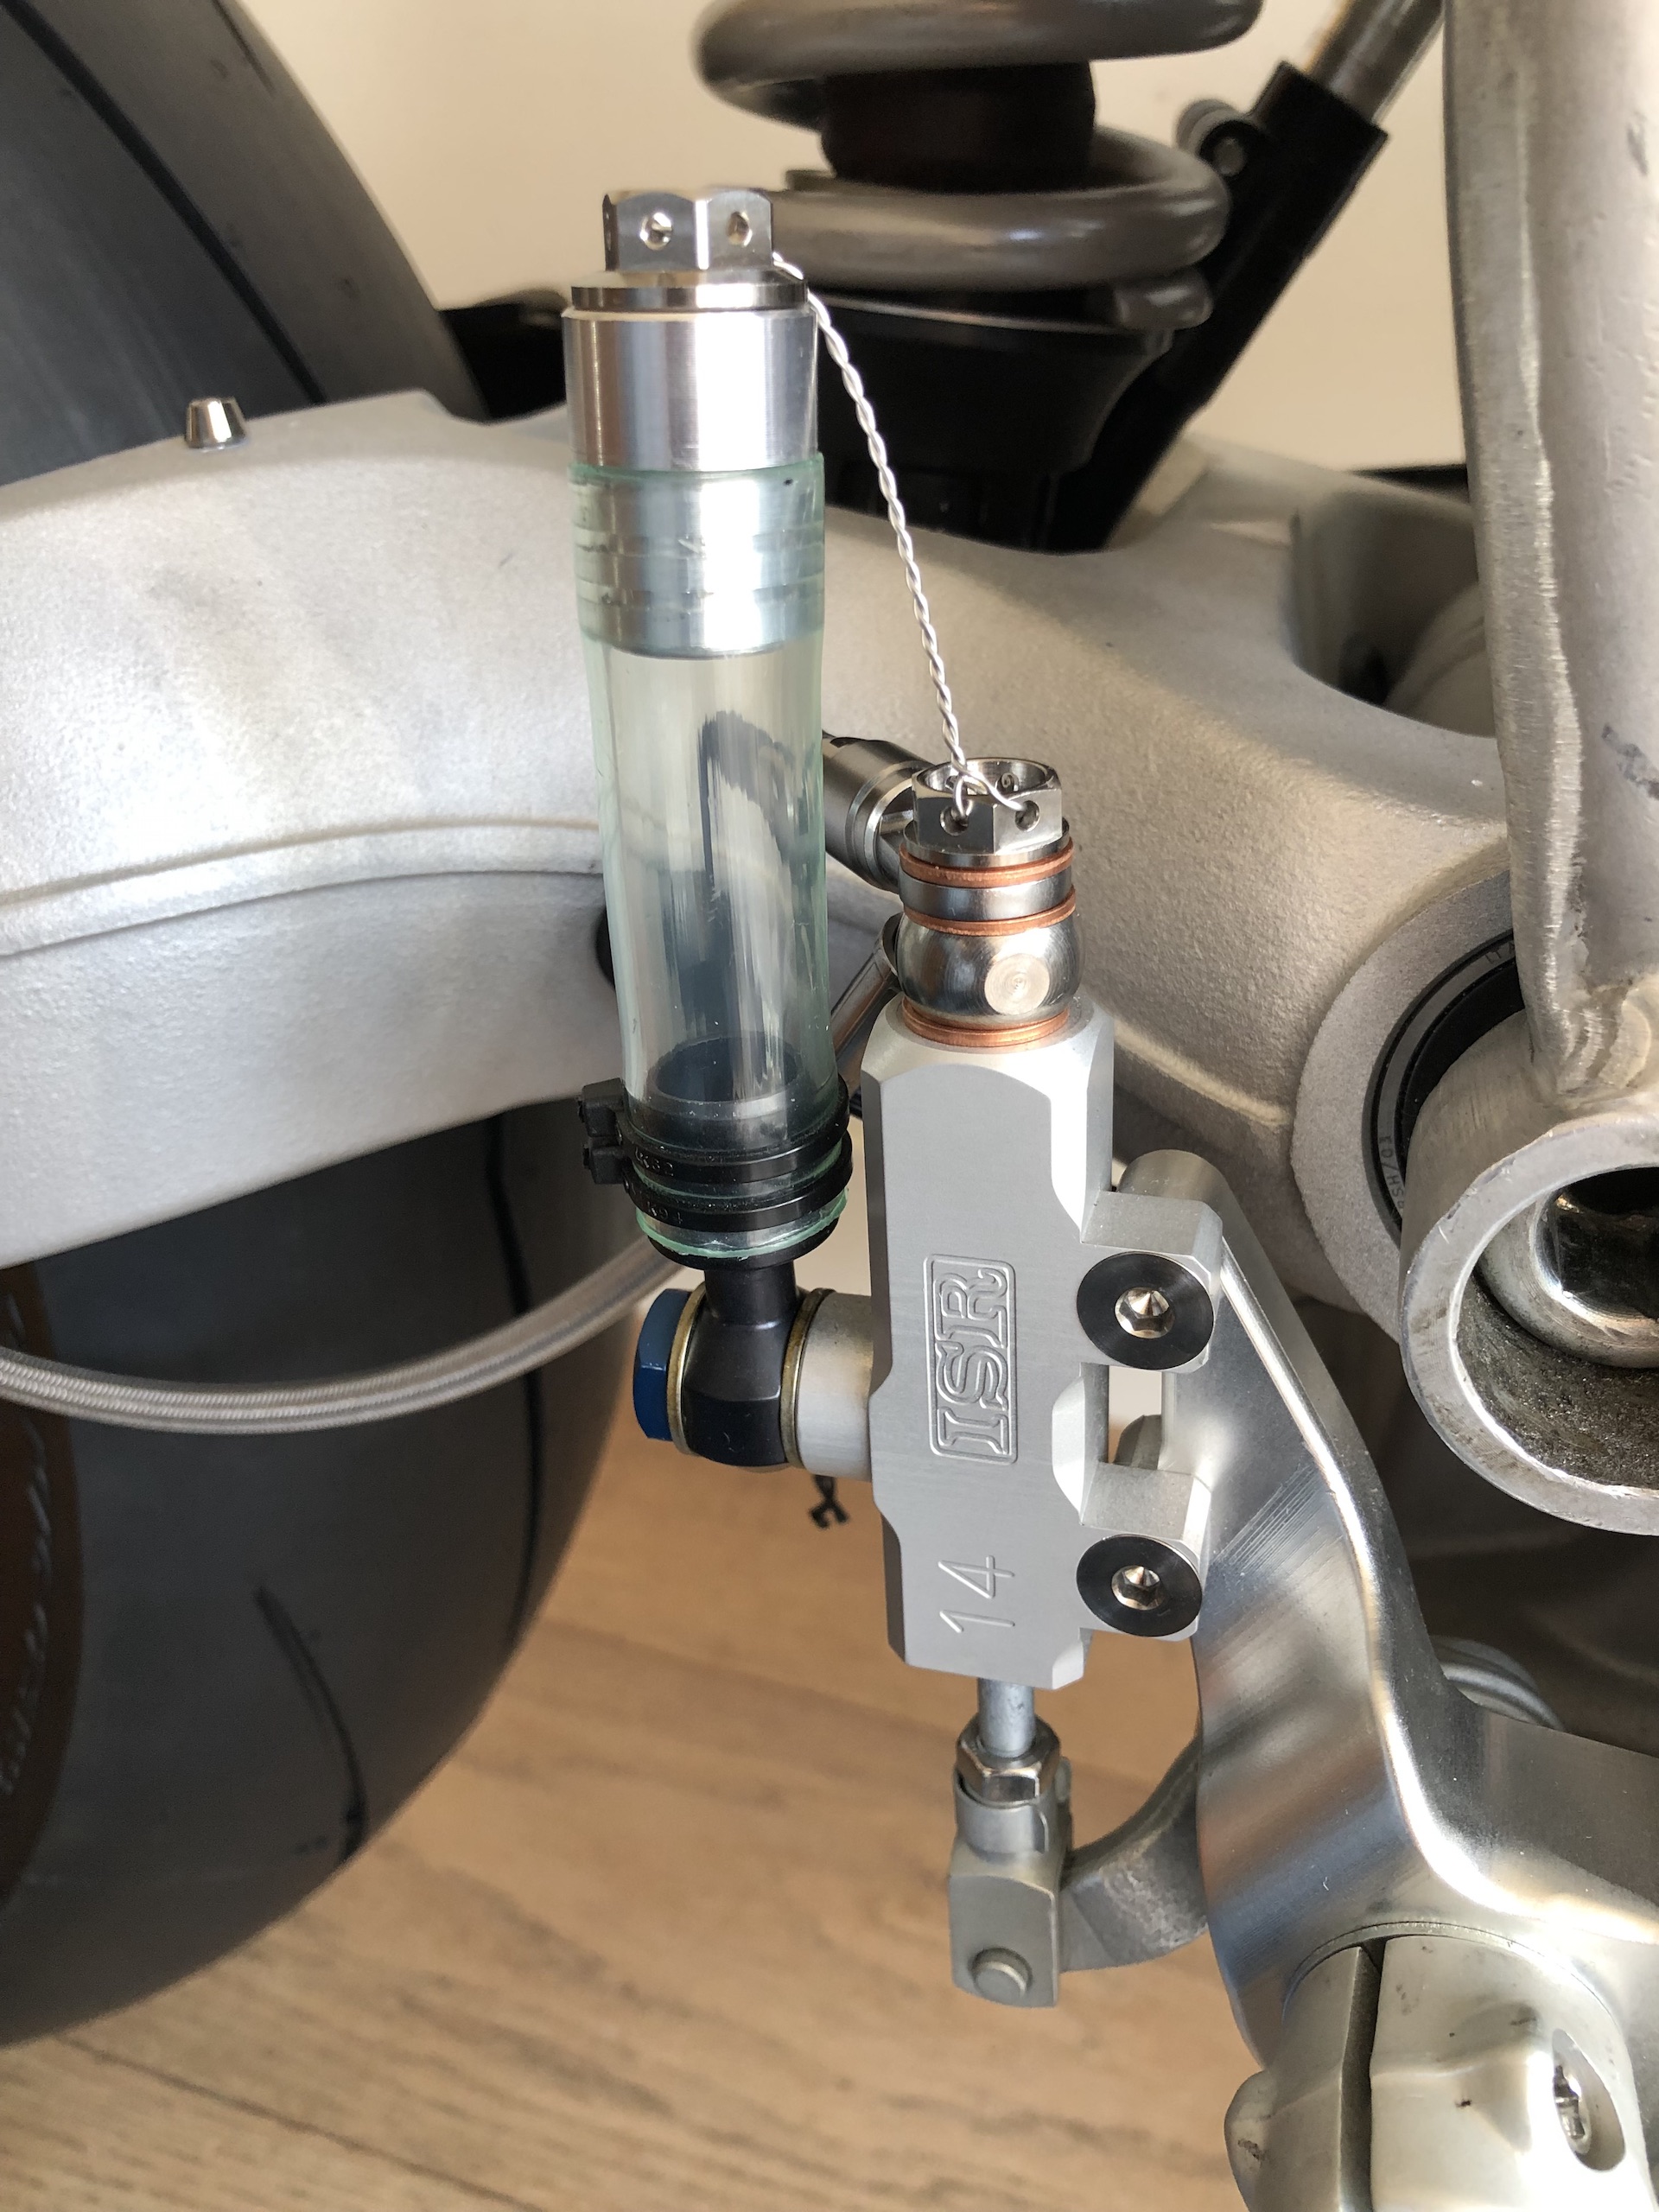
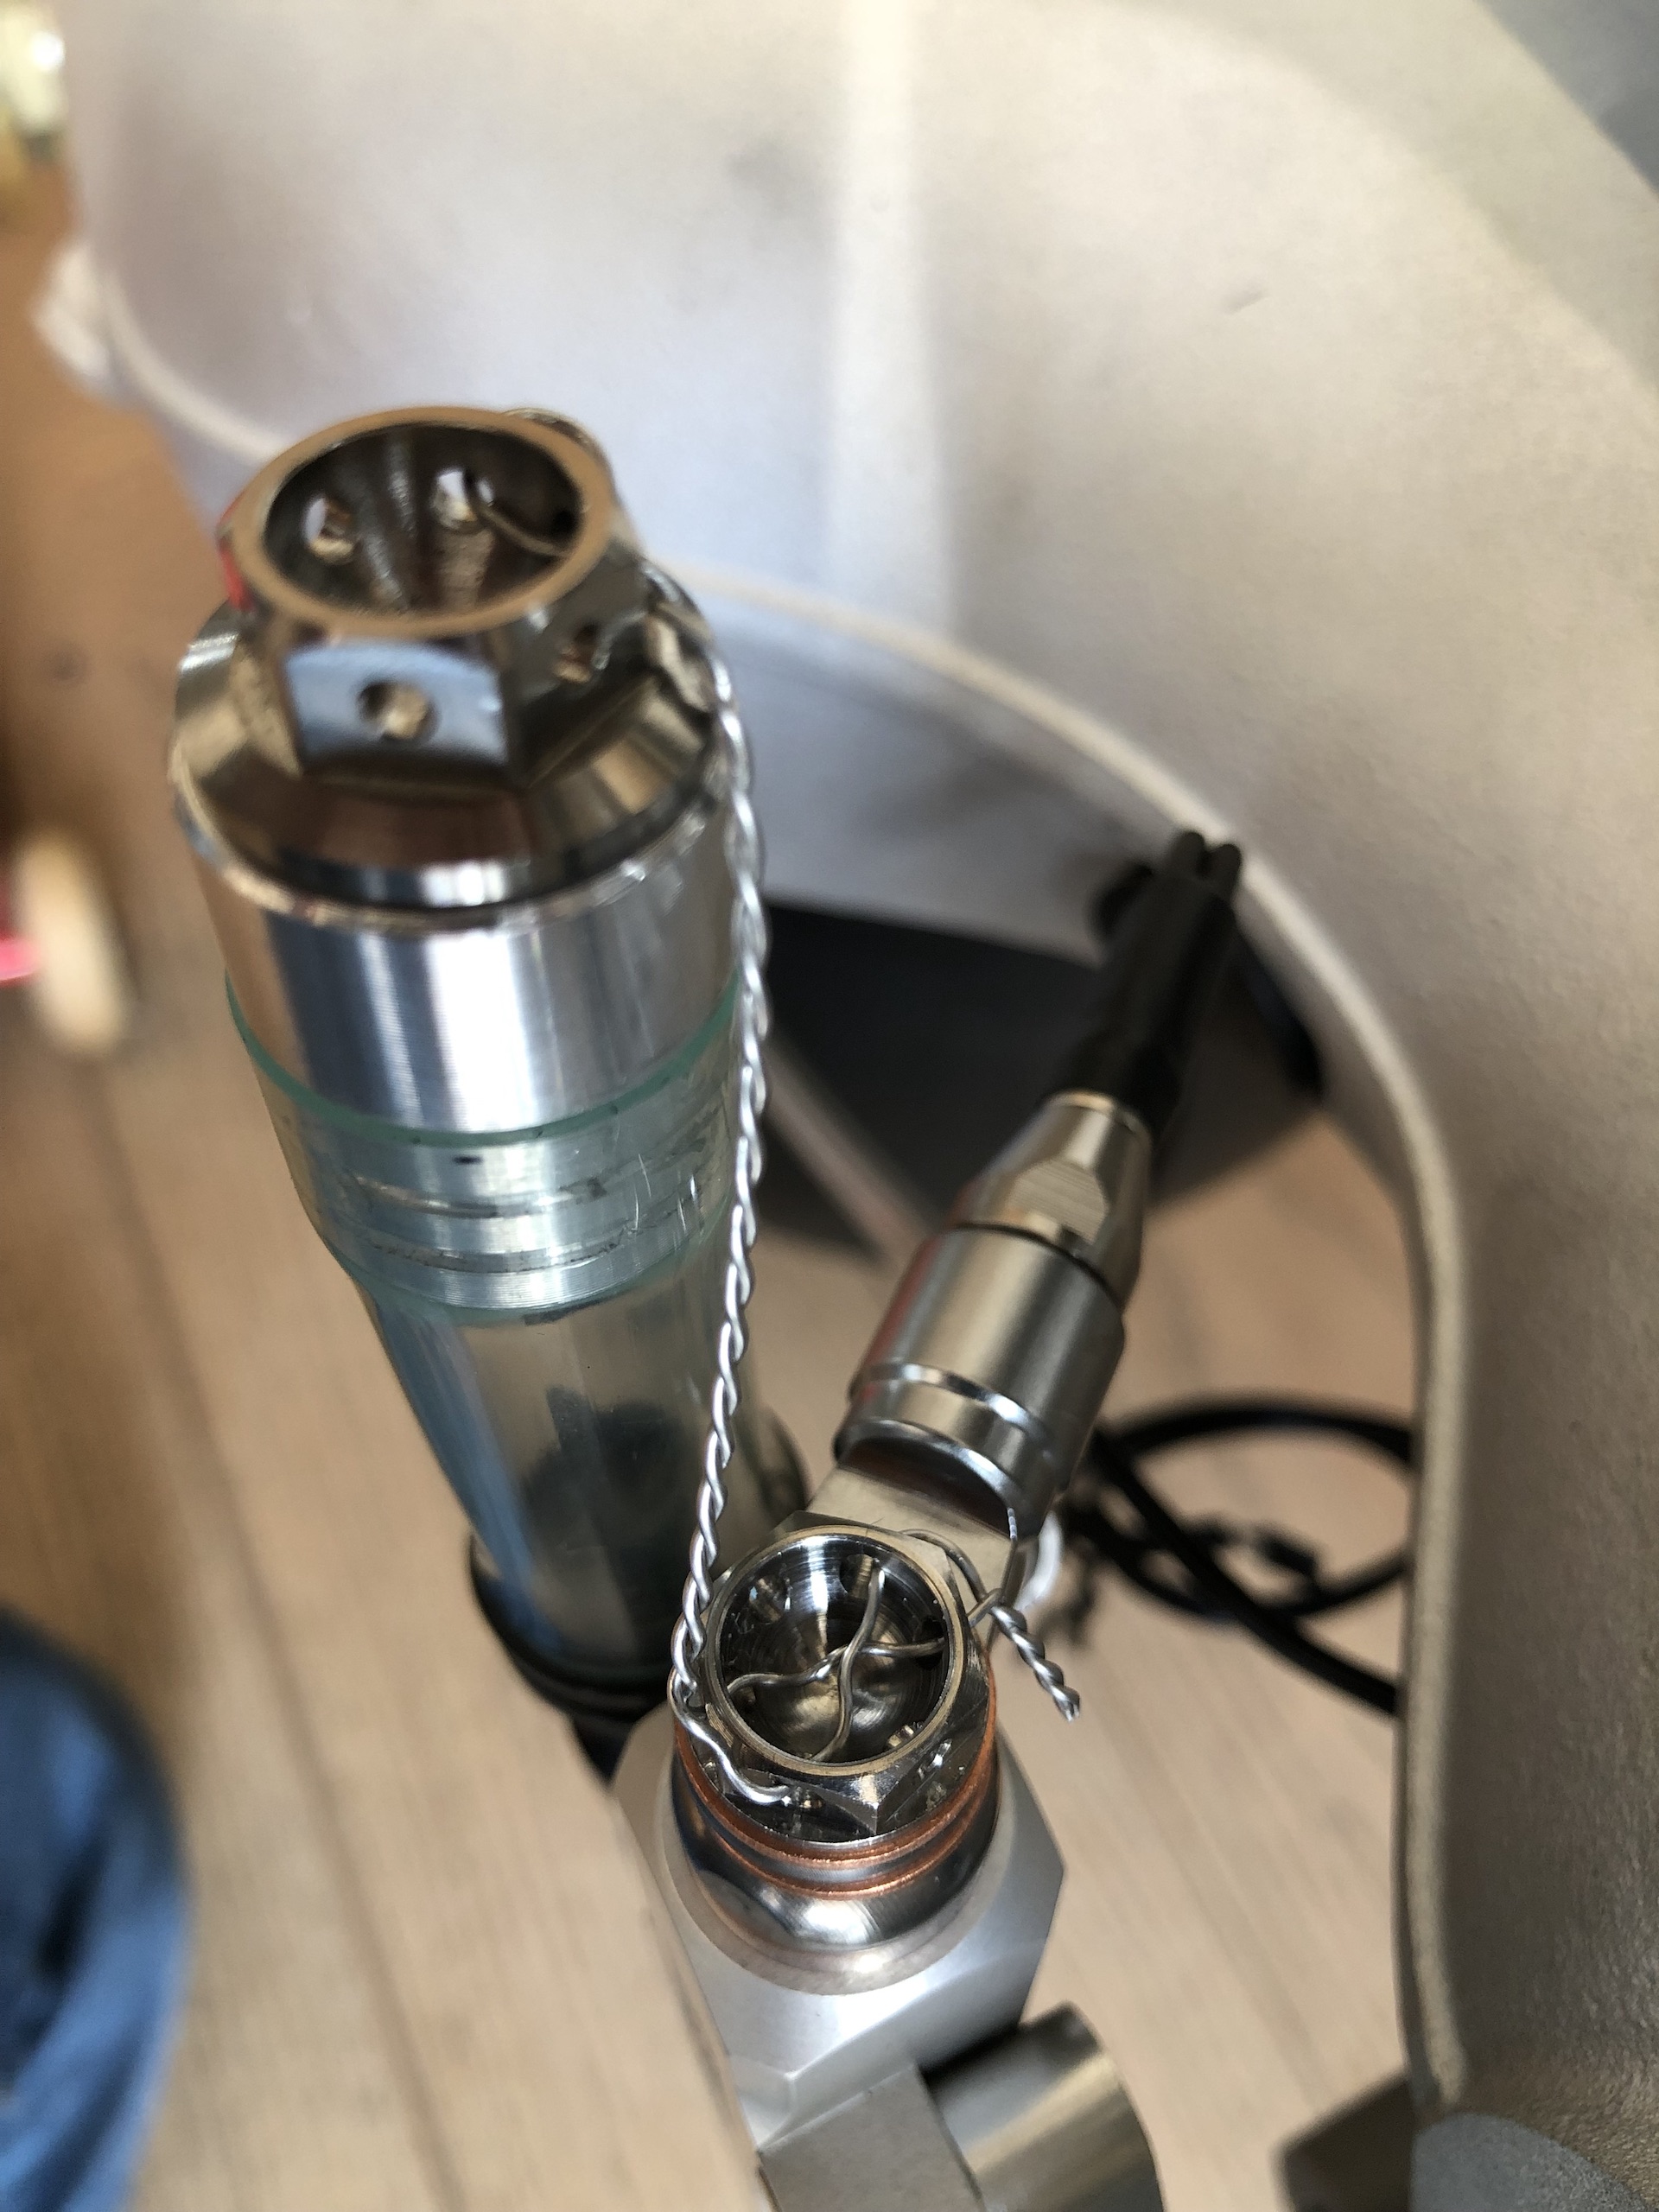
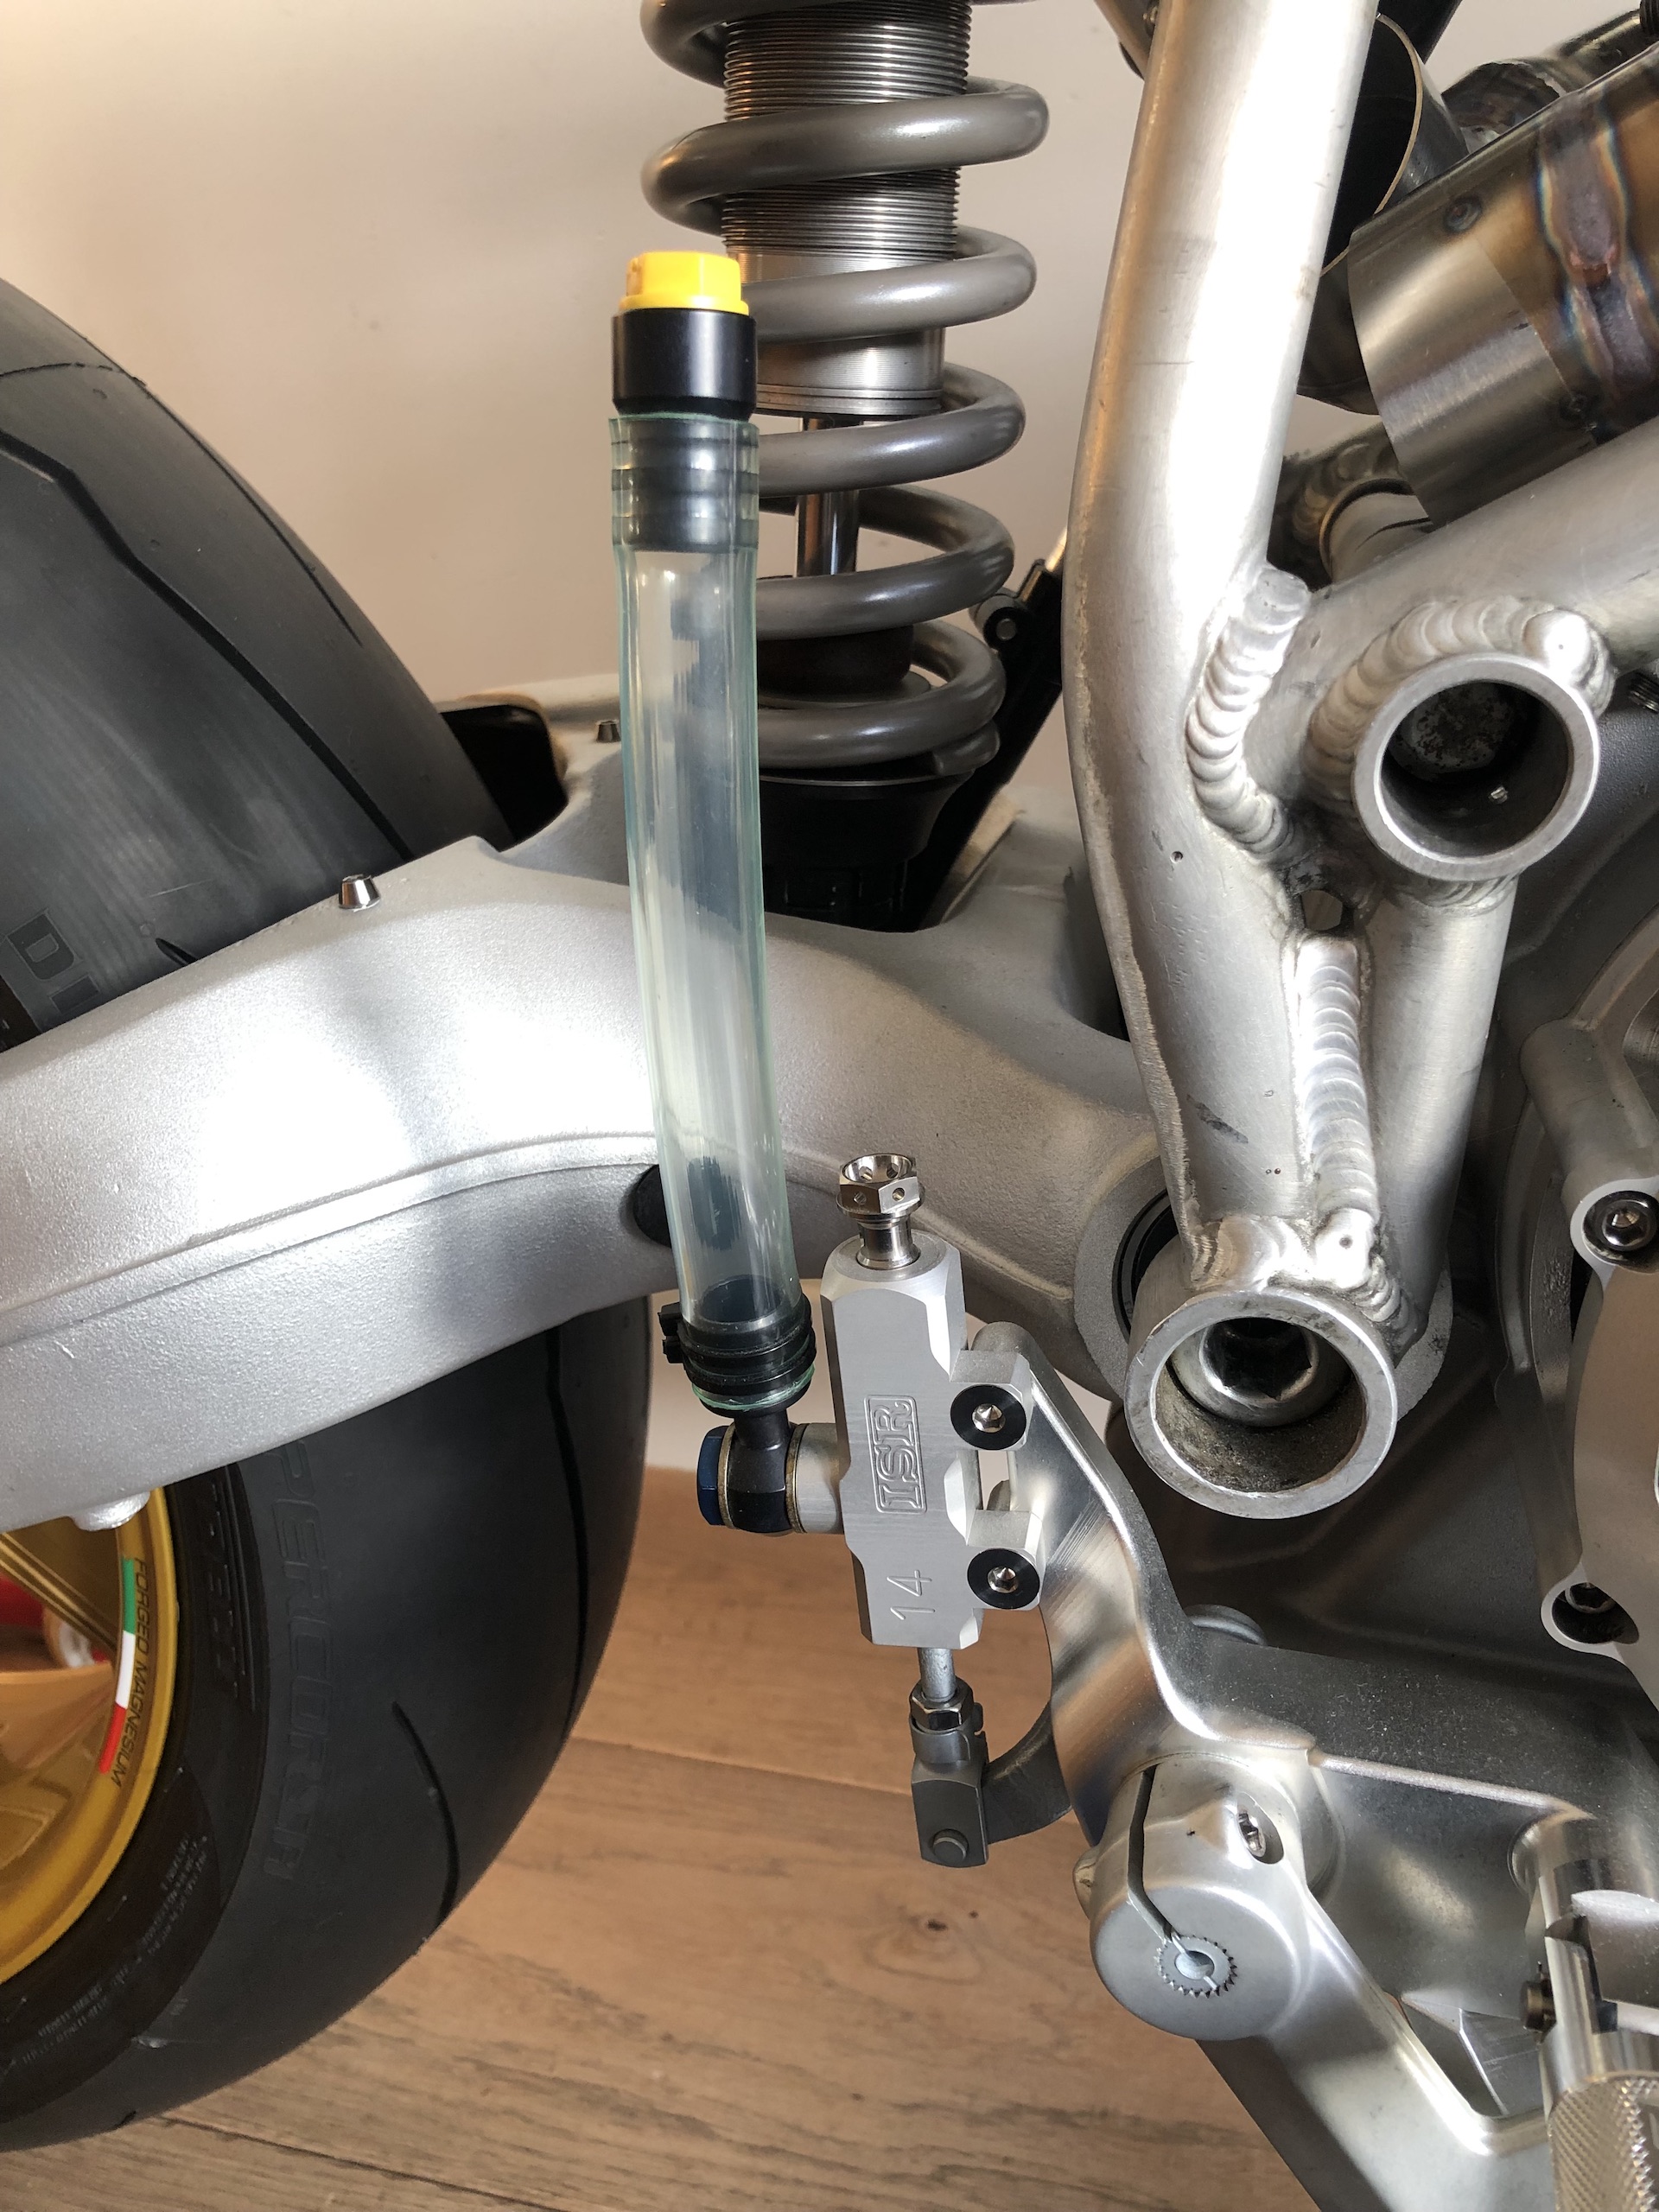
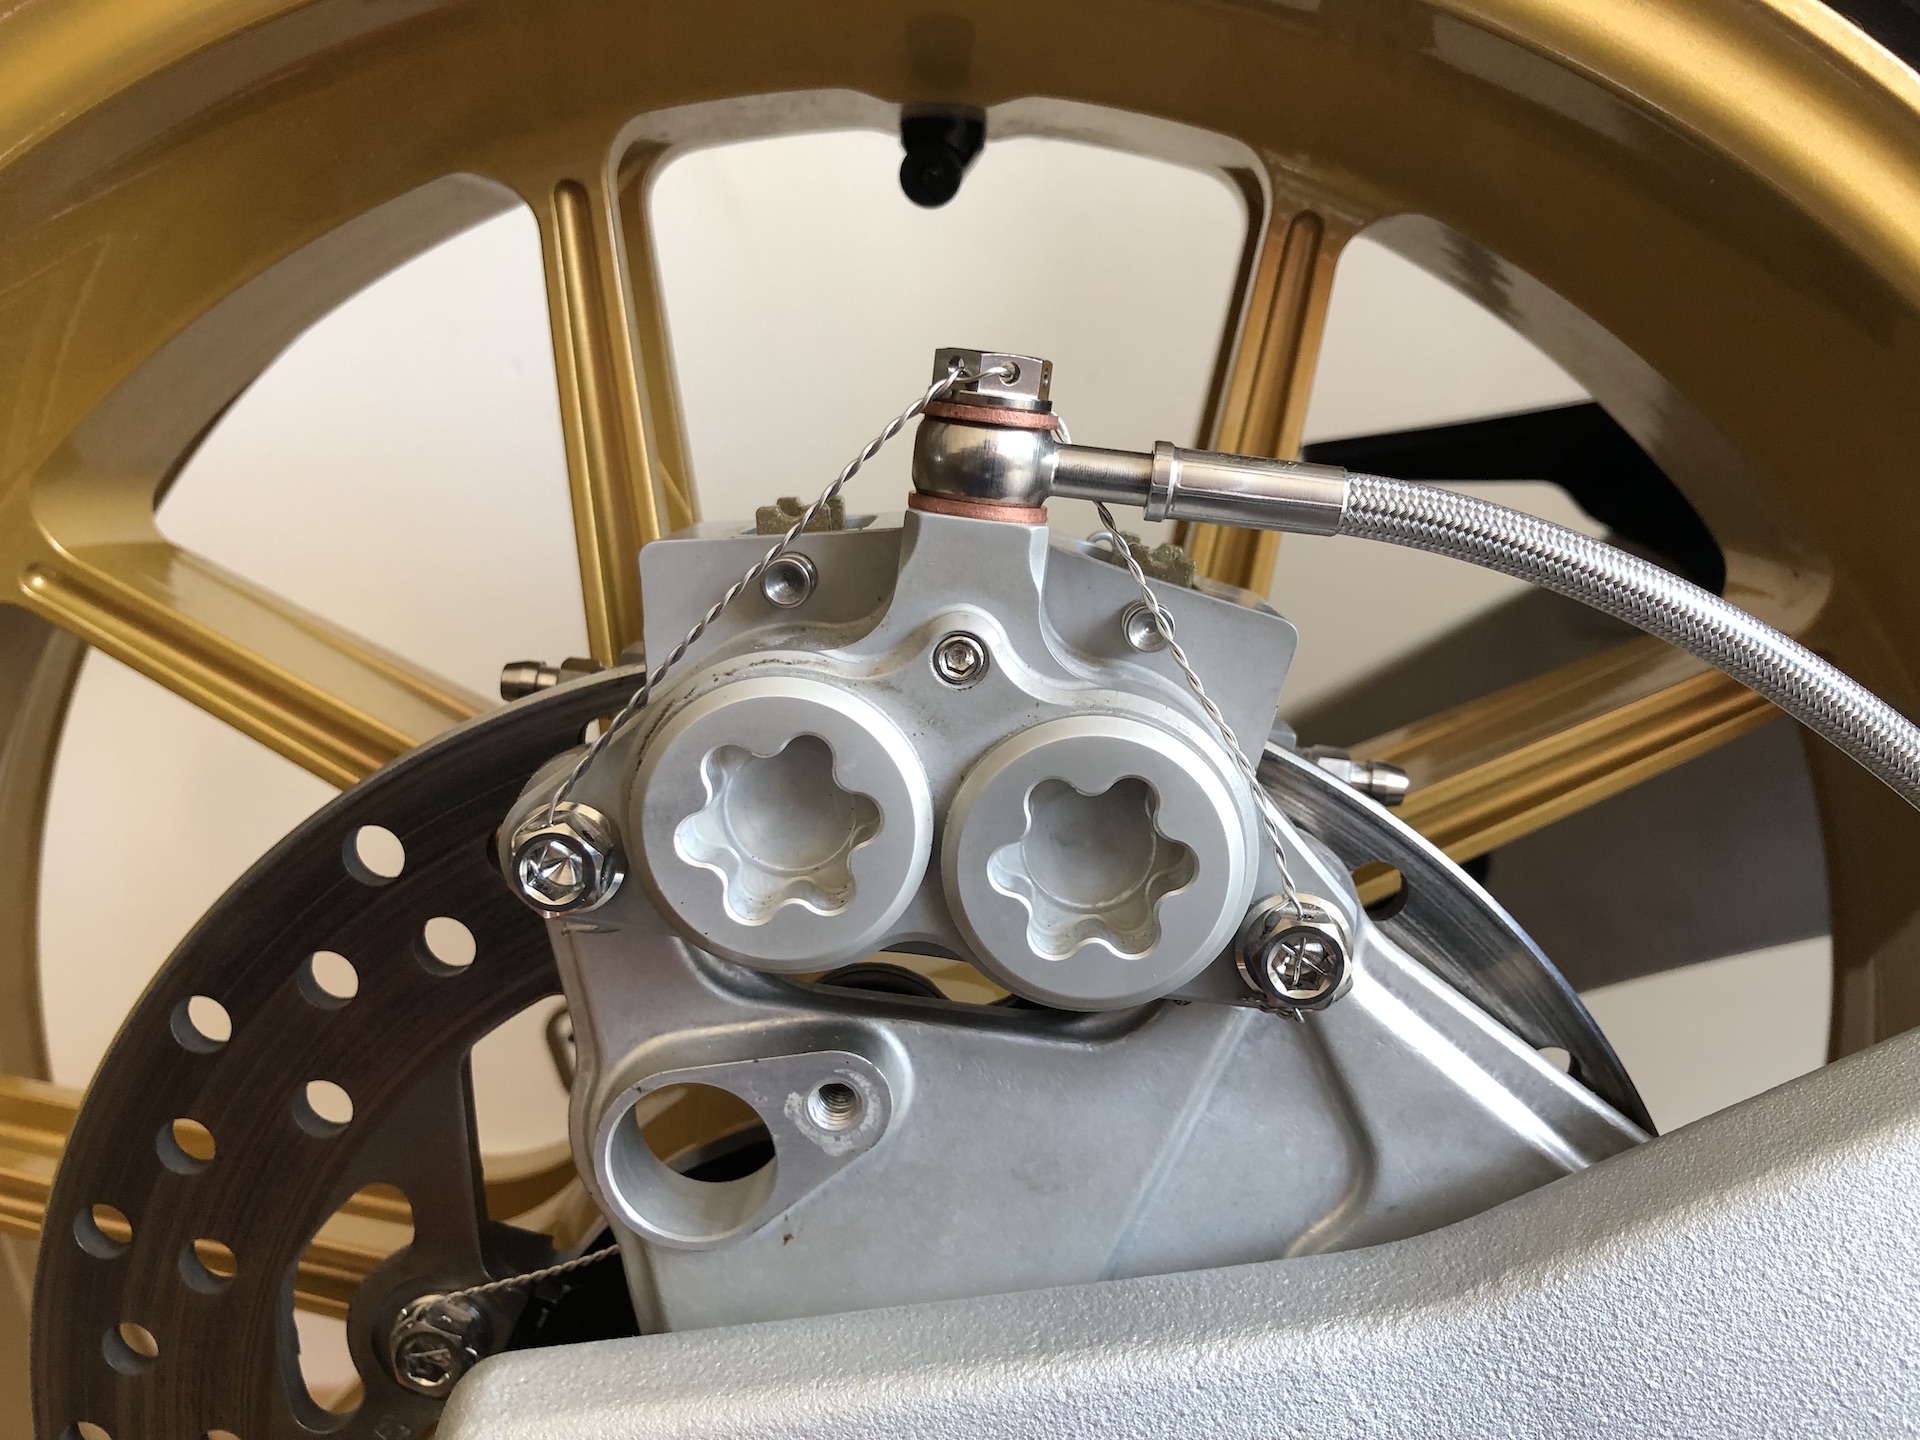
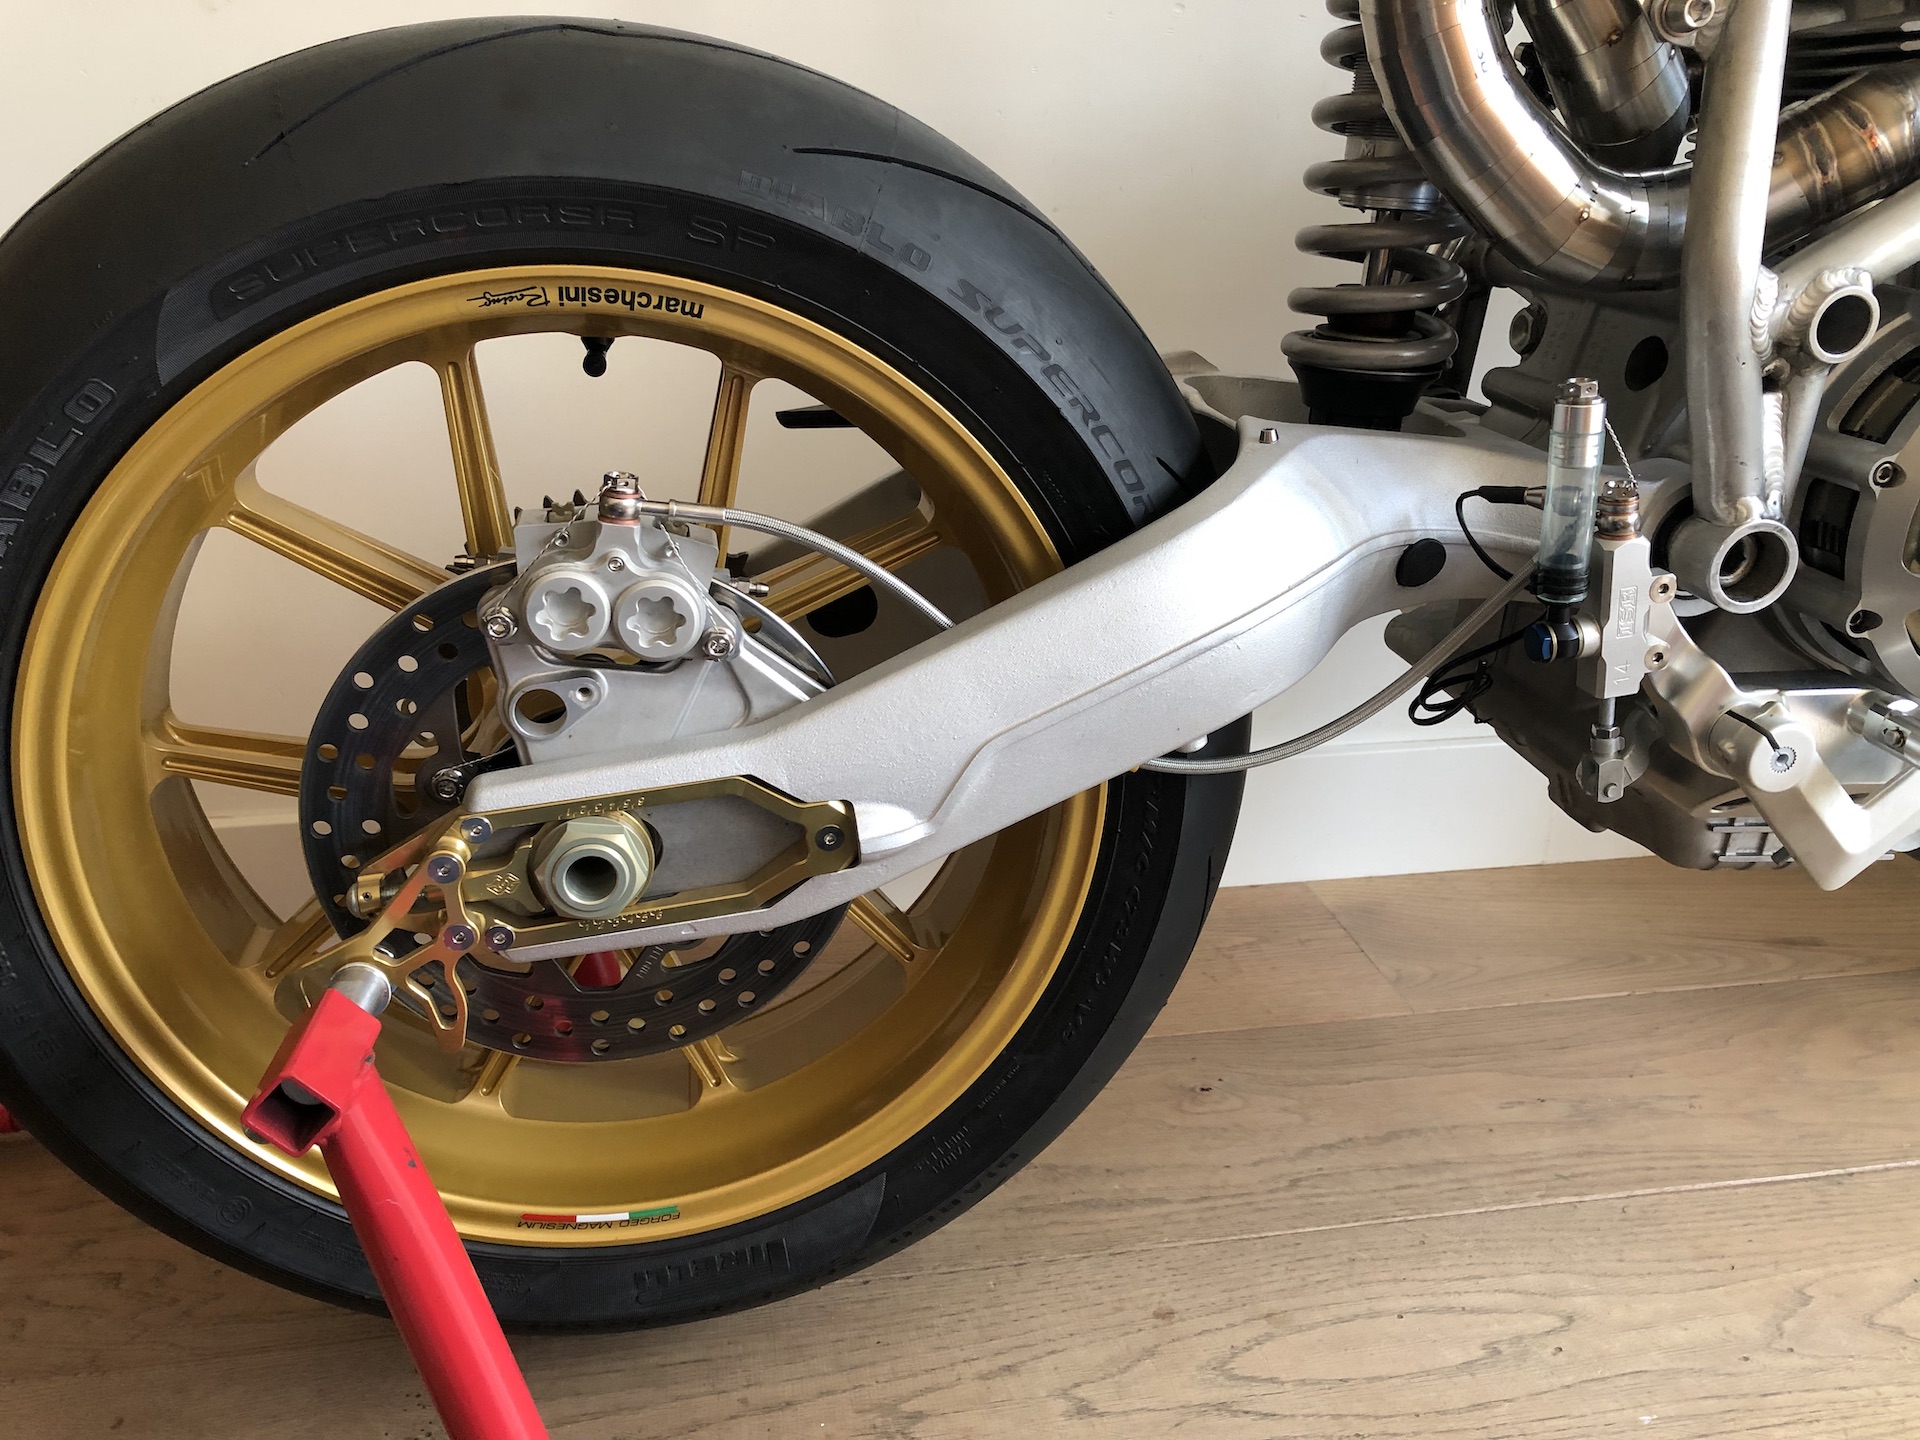
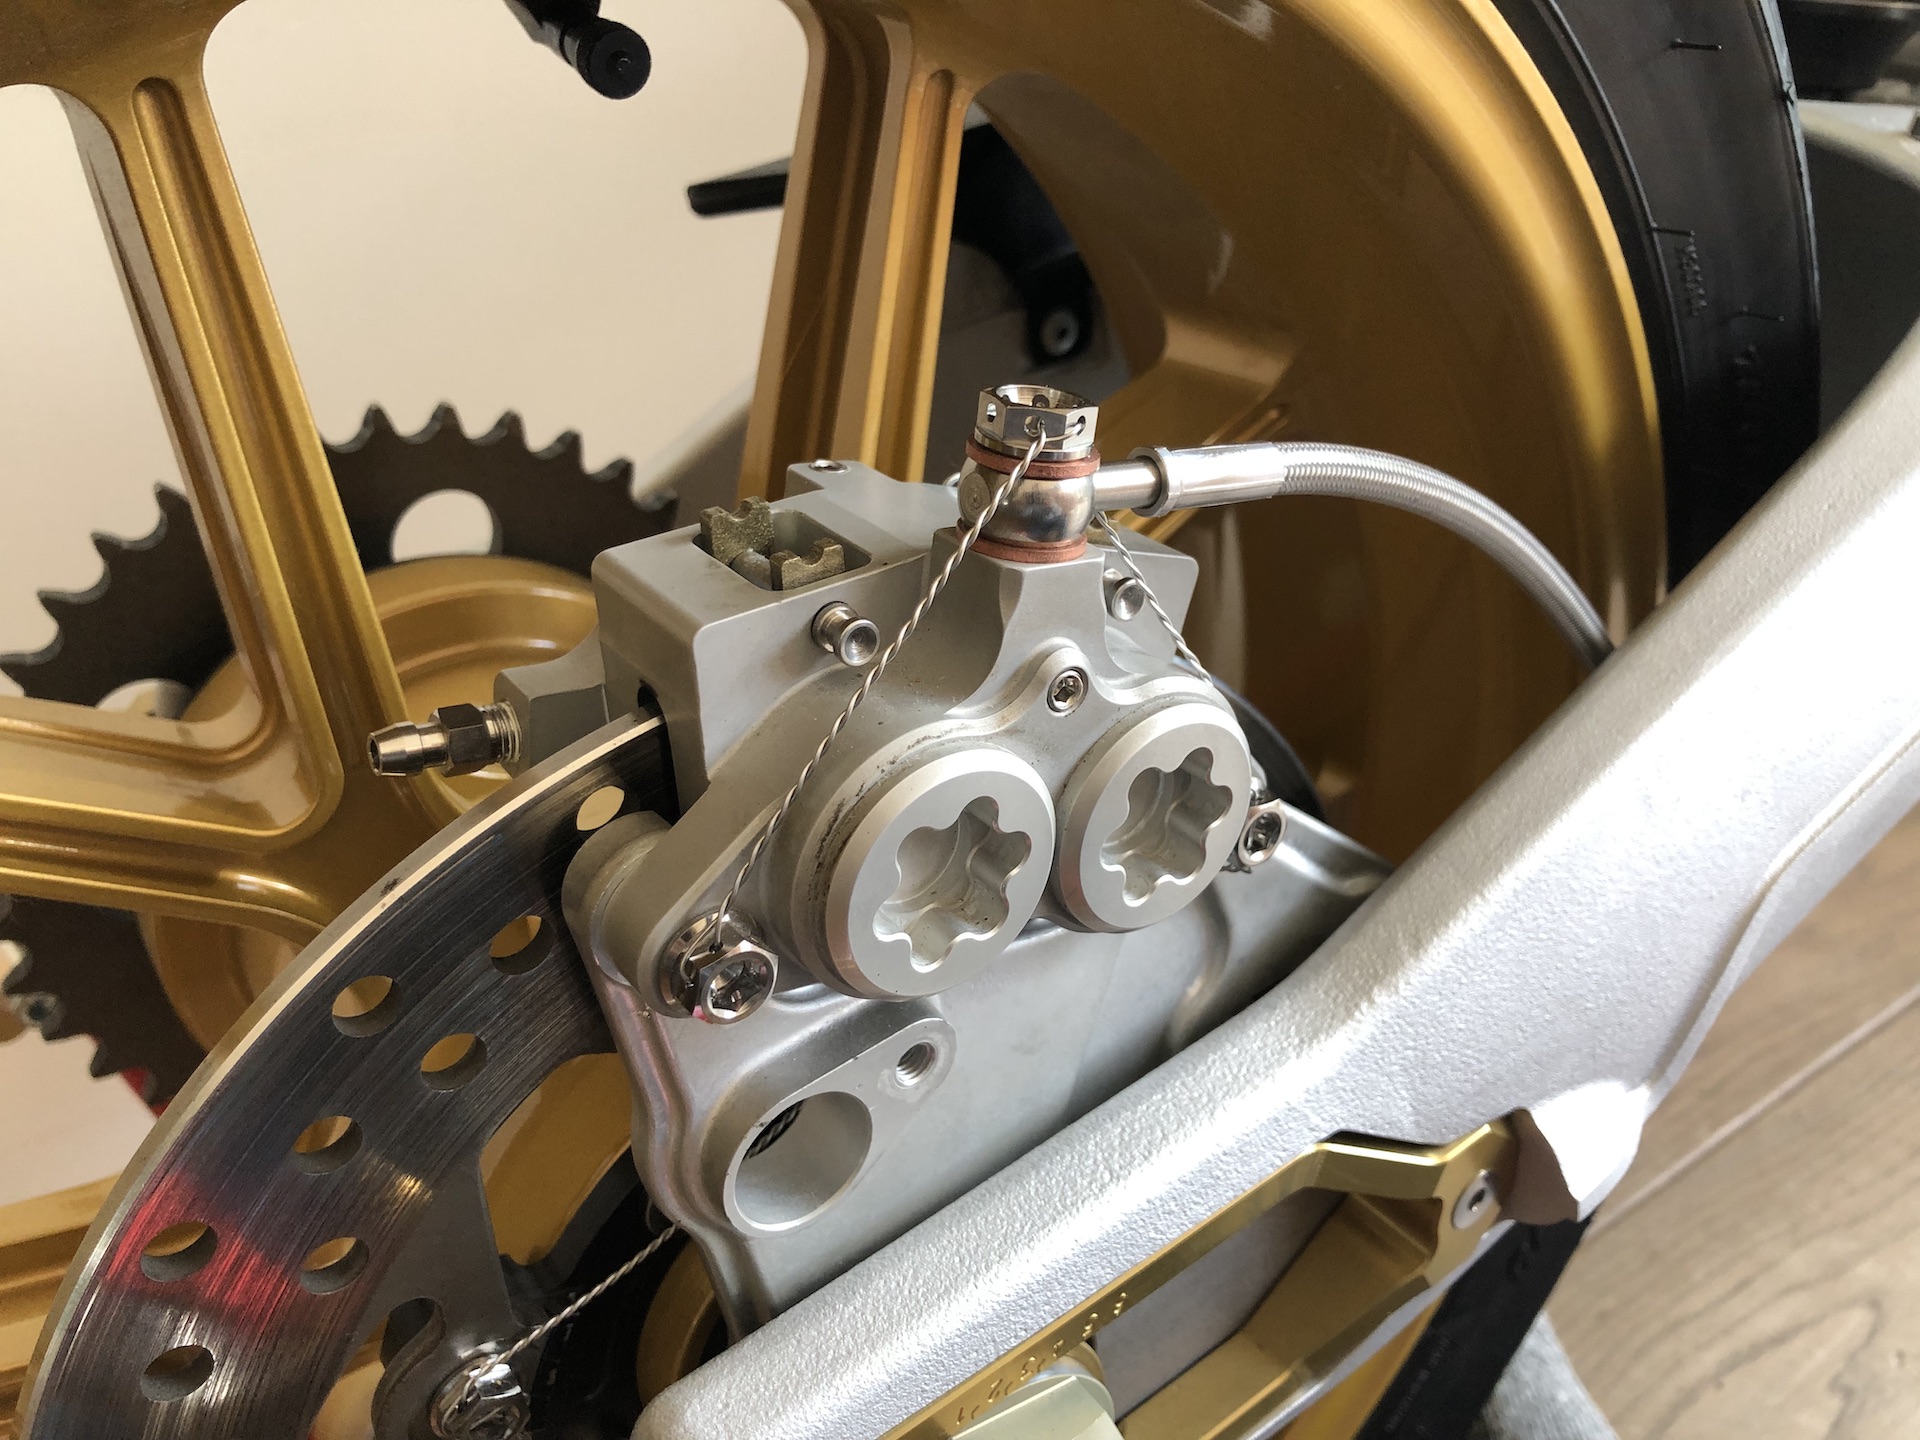
ISR REAR BRAKE SETUP
I didnt like the look of the stock ISR rear brake reservoir. So i turned a new cap on the lathe together with a titanium cap. Finished off with some locking wire and now it looks way better!
Also ordered. acustom Hell brake line and finished the caliper off with locking wire.
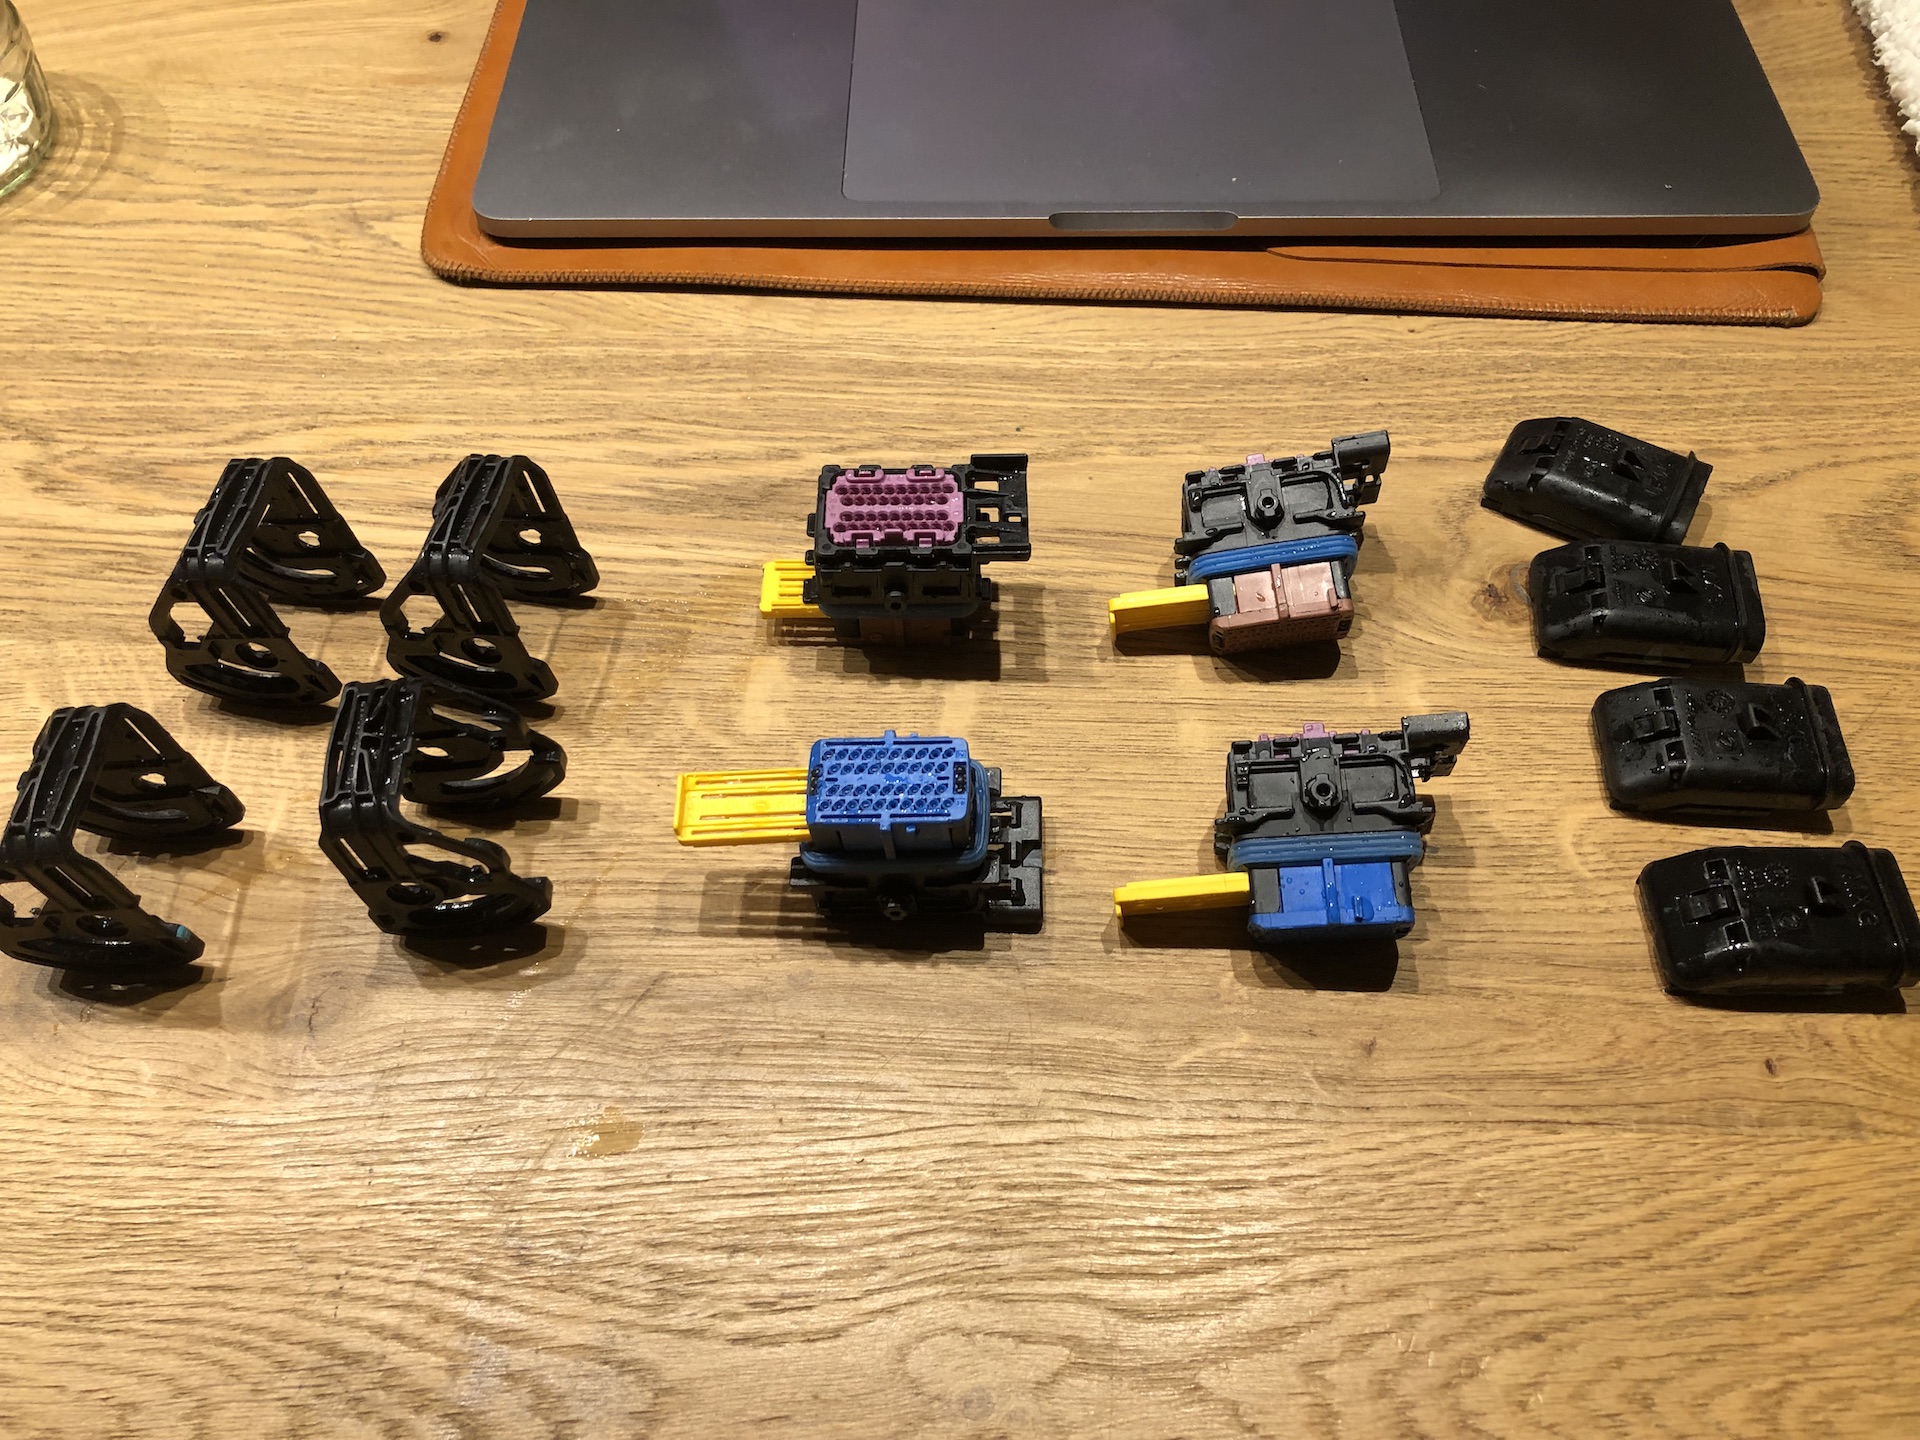
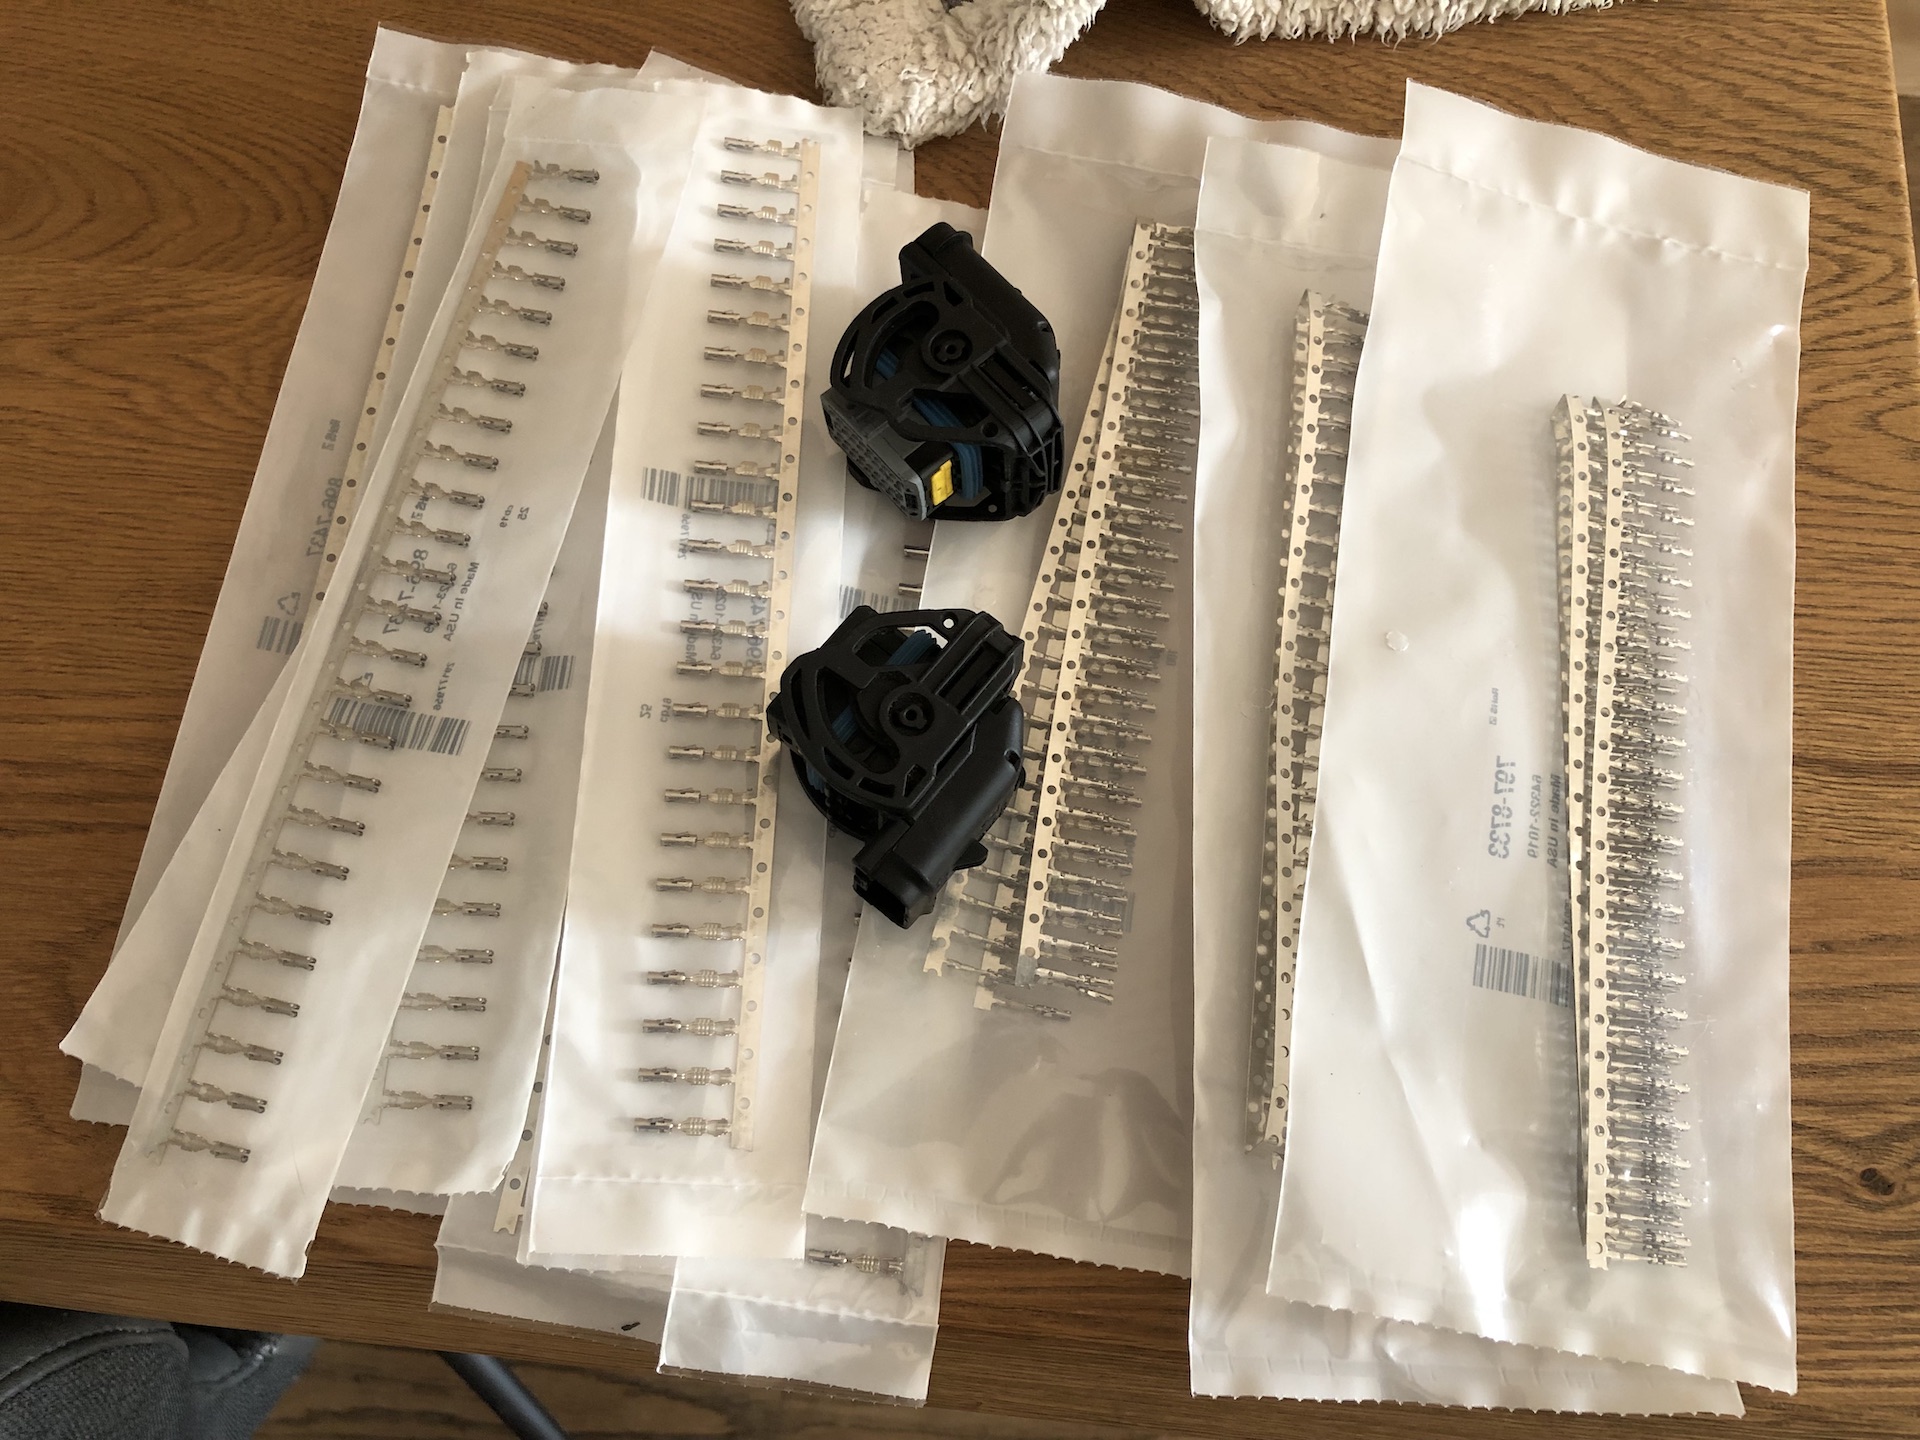
ECU IAW5 CONNECTORS READY!
Finally i found out how to depin the ECU IAW5 type connectors (thanks Richard!). These connectors are not available to buy new anymore sadly. I managed. to source new pins and got myself brand looking new connectors ready for when I create the wiring harness.


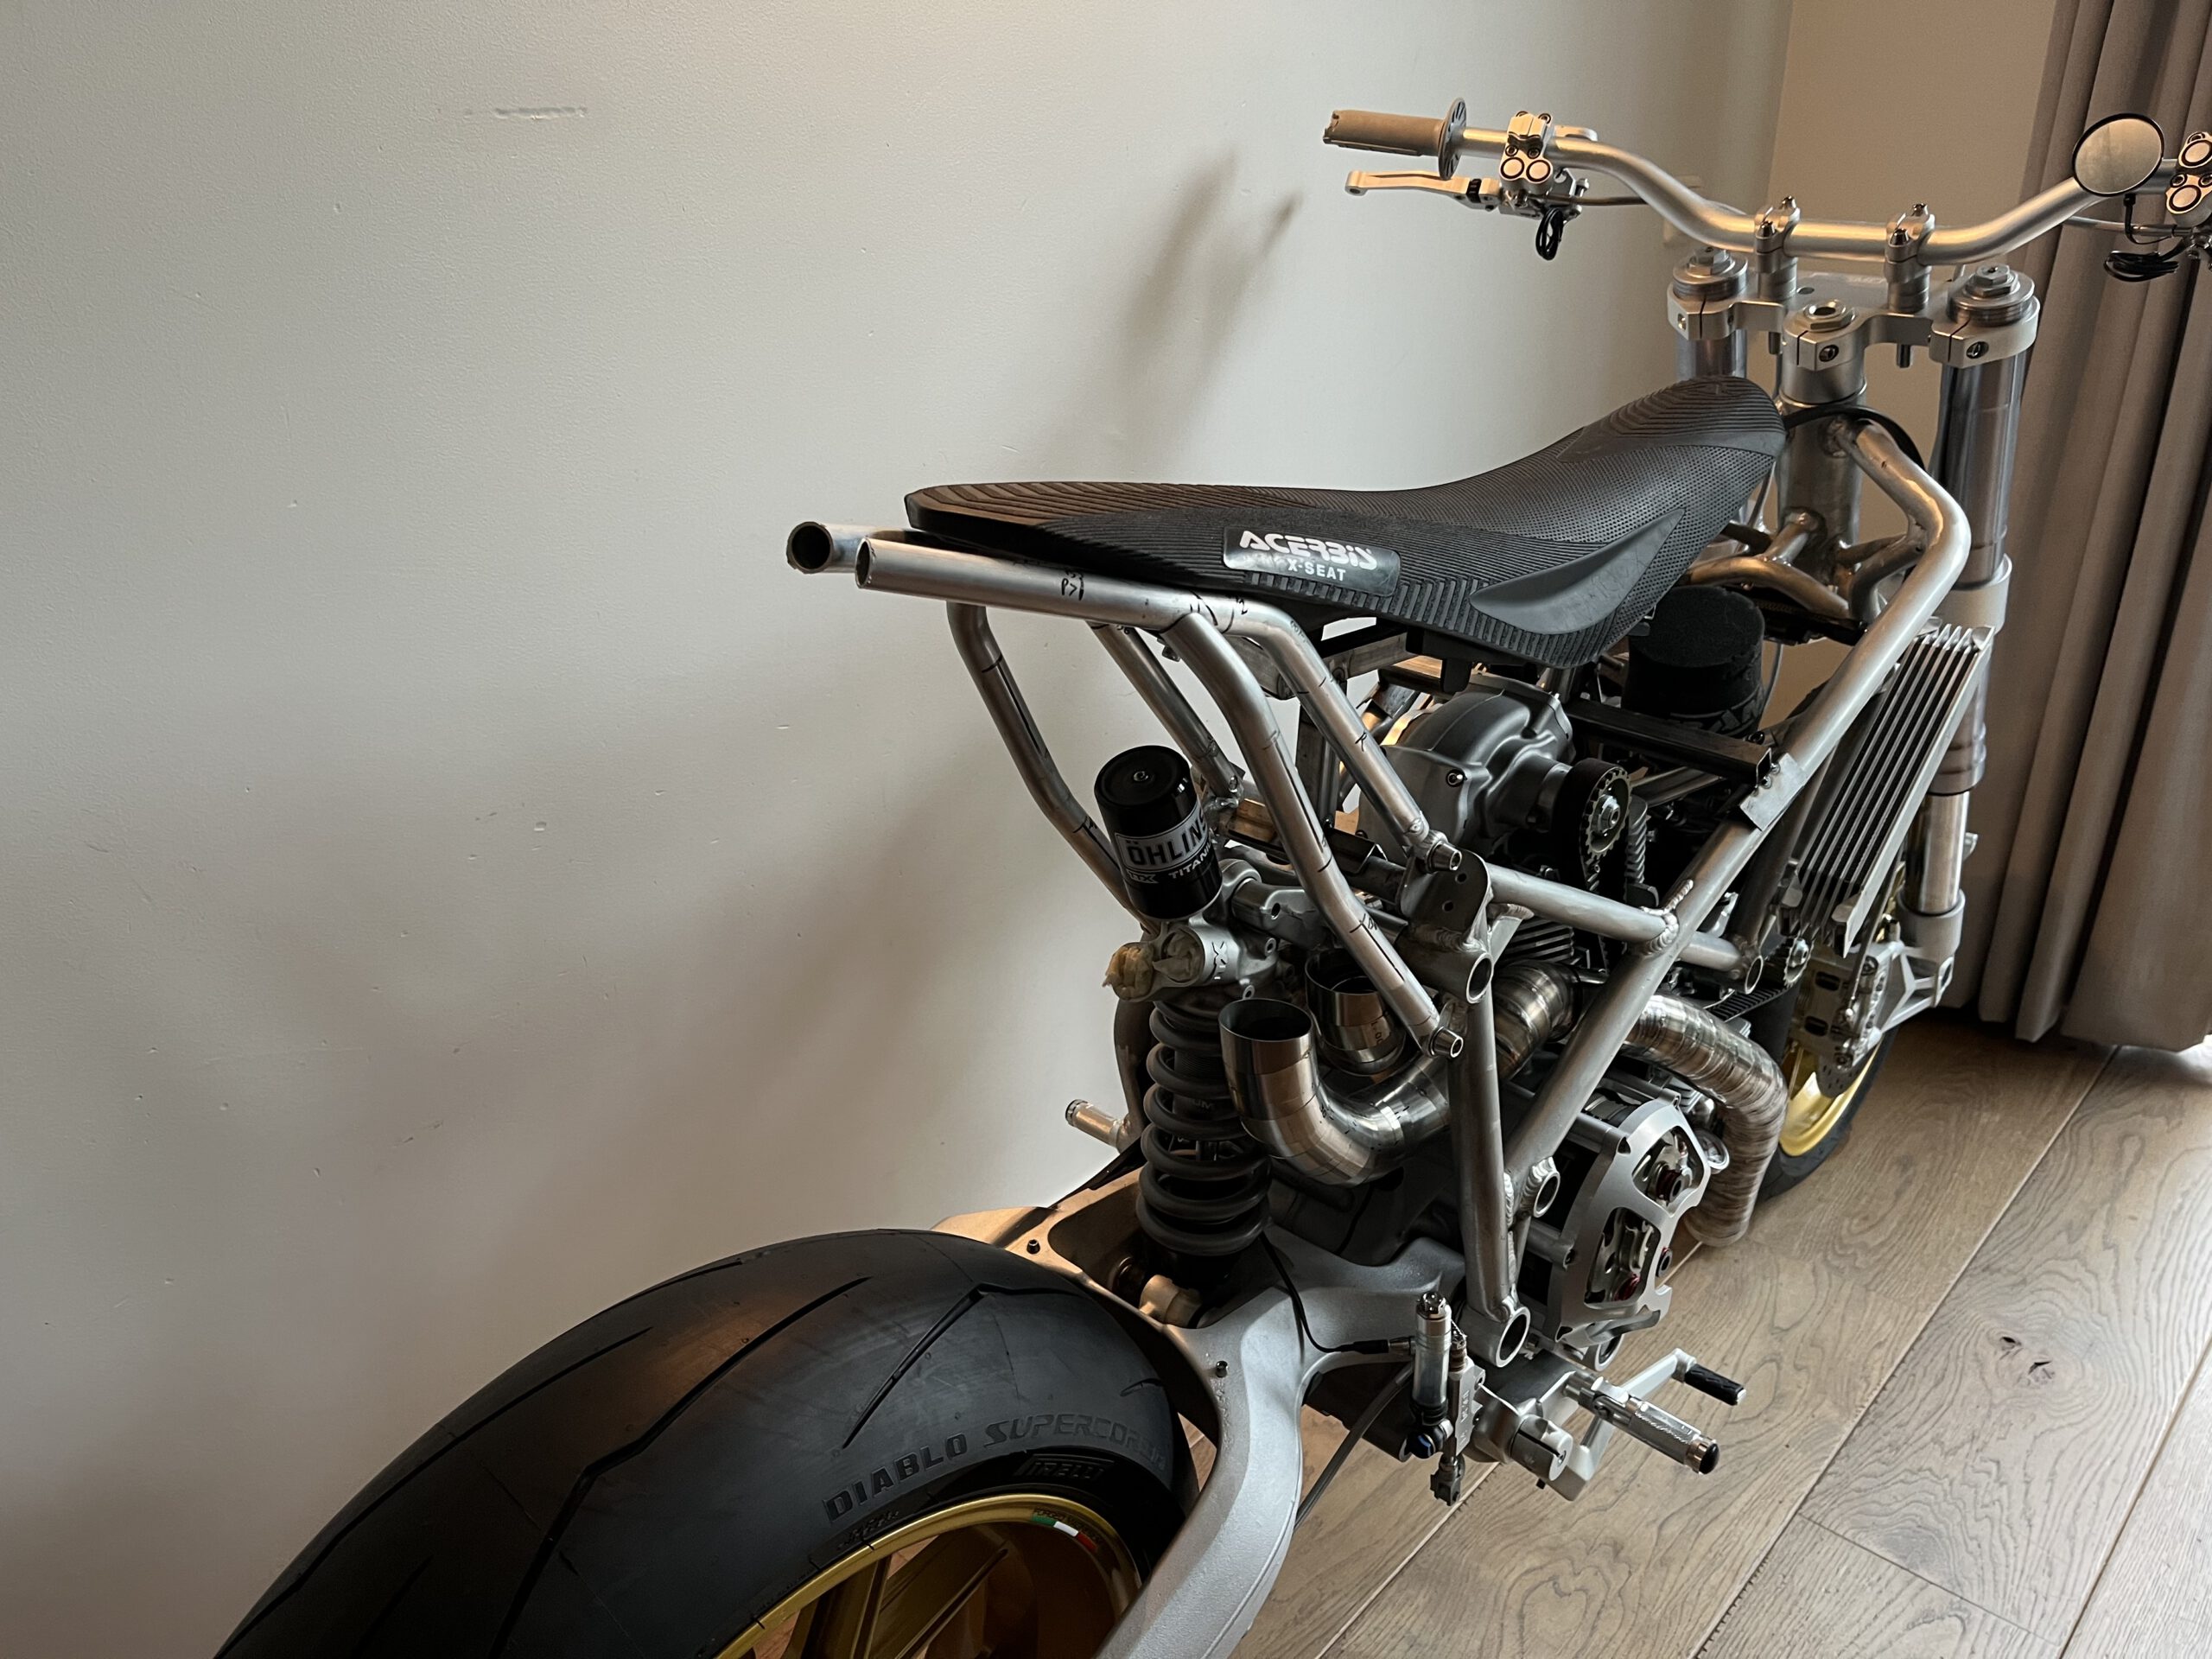
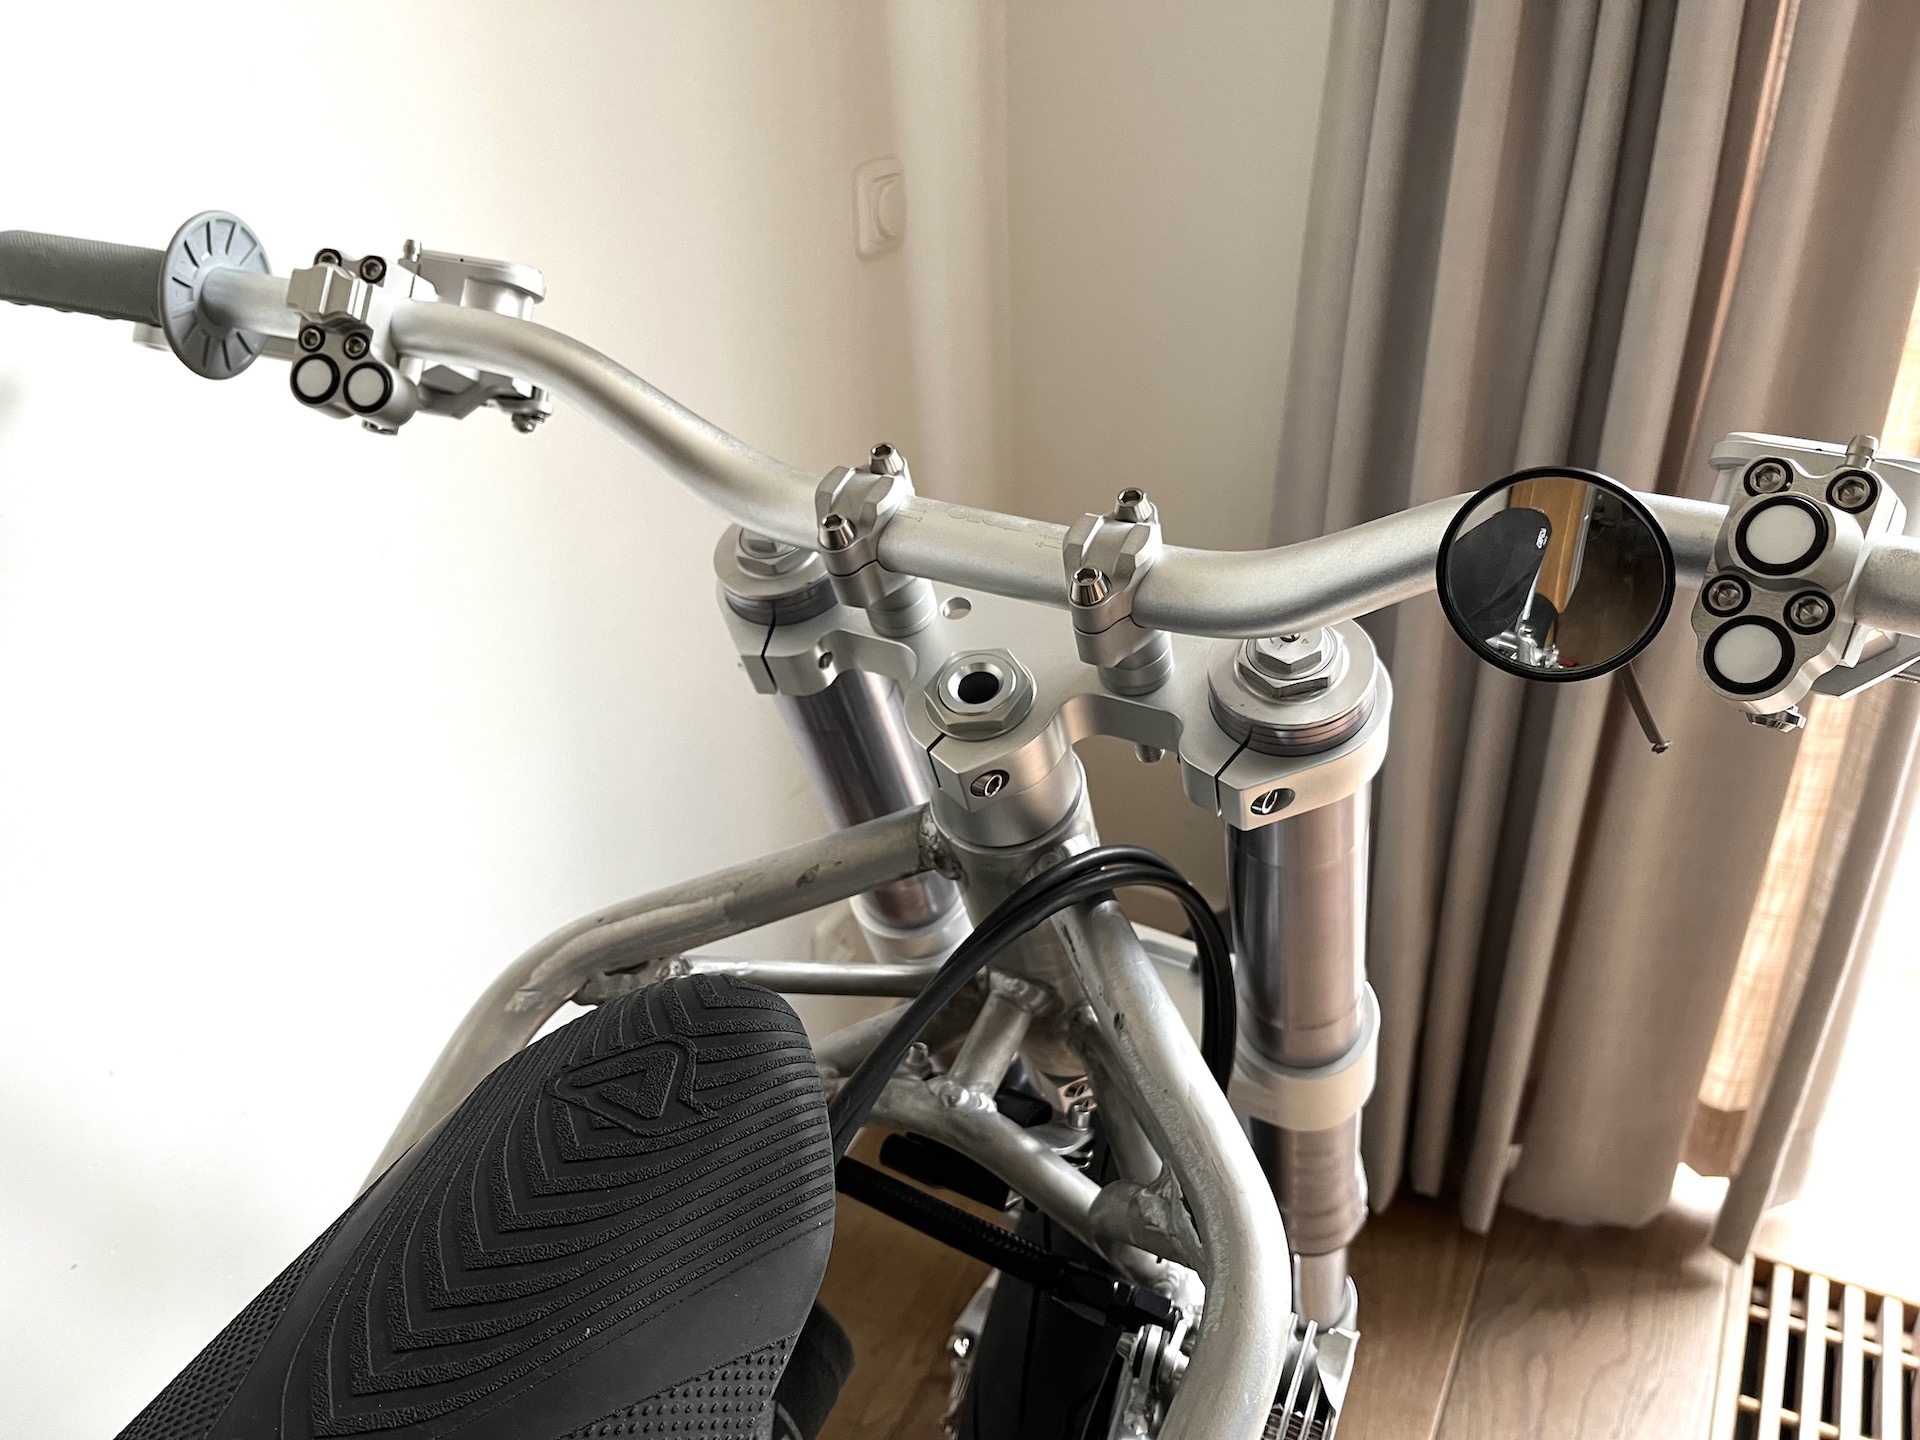
SEAT POSITION FINALISED
It feels good sitting on the bike. Hopefully I have enough grip when braking me not sliding to the front. But I think it will be fine.
Really starting to look like something now!
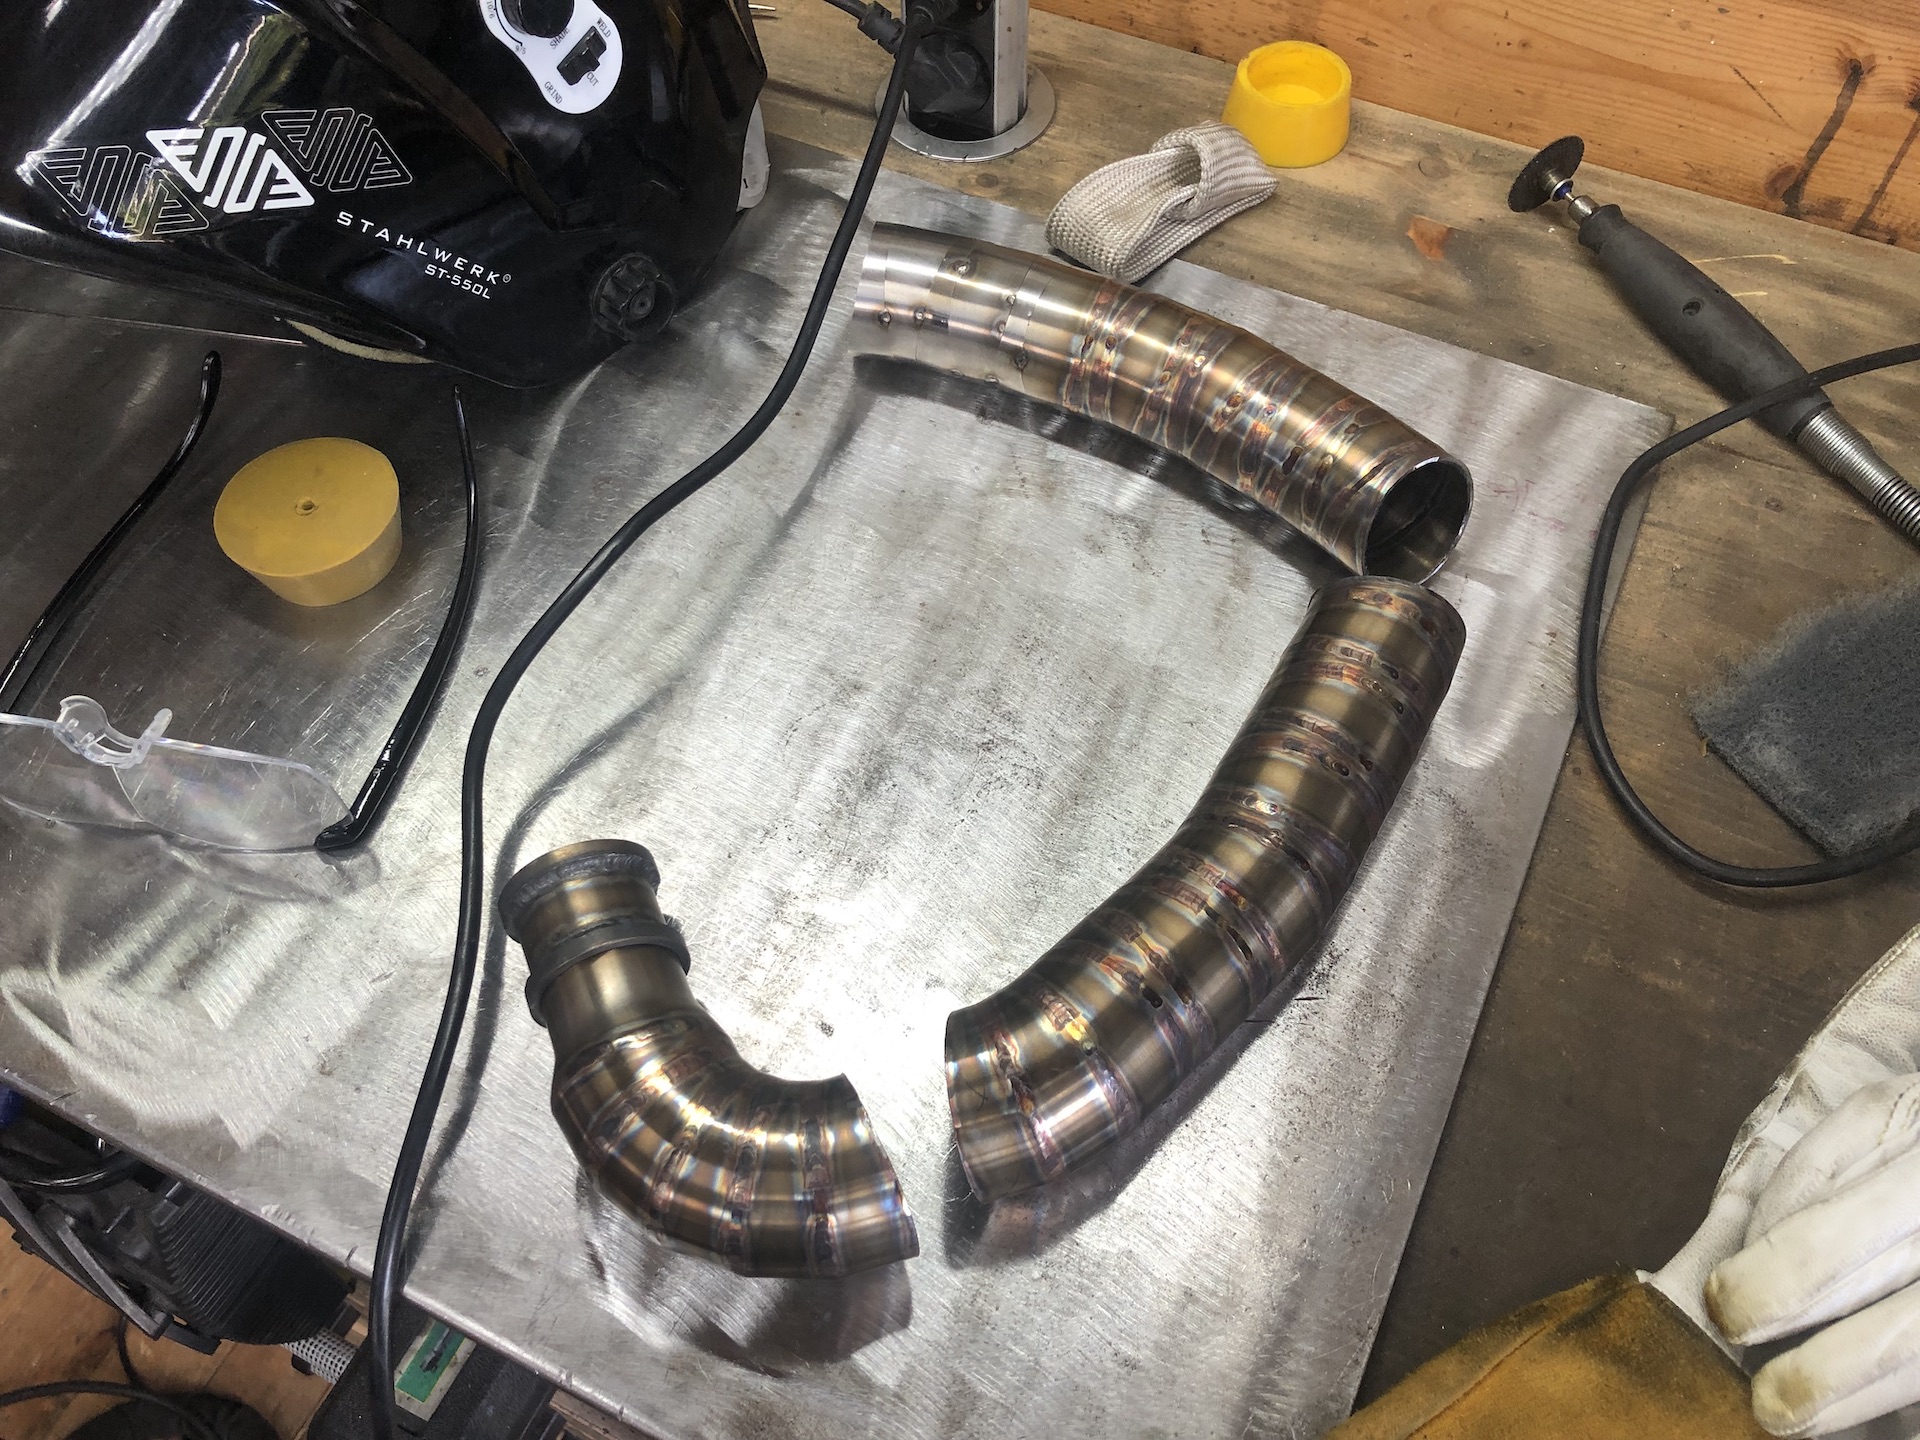
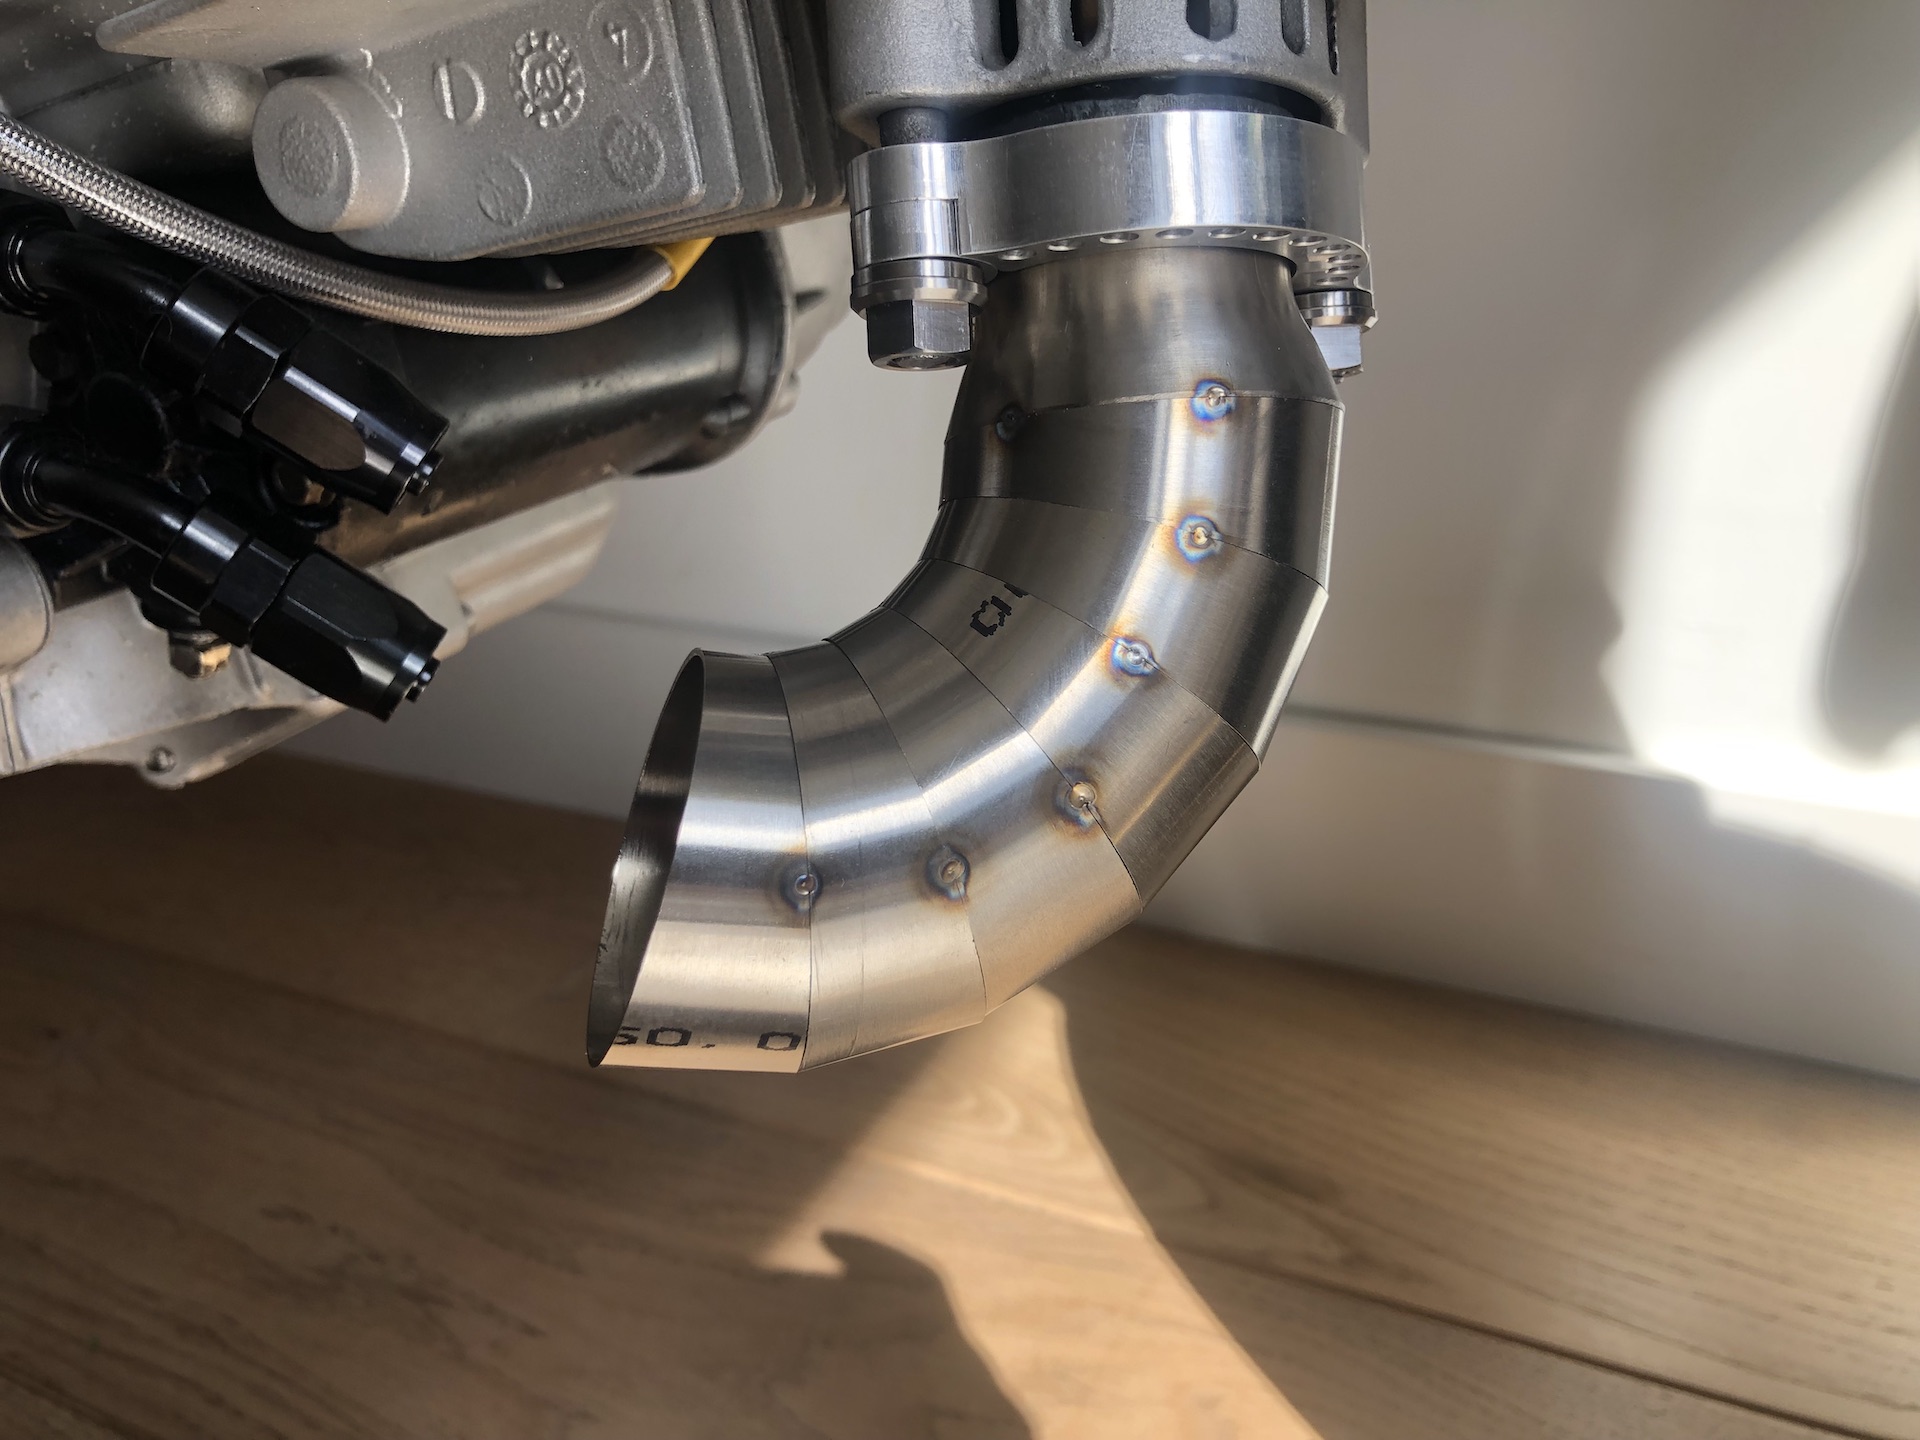
EXHAUST ATTEMPT NR2, YES IT FLOWS!
More progress later since im looking for a company that can expand some of my tubing so I can make removable pieces within the exhaust.
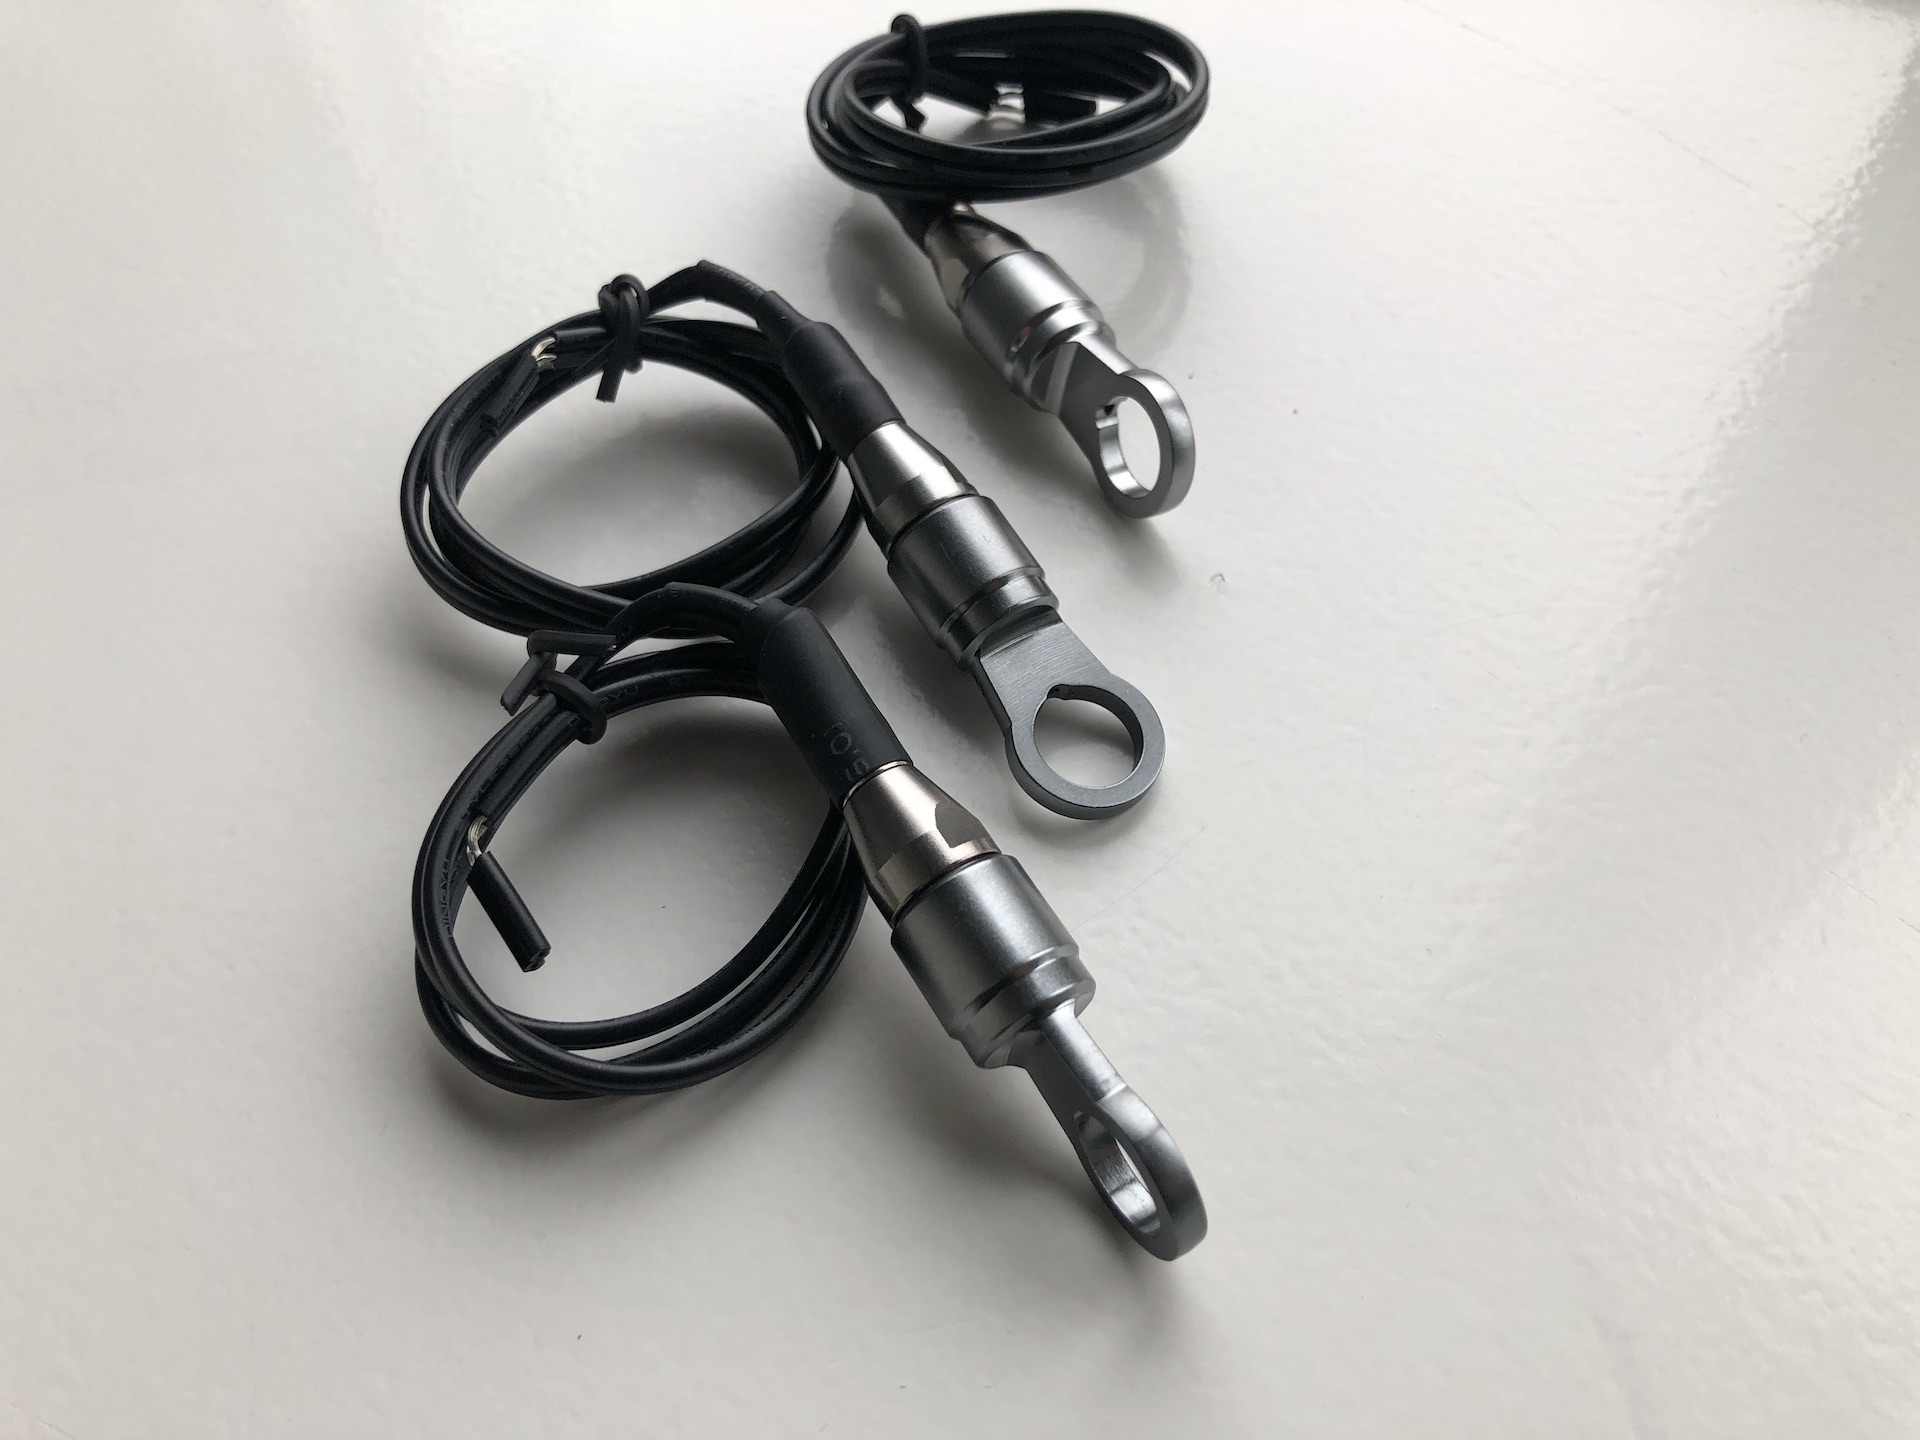
BANJO BOLT SWITCH P*RN
Going to be using this for front and rear brake light switches and the clutch switch for the ECU.
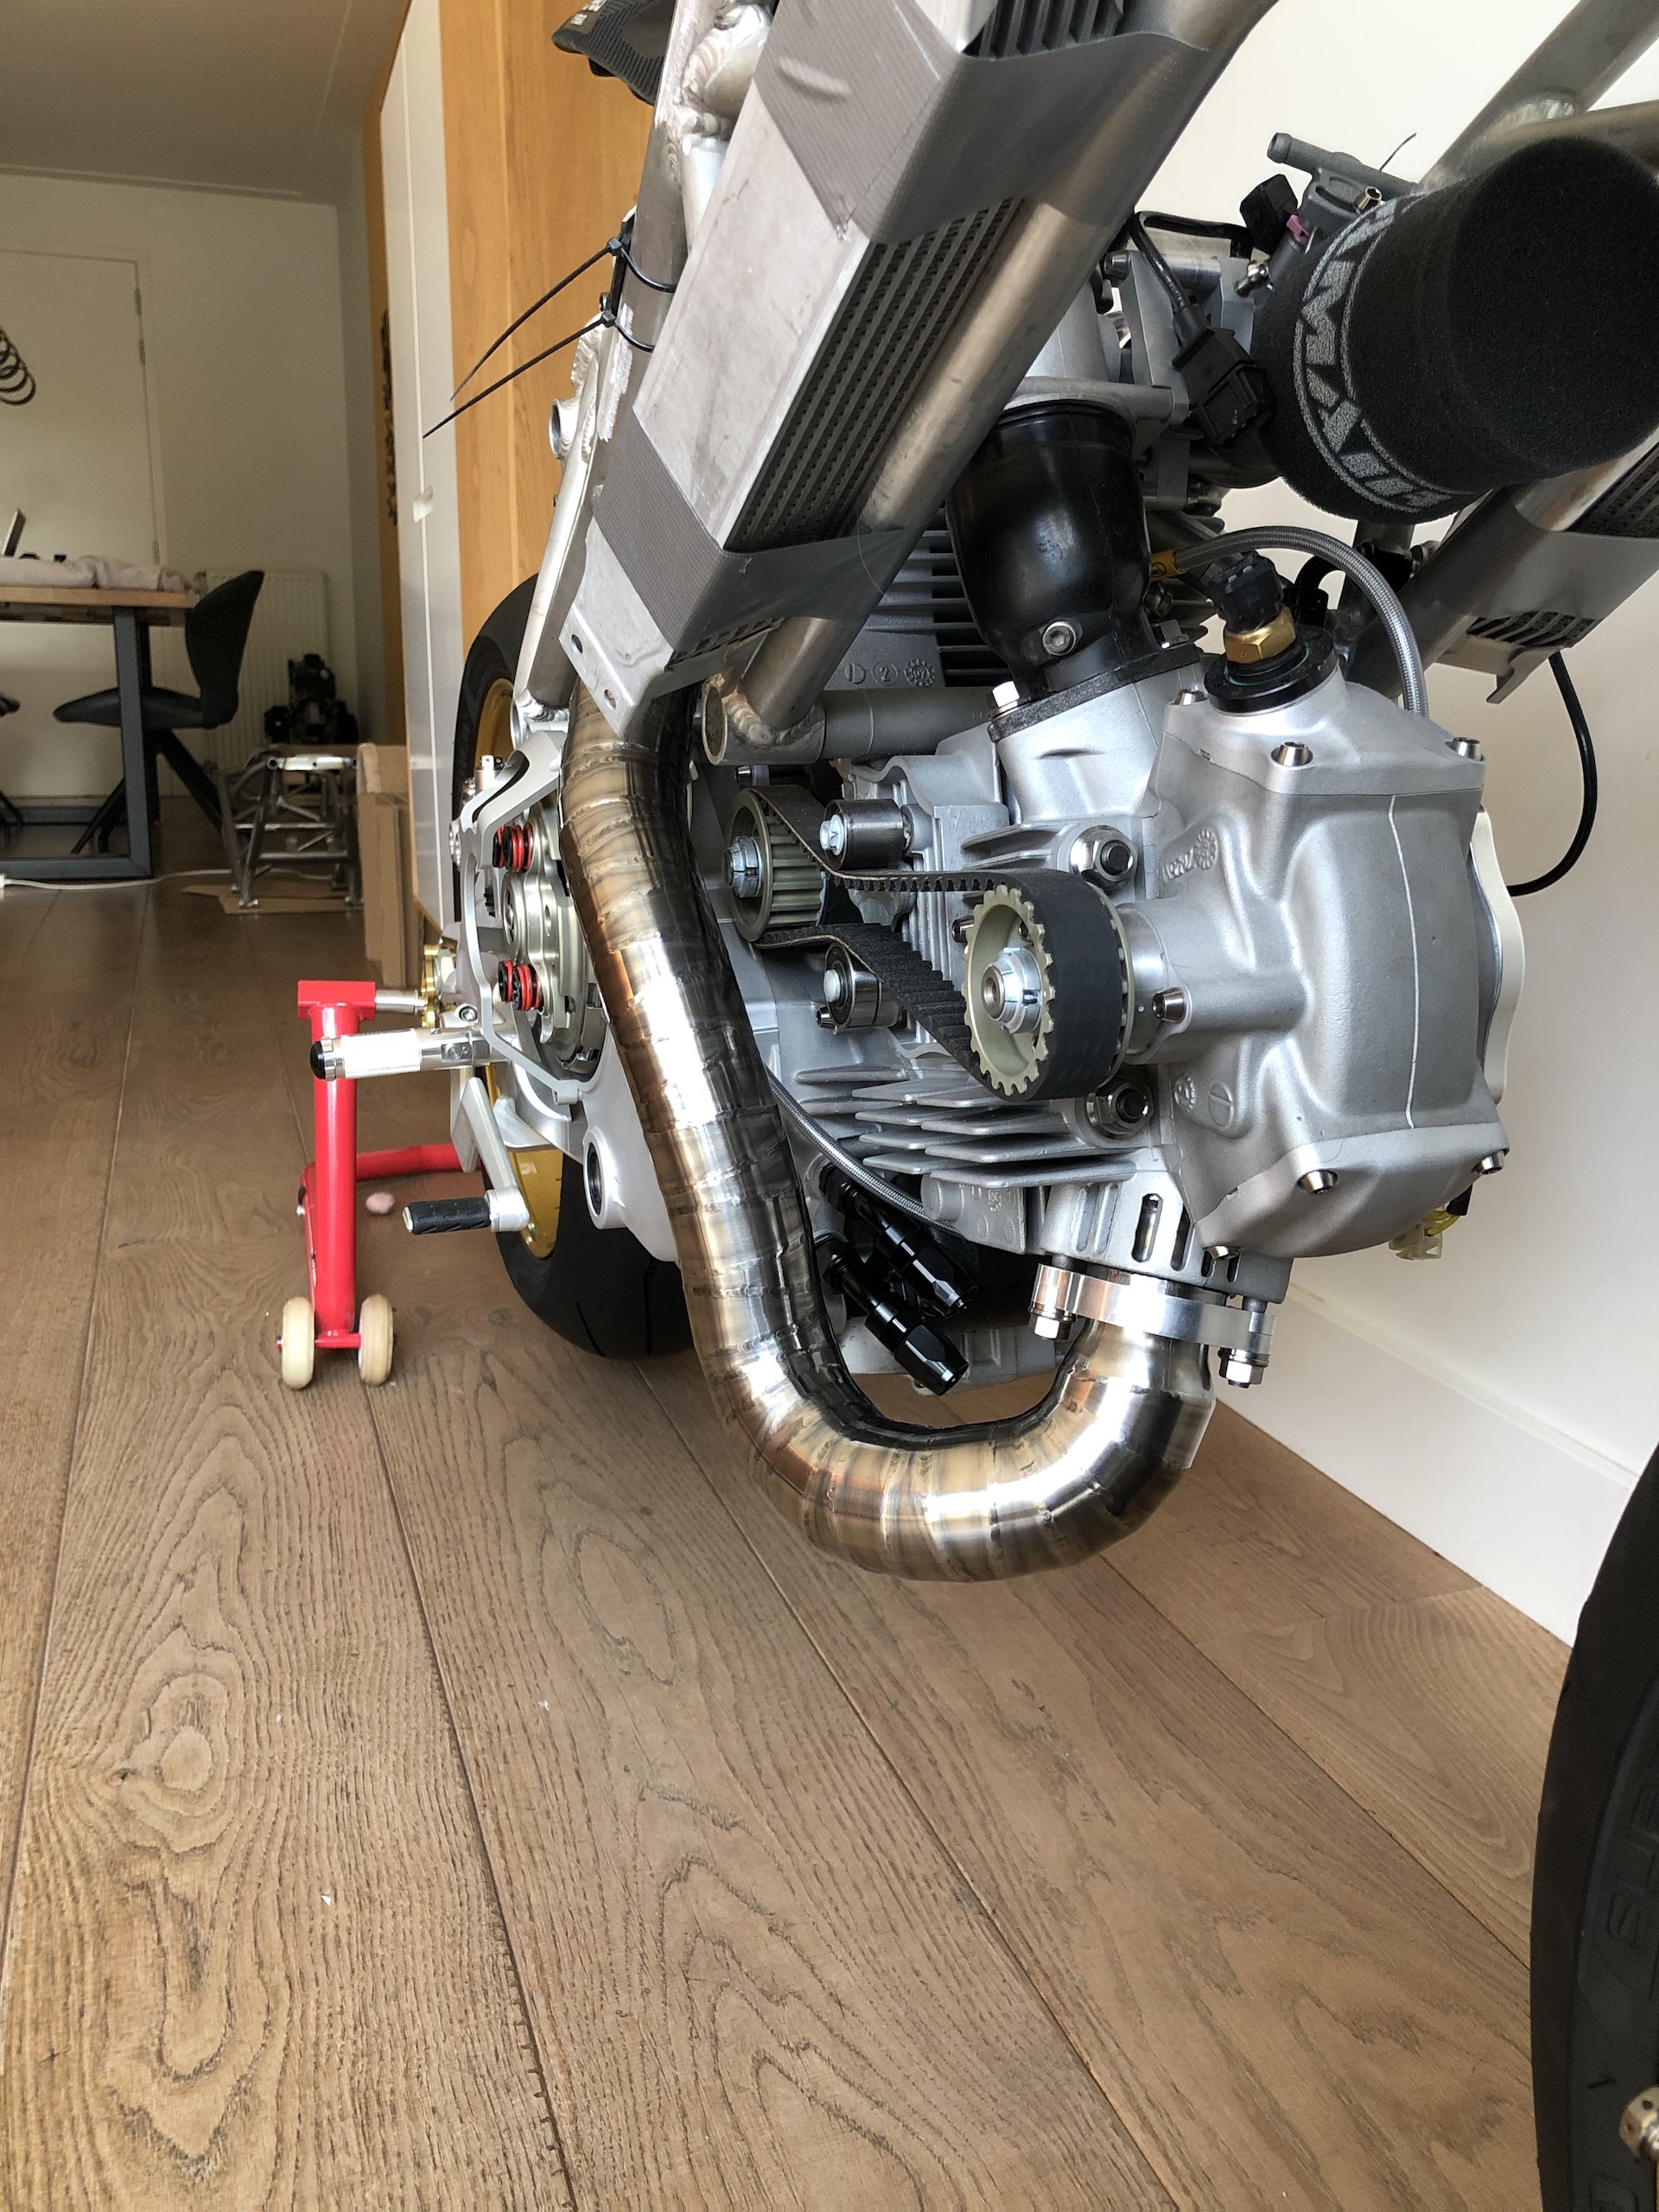
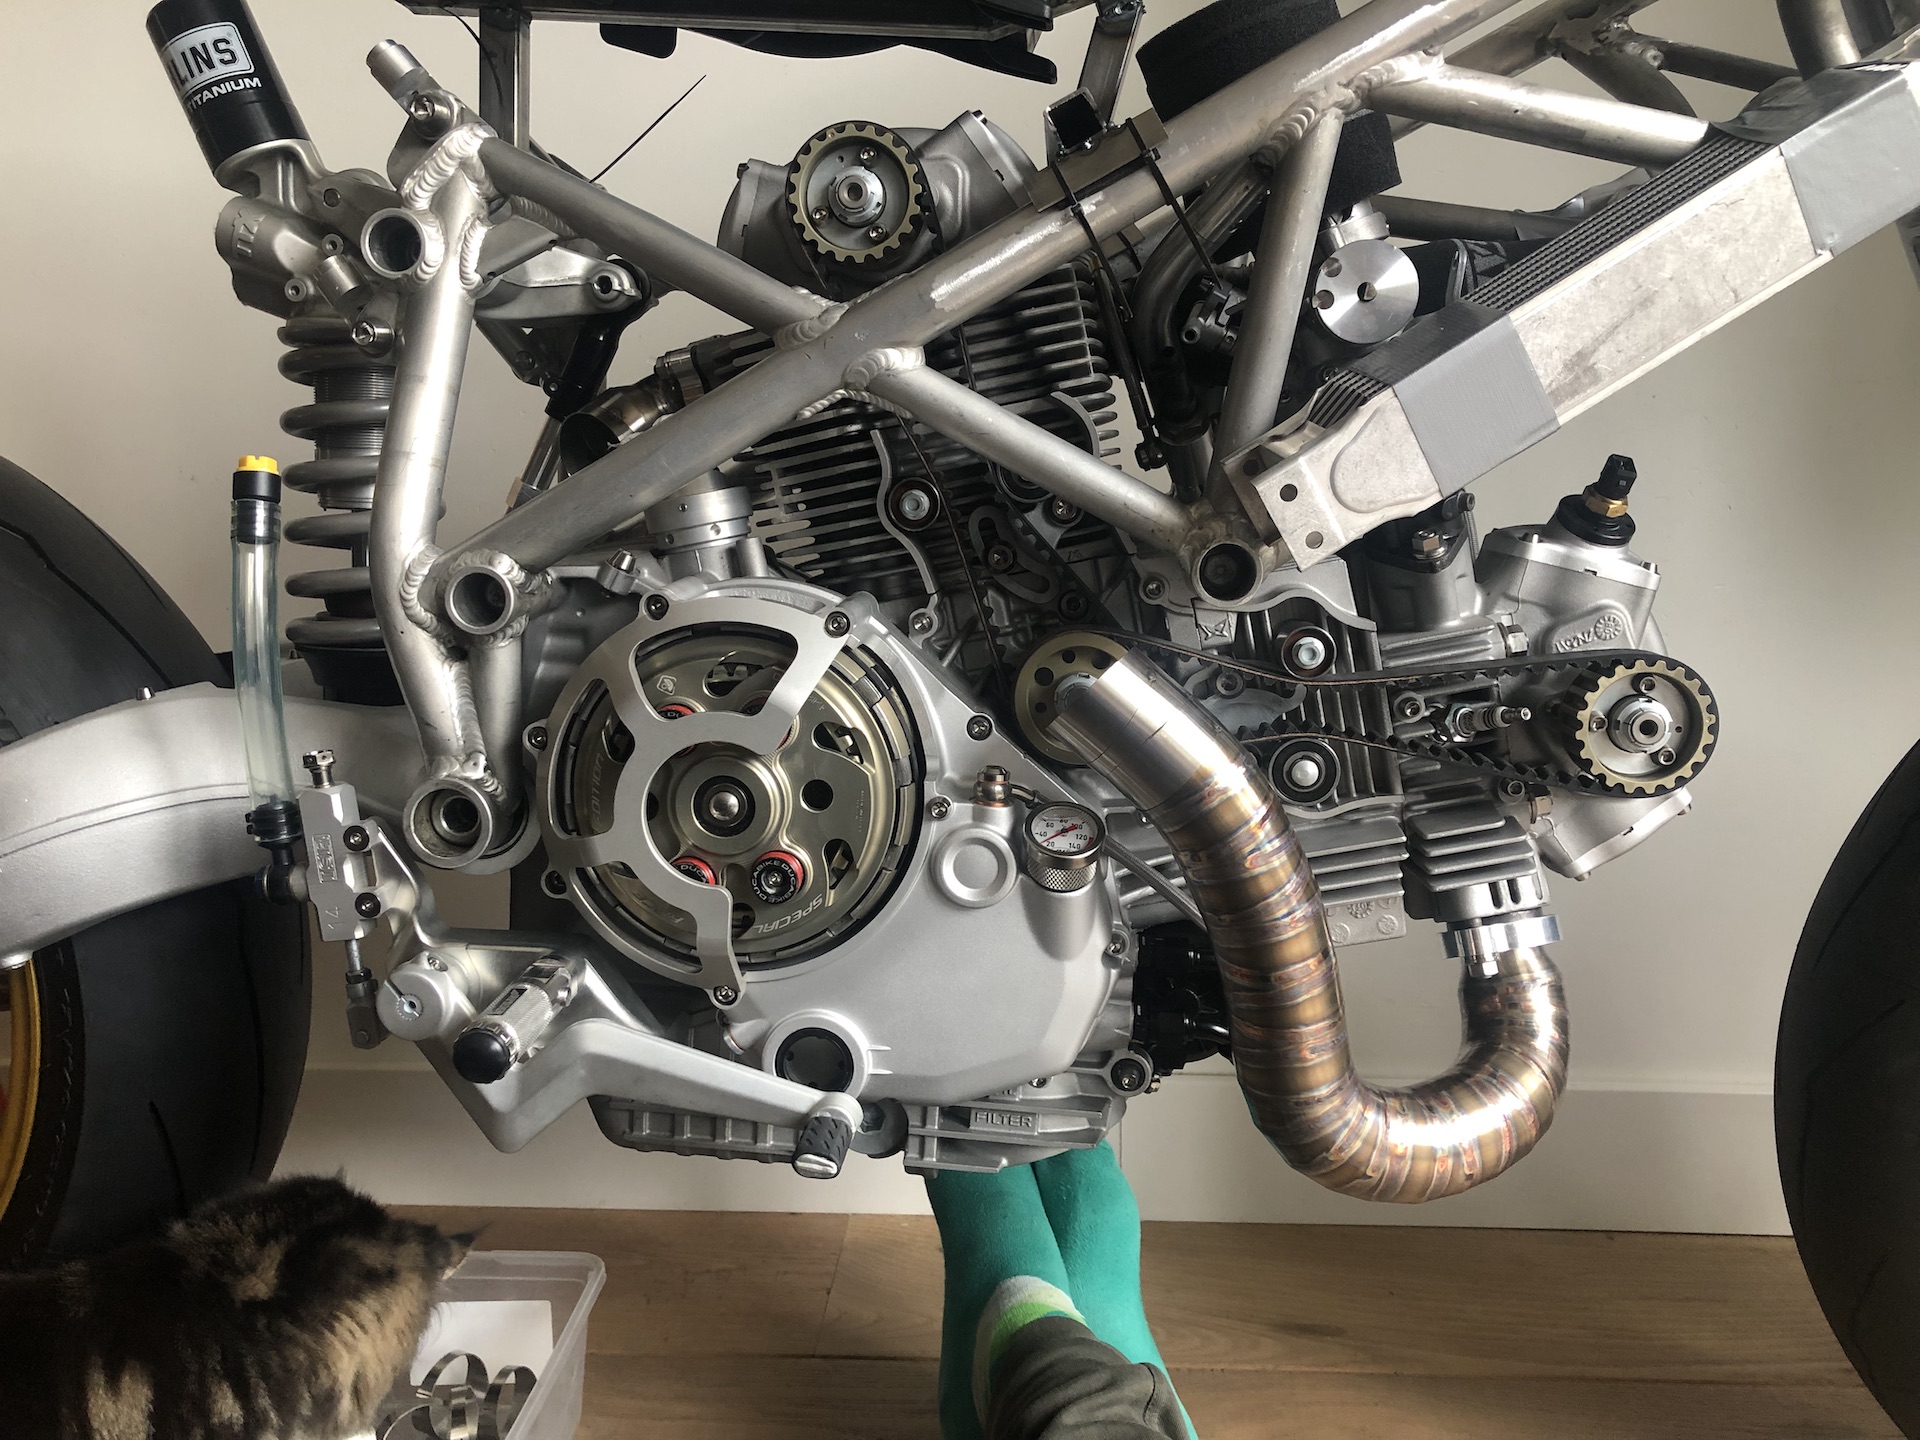
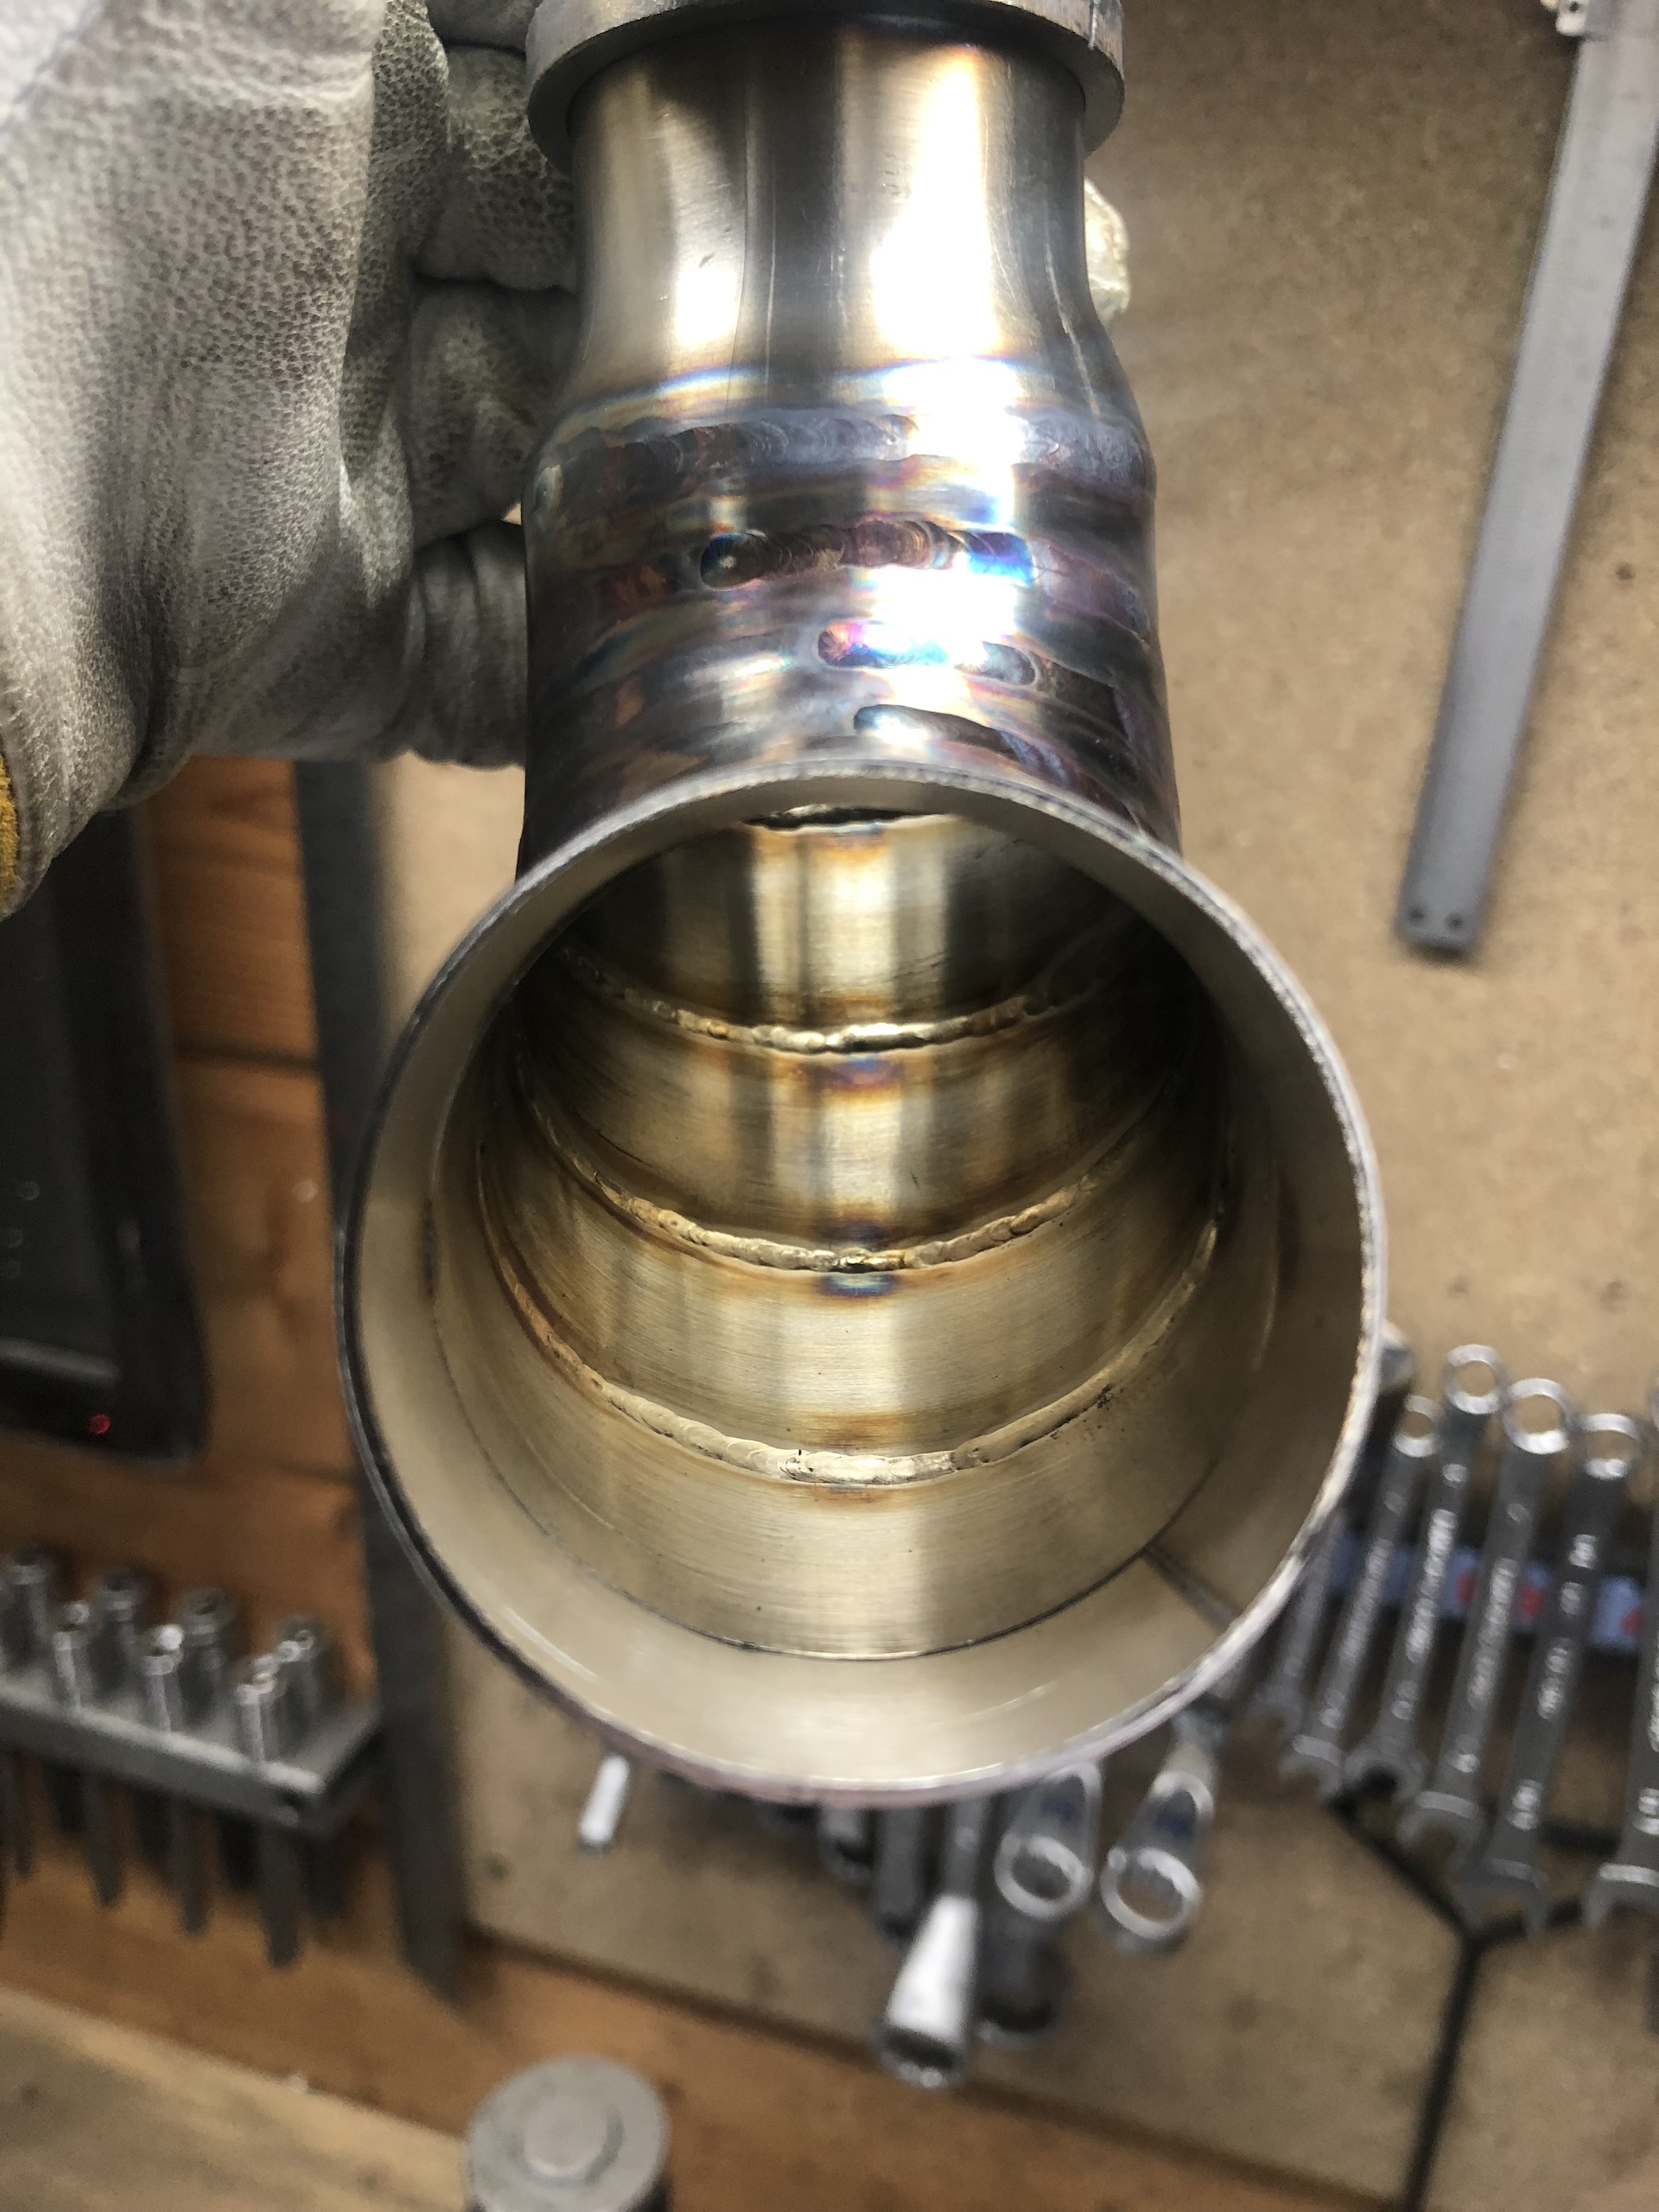
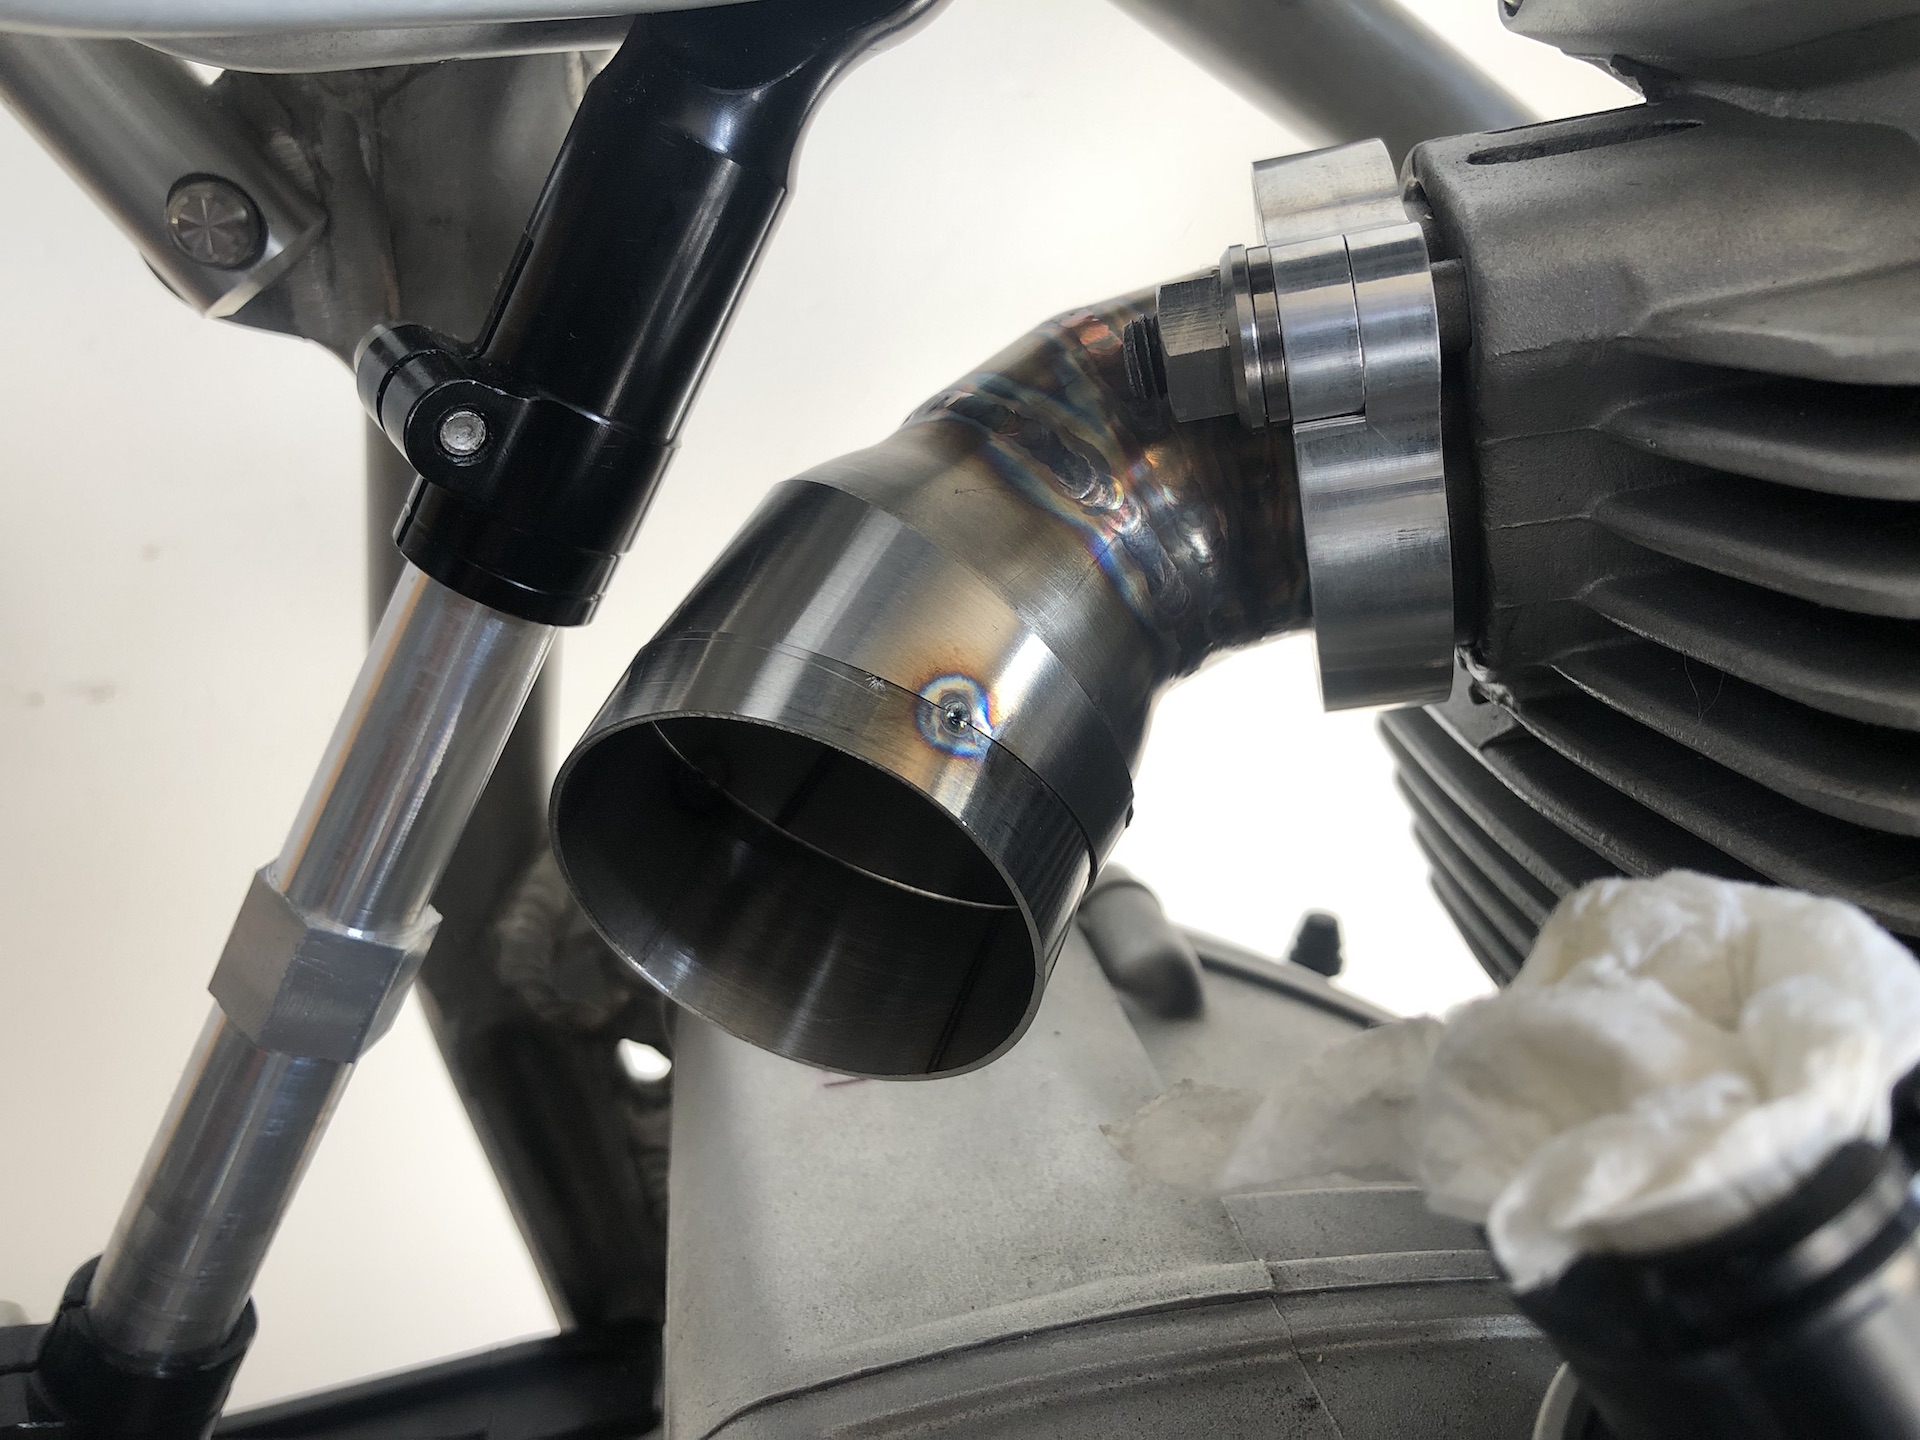
FIRST START WITH THE EXHAUST
With the new pie cuts I started work on the exhaust flanges. Holy shit, those lasercut pie cuts are amazing to weld since they have absolutely no gap between them. Using no filler wire, just flowing them together. As you can see with beautiful penetration.
Also managed to solve the vertical cylinder head manifolds clearance issue. I used 3 40mm pie cuts to make the bend start early and now everything clears the rear shock adjuster.


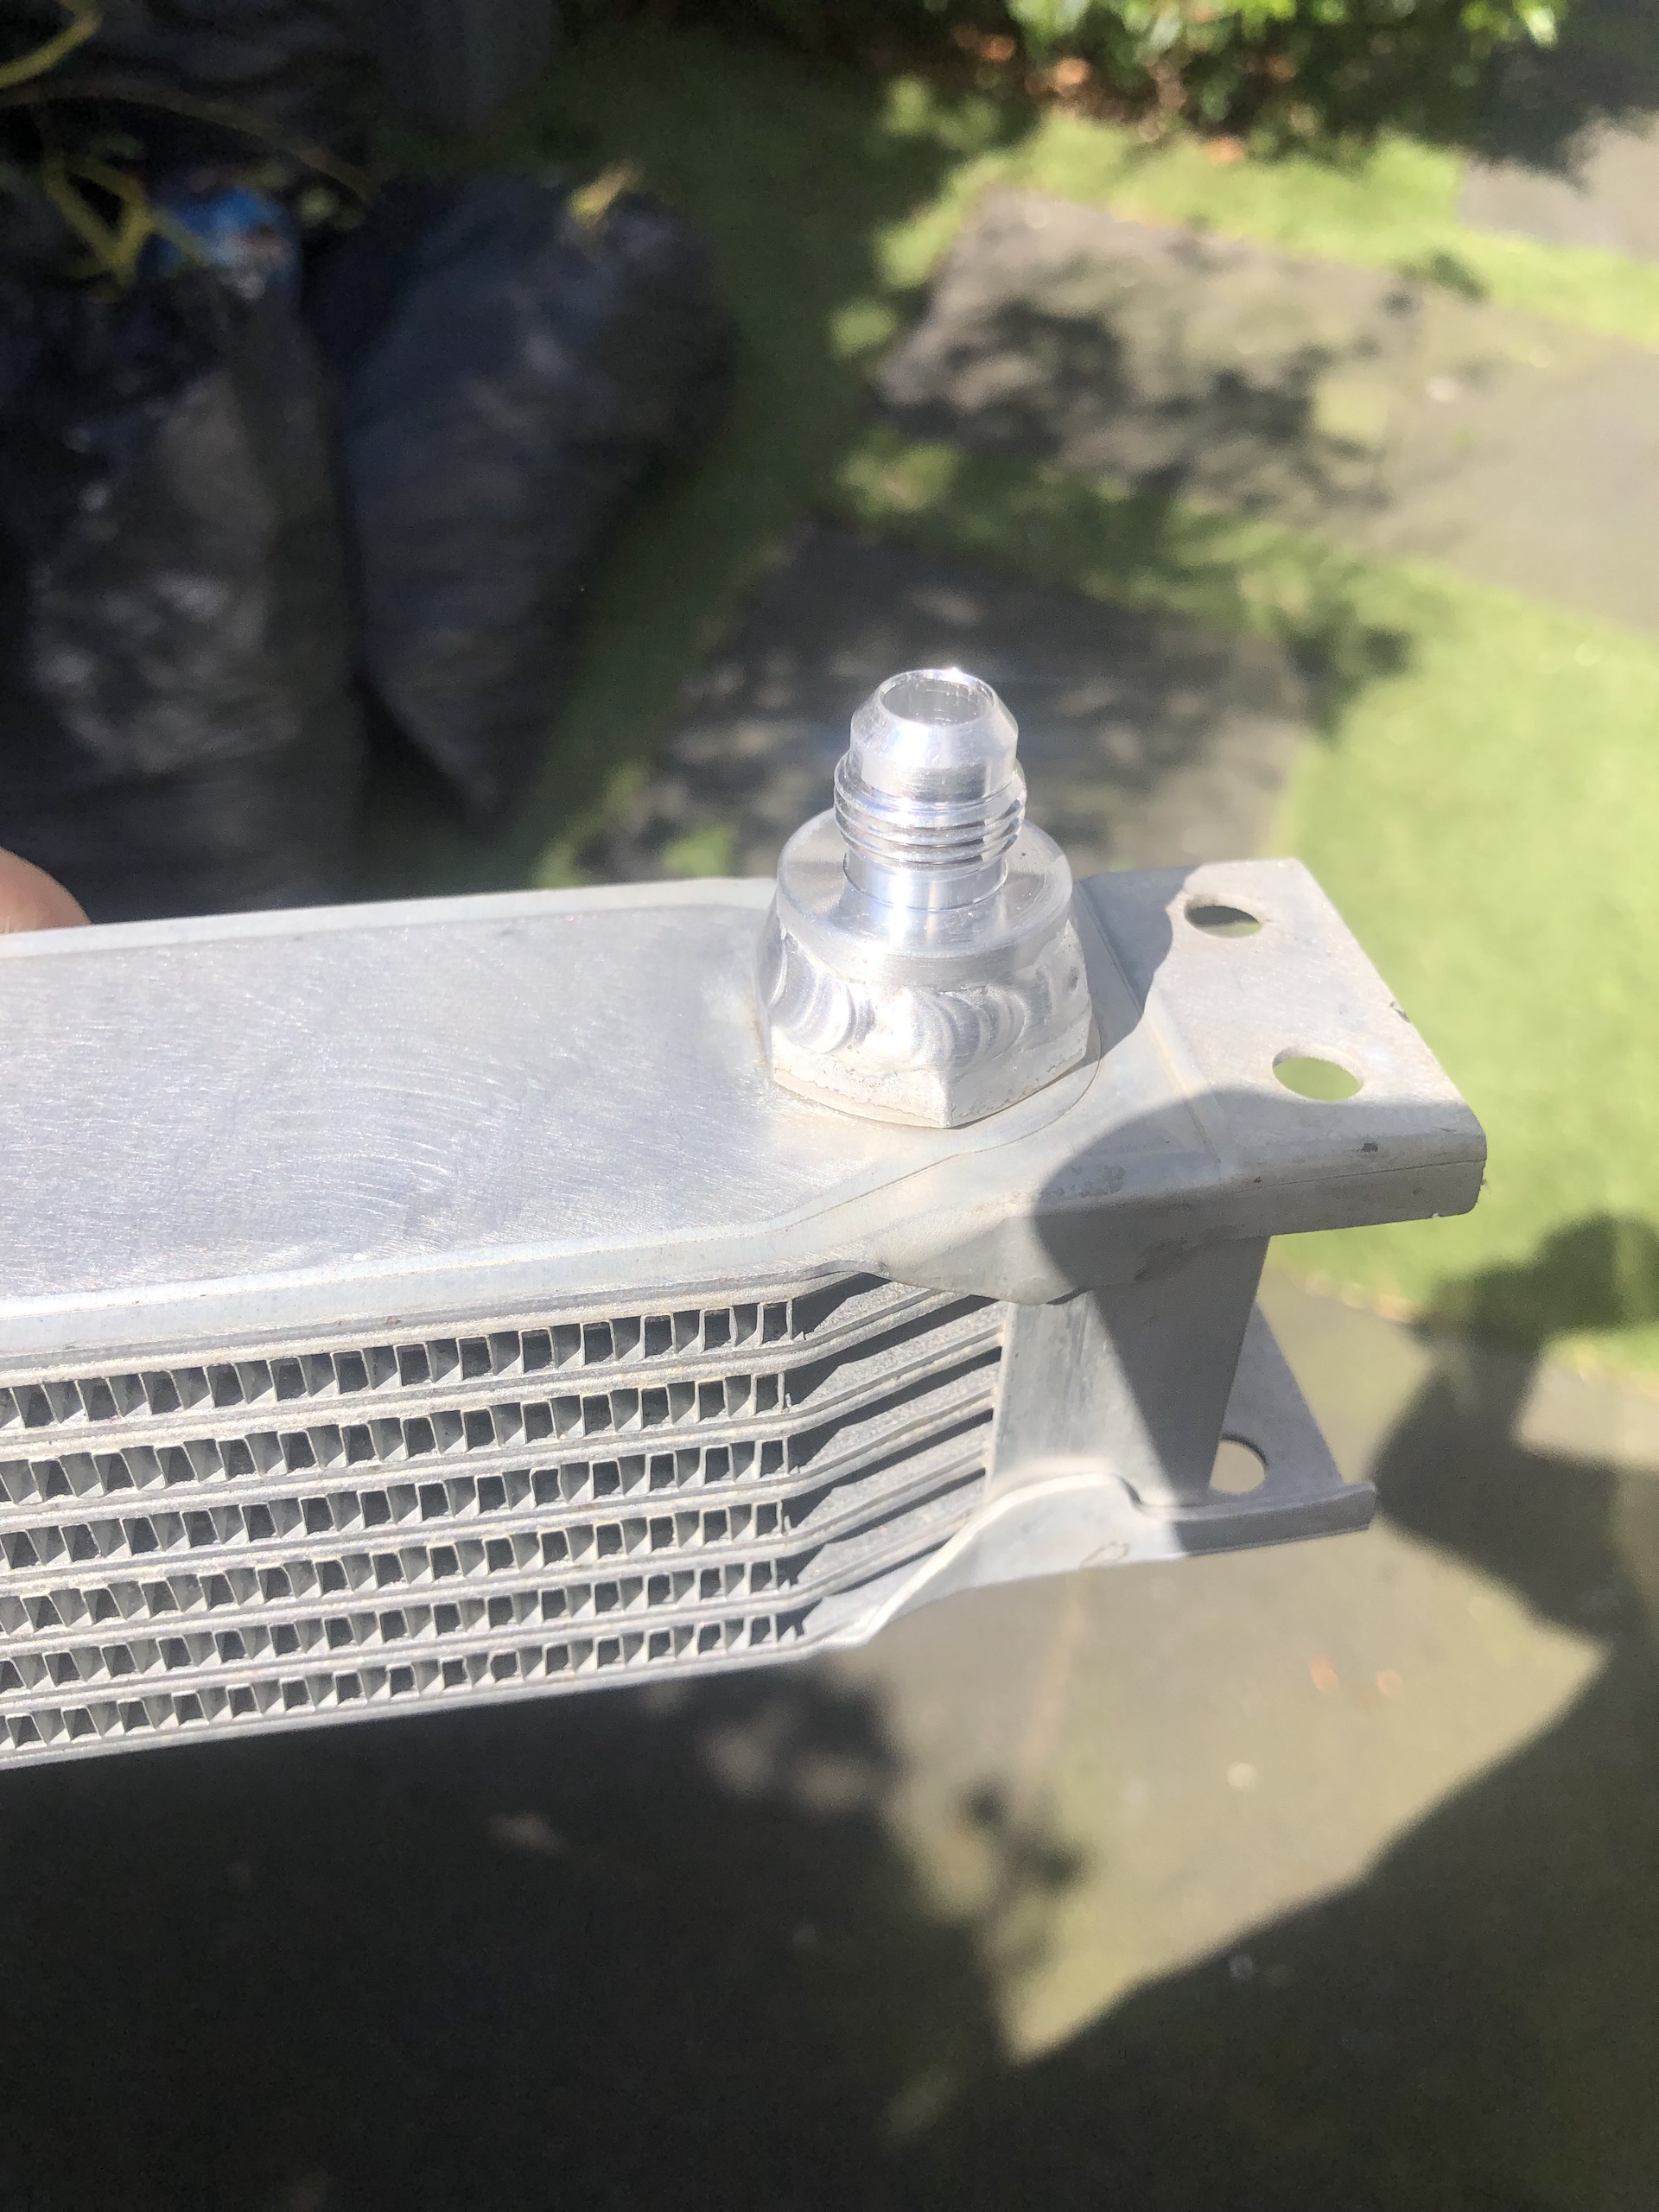
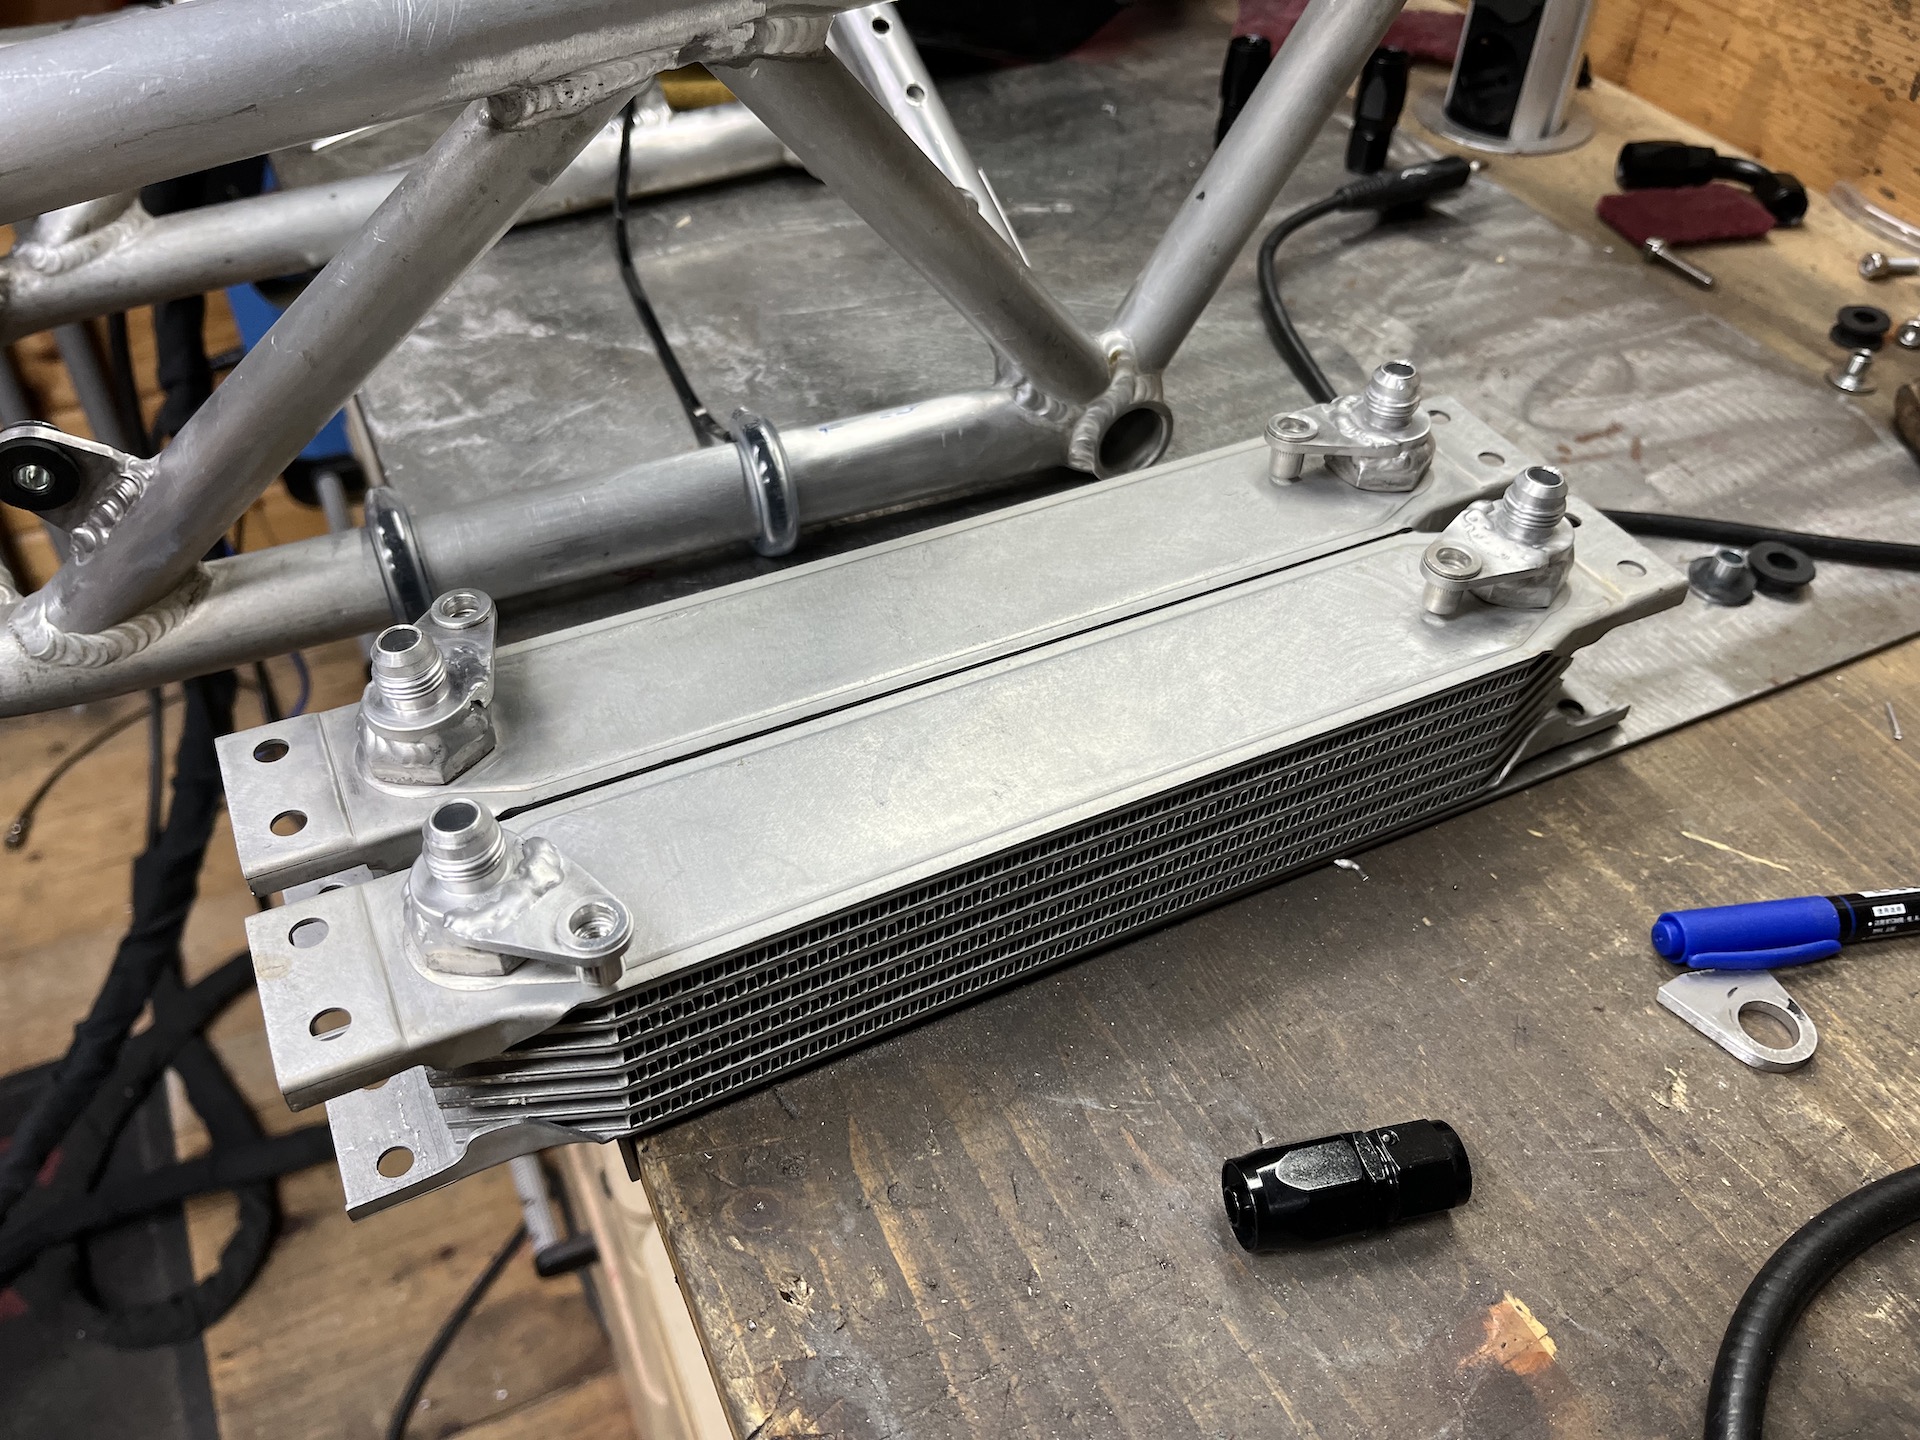
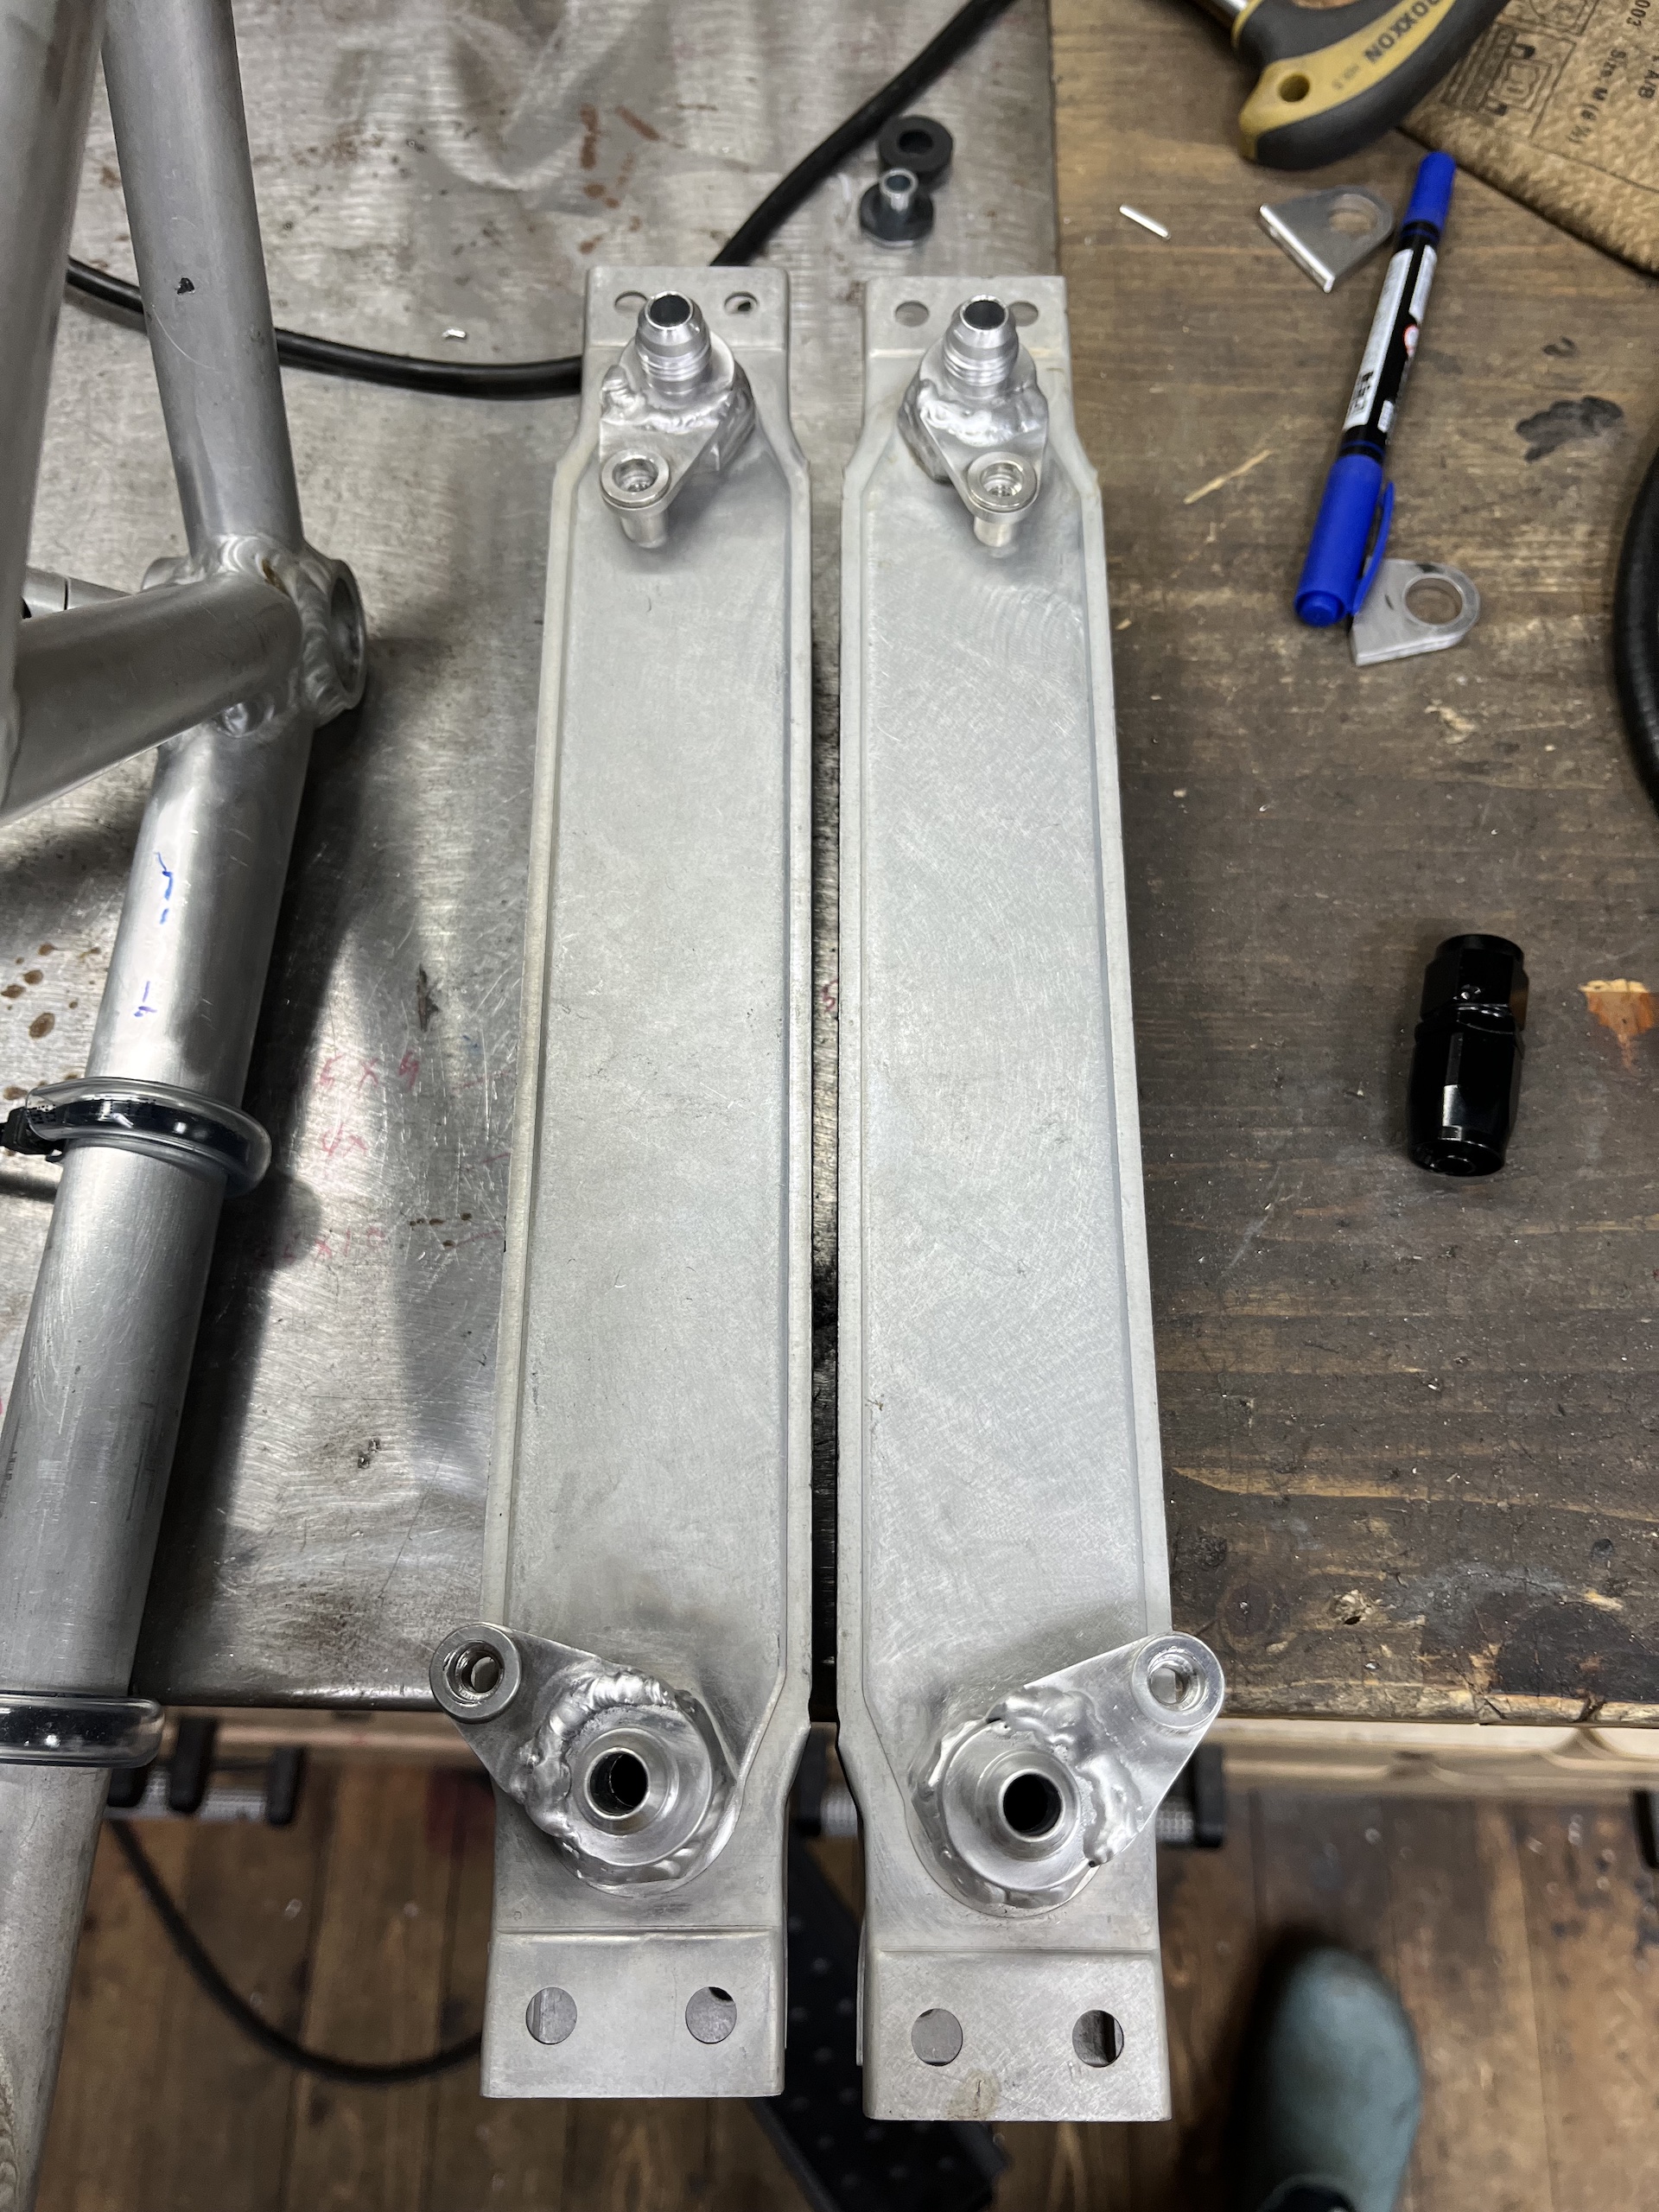
NEW AN6 FITTINGS + CHEMICALLY STRIPPED RADIATORS
The radiators originally had AN10 fittings welded on. However this is way overkill for what I need, and they take in way to much space. So I had the radiators chemically stripped of all the paint and then welded on new AN6 fittings. Perfect! Started to learn to weld with a foot pedal, and holy shit now aluminium is way easier!